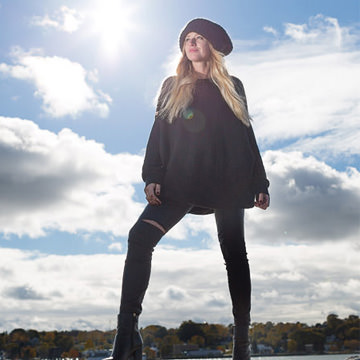

BEFORE LOMO EFFECT
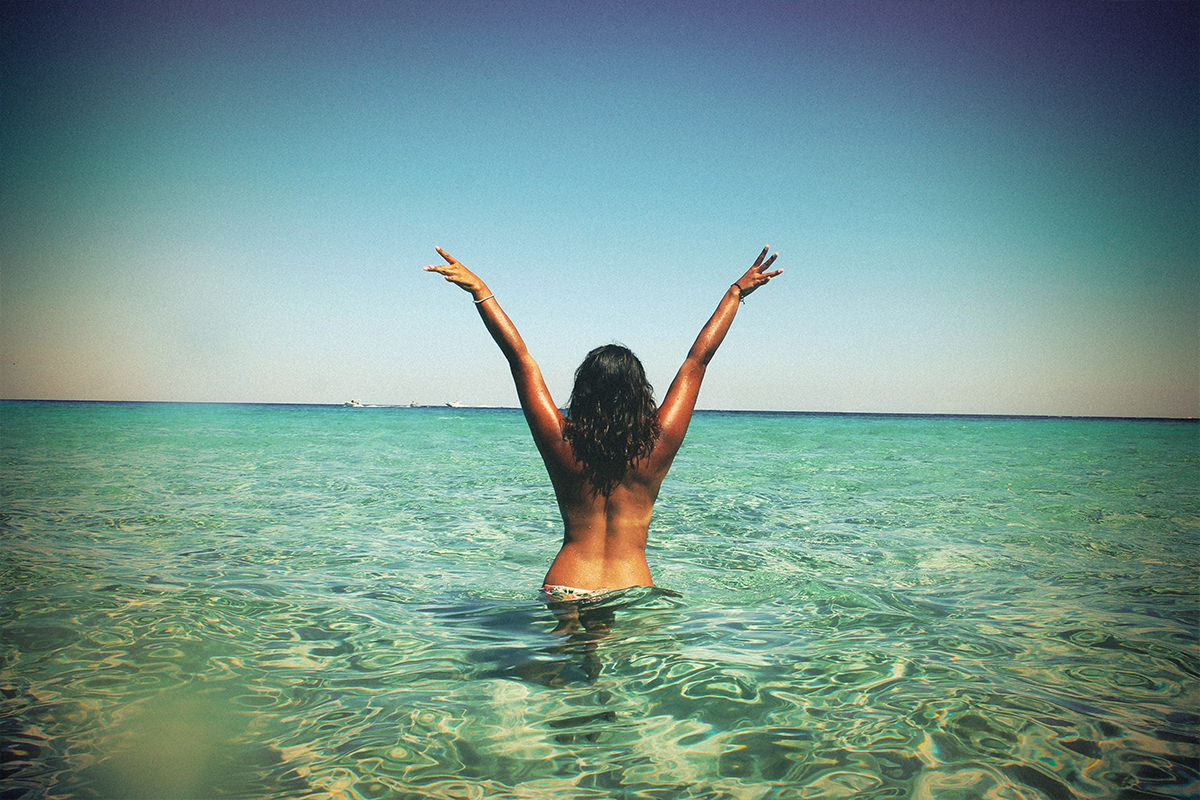
AFTER LOMO EFFECT
Download Sample Images
Click the link below to download the sample images and follow along with this tutorial.
DownloadTutorial Description
The Lomo Effect is based on the look of a classic Russian film camera called the Lomo LC-A
How to Use Graduated & Radial Filters
The key to creating effects in Lightroom is to use the Graduated and Radial Filters in Lightroom. These filters allow changes to be made to specific areas of an image. In this tutorial, we focus on the center and edges of the photo.
To create a Graduated or Radial Filter, enter the Develop Module in Lightroom by pressing D on the keyboard or clicking on “Develop” in the top right of Lightroom.
For help with Graduated & Radial Filters, check out this episode.
In the right column, click on the rectangular or circular icons just below the histogram.
After selecting the filter, click and drag on the image to add the effect. The sliders below the filter will affect just the area where the filter is visible.
To invert the selection, click on “Invert Mask” on the bottom of the filter dialog.
How to Add Split Toning
Split Toning is the process of adding one color to the highlights of an image and another color to the shadows.

Quick Tip: Use Complimentary Colors When Split-Toning
To split tone an image in Lightroom, scroll down the right column in the Develop Module until you get to “Split Toning.” Add Saturation to the highlights first, then adjust the Hue slider until you get to the desired color. Do the same for the shadows.
How to Add a Vignette in Lightroom
To add an additional vignette in Lightroom, navigate to the Develop Module and scroll towards the bottom of the right column to the Effects Tab.
Add Post-Crop Vignetting by changing the sliders to achieve the desired look. In this episode, we bring the Amount to -16, Midpoint to 85, Roundness to +35, Feather to 84 and Highlights to 0.
Also, when replicating the look of a film camera, it is important to add grain. Use the Grain Dialog to add grain and fine-tune the size and roughness.
How to Add Distortion
In order to make this image look like it was taken with a lower-quality lens, we add more distortion.
Navigate to the “Lens Corrections” Dialog and adjust the amount of distortion. In this case, we add +17 to distortion and click on “Constrain Crop” which will remove the curved-in edges of the photo.