

Download Assets
This tutorial includes 1 sample image and 1 PDF guide. Downloads are free with a PHLEARN account.
- Download the sample files from every free tutorial on PHLEARN
- New free tutorials published every week
- One free account: sign up once, then download anything
Free PDF Guide · 3 Pages
This Tutorial as a Step-by-Step PDF
The 3-page guide covers local edits in Lightroom’s Develop module: a before snapshot, how a graduated filter’s lines and rotation work, two graduated filters, a feathered Radial Filter with Invert Mask on the subject, a second one for warmth, and Mask > Brush with Alt/Option to paint it off skin. Keep it next to your keyboard.
description
Every slider in the Basic panel hits the whole frame. Graduated and radial filters hand you those same controls scoped to one region instead — two graduated filters to balance a dark left and right side, a radial inverted onto the subject, feathered so the edge never reads as a shape. Each filter also carries its own brush mask, so saturation can be subtracted back off skin.
Enjoying This Free Tutorial?
We publish a new free tutorial every week, each one with sample images and PSDs you can download and follow along with. Sign up and they land straight in your inbox, along with early word on sales, events and subscriber-only offers.

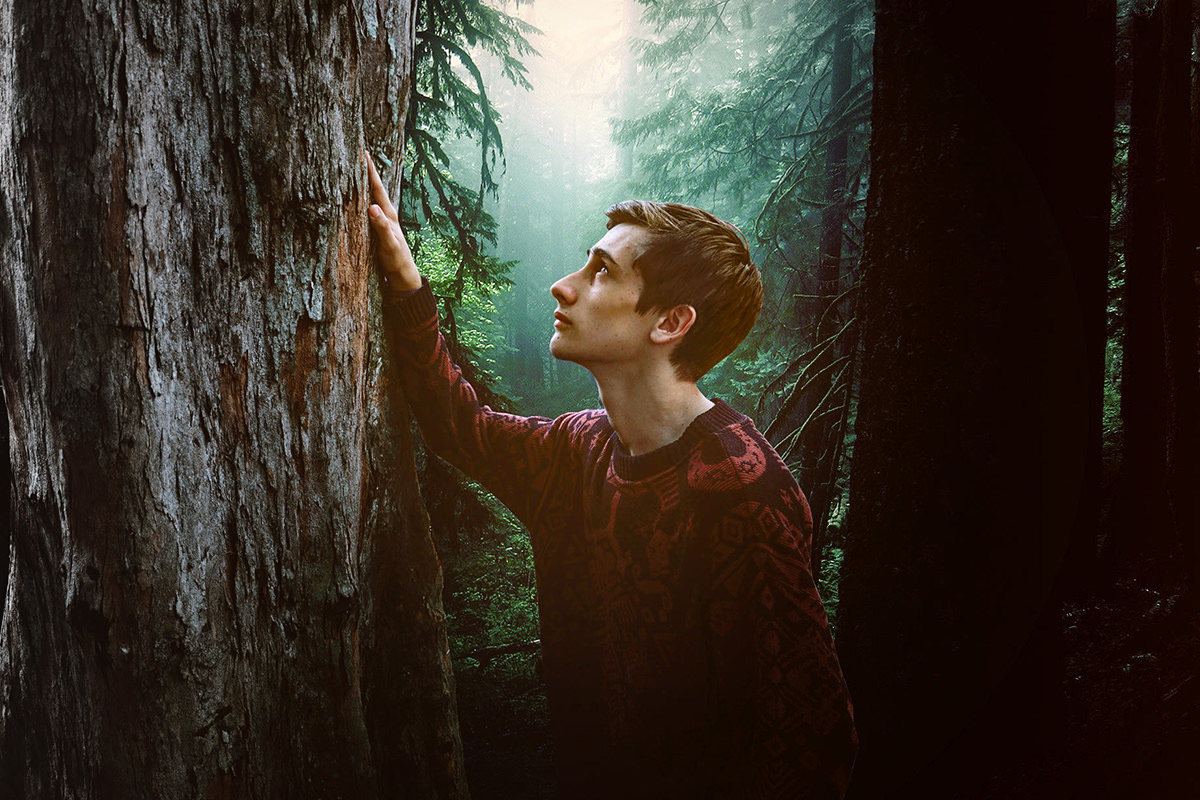
How to Use Graduated + Radial Filters in Lightroom
The Basic panel’s sliders in Lightroom are powerful, but they all affect the entire image at once. When you only want to brighten one side of a photo, darken a corner, or dial in the light on just your subject, graduated and radial filters let you apply those same adjustments to a specific area instead of the whole frame.
Applying a Graduated Filter
Before making any adjustments, it’s worth creating a snapshot of the image as it starts out — click the plus icon in the Snapshots panel on the left sidebar and name it something like “before,” so you can always jump back to the original later. The Graduated and Radial filter icons sit in the top right sidebar of the Develop module. Click the Graduated Filter icon, then click and drag across the image — dragging from the top down, for example, applies the filter’s settings to that region. The controls for the active filter appear in a panel right where the Basic panel normally sits, giving access to exposure, saturation, clarity, sharpness, and the rest of the same tools used for global edits, just applied locally.
Adjusting Transition Smoothness and Rotation
A graduated filter shows two parallel lines: full effect on one side, no effect on the other. The distance between those two lines controls how smooth or harsh the transition is — lines placed close together create an abrupt, obvious edge, while spreading them further apart blends the effect gradually into the rest of the image. Hovering over the filter and dragging near its edge lets you rotate the whole filter around its center point, which is useful for angling the effect to match diagonal light or a tilted horizon rather than a strictly horizontal or vertical gradient. Any filter that isn’t working out can simply be clicked and deleted with the Delete key, since multiple filters can be layered together at once.
Balancing Left and Right Sides with Multiple Graduated Filters
Graduated filters aren’t limited to one per image. To brighten a dark left side and a dark right side of a photo independently, add one graduated filter dragging in from the left and a second one dragging in from the right, adjusting each one separately so both sides get exactly the correction they need. On the left, bring Exposure up a little and Saturation down, which draws attention to the more colorful center. On the right, which is darker, bring Exposure up a little more, spread the lines out so the effect reaches the subject, and nudge Saturation up a bit. If brightening an area introduces an unwanted color cast, like a yellow tint showing up in the black levels, that same filter’s Blacks slider can be dragged to the left to compensate, all without affecting the rest of the image.
Applying a Radial Filter to Your Subject
The Radial Filter icon sits right next to the Graduated Filter icon. Click and drag out from a center point to create a circular or elliptical region instead of a straight-edged gradient. By default, the filter’s settings affect the area outside the circle rather than inside it.
Inverting the Mask to Affect the Inside of the Circle
To apply an adjustment to the inside of the radial shape instead — such as the area right around your subject — click the invert mask option at the bottom of the filter panel. Once inverted, exposure, highlights, shadows, contrast, and saturation all apply directly within the circle. Clicking the center lets you reposition the whole filter, and dragging its edges resizes or stretches it to better fit your subject.
Adjusting Feathering and Fine-Tuning the Subject
The feathering control determines how hard or soft the radial filter’s edge is. A hard edge with no feathering creates an obvious, unnatural-looking boundary, while increasing the feathering blends the effect smoothly into the surrounding image so it isn’t noticeable as a distinct shape. With feathering set to a soft edge, adjustments like lowering highlights, raising shadows, nudging exposure up slightly, and lowering contrast can even out the lighting on a subject, all concentrated right where the subject is standing. Raising Saturation brings out rich greens, but once the subject starts to look too saturated, bring it back down a little and leave the color for a second radial filter. Raising Clarity just a little helps draw attention to the subject.
Masking a Radial Filter to Protect Skin Tones
A second radial filter can be added specifically for color. Click the tool off and back on, drag out from the middle, click Invert Mask again and bring Exposure to 0, since this filter is only for color. Then make Temp a little warmer and bring Saturation up to draw attention to the center of the photo. The trouble is that increasing saturation broadly tends to affect skin tones too, making them look oversaturated or unnatural. This is where a radial filter’s built-in brush mask becomes useful.
Painting Out Unwanted Areas with the Brush Mask
Click the Brush option under Mask within the radial filter’s panel. Holding down the brush normally adds to the filter’s effect, shown with a plus icon, while holding Alt or Option subtracts from it. Painting directly over the subject’s skin with Alt or Option held down removes the saturation and warmth boost specifically from that area, restoring a much more natural skin tone while keeping the added color and warmth everywhere else the filter covers. Painting without the key adds a little color back where you want it, like the hair, and lowering the brush’s Flow setting allows for a lighter touch, subtracting the effect gradually rather than all at once.
Using Snapshots to Compare Before and After
Creating a snapshot at each major stage of editing (three in all: “before” at the start, “radial” after the two graduated filters and the first radial filter, and “final” once everything is masked and finished) makes it easy to click back and forth between different points in the process and see exactly how much of a difference each set of filters made. Comparing the final snapshot against the original “before” snapshot shows the full combined effect of two graduated filters and two radial filters working together.
Why This Approach Works
Graduated and radial filters work because they give you every tool from the Basic panel, but scoped to exactly the region of the image that needs it, rather than forcing a single global setting to serve the whole frame. Layering several filters together — two graduated filters balancing the left and right sides, and two radial filters shaping the light and color around the subject — lets each region of the photo get its own independent correction. The brush mask built into each filter adds a final layer of precision, letting you subtract the effect from specific areas, like skin, that shouldn’t be affected even though they fall inside the filter’s shape.
Final Thoughts
Graduated and radial filters turn Lightroom’s global sliders into targeted, local adjustments, and combining several of them with masking gives you an enormous amount of control over how light and color move around a photo. Once you’re comfortable dragging out a filter, adjusting its feathering, and masking out anything that shouldn’t be affected, you can use this same approach to fix uneven lighting, draw attention to a subject, or add mood to any part of an image.
Quick Reference: Keys, Menus and Settings
- Save a snapshotDevelop, left sidebar: plus icon next to Snapshots, name it before
- Graduated filterGraduated Filter icon at the top of the right sidebar, drag in from an edge; spread the lines to soften, drag along the center line to rotate
- Delete a filterClick the filter, press Delete
- Radial filter on the subjectRadial Filter icon, drag out from the center, Invert Mask at the bottom, raise Feather
- Second radial for colorInvert Mask, Exposure 0, Temp a little warmer, Saturation up
- Brush it off the skinMask > Brush, hold Alt/Option and paint; lower Flow to subtract a little at a time
No AI, no generative credits.

Free Downloads
Follow Along on the Same Photo
Get the foggy forest portrait from the video and the 3-page PDF guide to graduated and radial filters in Lightroom, with every step and slider move. Free with a PHLEARN account.
Graduated and Radial Filters: Common Questions
What do graduated and radial filters do in Lightroom?
They give you the same sliders as the Basic panel, like Exposure, Highlights, Shadows, Clarity and Saturation, but only on one part of the photo instead of the whole image.
Where are the Graduated and Radial Filter tools?
In the Develop module, side by side at the top of the right sidebar. Click one and its controls drop down right there.
Why does a new filter darken my photo?
A new filter starts with whatever its sliders are set to. If Exposure is negative, it darkens first. Set the sliders after you drag.
How do I make a graduated filter’s transition smoother?
Spread its lines apart. Lines close together give a harsh transition; drag an outer line farther out and it becomes a lot smoother.
Can I rotate a graduated filter?
Yes. Move the cursor along the center line, away from the center point, then click and drag to rotate the whole filter around.
Why does my radial filter change everything except my subject?
By default it affects the outside of the circle. Click Invert Mask at the very bottom of the filter’s controls to switch the effect to the inside. Each new radial filter needs it clicked again.
How do I hide the edge of a radial filter?
Raise Feather. A hard edge does not look realistic at all, and a softer edge makes the effect more subtle.
How do I keep a filter off the skin?
Next to Mask, click Brush. Hold Alt/Option and paint over the skin to subtract the filter there. Paint without the key to add it back, and lower Flow to subtract a little at a time.
How do I compare the before and after?
Save snapshots as you go. Click the plus icon next to Snapshots in the left sidebar; this edit uses three, named before, radial and final, and you click between them.
Is there a free download?
Yes, with a free PHLEARN account. You get 1 sample image and 1 PDF guide: 3 pages covering both filters, the snapshots and the brush mask, step by step.
Master Photoshop, Lightroom and Photography
Join PHLEARN PRO for $12.99 a month or $99.99 a year. Cancel anytime, with a 100% money-back guarantee.





