

Download Assets
This tutorial includes 2 sample images. Downloads are free with a PHLEARN account.
- Download the sample files from every free tutorial on PHLEARN
- New free tutorials published every week
- One free account: sign up once, then download anything
description
Turning a clean vacation photo into something that looks genuinely old comes down to three ingredients: a sepia-toned gradient map for color, a couple of paper textures for imperfection, and a final pass of blur and grain on the base image. This tutorial builds all three, keeping the gradient map on top of the whole stack so every added element automatically matches the same vintage palette, and applying the finish as Smart Filters so it stays adjustable.
Enjoying This Free Tutorial?
We publish a new free tutorial every week, each one with sample images and PSDs you can download and follow along with. Sign up and they land straight in your inbox, along with early word on sales, events and subscriber-only offers.

Create a Vintage Photo in Photoshop
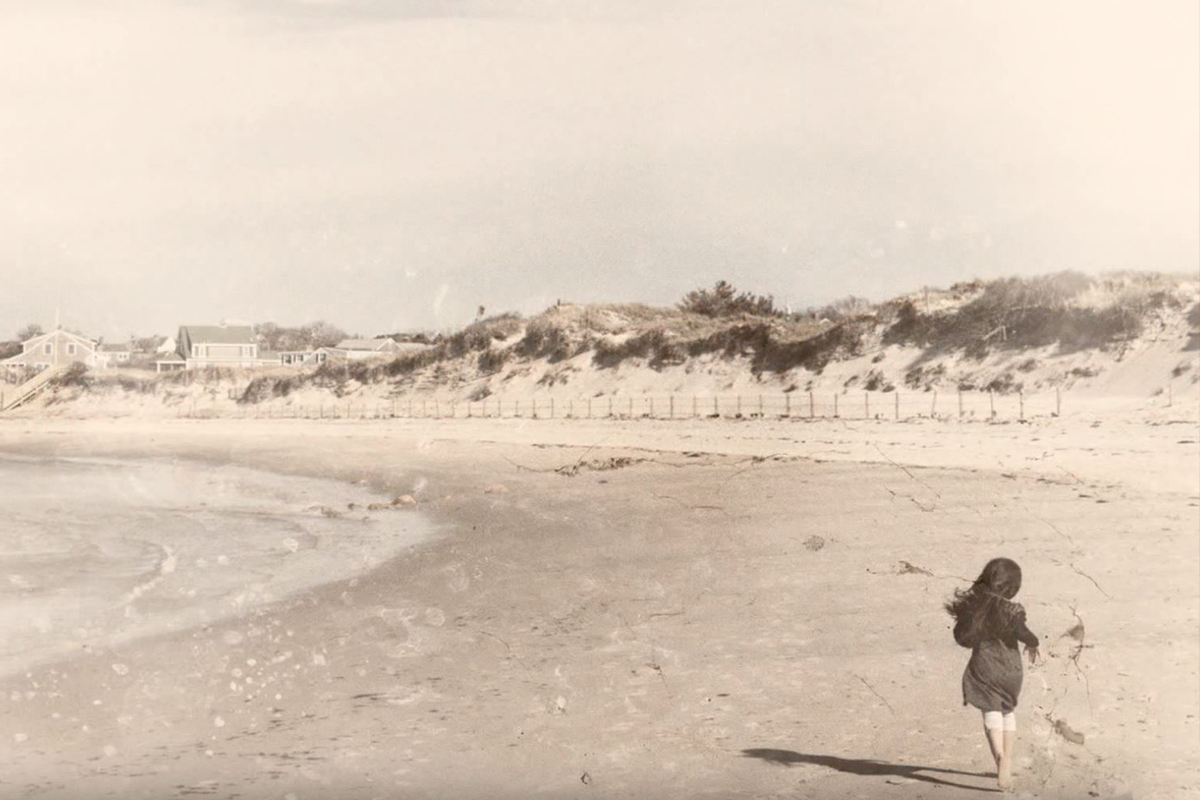
Turning a clean vacation photo into something that looks genuinely old comes down to three ingredients: a sepia-toned gradient map for color, a couple of paper textures for imperfection, and a final pass of blur and grain on the base image. This tutorial builds all three, keeping the gradient map on top of the whole stack so every added element automatically matches the same vintage color palette.
Coloring the Image With a Sepia Gradient Map
A Gradient Map adjustment layer recolors an image’s darks and lights based on a two-color gradient, which is an efficient way to apply a consistent sepia tone across an entire photo.
-
Add a Gradient Map Adjustment Layer
Add a Gradient Map adjustment layer and click the gradient bar to open its editor.
-
Set a Warm Color for the Light Point
Click the color stop on the right, representing the lightest tones, and choose a warm, bright yellow for a sepia look.
-
Set a Dark Brown for the Shadow Point
Click the color stop on the left, representing the darkest tones, and choose a dark brown rather than pure black, which keeps some color in the shadows.
-
Lower Opacity to Let Some Original Color Through
Lower the Gradient Map layer’s opacity slightly so a bit of the original color still shows through the sepia tone.
Adding a Screen-Blended Texture for Light Speckling
An inverted paper texture set to Screen adds light speckling and detail to an image without darkening it, which is exactly the effect wanted from certain damaged-paper textures.
-
Bring In a Paper Texture
Bring in a paper texture image, such as the free sample textures in the Download Assets card on this page, and stretch it with Cmd/Ctrl+T while holding Shift and Option/Alt to cover the entire image.
-
Invert the Texture
Press Cmd/Ctrl+I to invert the texture, turning its dark areas light and its light areas dark.
-
Set the Blend Mode to Screen
Change the texture layer’s blend mode to Screen so its dark areas become invisible and only the lighter detail shows through.
-
Adjust Visibility With Levels
Press Cmd/Ctrl+L to apply Levels directly to the texture layer, then drag the middle slider right to make the texture less visible or left to make it more visible.
Adding a Multiply-Blended Texture for Dark Cracks
A second texture set to Multiply darkens the image wherever its detail appears, which suits a texture with cracks or dark spots better than a lightening blend mode would.
-
Bring In a Second Texture
Bring in a different paper texture and position it over the image.
-
Set the Blend Mode to Multiply
Change this texture’s blend mode to Multiply so its darker areas darken the image beneath.
-
Adjust the White Point With Levels
Press Cmd/Ctrl+L to apply Levels directly to this texture and drag the white point slider to the left, so its lighter areas drop out and mostly the cracks remain.
Moving the Gradient Map Above the Textures to Unify Color
Dragging the Gradient Map layer to the very top of the stack recolors every texture added beneath it, keeping the whole composite in one consistent color palette.
-
Move the Gradient Map to the Top
Drag the Gradient Map adjustment layer above both texture layers in the Layers panel.
Why Keep the Gradient Map on Top of Everything
Adding new textures, borders, or painted elements below the Gradient Map means none of them need to be color-matched by hand, since the Gradient Map automatically recolors anything beneath it into the same sepia palette. This is why elements as different as a cooler-toned texture or even a bright green brush stroke all end up looking like they belong in the same warm, vintage image without any extra color correction.
Painting and Adjusting on New Layers Under the Gradient Map
With the Gradient Map handling color for the whole image, new adjustment layers underneath it can focus purely on brightness and contrast changes.
-
Group New Adjustments
Create a new group beneath the Gradient Map and name it Adjustments.
-
Add a Levels Layer to Lift the Blacks
Add a Levels adjustment layer and raise the black point so the darkest tones turn lighter, giving the image a faded, slightly blown-out look.
Fading Edges With a Masked Levels Layer
A masked Levels layer with a gradient applied to its mask creates the faded, washed-out corners typical of an old photograph.
-
Invert the Levels Mask
Press Cmd/Ctrl+I on the brightening Levels layer’s mask so the effect is hidden everywhere.
-
Paint a White-to-Transparent Gradient
Select the Gradient tool, choose a linear white-to-transparent gradient, and drag from a corner to reveal the fading effect gradually toward that edge.
Darkening Spots With Another Masked Levels Layer
A second Levels layer, this time darkening instead of brightening, adds small imperfect dark spots that help sell the image as aged.
-
Add a Darkening Levels Layer
Add another Levels adjustment layer and darken the image overall.
-
Invert the Mask and Paint White in Small Areas
Press Cmd/Ctrl+I to invert the mask, then paint white in a few scattered spots to introduce small, imperfect dark areas across the image.
Adding and Softening a White Border
A simple white border, softened with a slight blur, finishes the classic look of an old printed photograph.
-
Select and Invert a Border Area
Use the Rectangular Marquee tool to select just inside the image edge, then go to Select > Inverse to select only the border area.
-
Fill the Border With White
Press Shift+Delete and fill the selection with white.
-
Duplicate and Blur the Border
Press Cmd/Ctrl+J to duplicate the border layer, then apply a Gaussian Blur to soften its edge slightly.
Blurring and Adding Grain With Smart Filters
Converting the base image to a Smart Object before applying blur and grain keeps both effects fully adjustable after the fact, which matters for a subtle finishing pass like this one.
-
Duplicate the Background and Convert to a Smart Object
Press Cmd/Ctrl+J to duplicate the background layer, then right-click it and choose Convert to Smart Object.
-
Apply a Small Gaussian Blur
Go to Filter > Blur > Gaussian Blur and apply a small amount, such as around 4 pixels.
-
Add Noise for Grain
Go to Filter > Noise > Add Noise, choose Uniform, and set an amount that reads as grain without overwhelming the image.
Why Convert the Background to a Smart Object First
Filters applied directly to a regular layer bake in permanently, with no way to adjust their strength or turn them off later without undoing and redoing the whole step. Converting the layer to a Smart Object first turns those same filters into Smart Filters, which stay listed underneath the layer and can be double-clicked to adjust their settings, or toggled off entirely, at any point afterward.
Why Old Photos Need Both Blur and Grain
A perfectly sharp, noise-free image reads as too clean to pass as an old photograph no matter how convincing the color grading looks. Adding a small amount of both blur and grain together recreates the softer optics and film texture that real vintage photos actually have, which is often the detail that finally sells the whole effect.
Why This Approach Works
Keeping the Gradient Map at the very top of the layer stack is what makes it possible to freely add textures, borders, and painted elements underneath without ever worrying about color matching each new piece by hand. Building blur and grain as Smart Filters on a Smart Object, rather than baking them in directly, keeps the final aging effect adjustable right up until the image is finished. Layering multiple small imperfections, faded corners, dark spots, a soft border, blur, and grain, rather than relying on any single effect, is what makes the vintage look believable instead of feeling like one obvious filter was applied.
Final Thoughts
None of these steps are required in every combination, and it’s worth experimenting with different gradient map colors, texture blend modes, and amounts of grain to land on a specific vintage look. The same layered approach, color grading, texture, borders, and a touch of blur and grain, works on essentially any photo that needs to look like it’s been sitting in a box for decades.
Quick Reference: Keys, Menus and Settings
- Sepia toneGradient Map: dark brown on the left stop, warm yellow on the right
- Fit a textureCmd/Ctrl + T with Shift + Alt/Option
- Light specksCmd/Ctrl + I to invert, blend mode Screen
- Dark cracksBlend mode Multiply; Cmd/Ctrl + L, white point left
- Faded cornerLevels black point up, invert the mask, white-to-transparent linear gradient
- BorderRectangular Marquee, Select > Inverse, Shift + Delete white; duplicate and blur
- Blur and grainConvert to Smart Object; Gaussian Blur about 4 px; Filter > Noise > Add Noise, Uniform
Free Downloads
Use the Same Paper Textures
Get the two distressed paper textures from the video to layer over your own photo with Screen and Multiply for a vintage look. Free with a PHLEARN account.
Vintage Photo Effect: Common Questions
How do I give a photo a sepia tone?
Add a Gradient Map adjustment layer and click the gradient. Set the right stop (the lights) to a warm, bright yellow and the left stop (the darks) to a dark brown, then lower the layer’s opacity a little.
How do I stretch a texture over the whole photo?
Drag it in with the Move tool, press Cmd/Ctrl + T, and stretch it while holding Shift and Alt/Option until it covers the image.
How do I use a texture to add light specks?
Press Cmd/Ctrl + I to invert the texture, then set it to Screen. Screen hides the dark parts, so only the lighter specks show.
Which blend mode shows dark cracks?
Multiply, or Darken. Use Screen or Lighten when a texture should lighten the photo, and Multiply or Darken when it should darken it.
How do I make a texture less strong?
Press Cmd/Ctrl + L for Levels on the texture layer. On a Screen texture, drag the middle slider right to fade it; on a Multiply texture, drag the white point left so only the cracks stay.
My textures don’t match the color of the photo. What do I do?
Drag the Gradient Map to the very top of the Layers panel. It recolors everything beneath it, even a white border or a bright green brush stroke.
How do I get the faded corners of an old photo?
Add a Levels layer and raise the black point, press Cmd/Ctrl + I on its mask, then drag a white foreground-to-transparent linear gradient in from a corner.
How do I add a soft white border?
Drag a Rectangular Marquee just inside the edge, choose Select > Inverse, and press Shift + Delete to fill with white. Duplicate it with Cmd/Ctrl + J and give the copy a Gaussian Blur.
How do I add blur and grain I can change later?
Duplicate the background, right-click it and choose Convert to Smart Object. Then add Filter > Blur > Gaussian Blur (about 4 pixels) and Filter > Noise > Add Noise set to Uniform; double-click either Smart Filter to change it.
Are the sample files free?
Yes, with a free PHLEARN account. You get 2 sample images: the two distressed paper textures from the video, ready to layer over your own photo.
From the Magazine View all
Stories, interviews and guides for photographers, new every week.
 EditingHow to Color Grade Photos in Photoshop and LightroomCorrect the photo first, then put color in the shadows, midtones and highlights. Aaron Nace on the order, the tools and skin.
 BusinessHow to Compete With AI: Give Your Clients MoreEveryone has the same tools now, and your clients know it. The way to compete is to give them more.
 EditingLightCraft vs Lightroom: I Edited the Same RAW Files in BothThe free clone on the same RAW files: what matches, what breaks and who should switch.
Master Photoshop, Lightroom and Photography
Join PHLEARN PRO for $12.99 a month, or $99.99 a year (save 36%). Cancel anytime, with a 100% money-back guarantee.





