
Download Sample Images
Click the link below to download the sample images and follow along with this tutorial.
DownloadTutorial Description
Make your subjects stand out from the background and enhance any photo in Photoshop! Learn to use Curves and Vibrance to add brightness and color to specific parts of an image. Then finish the job by both sharpening the subject and blurring the background.
Guide the Eye
Chances are that if you’re photographing a person, you want the anyone viewing that photo to be drawn to your subject. But that doesn’t always happen with images coming straight-out-of-camera. This is especially true of more candid pictures, like in street photography or photos taken using only natural light.
Why is that?
To understand how to fix the problem, we need to talk a bit about what our eyes are instinctively drawn to.
Our Example
There are countless ways to describe how and why photography works. Today we’re going to talk about three of the most important elements; color, light, and sharpness.
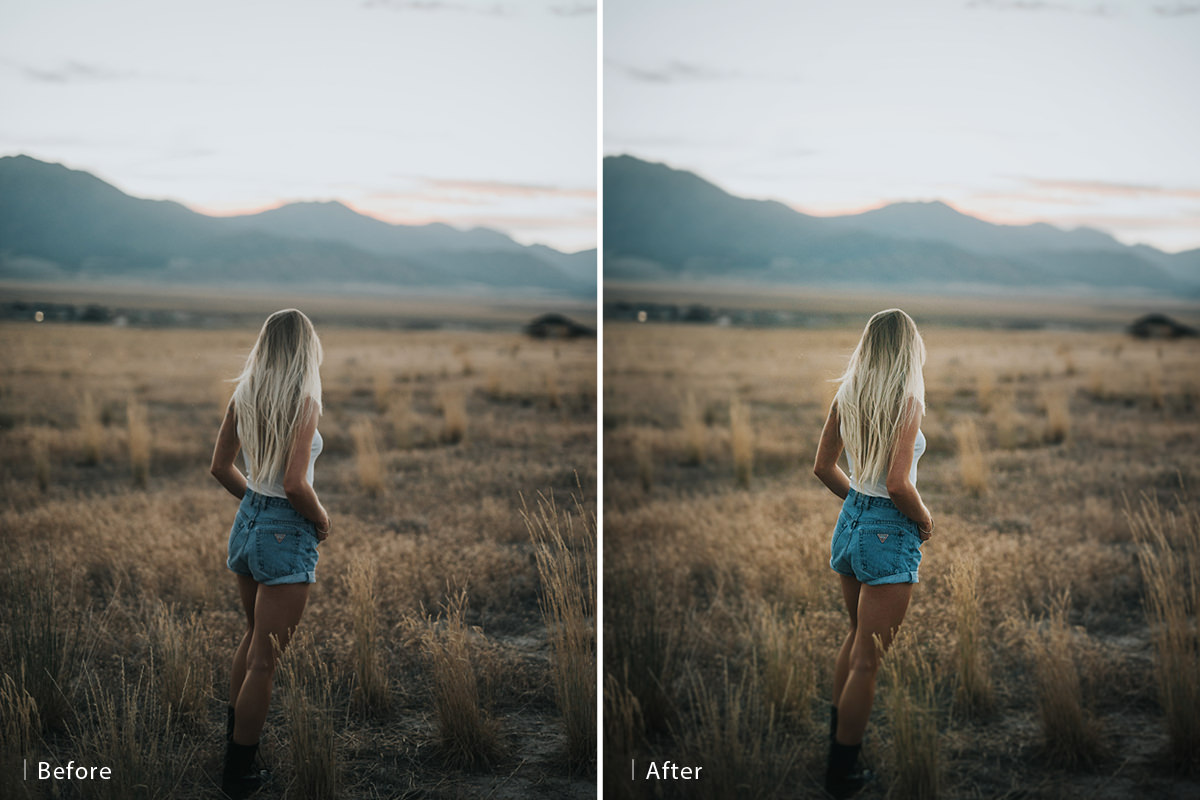
Looking at our original example photo, we can make a few observations. To start off, there’s absolutely nothing wrong with it as is. The composition is nice. The landscape and lighting are beautiful. The subject is in focus.
But the longer we look at it, the more we might notice that even though there’s a person in the foreground, our eyes don’t immediately gravitate towards her. Now this could very well be an artistic choice made by the photographer. Perhaps they wanted to create a sense that this person is blending into the beauty of the landscape beyond. Even if that is the case, what qualities are preventing the subject from being the obvious focal point in the image?
Light
Light is probably the simplest and most obvious explanation for why the subject doesn’t immediately jump out at us. Our eyes are naturally drawn to brighter areas of an photo. The lighting in this image is pretty even across the board, from foreground to background and from edge to edge.
Using Photoshop, we can use a Curves Adjustment Layer to brighten up the subject without creating an unnatural look. Simply make a selection around the subject using the Elliptical Marquee Tool. Apply this selection to the Layer Mask and add a Gaussian Blur until the exposure change blends evenly with the background.
The subject will be slightly brighter and that will instinctively guide our eyes her way.
Color
Yellows, golds, blues, and browns. The background of the image and the subject both made up of a very similar color palette. Color is a powerful tool for differentiating different elements in a photography. Think of how different this photo would be if she were wearing a bright blue shirt. Blue and yellow are complementary colors and complementary colors tend to stand out from one another.
In this case, the subject’s clothing isn’t different enough in color to help her stand out. Fortunately, we can use Photoshop to enhance the colors on and around her to help the viewer find her faster.
Create a Vibrance Adjustment Layer and apply the same Layer Mask that we used on the Curves Adjustment Layer. Vibrance has almost the same effect as Saturation, with the exception that it protects skin tones. We can crank the Vibrance up quite a bit, making the colors of our subject pop, without making her look unnatural.
Sharpness
Why are images that rely on a shallow depth of field and creamy bokeh so effective? The blurred background can be pretty, yes, but it has more to do with how much more relative sharpness the subject in those images have. Like light and like color, our eyes are drawn to whatever we can see the clearest.
In our example, we can tackle this from two angles. By sharpening the subject, we can enhance the details in her hair and clothing while also making her appear sharper, which will help draw our attention.
Additionally, we can create some subtle, artificial bokeh using some blur tools within Photoshop. Combining both sharpening and blurs will create a natural contrast between her and the background, helping her stand out even more.
Not every subject needs to jump of the page (or screen). Use these techniques as you see fit, whether that be individually or in combination with eachother for greater effect. The important thing to remember is that editing, like photography, is as much about helping the viewer understand the photo as it is about the photo itself.


