
Download Sample Images
description
Back from vacation with a pile of full memory cards? Just wrapped up a photoshoot and have thousands of images to go through for a client? Lightroom Classic can help!
In this tutorial, we show you how to quickly go through hundreds (or even thousands!) of photos to find the best of the best. Learn about Lightroom’s different methods for rating, sorting, and filtering, and then see them in action as we pick out our favorite images from a large collection of travel photos.
If you’re ready to take a deep-dive into everything Lightroom Classic has to offer, try our PRO tutorial The Beginner’s Guide to Lightroom Classic!
Free Lightroom Preset Sample 10 Pack
Lightroom Presets are a great way to quickly add style and charm to your photos. Try our custom-made PHLEARN Lightroom Presets with our free sample 10 pack of some of our favorite bright and beautiful looks!
Watch Next
This episode is part of our FREE Intro to Lightroom Classic series.
Share
LEARN TO USE LIGHTROOM CLASSIC
Find Your Favorite Shots
Getting Started with Culling
Culling is the process photographer’s use to narrow down a large collection of photos into the select few that they want to share. And with modern digital photography and massive memory cards, it’s not uncommon to come out of a single day of taking photos on vacation, or a studio photoshoot for a client, with thousands of images waiting to be looked at.
So how do photographers quickly go through all of their images to find the best of the best?
With Lightroom Classic!
How to Choose the “Best” Photos
In our first episode of this series, we showed you how to get started in Lightroom Classic by importing and organizing a collection of images. The next step is to go through them one-by-one and determine what the “best” photos are.
Now “best” can mean different things to different photographers. If it’s a set of family vacation photos, it might mean the images that best capture the experiences you shared with your loved ones. If it’s a collection from a professional photoshoot, it might mean finding the ones that are most useful for the client.
Before beginning the culling process, we recommend taking a little bit of time to think about what you want to get out of your final selection of images. This will give you a clear set of guidelines to use as you go through and pick the photos you want to share.
The Library Module
If you’re following along with the series, you’ve already seen the Library Module in action as we imported the full collection of photos. Now that the photos are imported, we can use a number of tools within the Library to view and rate each image.
First, let’s take a look at the different views Lightroom offers to look at and compare photos.
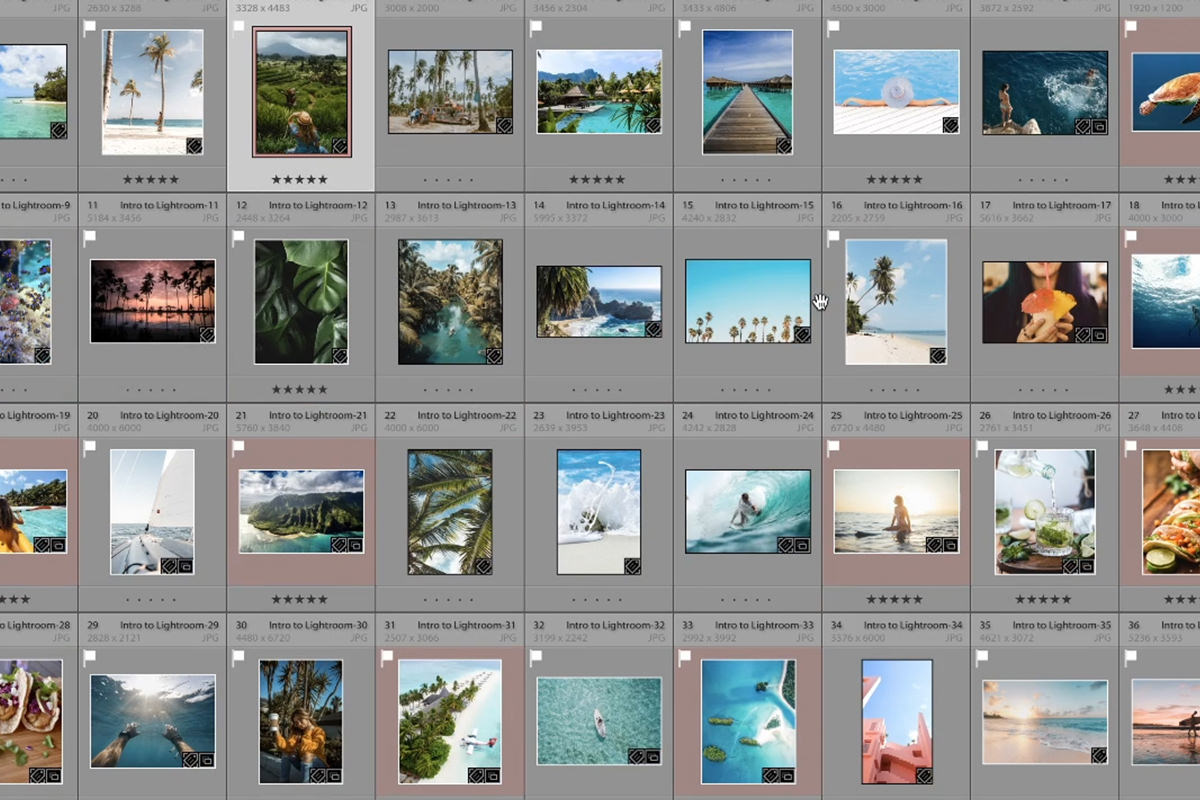
- Grid View:
- Loupe View:
- Survey View:
- Compare View:
See a preview of every photo that’s been imported into Lightroom.
Get a closer look at the images by viewing them one at a time.
Select and view images in small groups.
View two images side-by-side and choose the one you prefer.
And now let’s look at the different methods for rating images.
- Picks:
- Stars:
- Colors:
Adds a small white flag icon to an image chosen. Great for quickly marking the first batch of images you like.
Give an image a star rating from 1 to 5.
Adds a chosen Color Label (blue, green, yellow, or red) to an image.
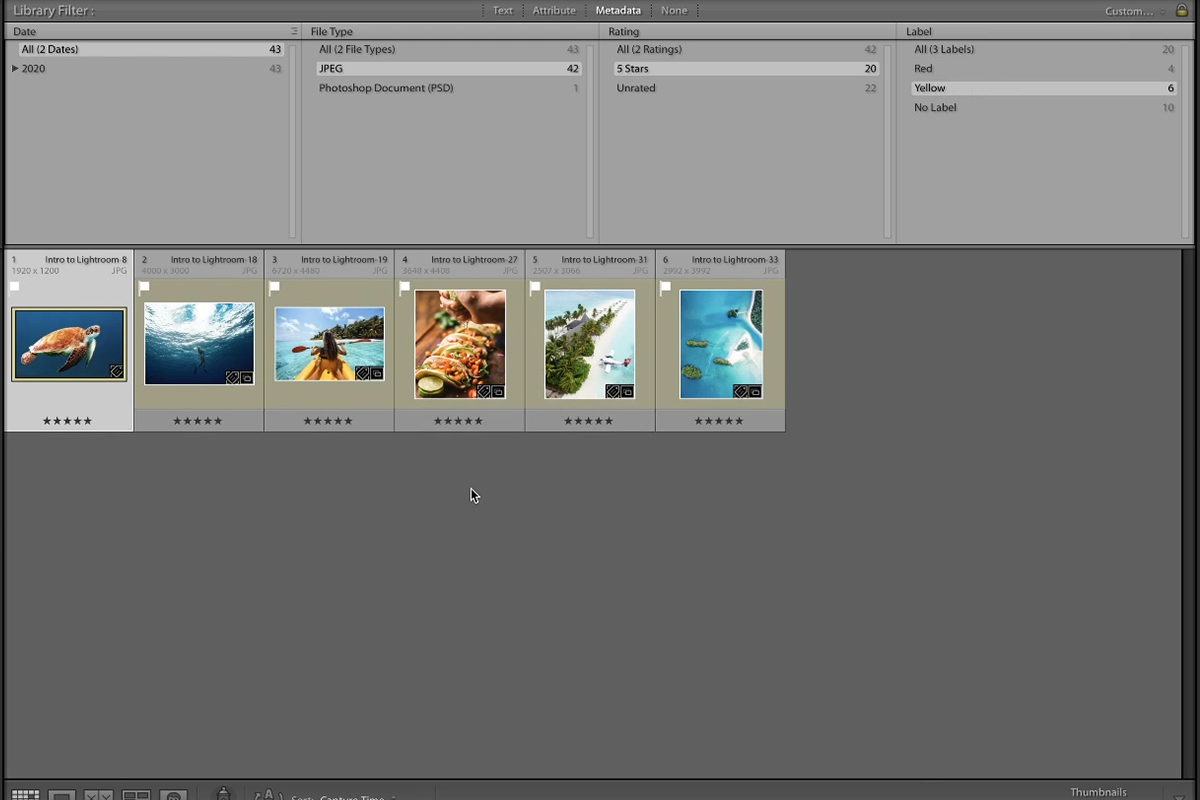
Filtering
These different ratings are great, but Lightroom Classic’s Filtering system is what makes them shine. We’ll be using each rating method to carry images from one round of culling to the next. We can then use Filtering to show only the photos that have been marked with a particular rating or group of ratings. So if we only want to see the photos that are flagged as Picks, rated 5-stars, and labeled yellow, we can!
Our Culling Workflow
There are countless workflows out there for sorting and culling images. The process we’re describing here just represents how we choose to work. It’s worked for us over the years, and we think it will work for you. But feel free to add to it, change it, or work in a totally different way that is comfortable for you. Workflow is as much about ergonomics and comfort as it is about efficiency. So use this workflow however you like!
Three Rounds of Culling
Our workflow is divided into three rounds of applying different ratings to images. The first round starts with all of our images from a shoot, and then narrows that selection down to a slightly smaller group. The second takes that smaller group and narrows it down even further. The third round takes a look at all of the images we have remaining and chooses the final selects from that group.
Let’s take a closer look at each round, and how we rate, sort, and filter groups of photos.
Round 1: Picks
The first round of our culling workflow is designed to be as fast as possible since it includes every photo that’s been imported. We don’t want to spend too much time looking over each image! The goal is to go through every photo one-by-one, applying a Pick rating to the images we want to move on to the next round.
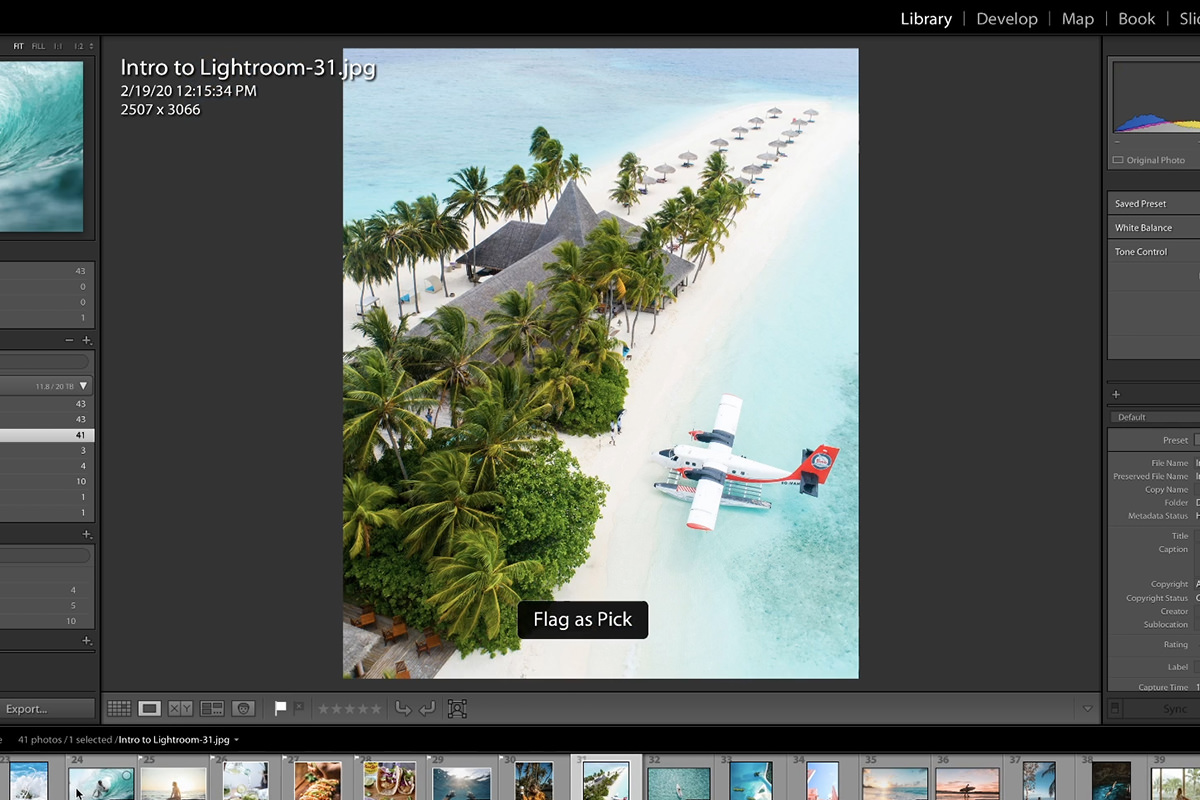
We recommend using the Loupe View and the left and right keys on your keyboard to quickly move from one image to the next. The right arrow will take you to the next image, the left arrow to the previous image. Then, if you like a photo and want it to go through to the next round, hit P to flag it as a Pick (U will remove it as a Pick.)
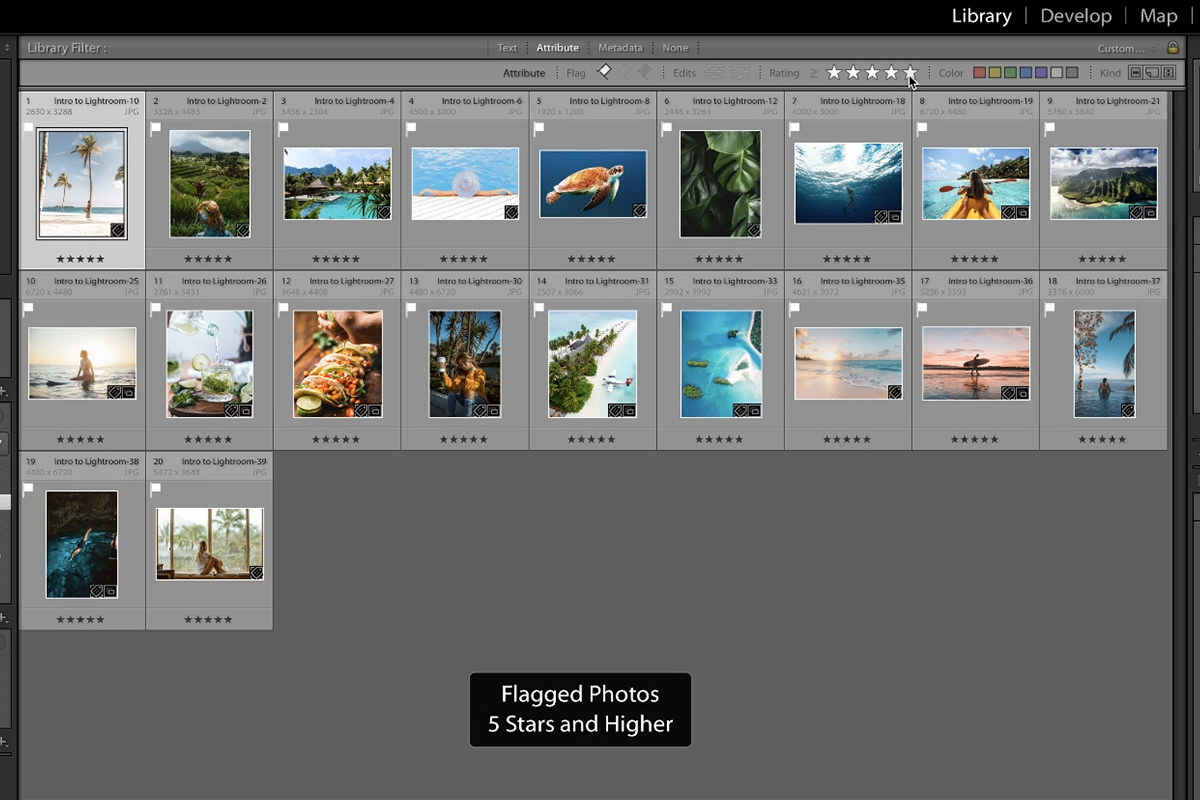
Round 2: Stars
Lightroom gives us the ability to rate any photo from 1 to 5 stars using the 1-5 keys on your keyboard. While this might be useful for some, we find it faster and more beneficial to simply give an image a 5-star rating if we want it to move on to the final round.
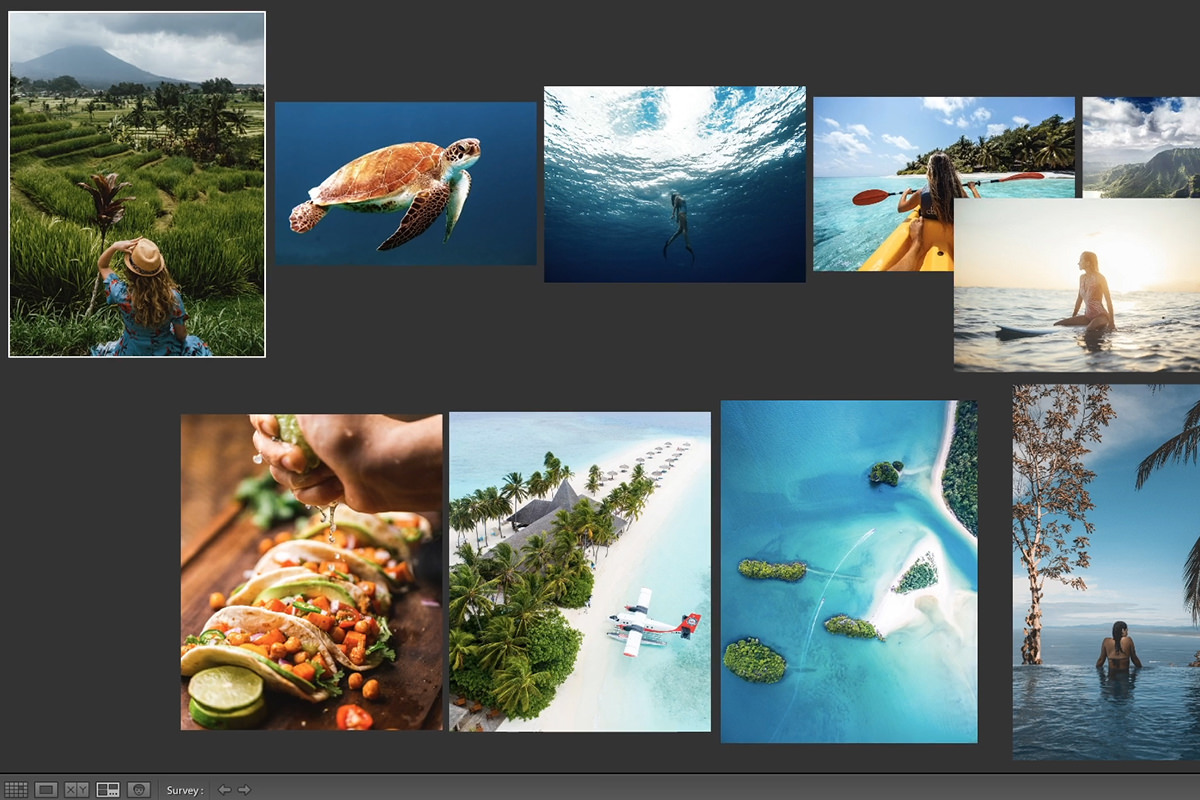
In round 1, we took our entire collection of photos and narrowed it down, one-by-one, to a smaller group of images that we liked. In this round, we’re going to take that smaller group and look at the images in batches using the Survey View option (you can see what Survey View looks like in the image above.) By looking at the photos in batches of four or five at a time, we can start to see what our final images might look like as a whole. If there are two very similar images in a batch, we can easily see that and decide which we want to keep by giving that photo a 5-star rating.
With all of the Picked images from round 1, select four or five of them and then switch to Survey View (you can access the Survey View by hitting S on your keyboard.) Survey View will show previews of only the images you have selected. Take a look at all of the photos and decide which you like enough to move on to the last and final round by giving them a 5-star rating (by using the 5 key on your keyboard.)
At this stage it’s best to look for variety and for the images that stand out the most from the group. And don’t worry! You can always go back and change ratings at any time if you change your mind.
Round 3: Colors
After the second round of culling, we’re left with a group of photos that have both a Pick rating and a Star rating. The last round of our culling process involves assigning a Color Label to the images that we want to move on to post-production.
We recommend again using the Survey View to look at the remaining images in batches. Simply select photos in batches of four or five, and then apply a Color Label to ones you want to edit and share.
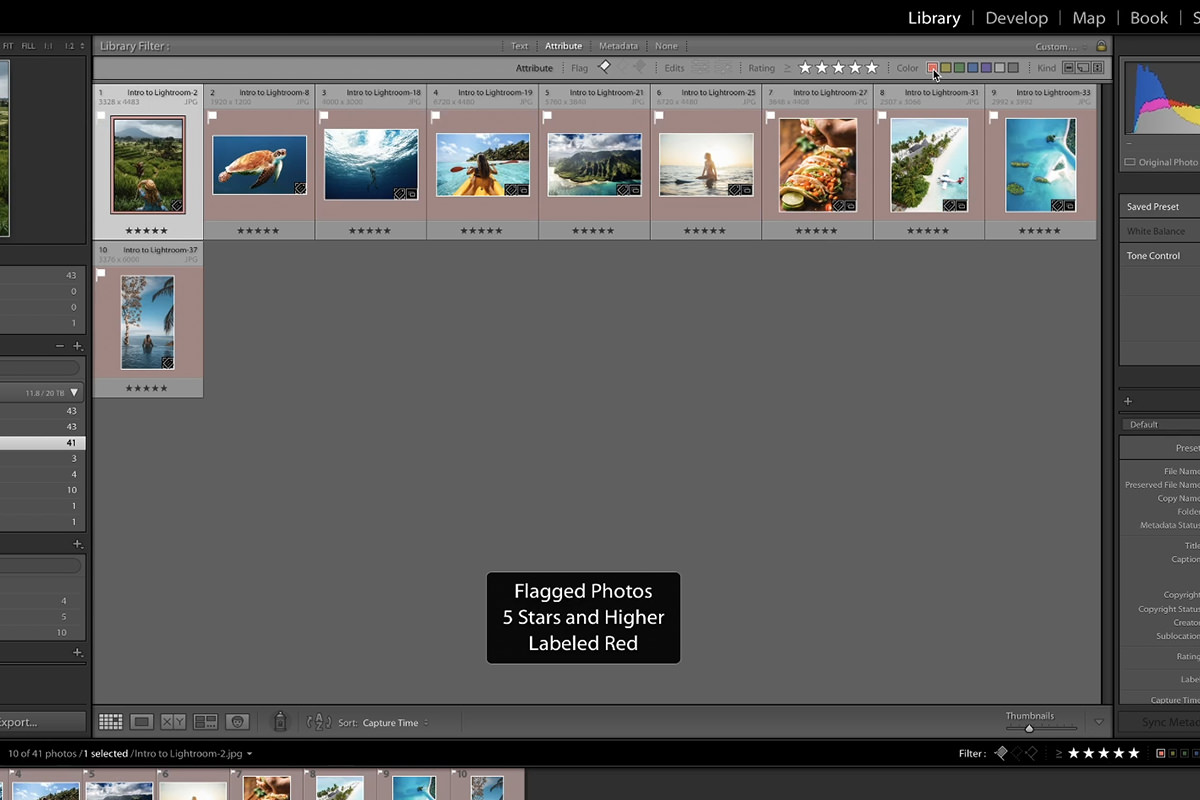
When you’re done, you’ll have a group of photos flagged as Picks, given a 5-star rating, and labeled red. These are the final images that you can move on to the much more fun and exciting editing process.
That’s it! And remember, this workflow is flexible. If you need to add or remove rounds, go for it! It all depends on how many photos you have to get through, and how many you want to take all the way through the editing process.


