Rain Photoshop Brushes
-

-
Add to
favorites
-
Software
-
Photoshop brushes14 Rain Brushes
-
DepthDrizzle to Close Drops
-
WindBreeze & Wind, Left & Right
Photoshop Brushes Download
Install Guide
How to Install Your Brush
A short PDF that shows two ways to install this brush in Photoshop, what to do if something looks wrong, and three tips for better results.
DESCRIPTION
Rain adds drama and mood to a photo, but it rarely shows up in camera the way you remember it. The PHLEARN Rain Brushes paint rain that looks photographed: tiny and soft far away, clearest at your subject, and brightest where the light catches it.
The pack holds 14 brushes: Drizzle, Distant Rain and Background Rain for far rain, Light Rain and Heavy Rain for the middle distance, Close Drops for the space near the lens, a soft Rain Veil, four brushes that slant the rain for a breeze or a strong wind, and the three original PHLEARN rain brushes.
One zip holds the brushes in a single .abr file, a How to Use guide with a worked example and the common mistakes, the install guide and a practice photo.
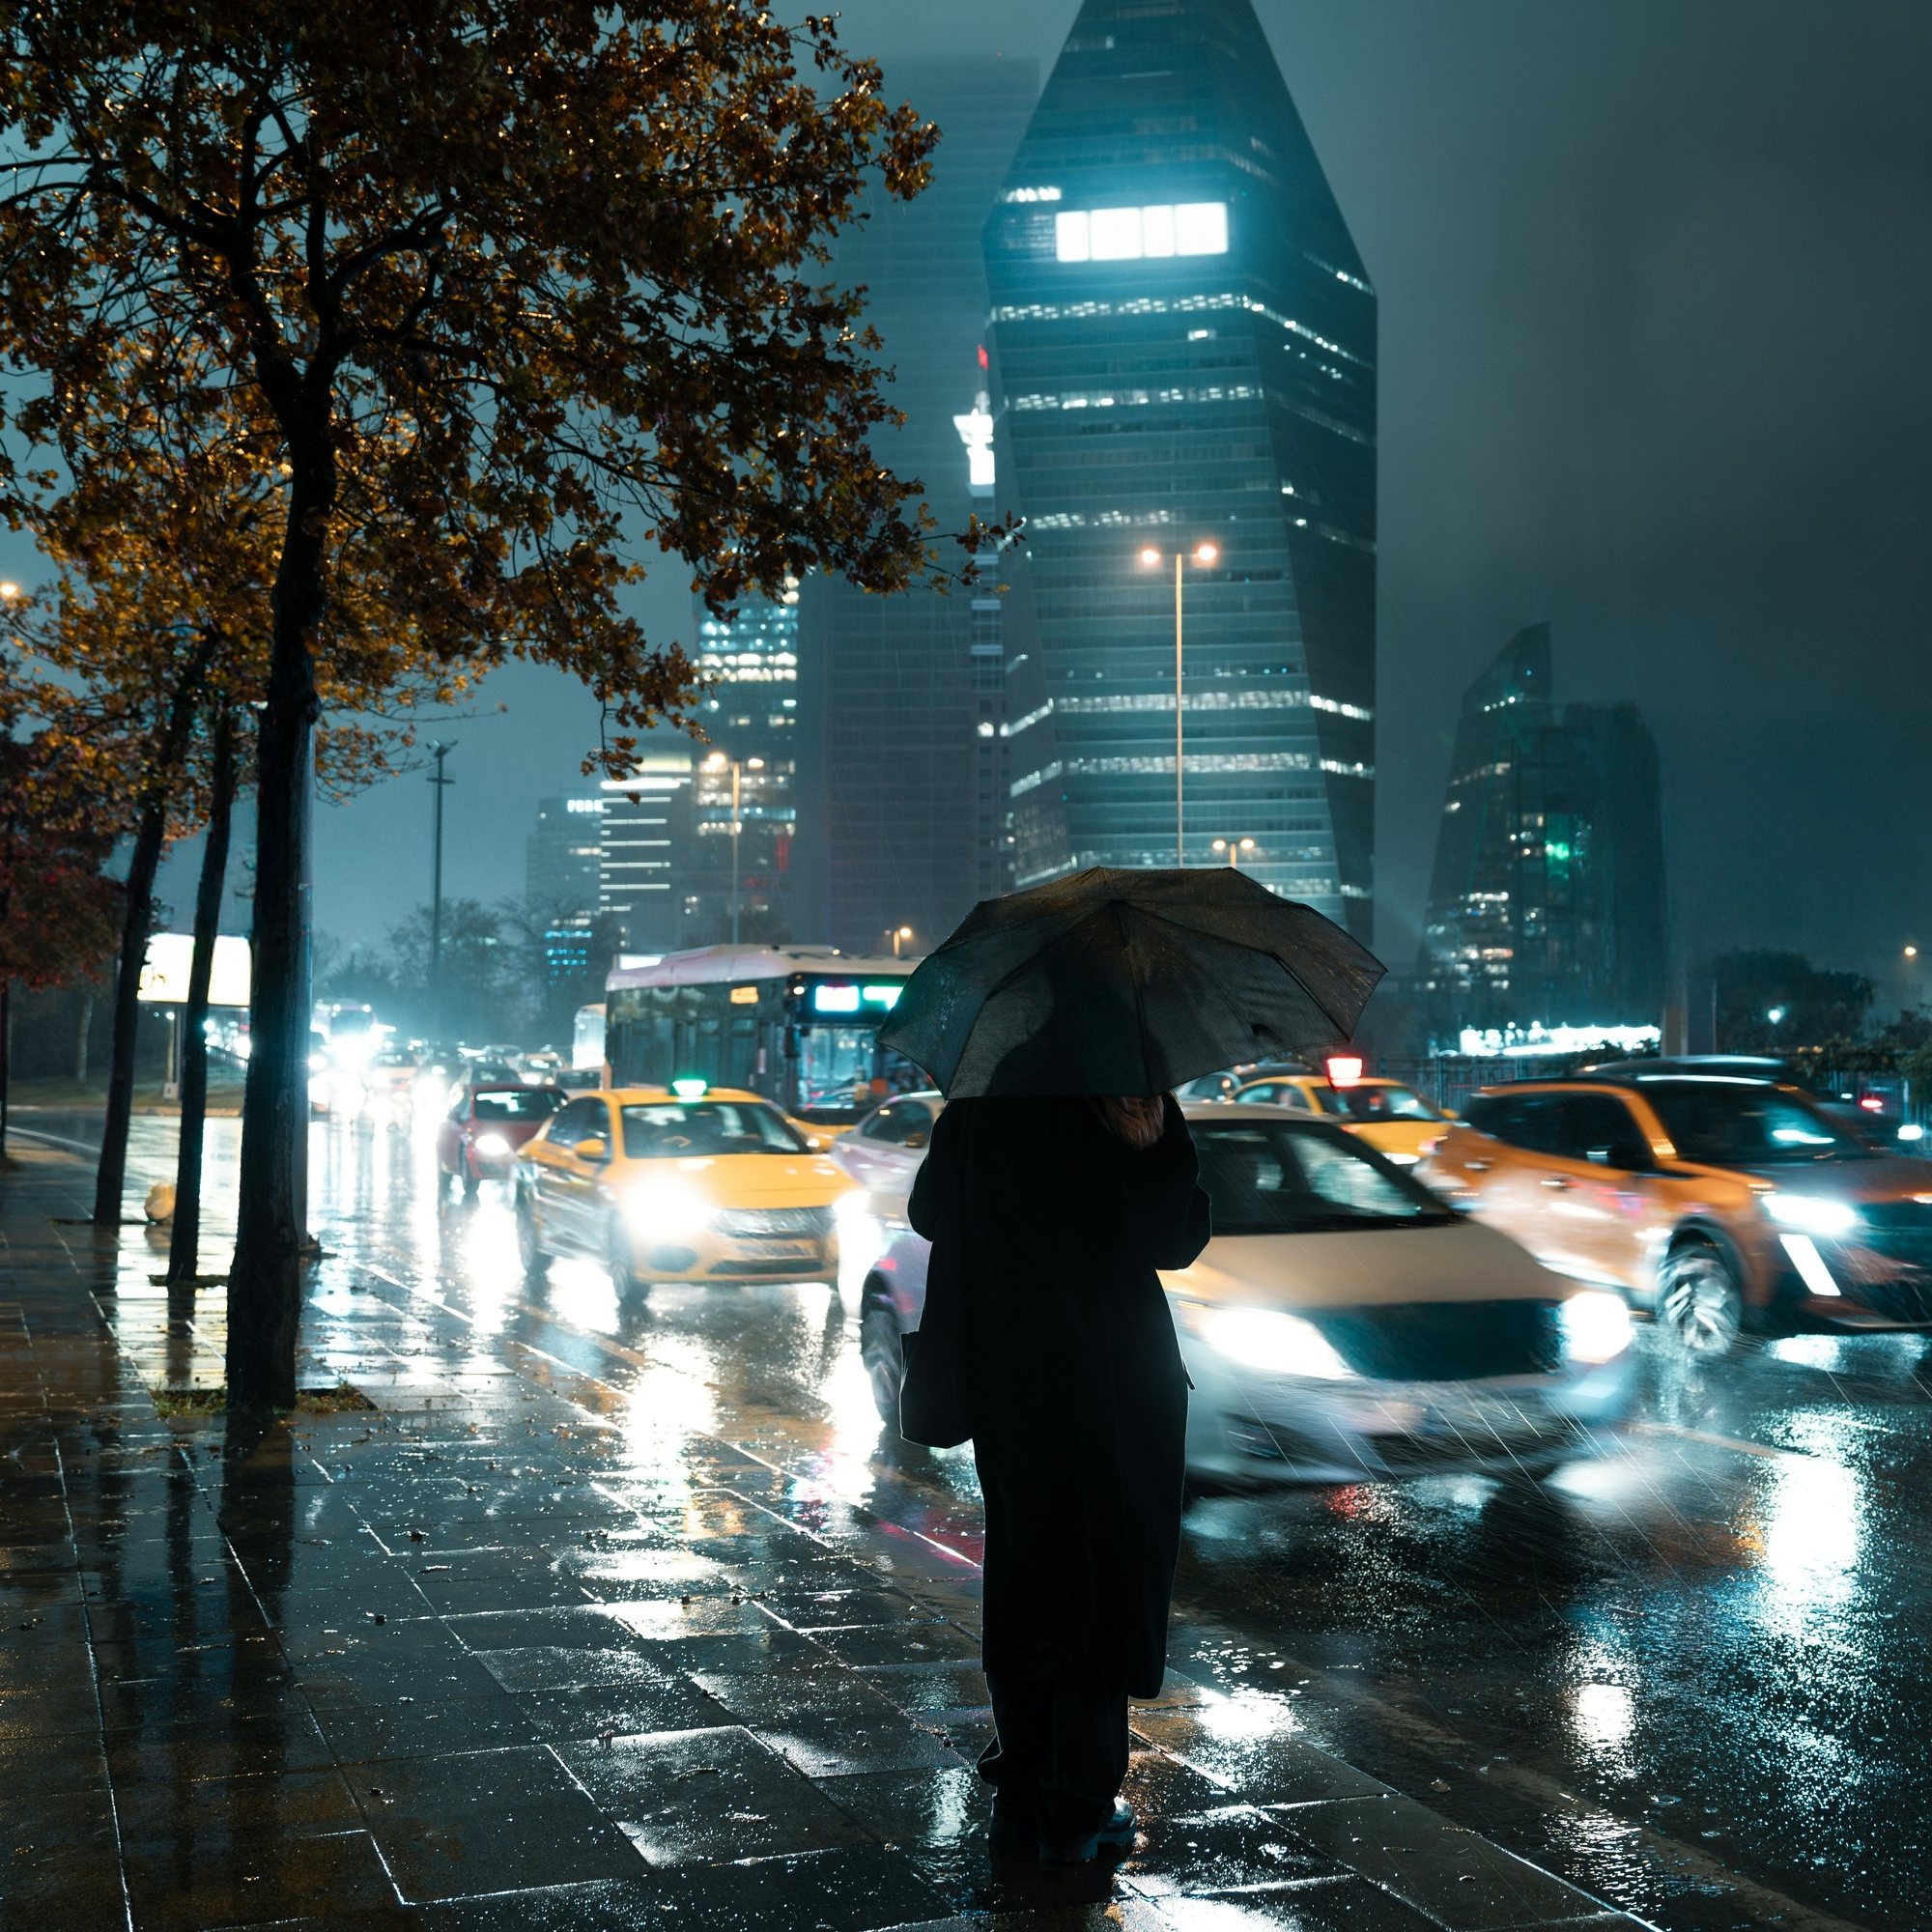
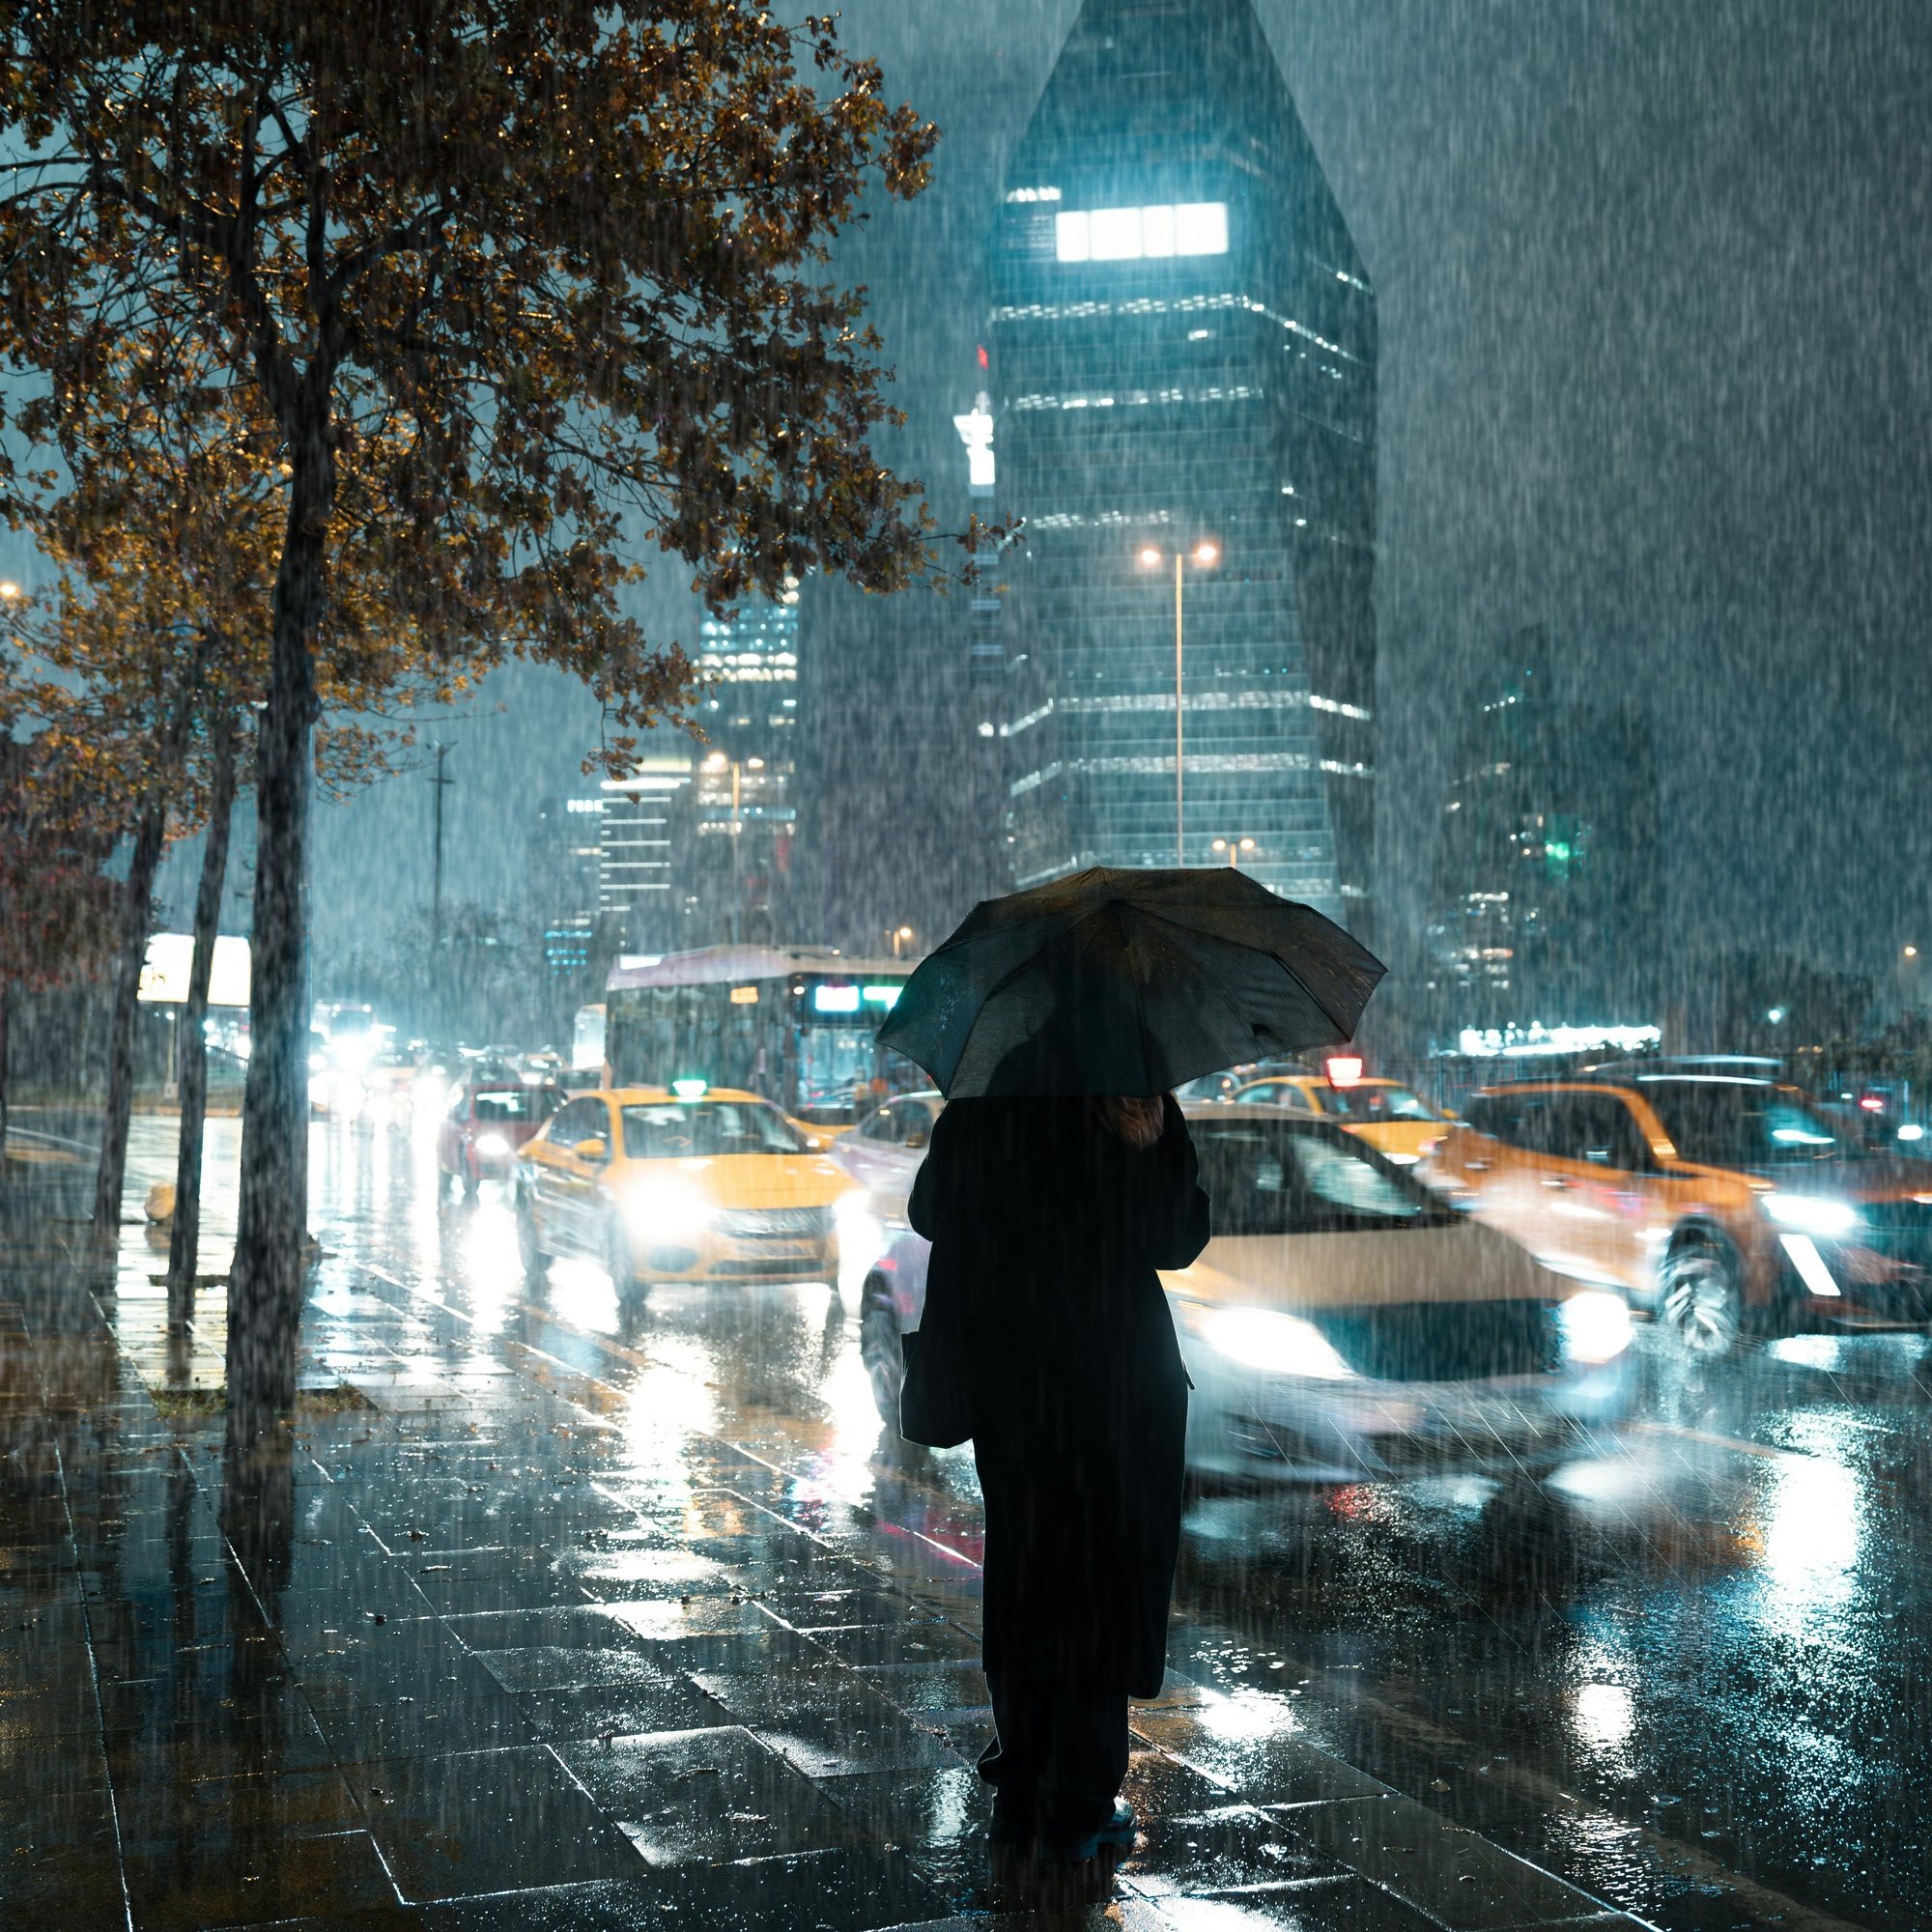
PHLEARN PRO · Photoshop Brushes
Rain Photoshop Brushes
14 rain brushesFar, middle & close rainHow to Use guidePractice image
Rain Brushes · How It Works
Believable Rain, Layer by Layer
Fourteen brushes for rain at every distance: tiny and soft far away, clearest at your subject, and only where the light catches it.

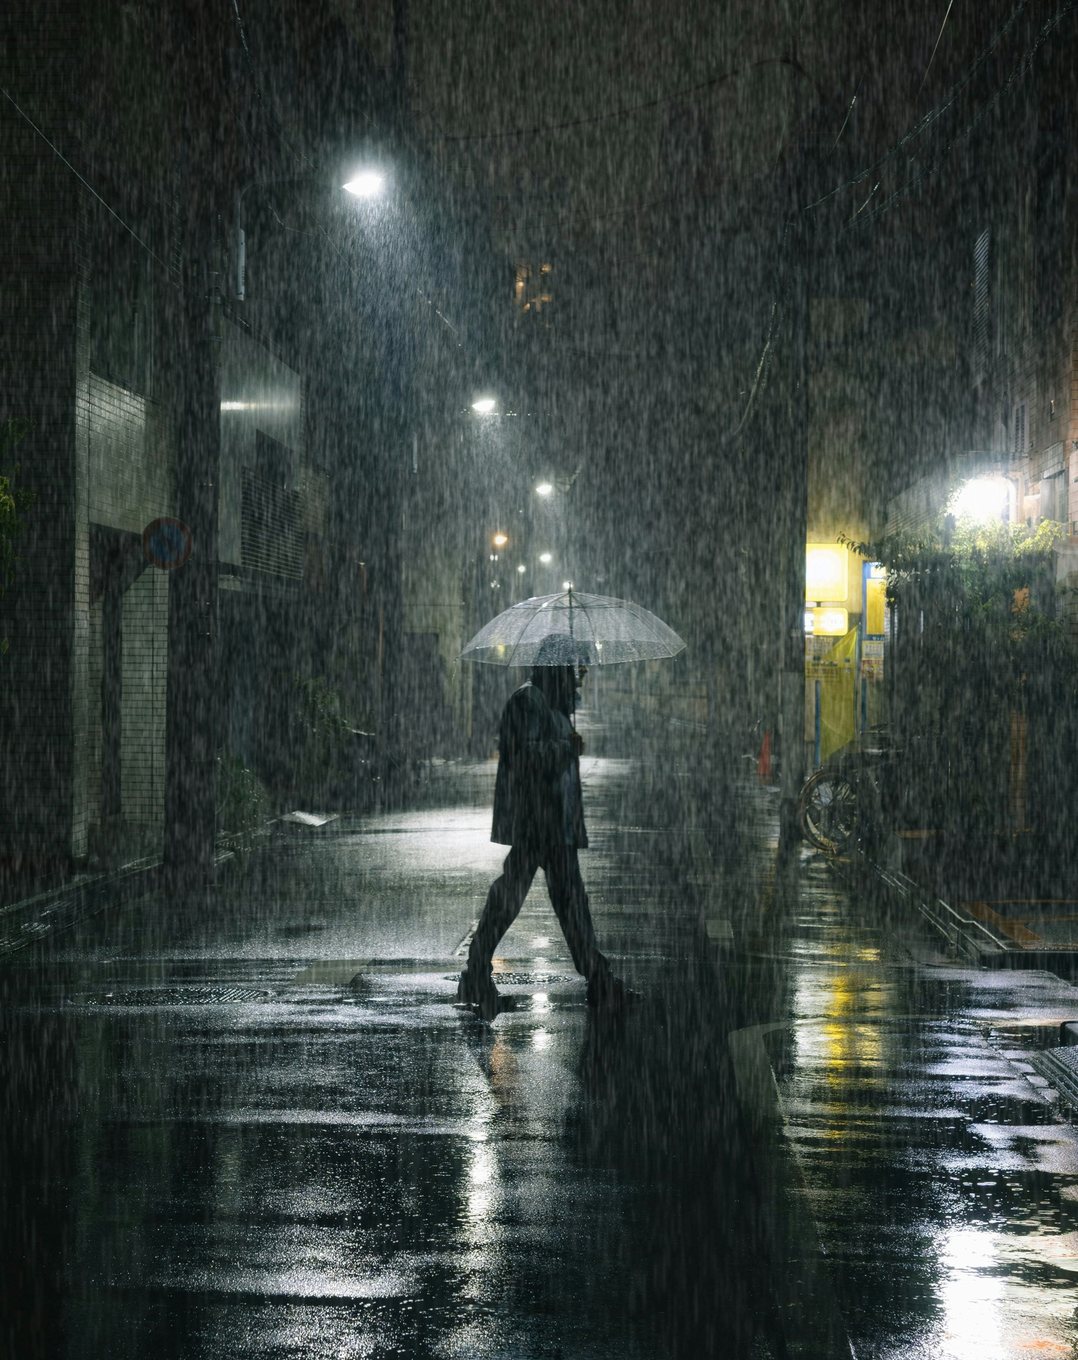
Alley Crossing in the Rain
This alley was already wet, so the rain is built up to a real downpour that still matches what the camera caught: dense, fine streaks deep in the alley, longer and brighter ones near the walker, and nothing oversized up front. Each layer is masked by distance and by the light, so the rain is brightest near each light and takes its color: cool white under the streetlights, warm by the yellow shop window.
Build It in Passes
One pass of rain rarely reads as a downpour. Paint the far layer, duplicate it and shift the copy a little, then add the middle layer at your subject’s distance. Zoom to 100% and keep the far streaks the same size as any rain already in the photo.
Let the Light Decide
Rain is only visible where light catches it. Choose Select > Color Range > Highlights, feather the selection and use it as a mask on the rain layers, so streaks glow under the lamps and fade in the dark.
Best on: night streets, alleys, neon and any scene lit by streetlights.
Brushes used: Drizzle, Distant Rain.
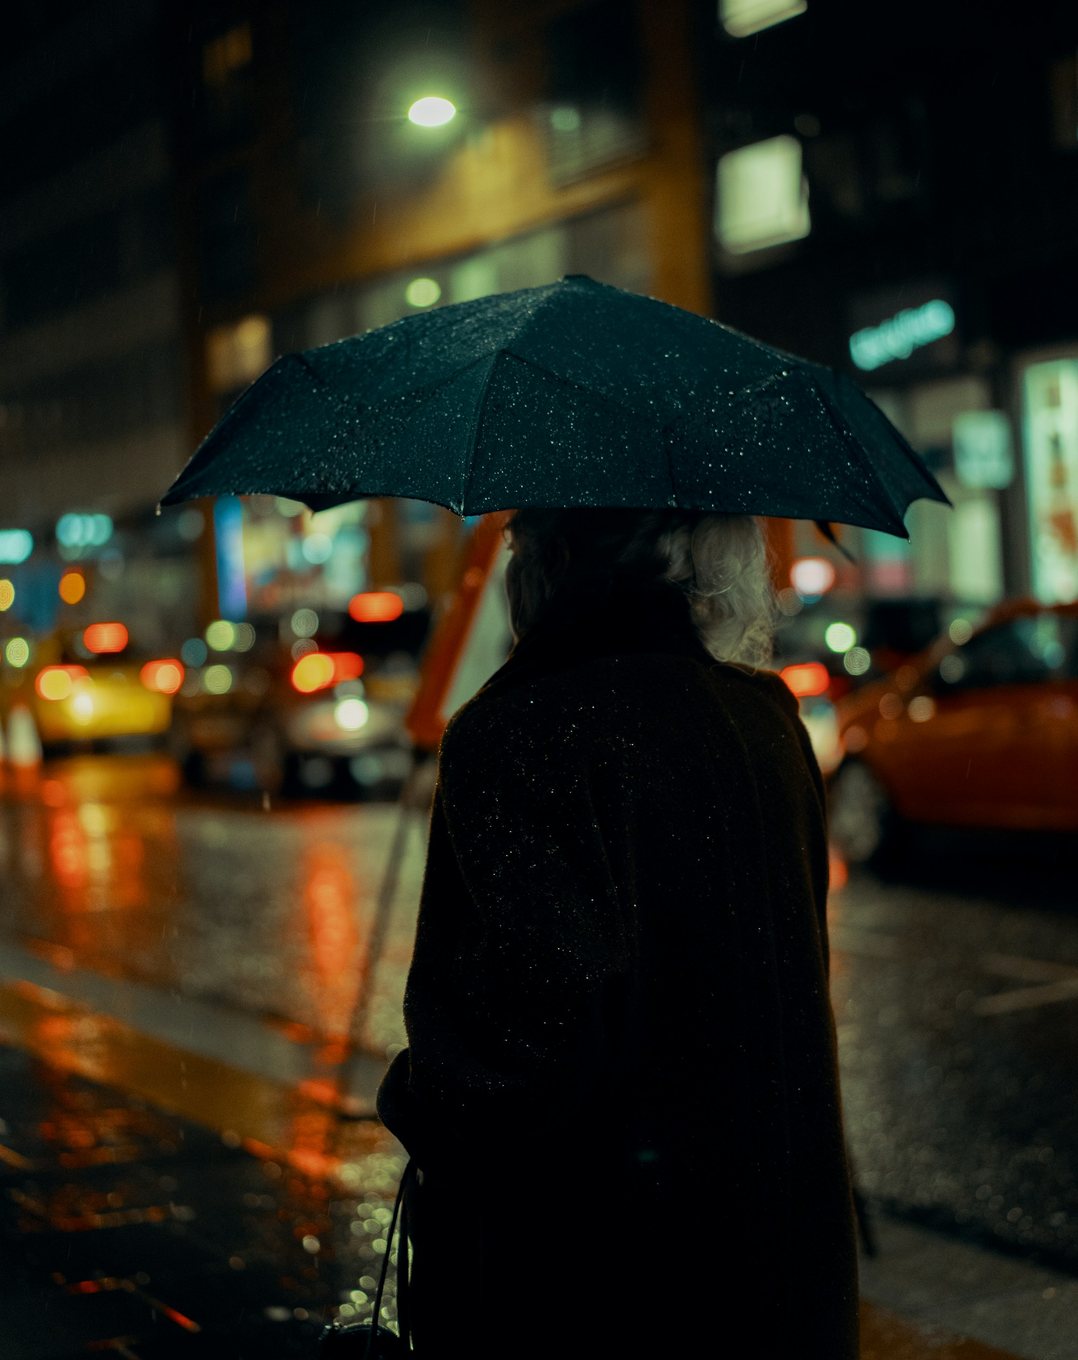
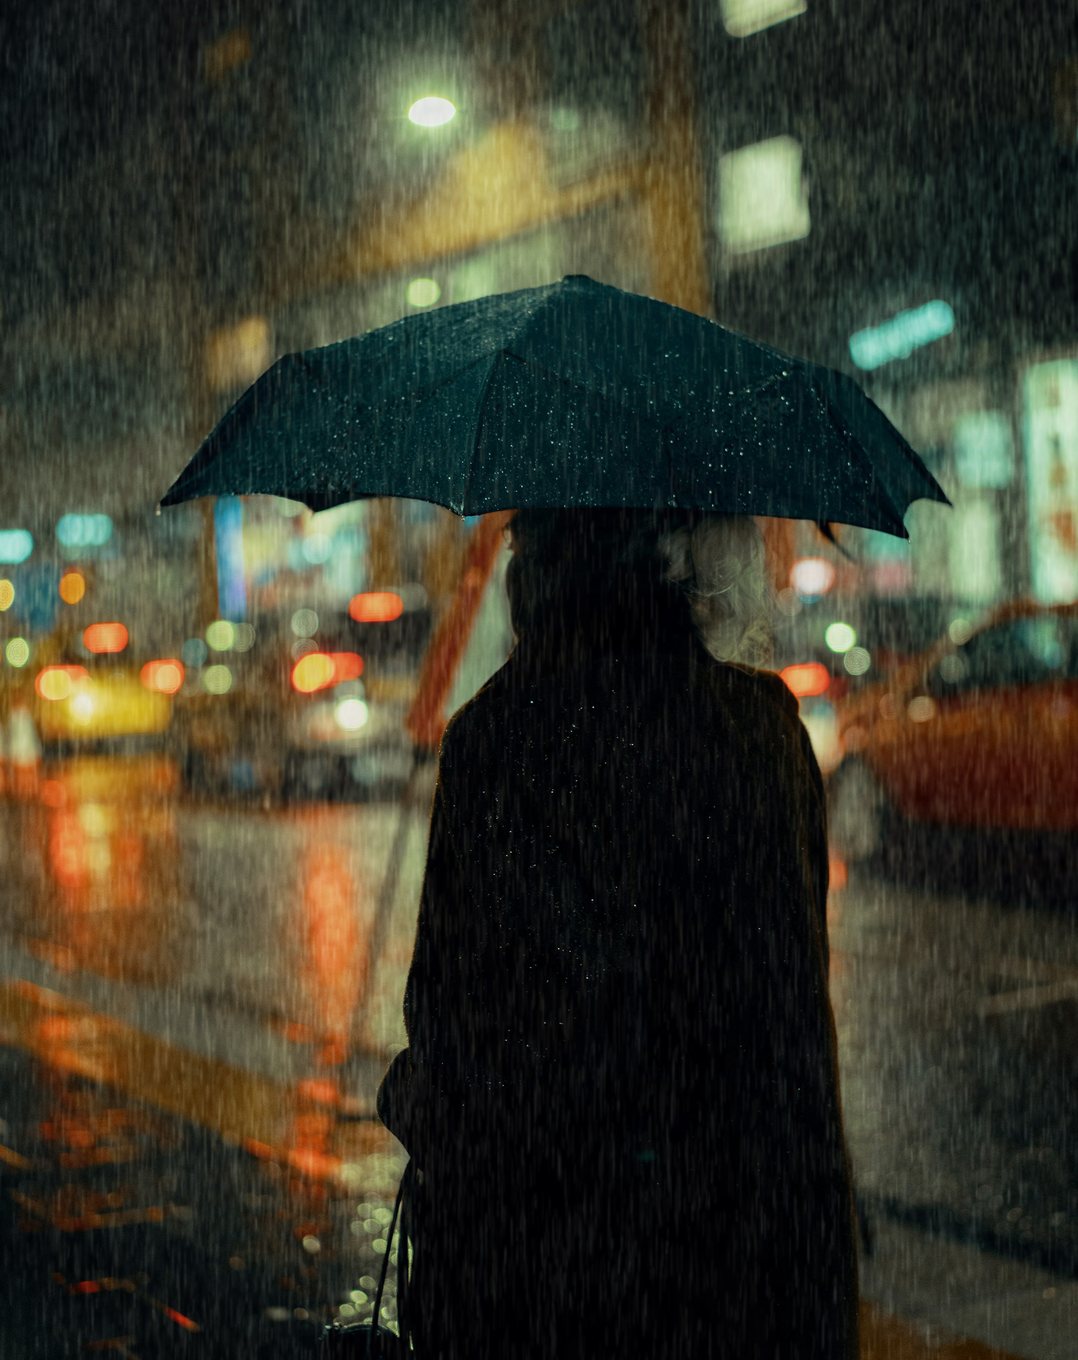
Night Rain in the City
Behind her the lens goes soft fast, with big round bokeh from the traffic lights. The rain follows that blur: dense far rain, tiny and out of focus over the bokeh, then heavier, crisp streaks at her distance, with every layer brightest near the lights and tinted by them, warm orange by the car lights. It reads as a proper rainy night, the kind a camera actually catches.
Blur by Distance
Look at how soft the background is and match it. Give the far rain layer a Gaussian Blur close to the blur of the bokeh, keep the layer at her distance sharp, and add a little Motion Blur in the direction the rain falls.
Brighter Where the Light Hits
Set the rain layers to Screen and mask them toward the brightest parts of the frame. Streaks in front of the headlights should glow; streaks over her dark coat should almost vanish.
Best on: night portraits with bokeh, umbrellas, city streets and wet reflections.
Brushes used: Drizzle, Distant Rain, Light Rain.
What’s in the Download
14 brushes for rain at every distance
Unzip it and load the .abr file in the Brushes panel. The brushes show up in a group named PHLEARN Rain Brushes 2026.
- ABRPHLEARN Rain Brushes 2026.abr14 brushes: far to close rain, a rain veil, four wind angles and the classic three
- PDFHow to Use (2026)PHLEARN Rain Brushes – How to Use (2026).pdf: the brushes, a worked example and the common mistakes
- PDFInstall Guide (2026)PHLEARN Photoshop Brushes – Install Guide (2026).pdf: two ways to install the brushes
- JPG1 Practice ImageThe city night scene from the How to Use guide
- Rain Vertical
- Rain Left
- Distant Rain
- Light Rain
- Heavy Rain
- Close Drops
- Rain Veil
- Breeze Left
- Breeze Right
- Wind Left
- Wind Right
- Background Rain
- Rain Right
- Drizzle
Photoshop Brush Questions, Answered
What’s included in the Rain Photoshop Brushes download?
One .abr file with 14 brushes: Drizzle, Distant Rain and Background Rain for far rain, Light Rain and Heavy Rain for the middle distance, Close Drops near the lens, a Rain Veil, Breeze and Wind brushes for each side, and the original Rain Vertical, Left and Right. The zip also has a How to Use guide, the install guide and a practice photo.
How do I make the rain look like it has depth?
Paint three layers. Far rain is tiny and as soft as the background, the middle layer is the sharpest at your subject, and only a few very faint, blurry Close Drops sit near the lens. Keep every layer faint, around 20 to 45% opacity.
How do I keep the rain behind a person?
Choose Select > Subject and fill the selection with black on the masks of the far rain layers. The streaks at the subject’s distance can cross in front of them.
Should the rain always be white?
No. Rain takes the color of the light that hits it. Sample a color from the streetlights or the sky, set the layers to Screen, and mask them with Select > Color Range > Highlights so the rain shows where it is lit.
Do I need a depth map?
No. You can paint each layer’s mask by hand with a big soft brush, which works in every version of Photoshop. A depth map just makes it faster: duplicate the photo, choose Filter > Neural Filters > Depth Blur, turn on Output depth map only, and paste the gray map into the layer mask. The How to Use guide in the download shows both ways.
Are Photoshop Brushes included in my PHLEARN PRO subscription?
Yes. A PHLEARN PRO membership includes every Photoshop Brush, plus PRO Tutorials, Lightroom Presets, LUTs and Photoshop Actions.
How do I install a Photoshop brush?
Unzip the download, open Photoshop, then double-click the .ABR file. Photoshop shows no confirmation, but the brush is now at the very bottom of the Brushes panel (Window > Brushes), named after the .ABR file. You can also choose Import Brushes from the Brushes panel menu. Every method is on our Photoshop Brushes install guide.
What version of Photoshop do I need?
Double-clicking the .ABR file works in current versions of Photoshop. In an older version, go to Edit > Presets > Preset Manager, set Preset Type to Brushes, click Load, select the .ABR file and click Done.
Why is the brush so big (or so small)?
Brushes load at the size they were built. Press [ or ] to resize, or hold Control + Option (Mac) or Alt + right-click (Windows) on the canvas and drag left or right.
The brush paints the wrong color or barely shows up. What do I do?
Press D to reset your colors, then check Opacity and Flow in the options bar at the top.
Photoshop says it could not load the brushes.
The download is still zipped or incomplete. Unzip it, or download it again.
My brush disappeared after an update.
Choose Edit > Presets > Migrate Presets, or install the .ABR file again.
What is the best way to use the brush?
Paint on a new, empty layer rather than on the photo itself, so you can move, fade or erase it later. Set that layer to Screen for bright brushes and Multiply for dark ones.
Terms of Use
These Brushes are licensed for personal and professional use by the individual who purchased or downloaded them. The license does not extend to companies or partnerships, and the files may not be resold, loaned, gifted, shared, copied or redistributed. All PHLEARN Brushes are copyright protected.
Master Photoshop, Lightroom and Photography
Join PHLEARN PRO for $12.99 a month or $99.99 a year. Cancel anytime, with a 100% money-back guarantee.





