Download Sample Images
description
Adobe’s most recent round of updates brought some helpful changes to both Photoshop and Lightroom, but one application in particular received a makeover that was long overdue: Adobe Camera RAW. Take a tour of ACR’s slick new interface and take a look at some of its new features as we create a stunning HDR image from 6 different RAW images.
Learn how to blend multiple exposures together to create your own HDR images, all while seeing the new Adobe Camera RAW in action!
Share

CREATE STUNNING HDR IN ADOBE CAMERA RAW 2020
Create Stunning HDR Images in Camera RAW
What is Adobe Camera RAW?
Using the same core software that powers Lightroom, Adobe Camera RAW is a RAW processing utility that helps us bring our high-end digital photos into Photoshop. In fact, when you try to open a RAW image in Photoshop it will automatically open in Adobe Camera RAW first.
The ACR interface provides a number of tools and options that we’re all used to: exposure adjustments, color temperature adjustments, color toning tools, and tools to help us target specific areas of the image to edit. There are also a number of important settings that will help us work in Photoshop while allowing us to return to Camera RAW at any time to make additional edits to the RAW information.
ACR’s New Look
Most would agree that Adobe Camera RAW’s interface was beginning to look outdated compared to some of the newer, more streamlined interfaces introduced to both Photoshop and Lightroom. But, after a much-needed makeover, Adobe Camera RAW has entered the modern photo editing era with a slick new look and some user experience enhancements to some of its most powerful tools.
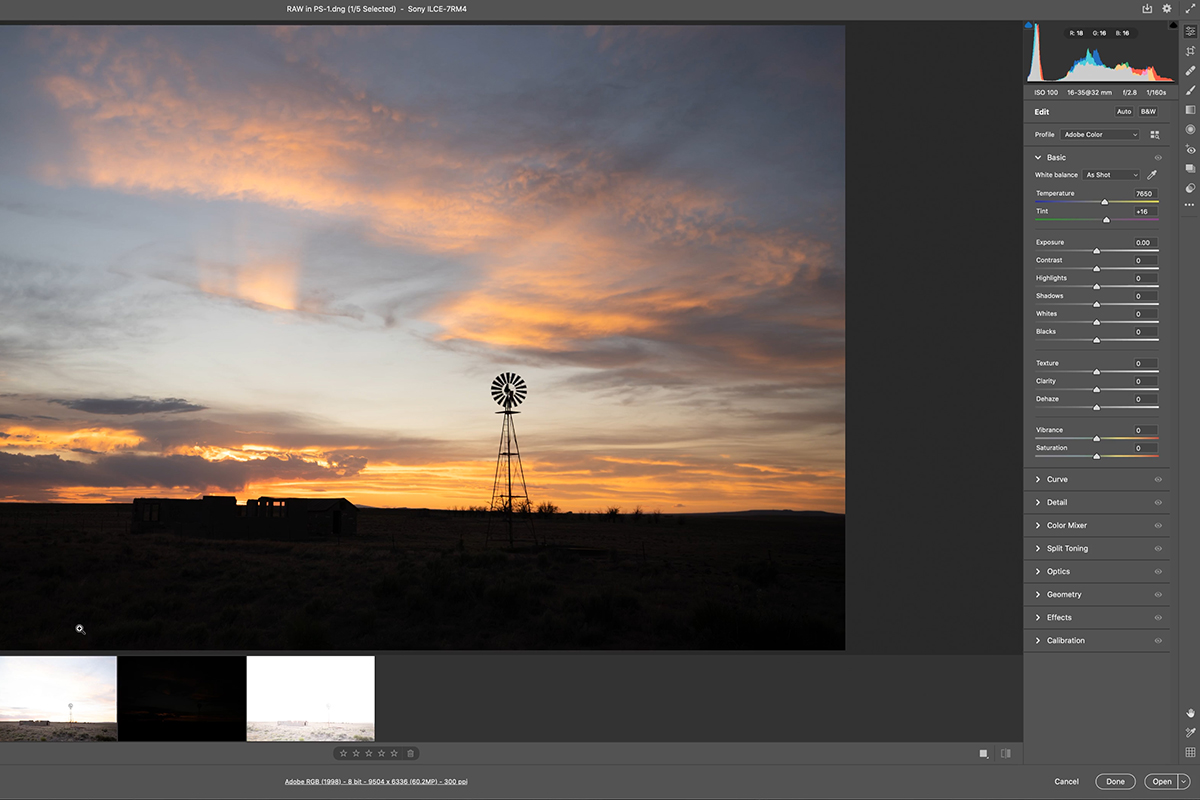
Lightroom users in particular should feel at home using Adobe Camera RAW, as its new look seems to be heavily inspired by the new cloud-based Lightroom app. When you open several RAW images in Photoshop, the Adobe Camera RAW interface will appear, complete with film strip displaying all of the selected RAW files along the bottom of the window. Here you can select images to edit individually or get creative with powerful features like HDR.
Creating an HDR in Camera RAW
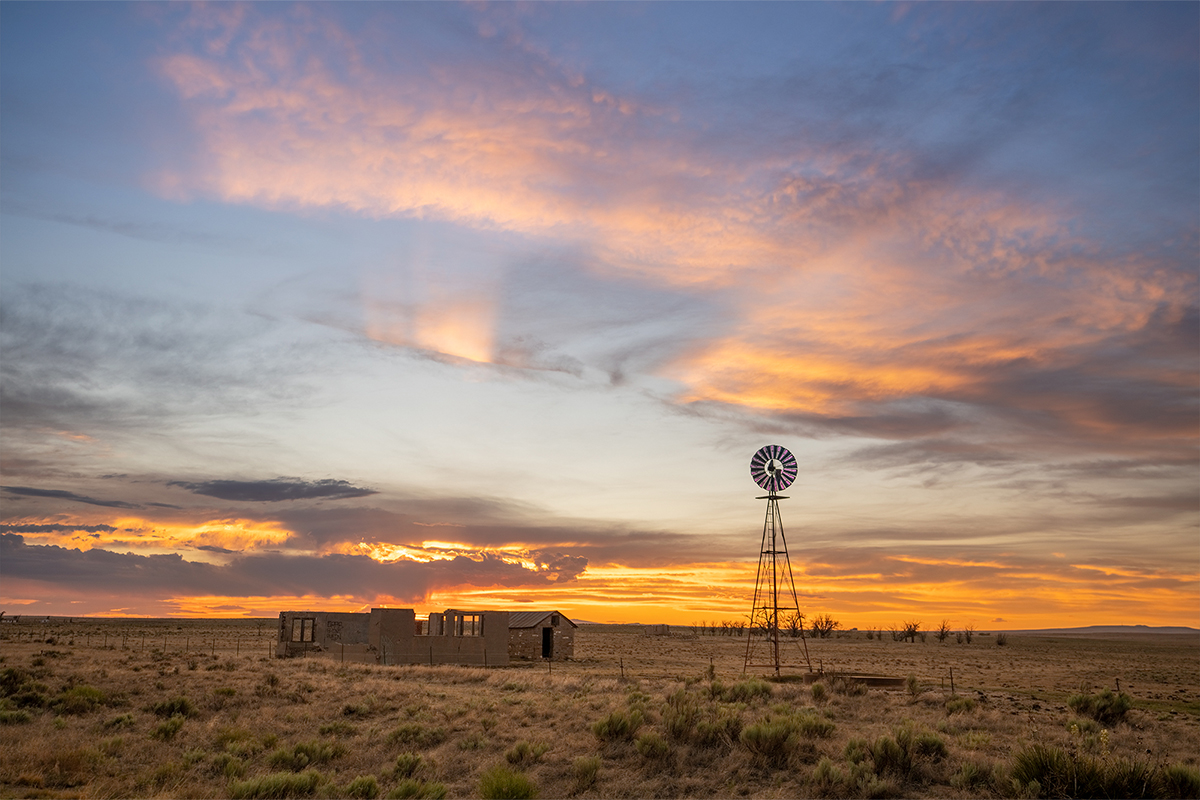
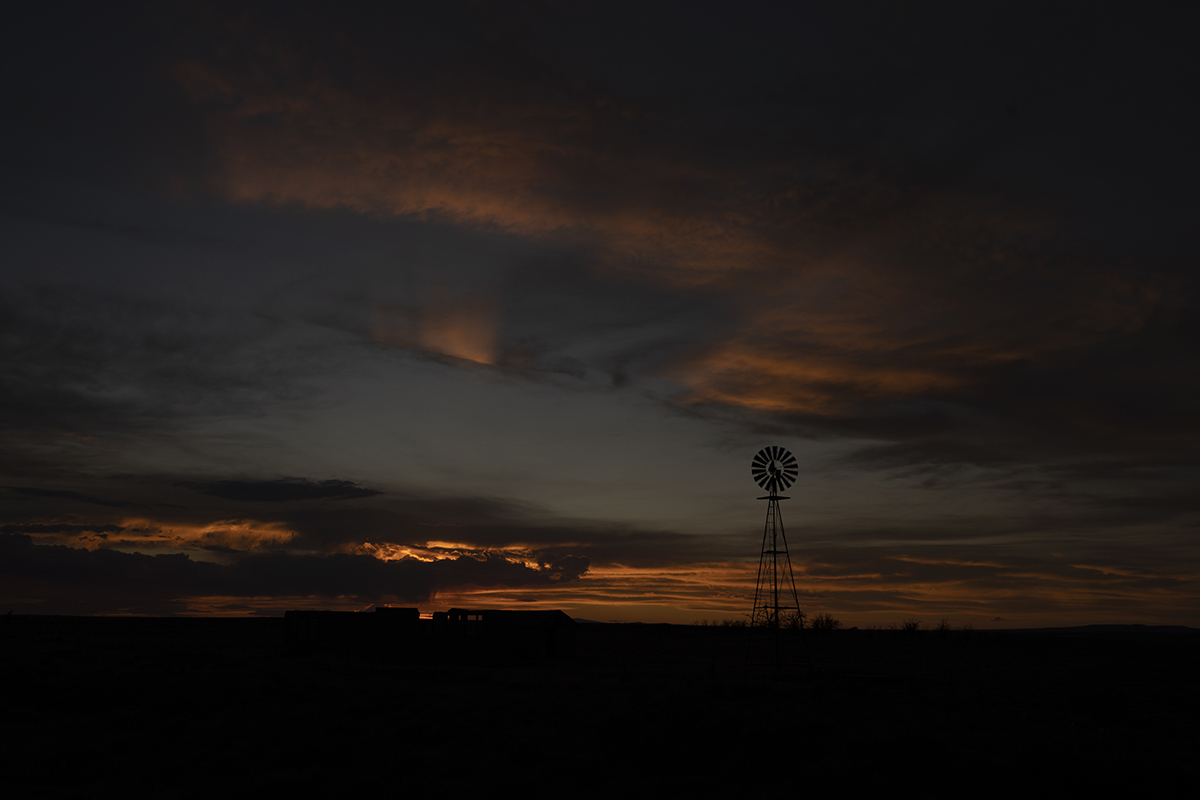
Creating an HDR in Adobe Camera RAW couldn’t be easier. In our example, we have 5 photographs of the same scene, each captured at a different exposure setting. Each exposure will capture different information from the landscape.
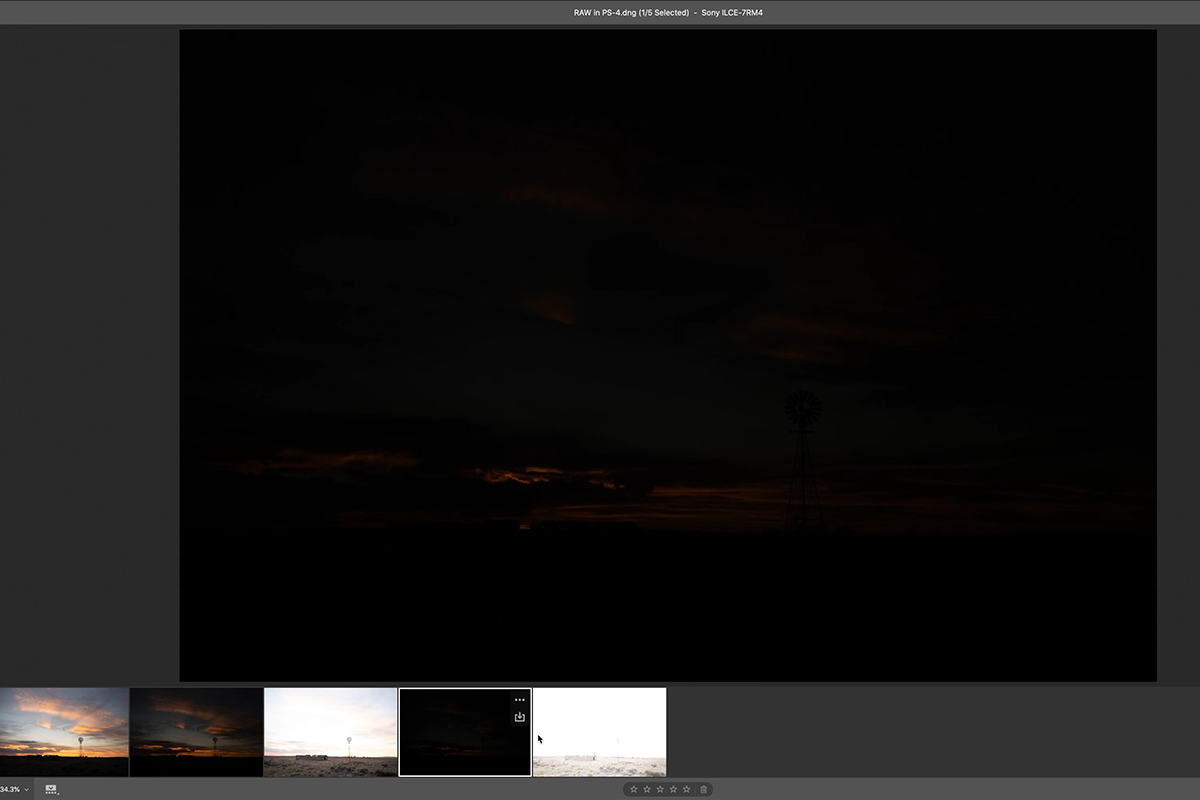
The images that are more underexposed will bring in all of the details from the brightest highlights, but almost no detail from the darks and shadows.
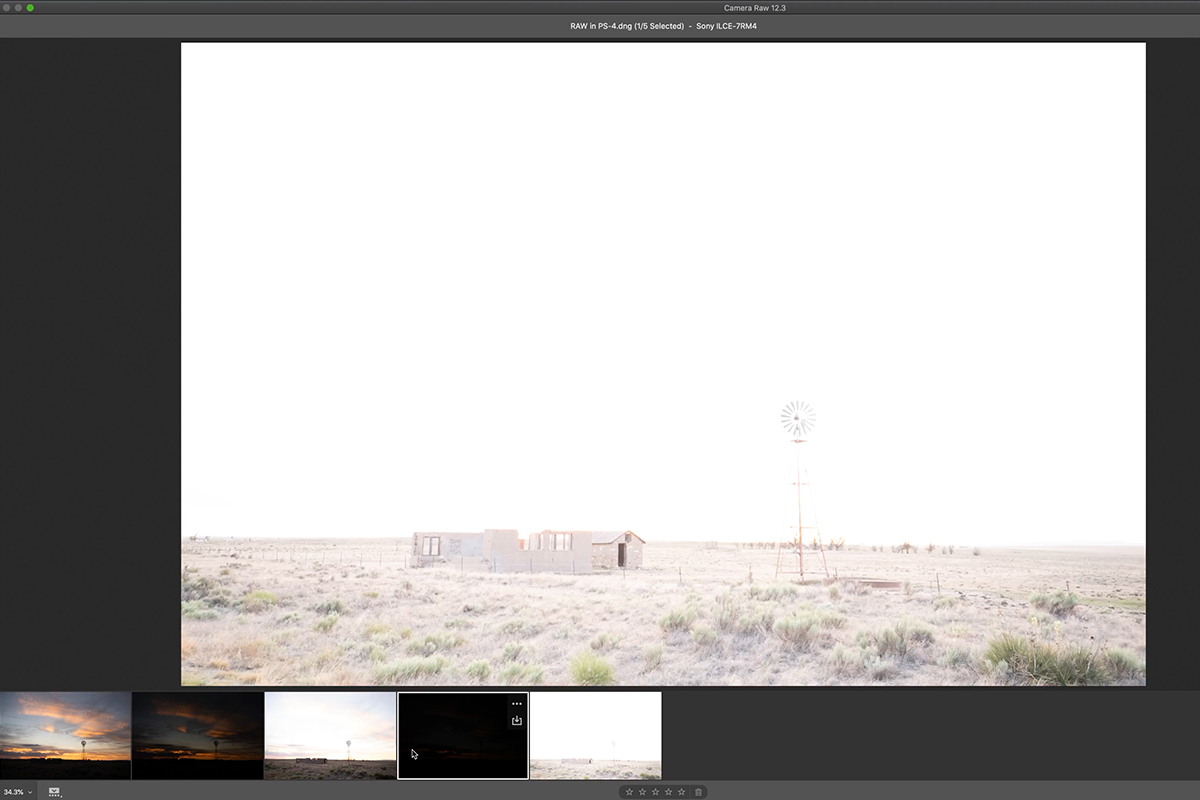
The images that are more overexposed will grab the details we need from the shadows while leaving the highlights blown out. There are also images that are more geared towards capturing the midtones which is technically a more balanced exposure. But due to the conditions of shooting outside into a bright sky and a dark ground, those lose a lot of detail in both the highlights and the shadows.
With 5 different RAW images capturing 5 different levels of exposure, we can use the handy HDR tools in Adobe Camera RAW to blend them together, bringing in the details we need from each to create a perfectly balanced final image.
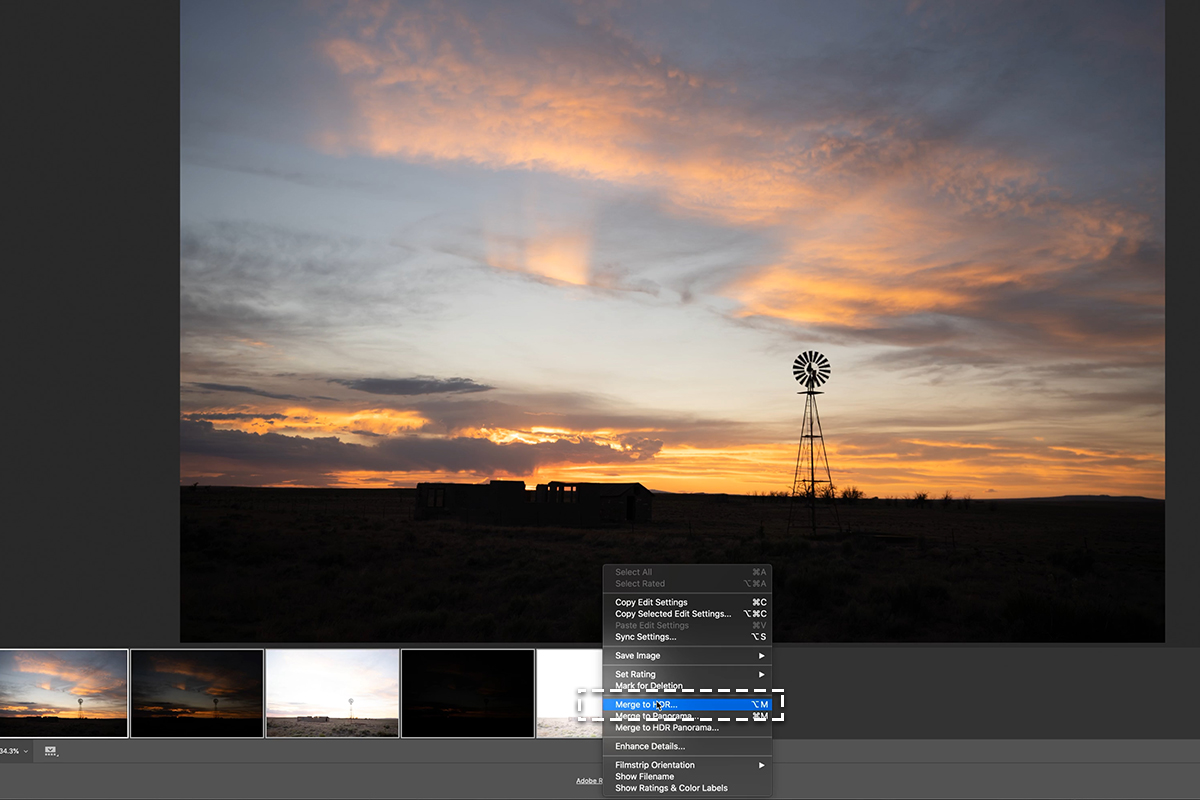
To create an HDR, just select all of the exposures in the film strip by holding SHIFT and clicking each. Then right-click on one of them and select Merge to HDR.
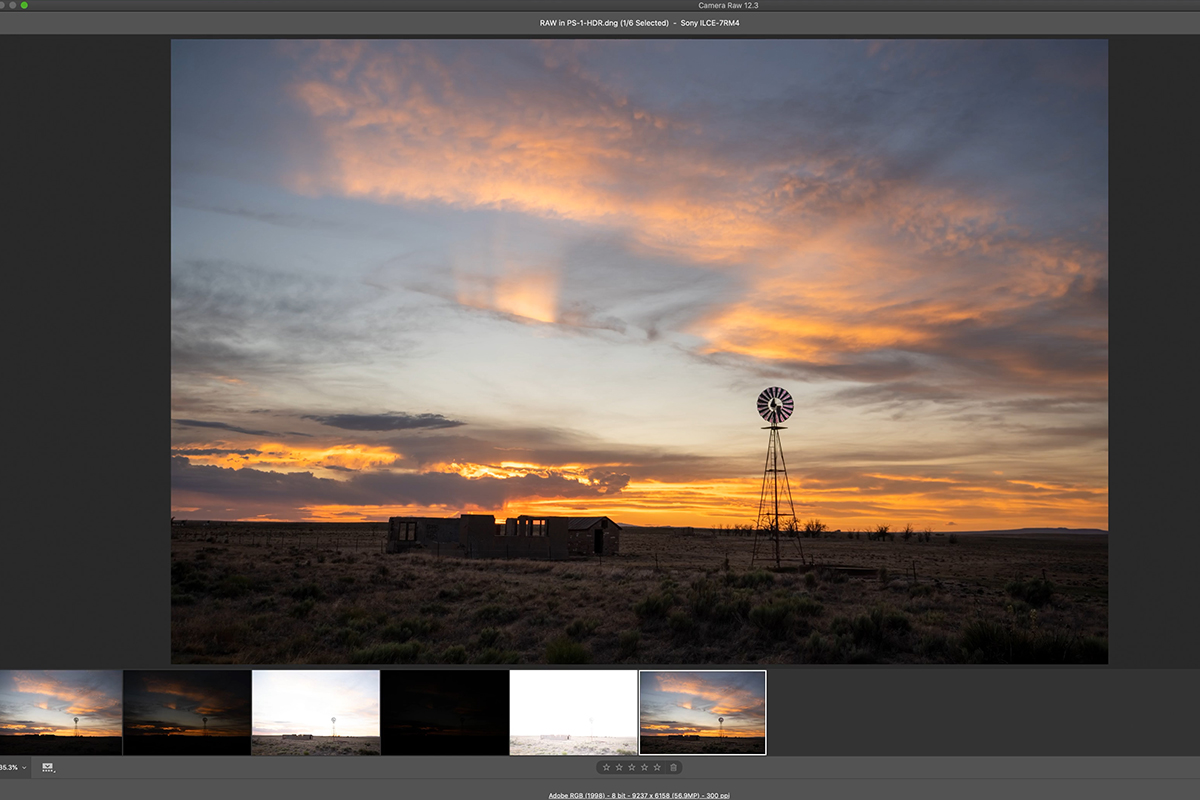
Give Camera RAW some time to process the HDR and, in a minute or two, a seamless image containing data from all 5 exposures will emerge.
Additional Adjustments
The HDR feature does a lot of the heavy lifting but it may not get you all the way across the finish line. In our example, the ground was still a little too dark and needed a bit of color work. Fortunately, the HDR image is also a RAW file and can take full advantage of all of the powerful tools in Adobe Camera RAW.
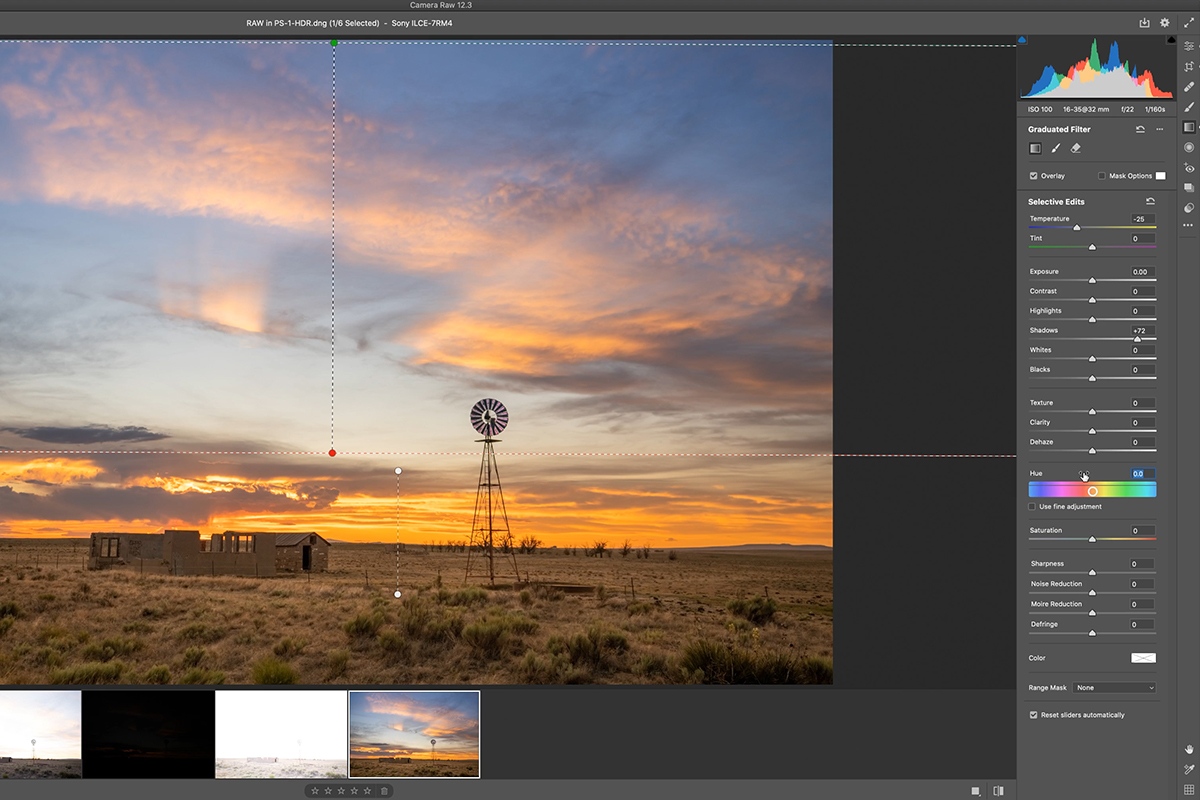
You can use Radial and Graduated Filters to target areas you want to edit (in our case, we used a Graduated Filter to select the dark ground), and use the exposure and color tools to brighten or darken areas, recover details, and even color correct and color tone! The best part is that all of your edits are using all of the information that a RAW file offers while also being totally non-destructive. That means you can constantly make changes, undo changes, or start over from the original at any time!
So our HDR is ready. How do we get it into Photoshop?
Working with RAW in Photoshop
In order to get the most out of our RAW files while working in Photoshop, there are a couple of important settings to check before moving on from Adobe Camera RAW. First, click the white text link at the bottom of the ACR dialog. This will open up the Camera RAW Preferences window, providing a number of options on how you want to handle your RAW image data.

Find the first section labeled Color Space and make sure Adobe RGB 1998 is selected from the drop-down menu. This settings just tells Photoshop how many colors to make available for the image, and Adobe RGB 1998 just happens to be a wide color space that is ideal for most photo editing.
Next to the Color Space drop-down, you’ll see another drop-down labeled Depth. Set this to 16 bits. RAW images are 16-bit files, and this will give you the full range of information to use as you continue editing in Photoshop.
The last setting we need to check is at the bottom of the window in the box labeled Photoshop. Check the box that says Open in Photoshop as Smart Objects. This setting will allow us to return to Adobe Camera RAW at any time to change or make additional adjustments using this powerful RAW processing software.
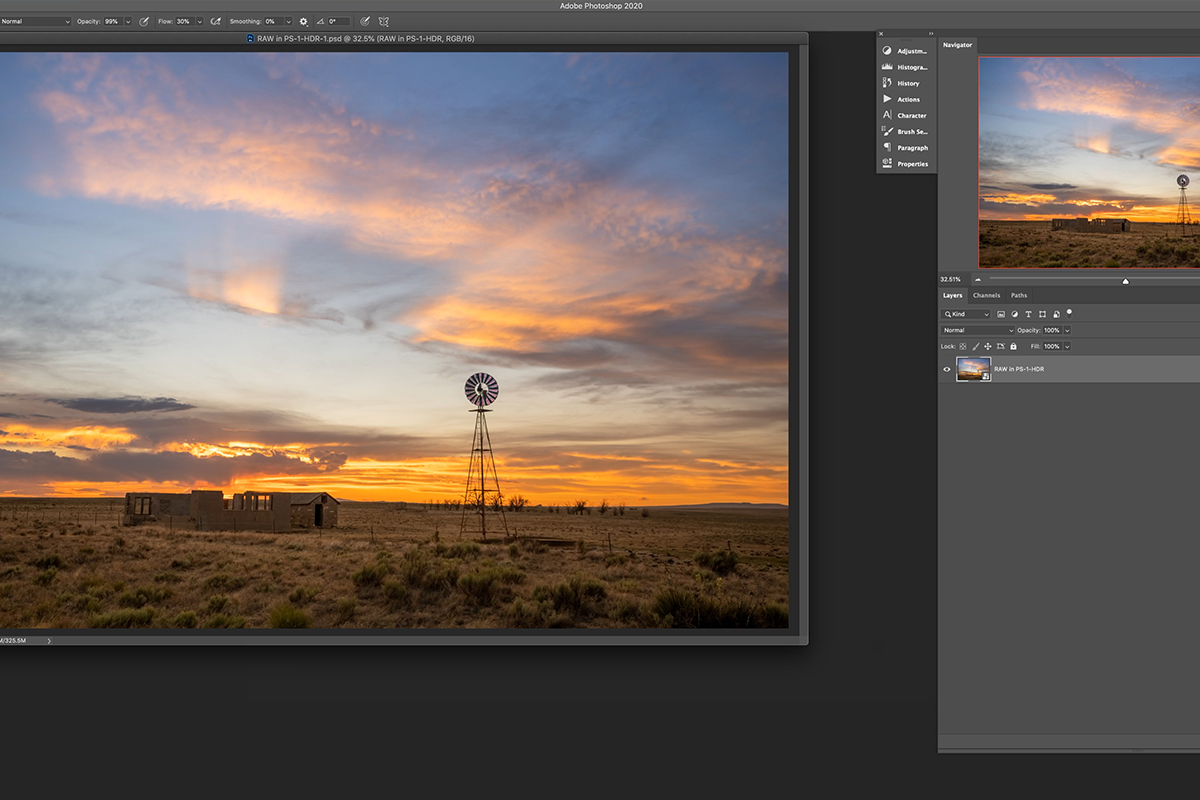
Click Okay to exit the Settings dialog, and then click OK to apply everything and load the image into Photoshop. You should see it pop up as a Layer and as a Smart Object. Now you can use all of your Photoshop tricks to finish it off, and even pop back into Camera RAW to make further adjustments.