
Download RAW Images (522 MB)
Download Assets
This tutorial includes 9 JPEG sample images, 9 RAW files and 1 PDF guide. Downloads are free with a PHLEARN account.
- Free sample files with every tutorial on PHLEARN
- New tutorials published every week
- Unlimited downloads with your free PHLEARN account
Download JPEG Images
Free PDF Guide · 4 Pages
This Tutorial as a Step-by-Step PDF
The guide walks through merging all nine frames with Photo Merge > HDR in Lightroom Classic, the traditional three, a single-photo HDR from two virtual copies, then the comparisons in Compare view: as merged, shadows pushed with Sync Settings on Exposure only, and highlights pulled. Keep it next to your keyboard.
description
HDR is a way to maximize the detail in a scene by combining multiple exposures together. But how many exposures do you need to get just the right amount of detail throughout the highlights, midtones, and shadows?
Today we find out!
Follow along as we experiment with HDR in Lightroom Classic. Learn how to create HDR images using a single exposure, three exposures, and even nine total exposures! Then we’ll take a look at the final images to try and determine what the magic number of exposures is for a perfect HDR photograph.
Enjoying This Free Tutorial?
We publish a new free tutorial every week, each one with sample images and PSDs you can download and follow along with. Sign up and they land straight in your inbox, along with early word on sales, events and subscriber-only offers.
Nine Exposures, Three, or One — Does It Actually Matter?
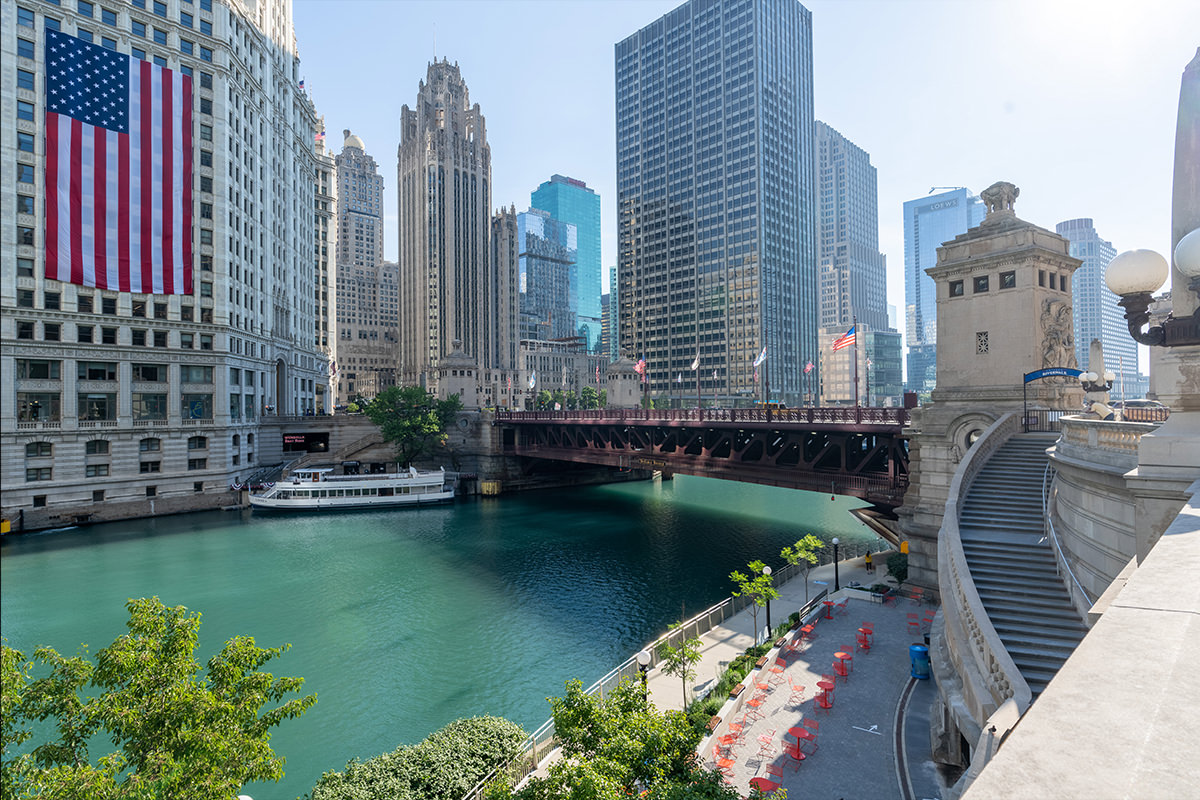
Modern cameras will happily bracket nine frames. The Sony a7R IV used for this test does exactly that. Which raises a fair question nobody seems to answer directly: does a nine-exposure HDR actually look better than the traditional three — or than a single raw file processed three ways?
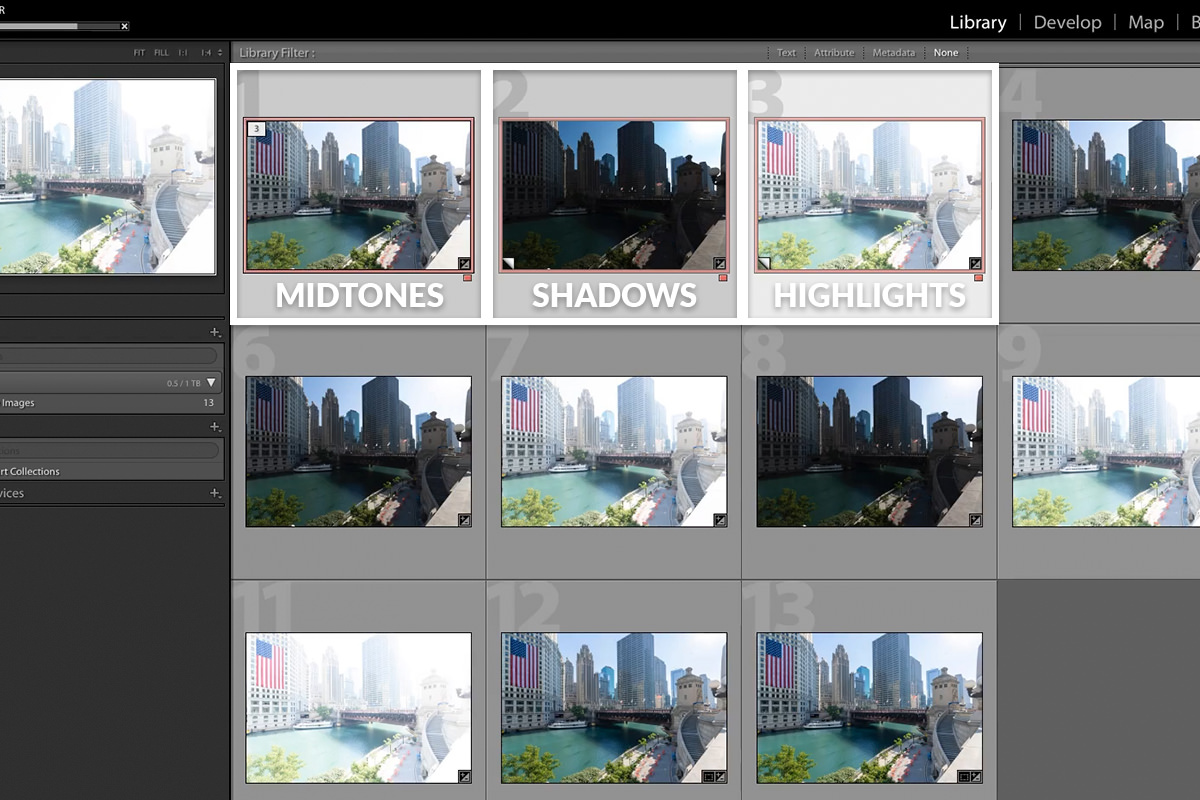
So we shot a nine-frame bracket in downtown Chicago, 0.7 stops apart, and built three HDRs from it: one from a single image, one from three, one from all nine. Then compared them properly. The answer turned out not to be the one expected.
What HDR Is Actually Doing
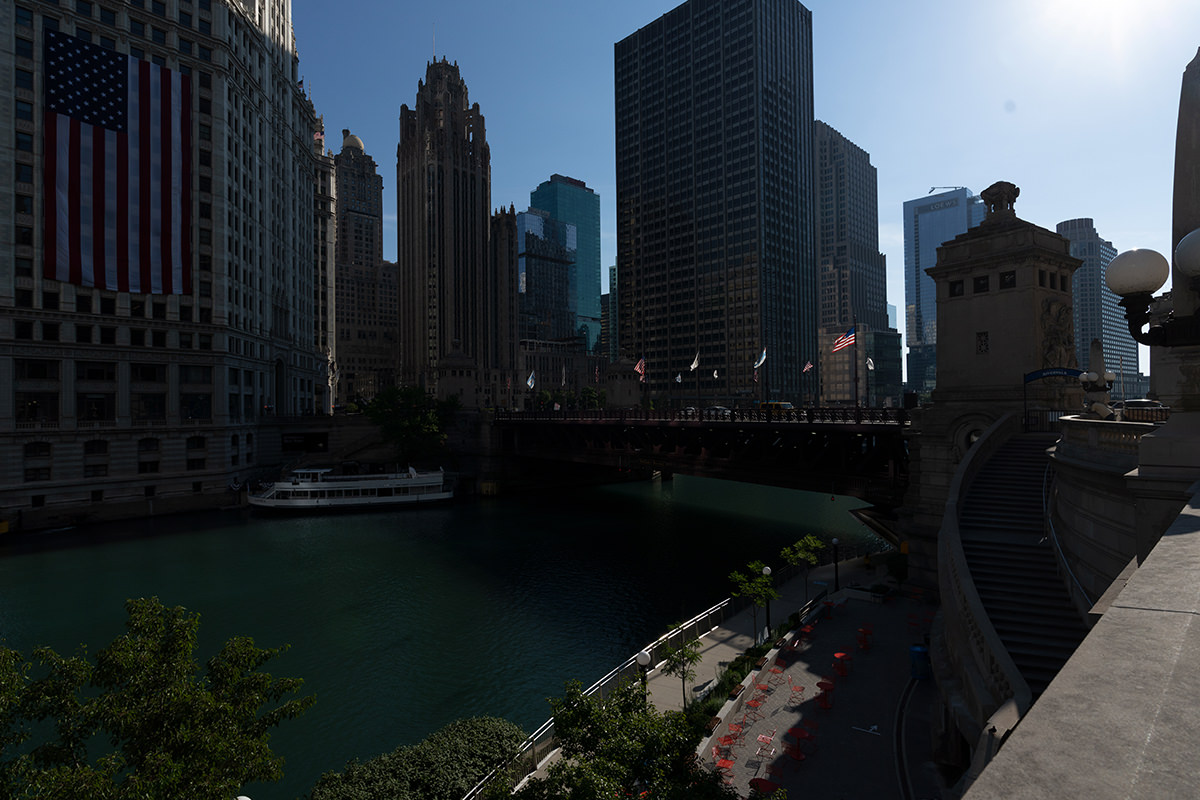
HDR stands for high dynamic range. A camera sensor can only record so much range between the brightest and darkest parts of a scene in one frame — expose for a bright sky and the shadows go black; expose for the shadows and the sky blows out.
Bracketing solves it by capturing several frames at different exposures. The darker frames hold the highlight detail; the lighter frames hold the shadow detail. Merging them produces a file with more information than any single frame could contain.
Merging a Bracket in Lightroom
-
Select the whole bracket
Grid view, Cmd/Ctrl + A, or click the first and Shift-click the last.
-
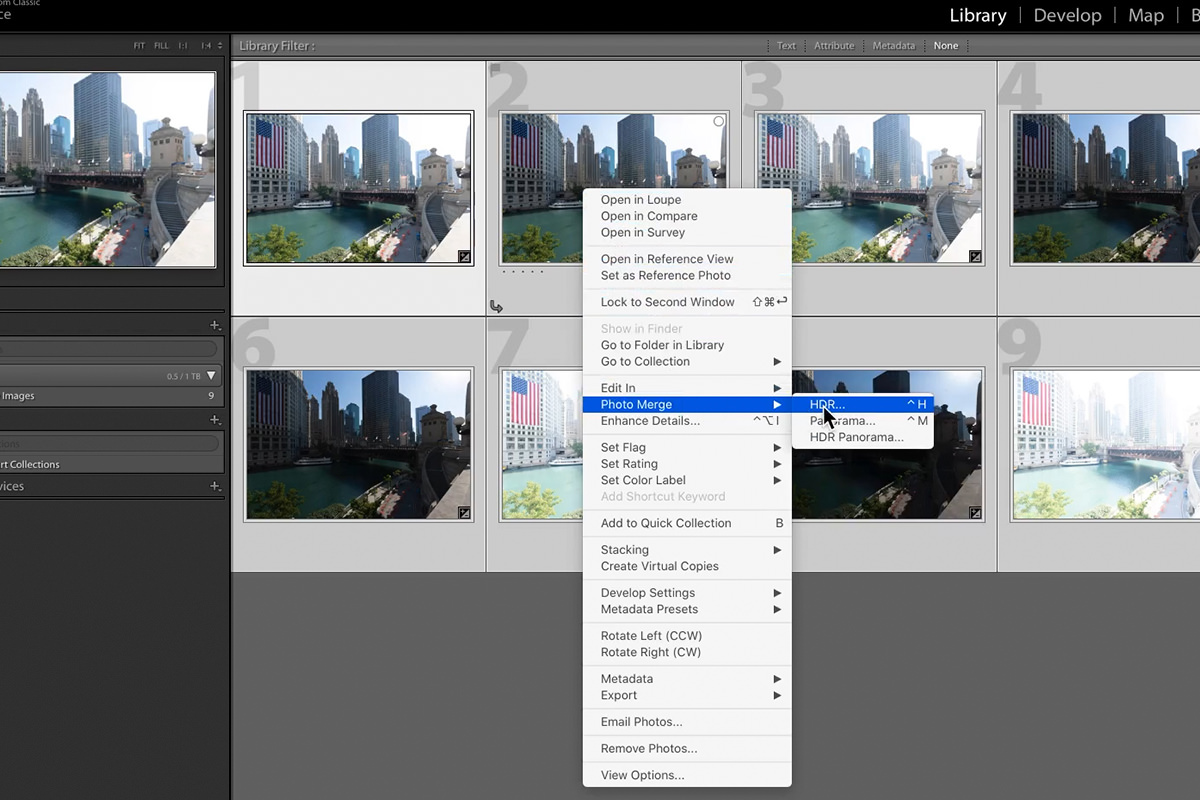
Right-click and choose Photo Merge › HDR
Lightroom builds a preview.
-
Click Merge
It writes a new DNG containing the combined data. Rename it so you can tell your tests apart.
Making an HDR from a single photo
You don’t need a bracket to try this. Take one raw file, right-click and Create Virtual Copy twice, raise the exposure on one copy and lower it on the other, then merge all three. It’s a genuinely useful fallback when you only came home with one frame.
It also makes an honest test subject — and it’s the first of our three contenders.
Test One: Single Exposure vs Nine

Compare them side by side in Lightroom’s Compare view (press C) straight out of the merge, and the surprise is how similar they look. Overall brightness, contrast, general rendering — close enough that you’d struggle to call it.
Zoom in and the difference appears immediately, and it isn’t where you’d expect. At 2:1 and 3:1 in the shadow areas, the single-exposure version carries visible noise throughout. The nine-exposure version has essentially none. This was not a high-ISO shoot.
Test Two: Three Exposures vs Nine
The traditional three-frame bracket — under, correct, over — gets much closer. Dynamic range between three and nine is very similar. Push to a 4:1 zoom and the nine-frame version is a little smoother in the deepest shadows, but you have to go looking for it.
Straight out of the merge with no adjustments, three and nine are hard to tell apart.
The Test That Actually Separates Them
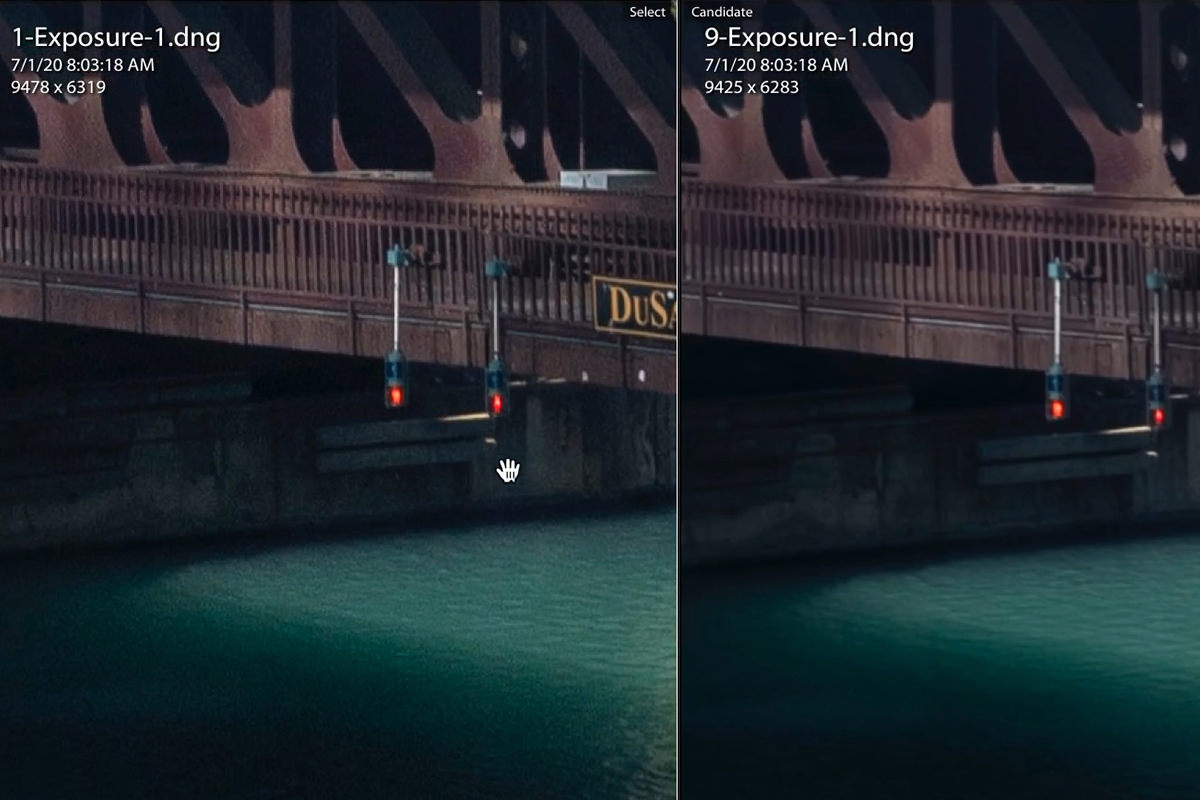
Comparing merges as they come out of Lightroom is misleading, because Lightroom applies its own automatic settings to each. The real question is how much you can push the file — which is the whole reason for shooting an HDR in the first place.
So: raise the exposure hard on the shadow areas under a bridge and see what survives.
This is where it stops being close. The nine-exposure file opens up with more than enough detail and only starts to look a little grainy. The single-exposure file falls apart — noisy, mushy, and unusable at the same setting.
To keep it fair between three and nine, select both, use Sync Settings with Check None and only Exposure ticked, so both files receive an identical adjustment. Even then the nine-frame version still looks a lot better, in both noise and dynamic range — with the exposure bumped up considerably on both.
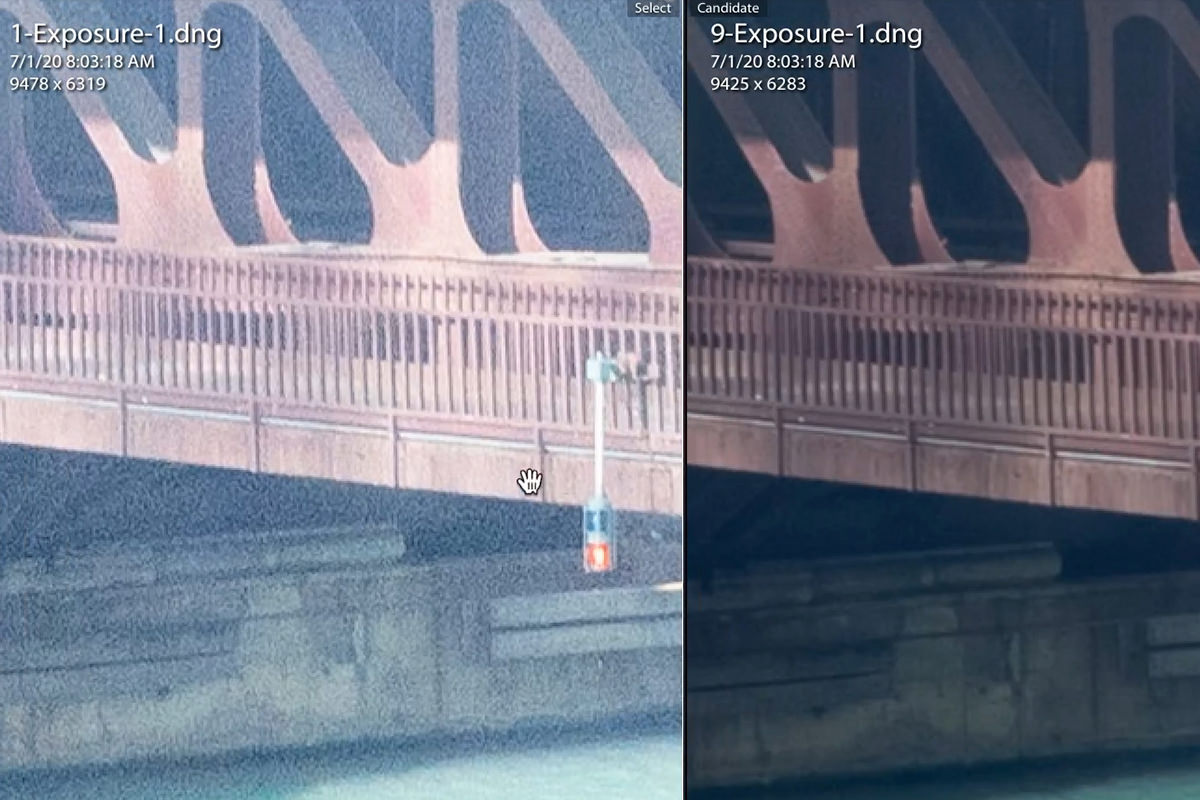
Highlights tell the same story
Pull exposure down instead and the pattern repeats. Single exposure versus nine: a blown white patch in the top corner on one, real sky detail on the other, with the difference extending to the gaps between buildings. Three versus nine: very close, with a slight edge to nine.
The Real Answer: It’s About Noise, Not Range
The finding that stands out isn’t the one you’d predict. The biggest advantage of a large bracket is ISO performance, not dynamic range.
The logic holds up. When you lift shadows from a single frame, you’re amplifying data the sensor recorded faintly — and amplifying noise with it. A bracket captures those shadows in a correctly exposed frame at native ISO instead. You’re not stretching weak data; you’re using good data.
The nine-exposure file stayed beautifully clean deep into the shadows even after a substantial exposure lift. That’s the practical benefit.
Two Things Worth Knowing Before You Shoot One
A tripod helps but isn’t essential
These nine frames were shot handheld, with the camera braced on a ledge and the shutter held down. It merged fine. A tripod is better, and not owning one is no reason to skip bracketing.
Movement in the frame is the real problem
Flags moving between exposures produced strange artifacts in the merge. Lightroom’s Deghost option fixes them — but at a cost. Set to High on the three-exposure merge, it cleaned the flags up completely, but the noise performance looked a lot worse. It seemed to be using less of the bracket to build the HDR.
That trade-off is worth remembering: a big bracket pays off most on static subjects. Architecture is close to ideal. Deghosting is a push and pull, so where things move, a lot of the time Aaron ends up compositing the moving parts back together by hand.
So How Many Do You Need?
- One exposure, processed as virtual copies — better than nothing, and fine if you’re not planning heavy adjustments. Falls apart the moment you push the shadows.
- Three exposures — very similar to nine straight out of the merge. Once you push the file, nine still looks better in both noise and dynamic range.
- Nine exposures — worth it when the scene is static and you know you’ll be lifting shadows hard. The gain is cleanliness rather than range.
And if your camera has no bracketing mode, do it manually: one correct exposure, one under, one over, using the exposure compensation dial, trying not to move between frames. Your phone camera, incidentally, does all of this automatically.
Where HDR Attempts Go Wrong
Judging the merge before adjusting it
Straight out of Lightroom, one, three and nine look remarkably alike. The differences only surface once you push the file, which is exactly what you shot a bracket in order to do.
Bracketing a scene full of movement
Deghosting will save the merge and cost you the noise advantage. Often the better fix is compositing the moving parts back by hand.
Assuming more frames always means better
Beyond three, the returns are mostly in noise. If you weren’t going to lift the shadows anyway, nine frames buys you very little.
Comparing without syncing settings
Lightroom applies its own automatic corrections per merge, so any comparison is unfair until you sync exposure across the files. Check None, tick only what you’re testing.
Run the Test Yourself
All nine raw files from this shoot are available to download free from this page, so you can build the same three HDRs and compare them on your own screen — which is worth more than taking anyone’s word for it, including ours.
The short version: do you need nine exposures? Maybe not for exposure alone. But for clean noise levels across the whole range, it really does make a difference. That wasn’t the expected answer.
Quick Reference: Keys, Menus and Settings
- Select the bracketG for Grid view, Cmd/Ctrl + A
- MergeRight-click > Photo Merge > HDR, then Merge; rename the result
- Single-photo HDRRight-click > Create Virtual Copy, twice; D for Develop, Exposure up on one copy and down on the other
- Show only the HDRsP flags picks, then filter by picks; View > Grid View Style > Expanded Cells
- Compare twoCmd/Ctrl-click both, C for Compare view; zoom to 2:1, 3:1 or 4:1 in the shadows
- Fair testSync Settings > Check None, tick only Exposure, Synchronize
- Moving subjectsDeghost Amount: High in the HDR merge preview (the noise gets worse)
No AI, no generative credits.

Free Downloads
Follow Along on the Same Bracket
Get all nine exposures of the Chicago bracket from the video, as JPEG sample images and as RAW files, plus the 4-page PDF guide. Free with a PHLEARN account.
HDR Exposure Count: Common Questions
How many exposures do I need for an HDR?
In this test, maybe not nine for exposure alone. But for clean noise levels across the whole range, nine really does make a difference. With no real adjustments, all three HDRs looked surprisingly similar.
What does an HDR merge actually do?
It combines several exposures of the same scene. The darker frames capture information in the highlights, like the sky, and the lighter frames capture information in the shadows.
How do I merge a bracket to HDR in Lightroom Classic?
Press G for Grid view and Cmd/Ctrl + A to select the frames. Right-click, choose Photo Merge > HDR, then click Merge. Rename the result so you can tell your tests apart.
Can I make an HDR from a single photo?
Yes. Right-click the photo and choose Create Virtual Copy twice, raise Exposure on one copy and lower it on the other, then merge all three. It looks similar as merged, but the shadows get noisy when you push them.
Why do my 1, 3 and 9 exposure HDRs look almost the same?
Lightroom processes each merge with its own automatic settings. The differences show up when you push the files, for example by raising Exposure in the dark areas.
How do I compare two HDRs fairly?
Select both files, click Sync Settings, choose Check None, tick only Exposure and Synchronize. Then press C for Compare view, which works with two photos at a time.
Why is the nine-exposure HDR less noisy?
With a bracket you are not cranking up the ISO to pull information out of the shadows. Each frame is a separate exposure at your native ISO, so the shadows stay clean even when you raise them.
How do I fix moving flags or other ghosts in an HDR?
Deghost Amount set to High fixed the flags completely in the video, but the noise looked a lot worse. A lot of the time Aaron composites the moving areas back together himself instead.
Do I need a tripod or a bracketing mode?
No. These frames were shot with the camera propped on a ledge and the button held down, though a tripod helps. Without a bracketing mode, take a proper, an under and an over exposure with the exposure dial and merge them.
Are the sample files free?
Yes, with a free PHLEARN account. You get 9 JPEG sample images, 9 RAW files and 1 PDF guide: all nine exposures of the Chicago bracket from the video, plus a 4-page step-by-step guide.
Master Photoshop, Lightroom and Photography
Join PHLEARN PRO for $12.99 a month or $99.99 a year. Cancel anytime, with a 100% money-back guarantee.





