How to Create Perfect Selections Using Channels in Photoshop
Channels are a great way to make extremely accurate selections! Prepare to make magic happen- even with highly detailed line drawings!
Although there are many different techniques that could yield similar results, Channels can provide the most accurate selections of all.
Section 1: Making Selections
To begin, click over to the Channels tab (if it is not showing up, go to Window – Channels).
Since our image is Black and White, we can use any of the Channels to get the selection we want (we use the Blue Channel for this particular example). However, this will change if your image is in color. Click on each Channel to see which selects the most of what you need, and then duplicate it by either Holding Cmd + J or dragging the Channel down to the New Layer icon.
Hold Ctrl/Cmd and click on the duplicate layer to create the selection. This selects the lightest areas, so if you need the dark areas selected simply go to Select – Inverse.
Section 2: Adding Color to Selection
With the selection active, create a new Solid Color Adjustment Layer. This will automatically make a Layer Mask and fill the selection with whatever Color you choose! That is why you can capture incredible detail with this method; it fills everything in seamlessly.
Section 3: Design Details
To begin really turning this into a piece of art, we crop the image into a square to give it some visual breathing room.
Then, we start to play with color! We create another Solid Color Adjustment Layer and place it underneath the illustration layer to act as the Background.
At this point, you should discover why this technique is so efficient: you can change the color of those Color Fill layers as much as you’d like!
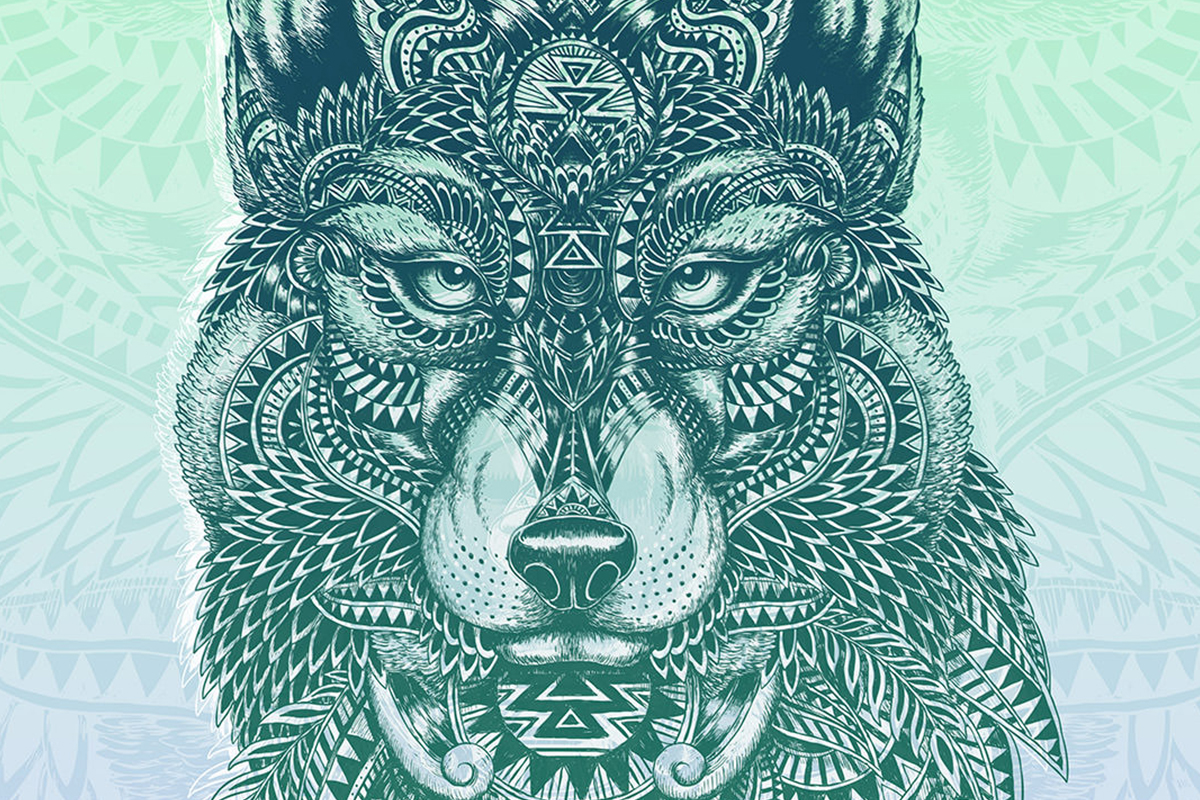
You can also have lots of fun playing with the Styling of the image. We duplicate the layer of the wolf and move it up a bit, which gives a sort of screenprint effect. We then add a blue Color Fill layer on top of the already present orange layer. Then, we add a Gradient from black to Transparent which acts as a mask for part of the color. The result is a beautiful Fade from one color to another! And, as you already know, you can always go back in and adjust those Colors. In this case we decide to stick with a cool palette, and use blue and green.
For a final artistic touch, we create a white Color Fill copy of the wolf and Scale it up (Cmd + T) as another layer of the Background. You are able to see through it, but we lower the Opacity even more so that the effect is nice and subtle.
We end up with a beautiful Graphic image by simply playing with Channels and Colors!!