
Download Assets
description
Explore the power of the brand new Clarity and Dehaze adjustment layer in Photoshop 2026! We’ll show you how this tool targets atmospheric haze to bring back incredible detail. Plus, discover a hidden trick within the Object Selection Tool to make perfect, automatic selections of any background element.
Go PRO:
Dive deeper on non-destructive editing with our in-depth PRO tutorial The Ultimate Guide to Non-Destructive Editing in Photoshop . We’ll cover everything from mastering masks and smart objects to building an unbreakable raw pipeline, all while preserving your original image intact..
Image Source
- Slava Jamm
Images sourced from Unsplash.
Share

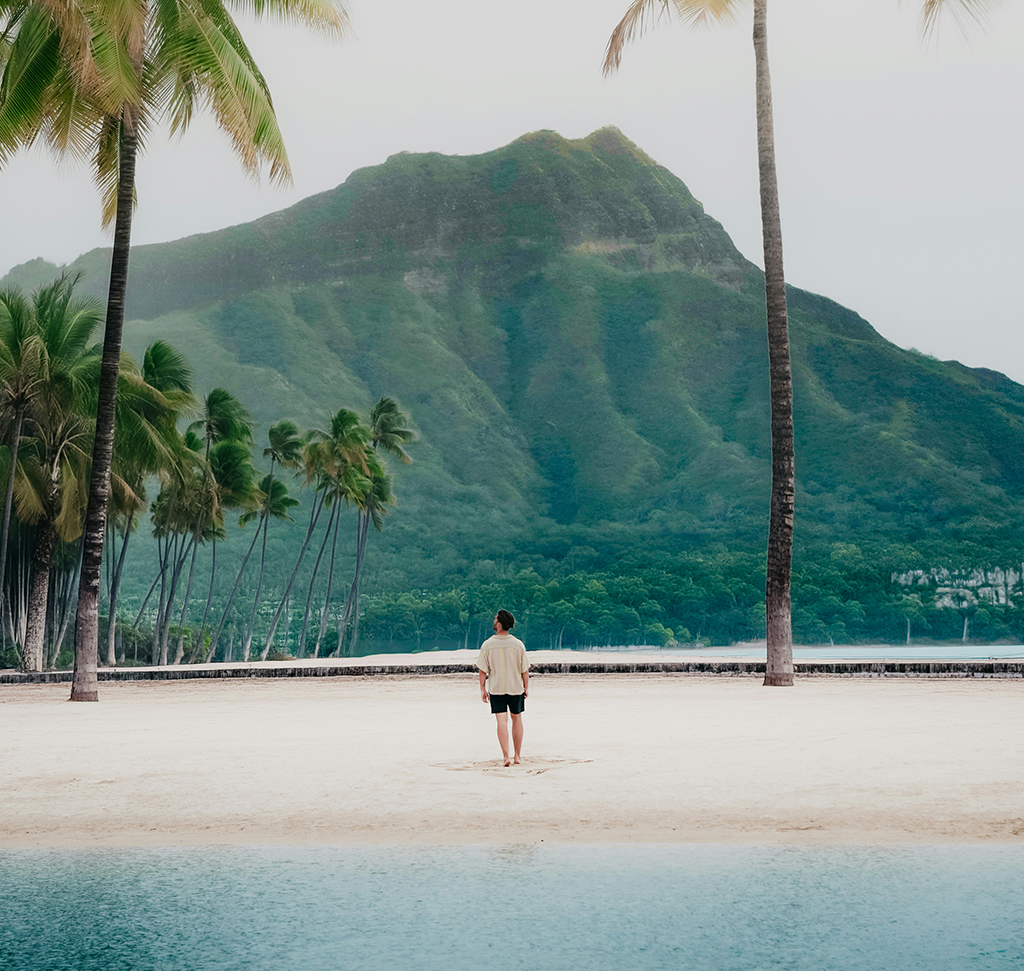
AFTER
BEFORE
Fix Flat Colors
Haze and atmospheric interference can turn a vibrant tropical landscape into a dull, “flat” image, washing out colors and reducing depth. In the past, cutting through that “grey veil” meant wrestling with complicated masks and losing your mind over contrast sliders. But today, we’ll show you how the brand-new Clarity and Dehaze adjustment layer makes it easier than ever.
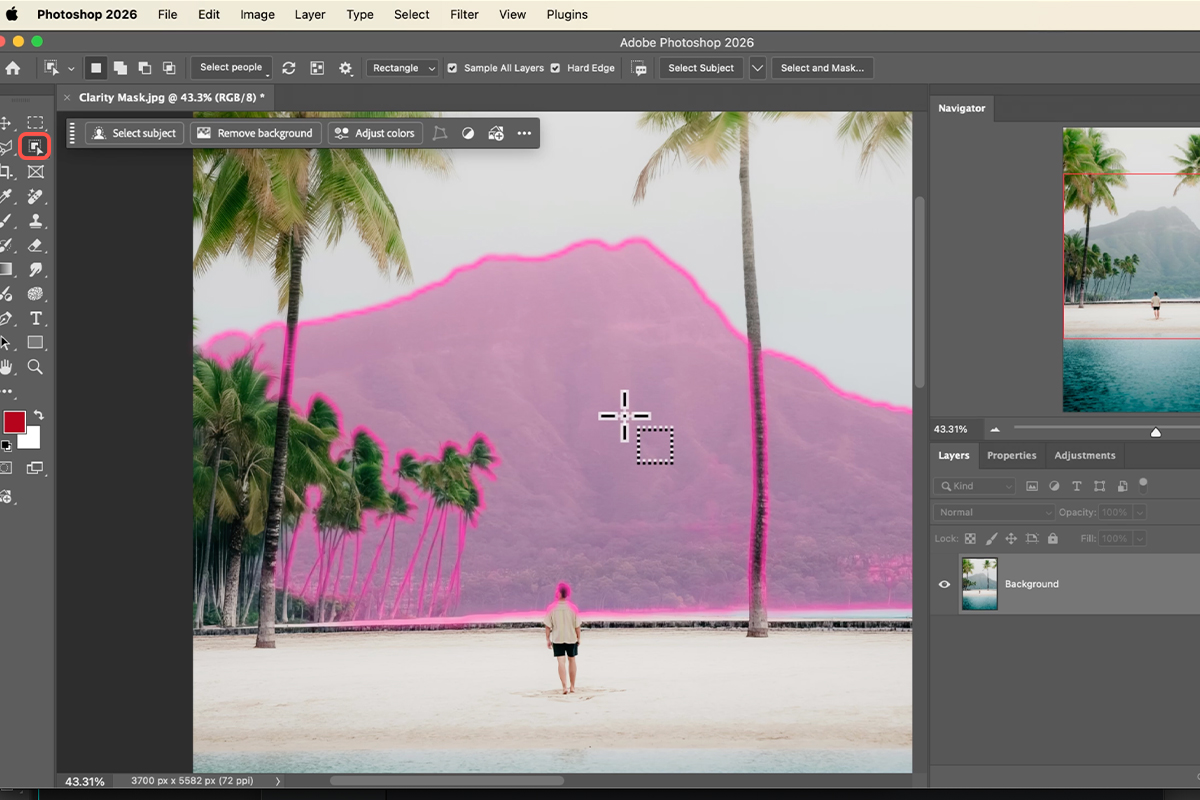
Smart Object Selection
Before we touch those sliders, we need a precise selection to isolate the hazy areas.
1. Grab the Object Selection Tool by pressing W.
2. Instead of digging through menus, simply hover your cursor over your image.
3. Photoshop will highlight objects in pink; once your background element lights up, just click to create your selection. This ensures your “dehazing” only hits the foggy spots, keeping the rest of your photo untouched.
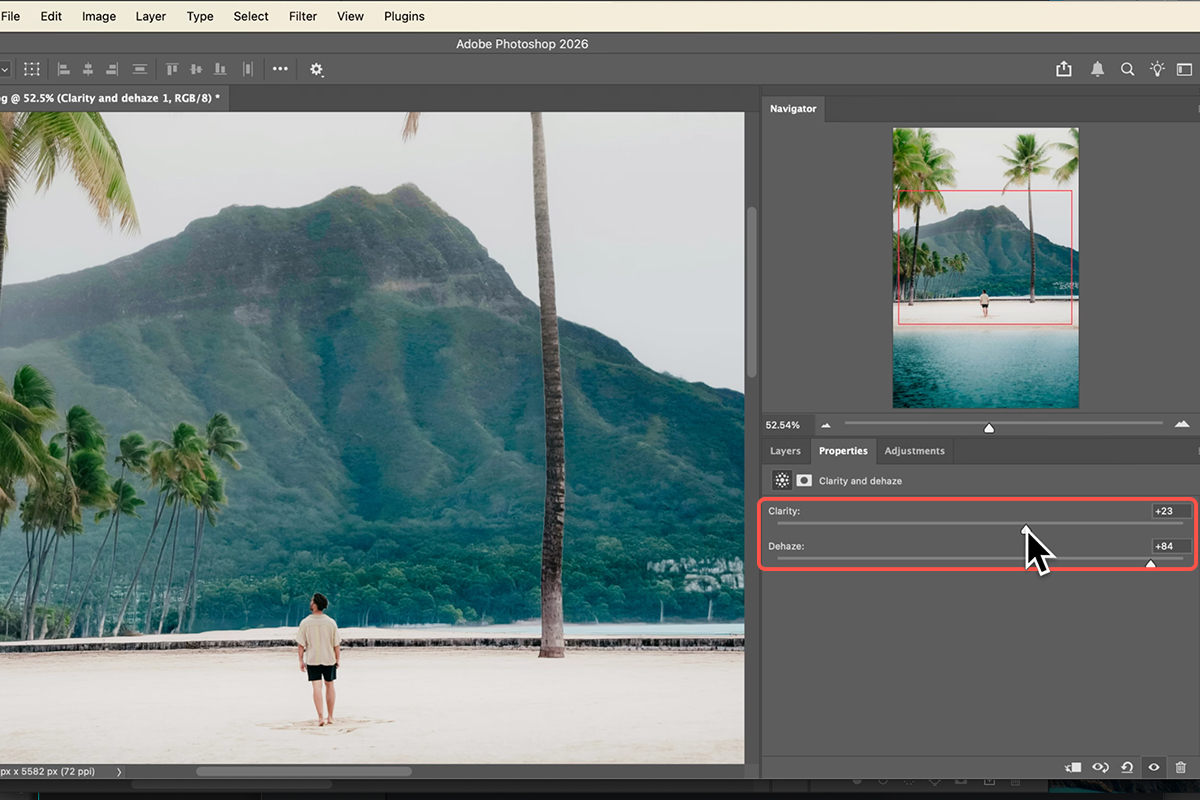
Apply New Adjustments
4. With your selection active, go to Layer > New Adjustment Layer > Clarity and Dehaze. Photoshop is smart enough to automatically load your selection into the layer mask.
5. ouble-click the adjustment layer icon to open the Properties window.
6. Slide Dehaze to the right to cut through the fog, and add a touch of Clarity to bring back that beautiful, rugged texture.
Mask Copying
7. To make the colors more vibarnt, add a Color and Vibrance adjustment layer.
8. You don’t need to redo your work—just hold Alt/Option and then click and drag the layer mask from your Dehaze layer onto your new Color layer. This instantly copies the mask!
9. Now you can crank up the Vibrance for a lush, realistic finish.


