
How to Create an Epic Composite: A Dark Force (2026 Edition)
-

-
Add to
favorites
-
DifficultyAdvanced
-
Length6.5 hours
-
Software
Description
The 2017 classic has been completely reimagined! Re-recorded from scratch in Photoshop 2026, this step-by-step tutorial shows you how to combine over 18 images to bring an entire world to life. You’ll learn how to seamlessly integrate people, animals, buildings, and plants while mastering advanced 2026 techniques for compositing, coloring and blending. We’ll even including an exclusive Photoshop Brush and a PDF guide to streamline your workflow and maximize your creativity.
THIS COURSE INCLUDES
- 18 Sample Images
- 1 Sample PSD
- 1 Photoshop Brush
- 1 PDF Guide
Share
Table of Contents
-
01 - Building The Background1:08h
-
02 - Adding Sky Elements39:01m
-
03 - Distant Mountains & Scaling1:04h
-
04 - Custom Brush Creation32:36m
-
05 - Placing Distant Lights1:03h
-
06 - Foreground Subject Integration32:25m
-
07 - Placing The Main Subjects56:49m
-
08 - Final Touches25:51m
Course Downloads
A PHLEARN Classic, Upgraded

Beyond The Shortcuts
Back in 2017, A Dark Force became one of PHLEARN’s most-watched classic compositing tutorials. Today, with shortcuts everywhere, we’ve completely re-recorded it for Photoshop 2026 to bring the focus back to a real, manual workflow . Learn to stitch landscapes, match light, and build immersive worlds from scratch, claiming the ultimate creative pride that automated buttons just can’t match.
Workflow Organization
Because this composite is massive, standard files won’t cut it. We’ll teach you how to use the Large Document Format to handle the huge canvas size and heavy layer count. You’ll also learn smart asset organization, using structured group folders and filters so your work stays clean and completely editable.
Non-Destructive Editing
When building advanced composites, keeping your work flexible is everything. We’ll show you how to master a non-destructive workflow using smart objects so you can adjust your effects at any time. You’ll learn to refine details safely, ensuring every layer, texture, and light adjustment remains fully editable from start to finish.
Scale & Perspective
Placing assets randomly is the quickest way to ruin a great composite. We’re going to look at the math of the scene—analyzing perspective lines and vanishing points so every element fits naturally. You’ll learn how to scale your subjects perfectly, ensuring the size relationships look visually correct and completely seamless.
Seamless Blending
To blend different images seamlessly, you have to match their lighting perfectly. We’ll teach you how to use targeted Levels adjustment layers and clip them directly to individual assets. This isolates your changes to just that layer, giving you total control to balance exposures and make separate elements look like they belong in the exact same shot.
Adding Textures
We’ll show you how to create and clip dedicated grain adjustment layers directly to your assets to add a sense of realism. This technique seamlessly replicates the organic photographic noise of your original background image, erasing any digital sharpness so every element looks completely unified.
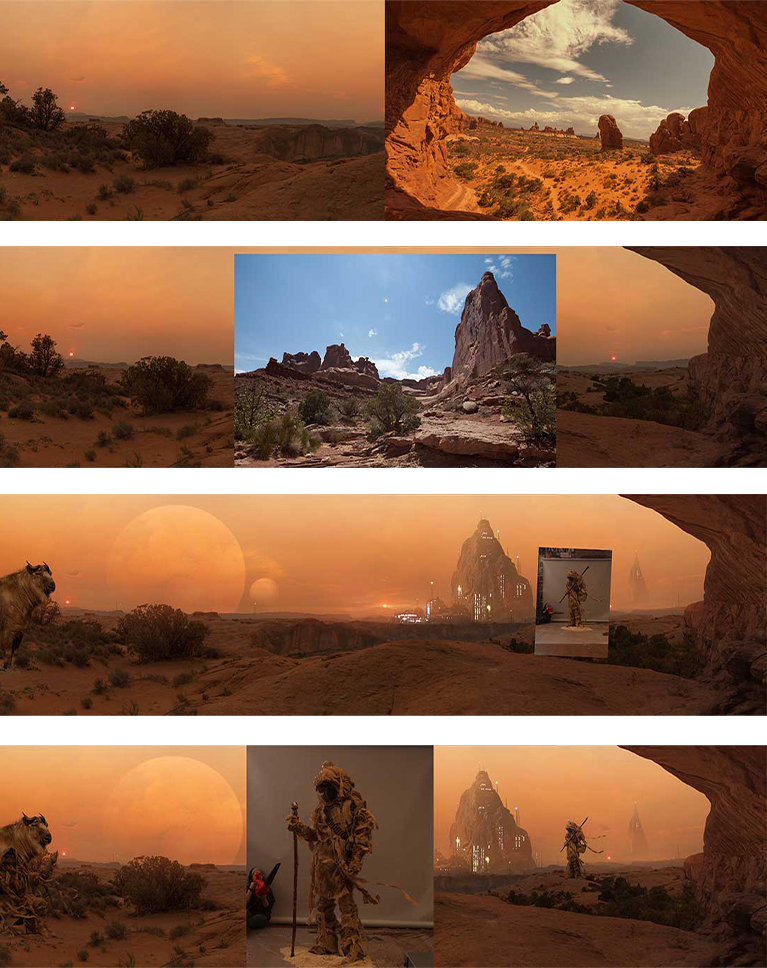
Build Epic Worlds

Realism, Lighting & Color Correction
Learn how to match light, balance colors, and blend textures seamlessly! We’ll show you the essential techniques needed to make complex composites look completely real.


AFTER
BEFORE
Object Selection
Making a perfect selection is the foundation of a great composite. Photoshop’s Select Subject tool can quickly isolate a subject, but it’s rarely perfect. We’ll show you how to refine these selections, from cleaning up edges to perfecting fine details, so you can achieve great results every time.
Atmospheric Depth
Learn how to create realistic depth using atmospheric contrast correction. We’ll use the Levels tool and adjust the Output Levels sliders to dim far-away lights. This simple technique mimics how light naturally loses contrast over a distance, making your background elements look like they are truly miles away.
Final Touches
Learn how to anchor your subject perfectly into the scene using localized shadow work. You will learn how to manually paint soft, realistic cast-shadows beneath feet and clothing. It’s the perfect way to blend your subject smoothly and add that final touch of realism to your composite.


AFTER
BEFORE
Photoshop Brush
Get the job done better and faster by using the right tools. Use the included PHLEARN custom Photoshop Brush to blend layers together seamlessly and even do light retouching. Once the brush is loaded into Photoshop, it’s yours forever and can be used on any image.
Included PDF Guide
Learn how to speed up your workflow with our included PDF guide. Packed with essential keyboard shortcuts and helpful tips, it’s the perfect companion for this tutorial. Download the guide to keep these handy references by your side, making it easier than ever to follow along and master these techniques.
Compositing Learning Paths
We love compositing in Photoshop! So much so that it’s become a pillar of our course catalog here on PHLEARN. If you’re new to the craft, we recommend exploring our exclusive Compositing Learning Paths: Everday Compositing, and Magical Compositing. The tutorials in these paths will equip you with a comprehensive toolkit to build and master your own photorealistic worlds.

Aaron Nace
PHLEARN Founder – Class Instructor
Aaron Nace is a photographer, Photoshop artist and founder of PHLEARN. He is the #1 Photoshop instructor in the world with millions of YouTube subscribers.
Reviews
New & Popular Tutorials


Training Site in
the World
Tutorials!
Ratings
and Counting
Subscribers
Only half way through first tutorial but loving this video. One of your team also gave me very helpful information on the simple composite I was trying to create. I am thinking of buying a wacom intros pro that I believe you are using. I see from your wacom tutorial you are using a medium size but seem to set up just a small part of the tablet to work for the whole screen. You are also using a small size tablet in your tutorial. Is there any advantage in buying the medium size or should I go for the small size? This is just a hobby. Your opinion would be appreciated.
Hi Nicola! If this is just a hobby you can definitely use the small size. Ultimately, is what works best for your workflow!
i loved this manual compositing its real nice to tweek the image levels. more please
Thank you so much for non AI tutorial. Even if I liked AI my CC plan only has 25 credits.
Aaron great tutorial. I learned a lot. I love all the humor you brought along the way!
This is a fantastic class for everyone. Whether you love AI, hate AI, or if you are someplace in between, this class will wake up your neurons, and stoke your creative juices. As usual, Aaron teaches the who, what, where, when, how, and why in every step along with tips that we probably don’t know because some are hidden in PS. All the resources needed are included with the downloads. I was taking classes during the covid period on Creative Live, which is where I encountered Aaron and his classes, and breathtaking composites. That’s when I began transitioning to composite work. I learned about PHLEARN and moved over here, and I’ve been here since then.
I love this one, more of the this type would bw great