

Learn how to create a realistic composite using Photoshop’s new AI tools. We’ll break down our three-step workflow: fixing 3D perspective with the brand-new Rotate Object tool, matching lighting using Harmonize, and blending natural shadows using Generative Fill.
Free practice files
Practice Files for This Tutorial
The 2 sample images, the layered PSD and the 4-page PDF guide from the video, so you can follow every step on the same files.
This tutorial includes 2 sample images, 1 sample PSD and 1 PDF guide.


Create a free PHLEARN account to download, or log in if you already have one. One account gets you the files for every free tutorial.
description
Enjoying This Free Tutorial?
Image Source

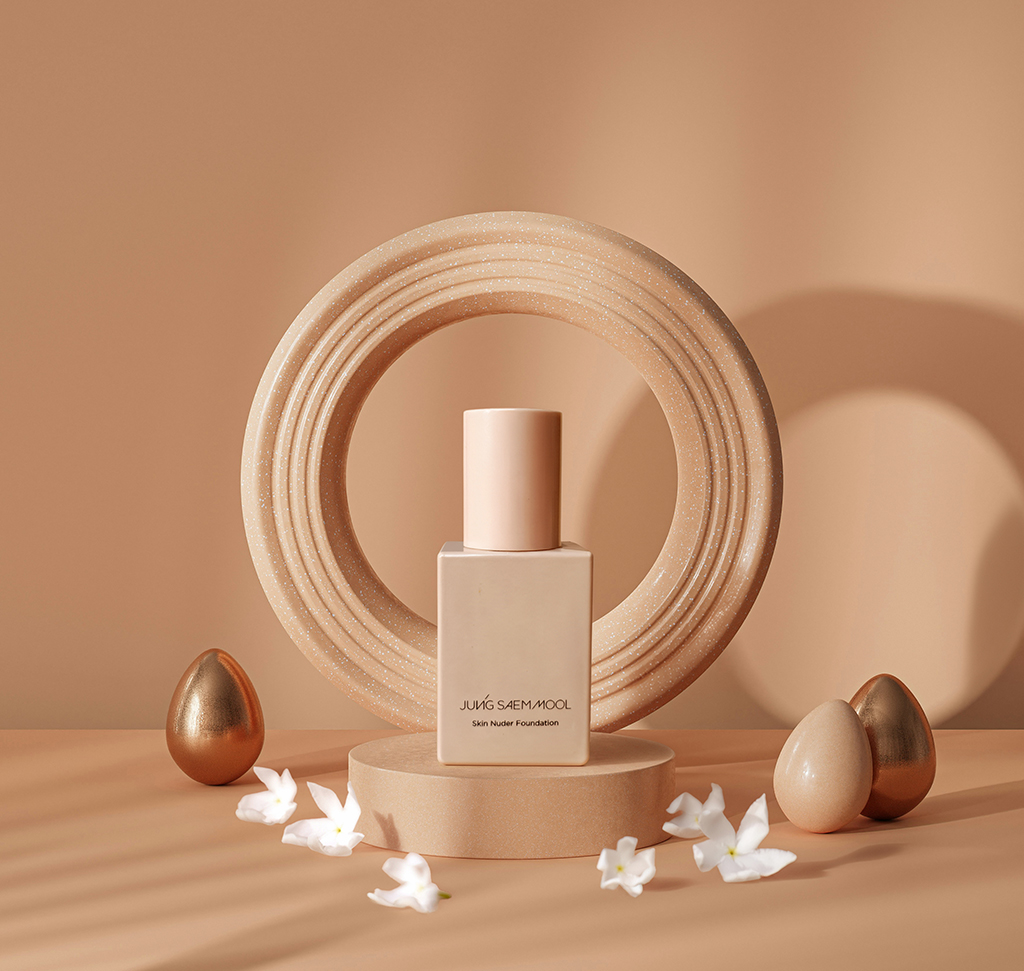
Rotate Object in Photoshop: Composites That Actually Belong
Dropping a product into a new scene is easy. Making it look like it was photographed there is the hard part, and it comes down to three things your eye checks instantly: the angle, the light, and the shadow where the object meets the ground. Get any one of them wrong and the composite falls apart, no matter how clean your cutout is.
Photoshop 2026 has a tool for each of those problems — Rotate Object, Harmonize, and Generative Fill — and used in that order they turn a job that used to take an hour of manual transforming, dodging and shadow painting into a few minutes of work.
The Three Things That Give a Composite Away
Perspective Mismatch
Your product was shot straight-on; your background scene was shot from slightly above. Your brain notices the disagreement before it can name it, and the object reads as “stuck on” even when nothing else is wrong.
Wrong Ambient Light
A subject photographed under cool studio light sitting in a warm afternoon scene will never look right. Every real object picks up the color of the light around it, and the missing color cast is one of the loudest tells there is.
No Contact Shadow
This is the biggest one. Where an object touches a surface, real light gets blocked and a dark, tight shadow forms. Without it, the object appears to hover a few millimeters above the ground — and that’s the effect people describe as “looking fake” without knowing why.
Fix the Angle First With Rotate Object
Perspective comes first because both of the later steps depend on the object being in its final position. Harmonize samples the surrounding pixels, and the shadow has to be generated under where the object actually sits.
-
Bring the Product Into Your Background
Open your background scene and place your product image into the same document as its own layer.
-
Isolate It on a Clean Layer
Grab the Object Selection Tool from the toolbar, click your product to generate a selection, and press Cmd/Ctrl + J to copy it onto its own isolated layer. If the edges need more care than the automatic selection gives you, our guide to object masking in Camera Raw covers refining tricky selections.
-
Open Free Transform
Press Cmd/Ctrl + T on the isolated product layer to bring up the transform box.
-
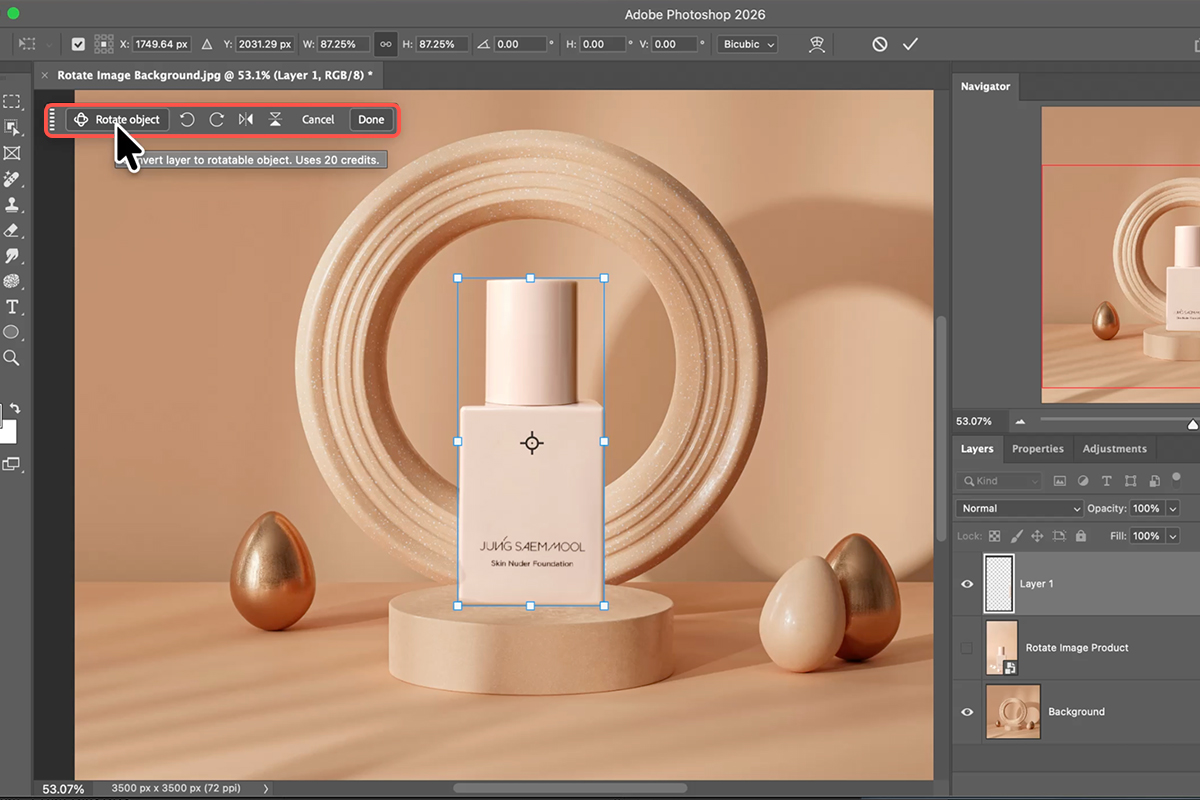
Click Rotate Object in the Contextual Taskbar
The taskbar floats near your selection — if it isn’t visible, turn it on under Window > Contextual Taskbar. Rotate Object lets you tilt and turn the product in three dimensions and includes a perspective warp slider, so you can match the camera angle of the background rather than just spinning the object flat.
-
Click Done and Let It Re-Render
When the angle matches, click Done. Photoshop rebuilds the rotated object at higher resolution, so you don’t inherit the softness that a normal transform would leave behind.
Match the Light With Harmonize
With the angle right, the object will still look imported — the highlights and color temperature belong to wherever it was originally photographed.
-
Click Harmonize on the Product Layer
Make sure the rotated product layer is selected and click Harmonize in the Contextual Taskbar. It reads the background and adjusts your subject’s color temperature and tonal range to match the scene it’s now sitting in.
-
Cycle Through the Variations
The Properties panel gives you three options to click through. Press Generate for more if none of them land. It’s worth being picky here — the difference between the second-best and the best variation is often the difference between believable and almost.
-
Judge It Zoomed Out
Step back to fit-on-screen before choosing. A variation that looks subtly wrong at 100% often reads perfectly at viewing size, and vice versa. For more on how this tool behaves, see our free breakdown of the Harmonize and Upscale tools.
Ground It With a Generated Shadow
This is the step that sells the whole thing, and it’s the one people skip.
-
Paint Over the Contact Point
Press L for the Selection Brush Tool, size the brush with the [ and ] keys, and paint over where the object meets the surface plus a little of the ground around it. You’re marking the area Photoshop will rebuild, so give it room to work.
-
Generate a Shadow
Click Generative Fill in the taskbar, type shadow into the prompt, and generate. Firefly reads the light direction in the scene and produces a contact shadow that falls the right way — which is exactly the part that’s tedious to paint by hand.
-
Cycle Variations Until It Grounds
As with Harmonize, you get multiple results. Look for the one where the shadow is darkest right at the contact point and softens as it moves away; that falloff is what real shadows do. Our free Generative Fill primer goes deeper on writing prompts that behave.

Why This Order Matters
Rotate, then Harmonize, then shadow — and it genuinely has to be that sequence. Harmonize analyzes the object against its surroundings, so running it before the object is in its final position and orientation means it’s matching to the wrong context. And a shadow generated before the object moves is a shadow in the wrong place, which means redoing it.
Each step also builds on a real, non-AI principle. Perspective, ambient color, and occlusion shadow are what make any composite work, whether you’re using 2026’s tools or doing it entirely by hand. If you want the manual version of the same logic, the PRO Ultimate Guide to Manual Compositing builds it from scratch without any generative tools at all.
Where It Goes Wrong
Rotating With Free Transform Instead
Dragging a corner handle scales and skews — it doesn’t rotate in depth. A skewed object looks stretched rather than turned, and no amount of shadow work fixes it. Use Rotate Object for anything that needs to face a different direction.
Accepting the First Harmonize Result
The first variation is not automatically the best; it’s just the first. Cycling through all three and generating more takes ten seconds and is often the single biggest quality gain in the whole workflow.
Selecting Too Tightly for the Shadow
Painting only the exact contact line gives the generator nowhere to fade the shadow into. Include a margin of surrounding ground so the falloff has somewhere to go.
What the Tools Are and Aren’t Doing
It’s worth being precise about this: Rotate Object and Harmonize aren’t inventing your product. They’re re-rendering and re-grading something you photographed. Only the shadow step generates new pixels, and it’s generating something that would exist in reality anyway.
That distinction matters for how you use them. These are tools for making real photography sit together convincingly, not for producing images out of nothing — which is why the creative judgment about angle, light and placement is still entirely yours.
Put It Into Practice
Object Selection to isolate, Rotate Object to fix the angle, Harmonize to match the light, Selection Brush plus Generative Fill to ground it. Download the free sample images and PSD and run through it once with the provided files — then try it with a product shot of your own against a scene you photographed, where the perspective mismatch will be real rather than staged.
Quick Reference: Keys, Menus and Settings
- Cut out the productObject Selection tool, click the object, then Cmd/Ctrl + J
- Rotate ObjectCmd/Ctrl + T, then Rotate Object in the Contextual Task Bar (Window > Contextual Task Bar if hidden)
- The three controlsTilt toward you, the turntable for the sides, Perspective Warp for the lens feel; Done to enhance
- Start overEsc, then Rotate Object again
- Match the lightHarmonize in the task bar; pick a variation in Properties, Generate for three more
- Where it meets the groundNew layer, L for the Selection Brush, paint the contact area, Generative Fill, prompt “shadow”
- Brush size[ ]
- Check your creditsThe credits button in Photoshop; Features lists what each tool costs (Rotate Object: 20)
Mac first, then Windows where they differ.
Image source
Photos by Ronnrit Jirthnykorn and Rodion Kutsiev via Unsplash
Free Downloads
Follow Along on the Same Photos
Get both sample images (the scene and the product), the layered PSD with the rotated object, and the PDF guide. Free with a PHLEARN account.
Rotate and Composite Objects: Common Questions
What does Rotate Object do?
It uses AI to turn a flat cutout into something you can tilt toward you, spin on a turntable and change the perspective of, so an object shot straight on can match a scene seen from above. It lives inside Free Transform in the Contextual Task Bar.
Do I need to cut the object out first?
It will try to find the object on its own, but cutting it out first works better. Click it with the Object Selection tool, press Cmd/Ctrl+J, then press Cmd/Ctrl+T and choose Rotate Object.
Why does the object look low resolution while rotating?
That’s the working preview. When you click Done, Photoshop enhances the rotated result and the quality comes back. Keep the rotation subtle; it’s guessing what the unseen sides look like, and small moves hold up best. If you don’t like a result, press Esc and run Rotate Object again.
What is the Perspective Warp control for?
It changes the apparent focal length. Drag one way and the object flattens like a 200mm lens; the other way and it distorts like a 16mm lens. Drag until it looks right against your background, then stop.
What does Harmonize do?
It matches the object’s highlights and shadows to the background and casts shadows onto it. Click Harmonize in the task bar, then pick from the variations in Properties. Generate gives you three more if none fit.
Why is Generative Fill the third step?
The spot where the object touches the ground usually looks wrong after the first two steps. On a new layer, paint over that contact area with the Selection Brush (L), click Generative Fill, type “shadow” and generate. Skip this and the composite doesn’t sell.
Does this use generative credits?
Yes, all three tools do, and each Generate click can use more. Check the credits button inside Photoshop: it shows your balance and, under Features, what each tool costs. Rotate Object was 20 credits in the video; amounts depend on your plan.
Can I add other elements from the original photo?
Yes. Select the flowers with the Object Selection tool (Shift-click to add more), copy them to their own layer with Cmd/Ctrl+J, place them, then Harmonize and paint a Generative Fill shadow where they meet the ground, the same as the product.
Are the sample files free?
Yes, with a free PHLEARN account. You get both sample images, the layered PSD with the rotated object, and the PDF guide.
Master Photoshop, Lightroom and Photography
Join PHLEARN PRO for $12.99 a month or $99.99 a year. Cancel anytime, with a 100% money-back guarantee.





