
Download Assets
description
Learn how to clean up and reframe your photos using the latest tools in Photoshop. We’ll show you how to use the Remove Tool to clear background clutter and wires, followed by Generative Expand to fix tight framing. We’ll even walk through adding a new sky and using Camera Raw to naturally blend the final image.
Go PRO:
Dive deeper on non-destructive editing with our in-depth PRO tutorial The Ultimate Guide to Non-Destructive Editing in Photoshop . We’ll cover everything from mastering masks and smart objects to building an unbreakable raw pipeline, all while preserving your original image intact..
Image Source
- Fellipe Ditadi
- Omar Ramadan
Images sourced from Unsplash.
Share
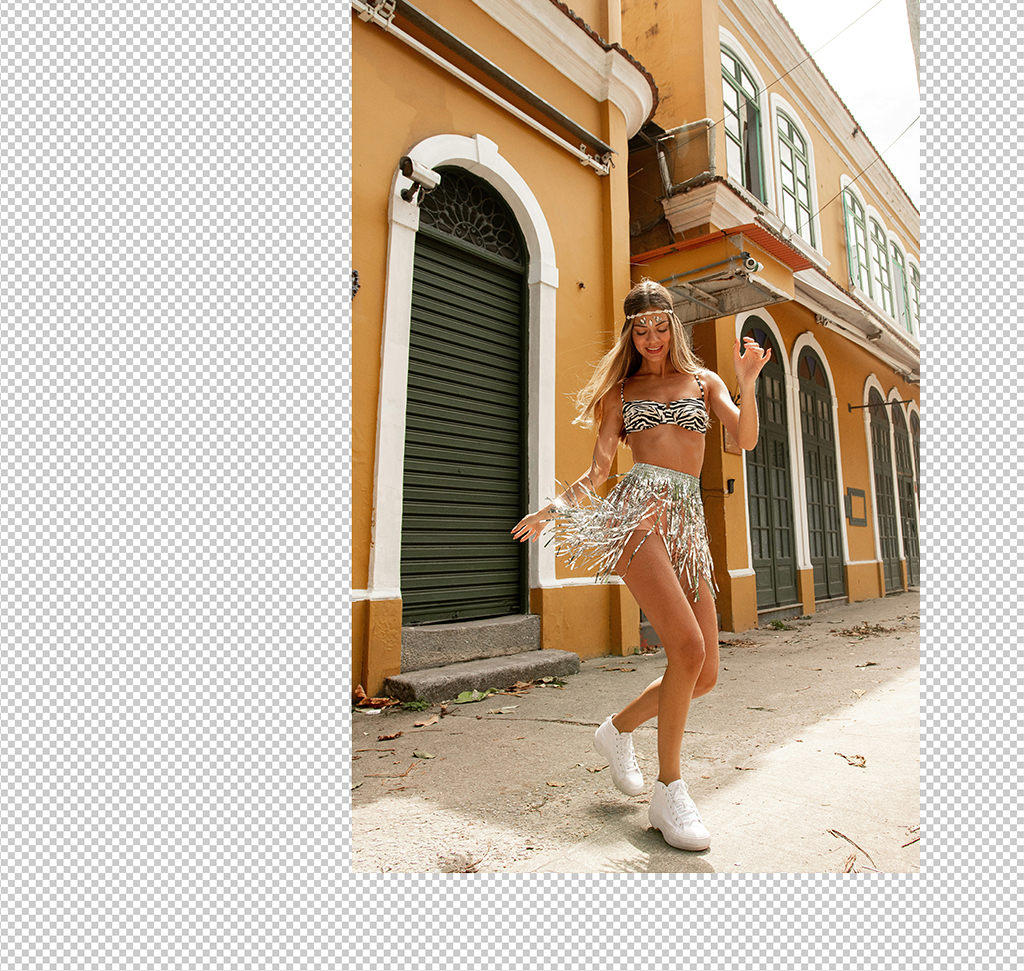

AFTER
BEFORE
Clean, Reframe & Polish
Removing background distractions is one of the most effective ways to instantly elevate an image and ensure your subject remains the absolute center of attention. When a photograph is cluttered with random objects, overhead cables, or tight, awkward framing, the viewer’s eye wanders away from the story you are trying to tell. This guide walks you through a clean, professional, and non-destructive workflow to eliminate visual noise, perfect your composition, and add a polished final look to your portraits.
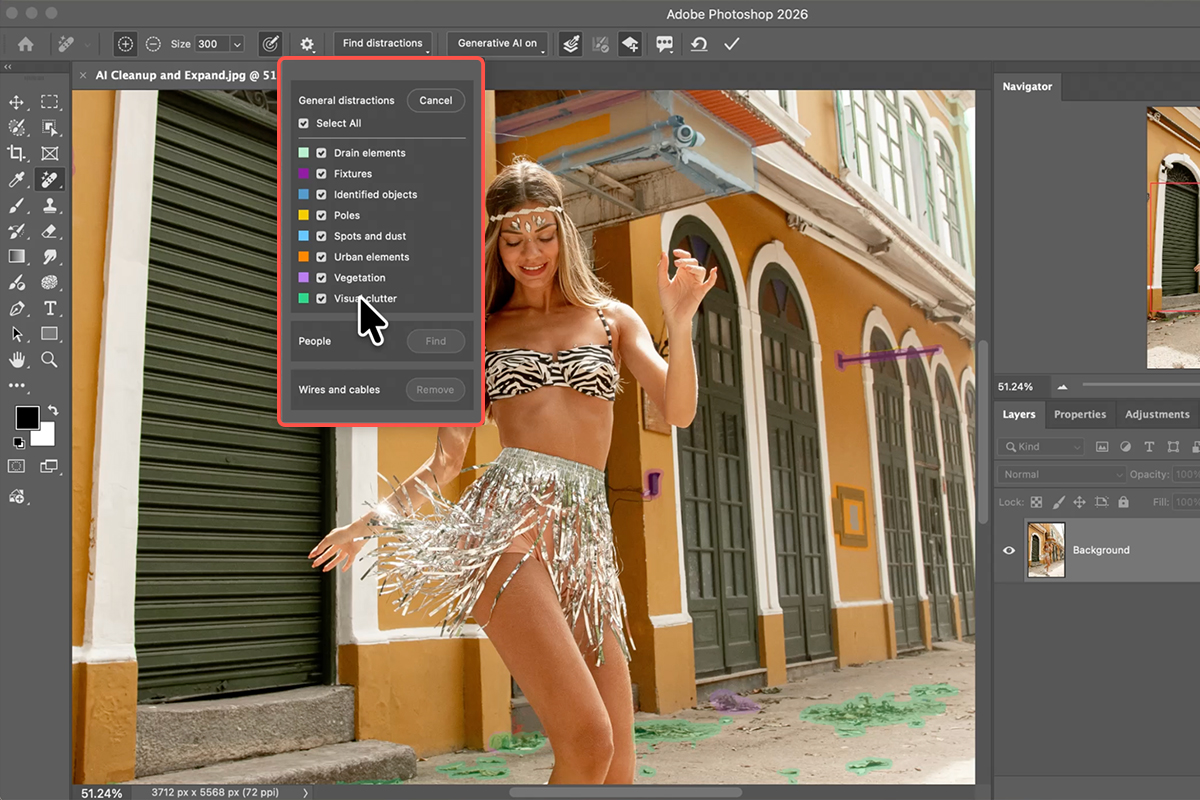
Clear Visual Clutter
1. Begin by selecting the Remove Tool from the toolbar or press J on your keyboard.
2. In the options bar, click on Find Distractions to let Photoshop automatically scan, color-code, and categorize unwanted objects in the background.
3. If the tool accidentally highlights an area you want to keep, simply hold Alt/Option and paint over it to subtract it from the selection, or manually brush over any missed clutter. Ensure you have Generative AI and Sample All Layers checked, then click the checkmark to completely clear out the distractions on a clean, separate layer.
Fix Awkward Framing
4. If your subject is framed too tightly against the edge of the image, grab the Crop Tool by pressing C.
5. Click and drag the edge of the bounding box outward to expand the canvas, using the grid intersections to align your subject with the rule of thirds.
6. In the contextual task bar, change the fill option to Generative Expand and click Generate without typing any text prompts. Photoshop will automatically create entirely new, matching pixels from scratch to fill the empty space and create a perfectly balanced composition.

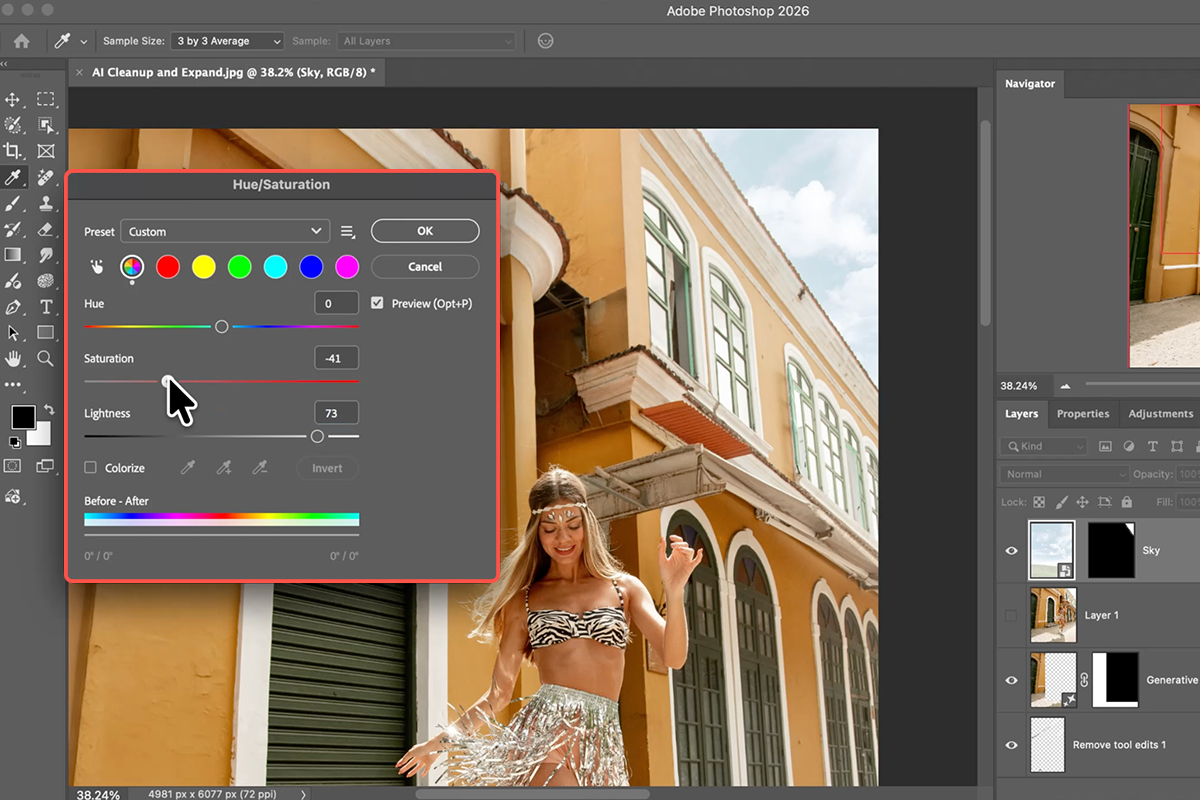
Replace Flat Skies
7. To replace a dull background sky, create a merged snapshot of your visible artwork on a clean layer, then navigate to Select > Sky.
8. Once the selection marquee is active, drag your new sky image into the document, hit Enter, and click the Layer Mask icon to drop the new backdrop perfectly into place.
9. To make the composite look entirely realistic, open Image > Adjustments > Hue/Saturation to lower the saturation and raise the lightness until the new sky naturally matches the bright, ambient light of the original photograph.
Final Polish
10. To blend your edits seamlessly, merge a final snapshot layer, right-click it, and choose Convert for Smart Filters to turn it into a non-destructive Smart Object.
11. Go to Filter > Camera Raw Filter and head to the Effects panel to add a small amount of Grain, which unifies the texture of the smooth AI-generated areas with the rest of the photo.
12. Finish the portrait by pulling in a subtle Vignette under the Optics tab, using a Radial Mask to boost the exposure on your subject while protecting the highlights, and applying a gentle Lens Blur to softly drop the background out of focus.


