Download Assets
description
Learn how to eliminate ugly edge fringing on any subject using clipping masks in Photoshop. If your layer masks look great but your cutouts still have halos, the mask isn’t the problem! We’ll show you a powerful, non-destructive cloning and brushing technique that delivers flawless, professional selections every single time.
Go PRO:
Dive deeper on non-destructive editing with our in-depth PRO tutorial The Ultimate Guide to Non-Destructive Editing in Photoshop . We’ll cover everything from mastering masks and smart objects to building an unbreakable raw pipeline, all while preserving your original image intact..
Image Source
- Fellipe Ditadi
Images sourced from Unsplash.
Share
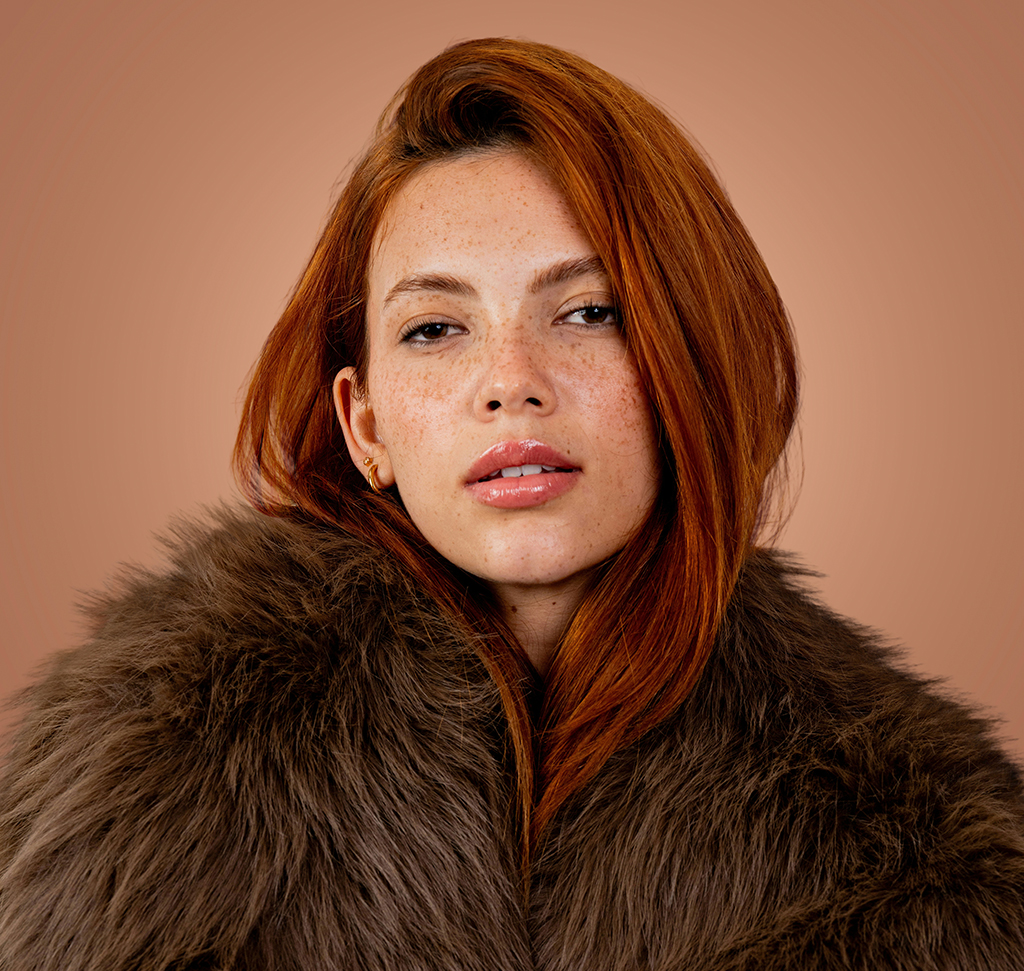
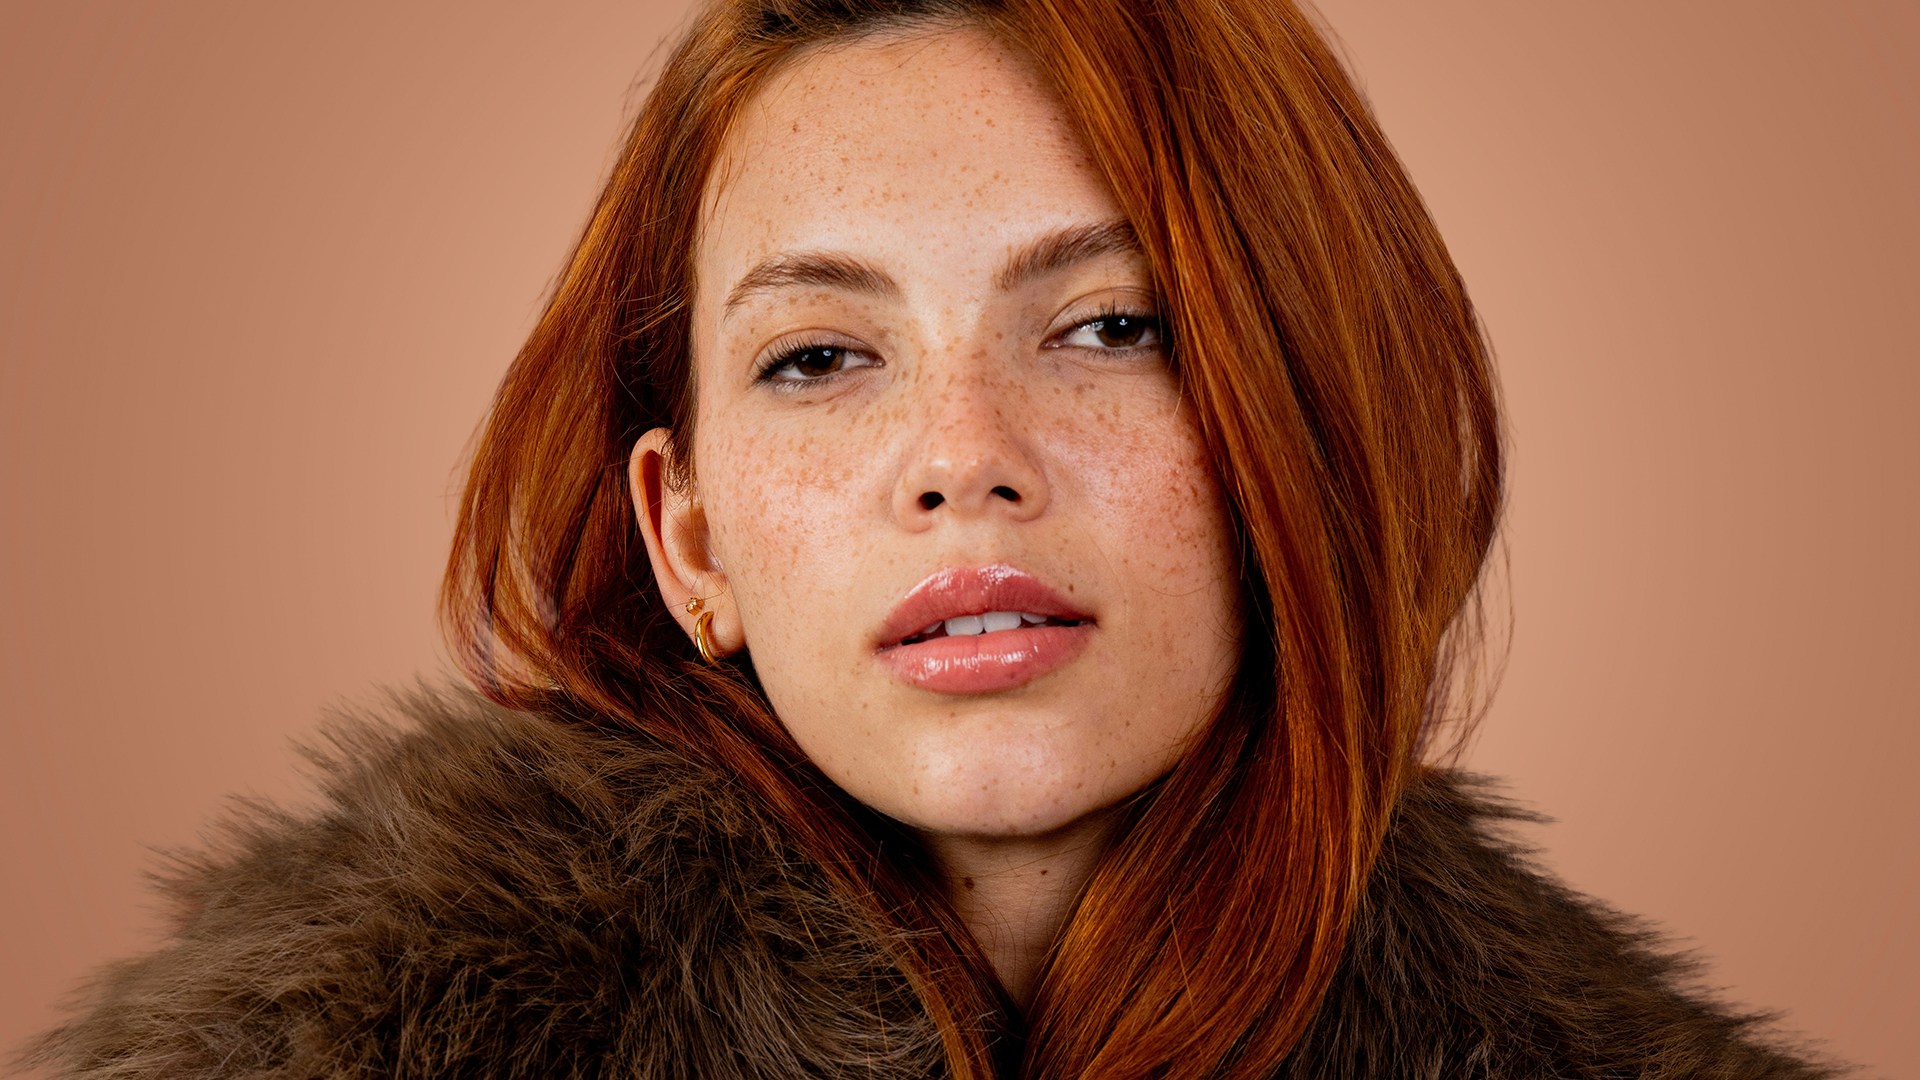
AFTER
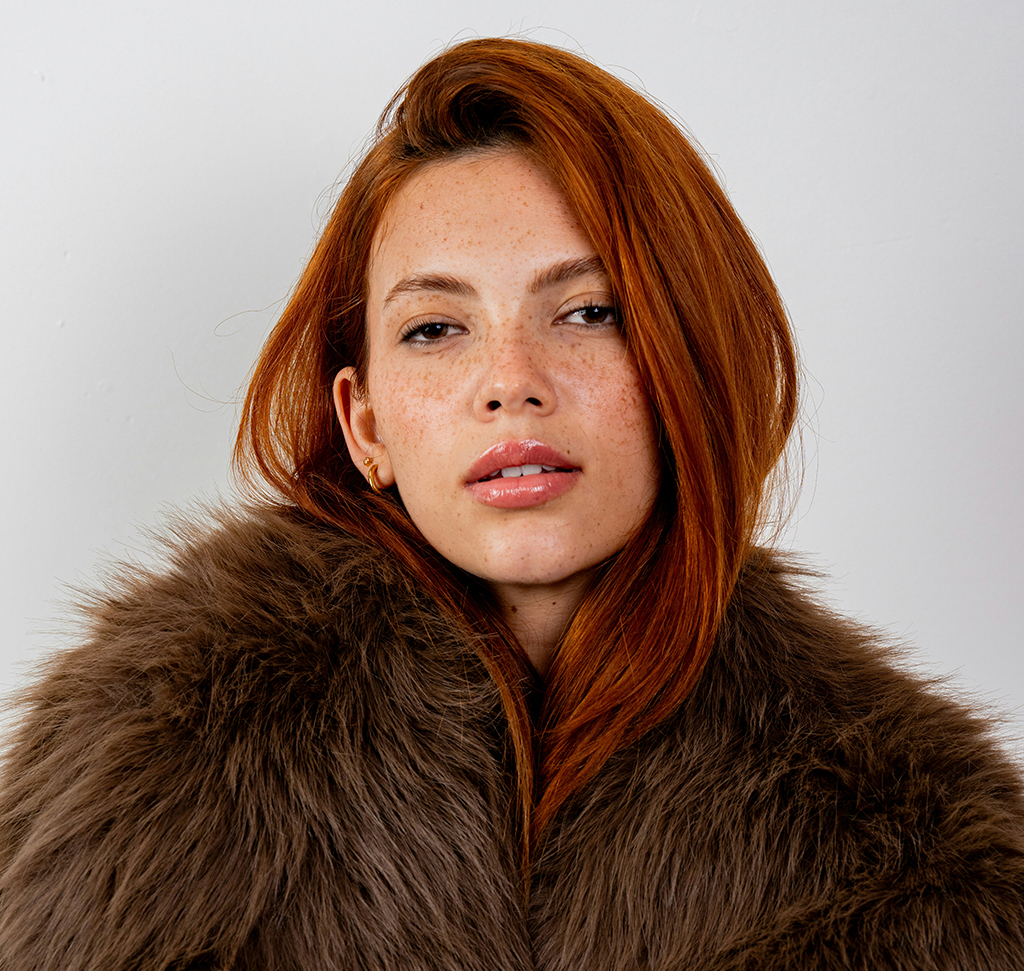
BEFORE
Fix Fringing Forever
Getting a perfect subject cutout in Photoshop is one of the most common and most frustrating challenges. You can spend ages refining a selection, utilizing advanced tools to capture every fine strand of hair or fur, only to drop a new background behind the subject and find ugly edge fringing everywhere. This white or light halo makes the composite look instantly fake. Most editors assume the issue lies with a broken layer mask and waste hours trying to manipulate it, but the real problem is simply the color data from the original background trapped in the edge pixels. Fortunately, you can fix this seamlessly without relying on unpredictable AI tools.
Set the Base
1. First, isolate your subject by creating a standard layer mask. You can speed this up by checking the Contextual Taskbar (Window > Contextual Taskbar) and clicking Remove Background.
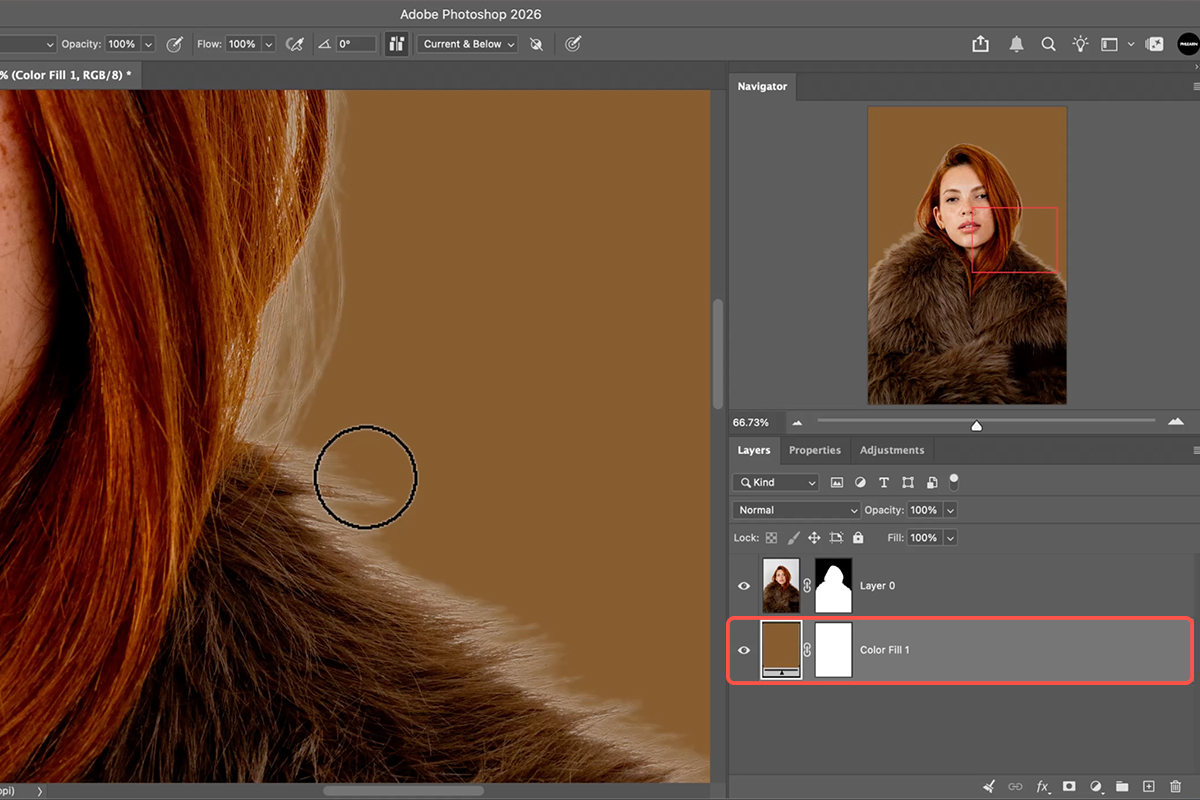
2. To accurately spot edge flaws, add a solid color fill layer under your subject and make it a dark, contrasting color. This instantly reveals the trapped original background color around the hair and fur. If you check the mask itself in the black-and-white overlay mode, you will see the selection is actually clean; the mask is fine, but the edge pixels themselves need to be re-colored.
Clip a Layer
3. To fix the edges without altering your original image, create a new blank layer directly above your subject.
4. You need to turn this into a clipping mask so that anything you paint only shows up precisely where the subject is visible. You can do this by holding Alt/Option and hovering between the two layers until your cursor changes to a square with a down arrow, then click. Alternatively, use the keyboard shortcut Ctrl + Alt + G (Windows) or Cmd + Option + G (Mac) to instantly clip the layer.
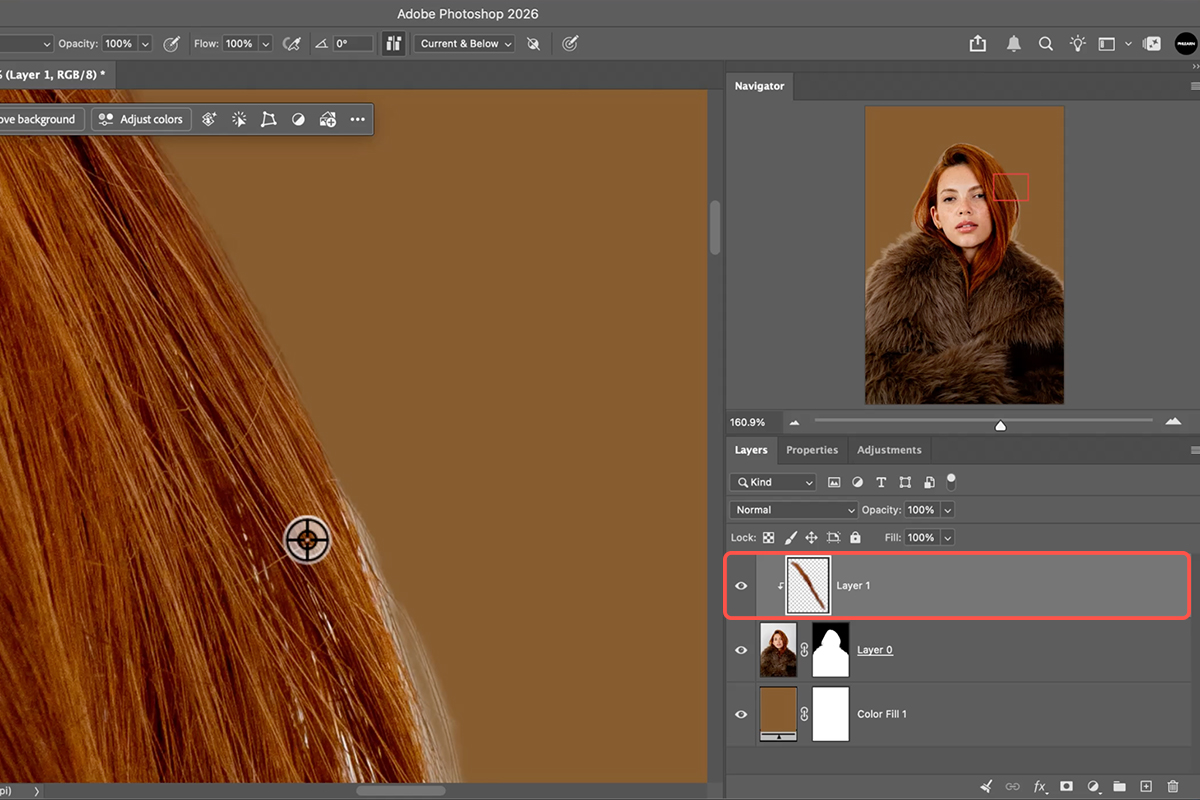
Clone & Paint
5. Select the Clone Stamp tool (Keyboard Shortcut “S”) and ensure the Sample option in the top bar is set to Current & Below so you can pull detail from your subject onto the blank layer.
6. Zoom in close, hold Alt/Option to sample clean hair or fur from just inside the edge, and brush outward over the fringing. The clipping mask keeps the texture perfectly contained within the silhouette while replacing the ugly light halos with realistic hair details.
7. For organic areas with complex curves, you can clone hair onto a new layer, hit Ctrl/Cmd + T to transform, right-click to select Warp, and shape the strands to match the natural flow before clipping it into place.


