Download Sample Image & PSD
description
Learn how to blur any background in just a few clicks using Photoshop’s new Depth Blur Neural Filter! See how this new automated tool holds up, and how we can use some traditional Photoshop tricks to refine the effect.
Share

INSTANTLY BLUR ANY BACKGROUND
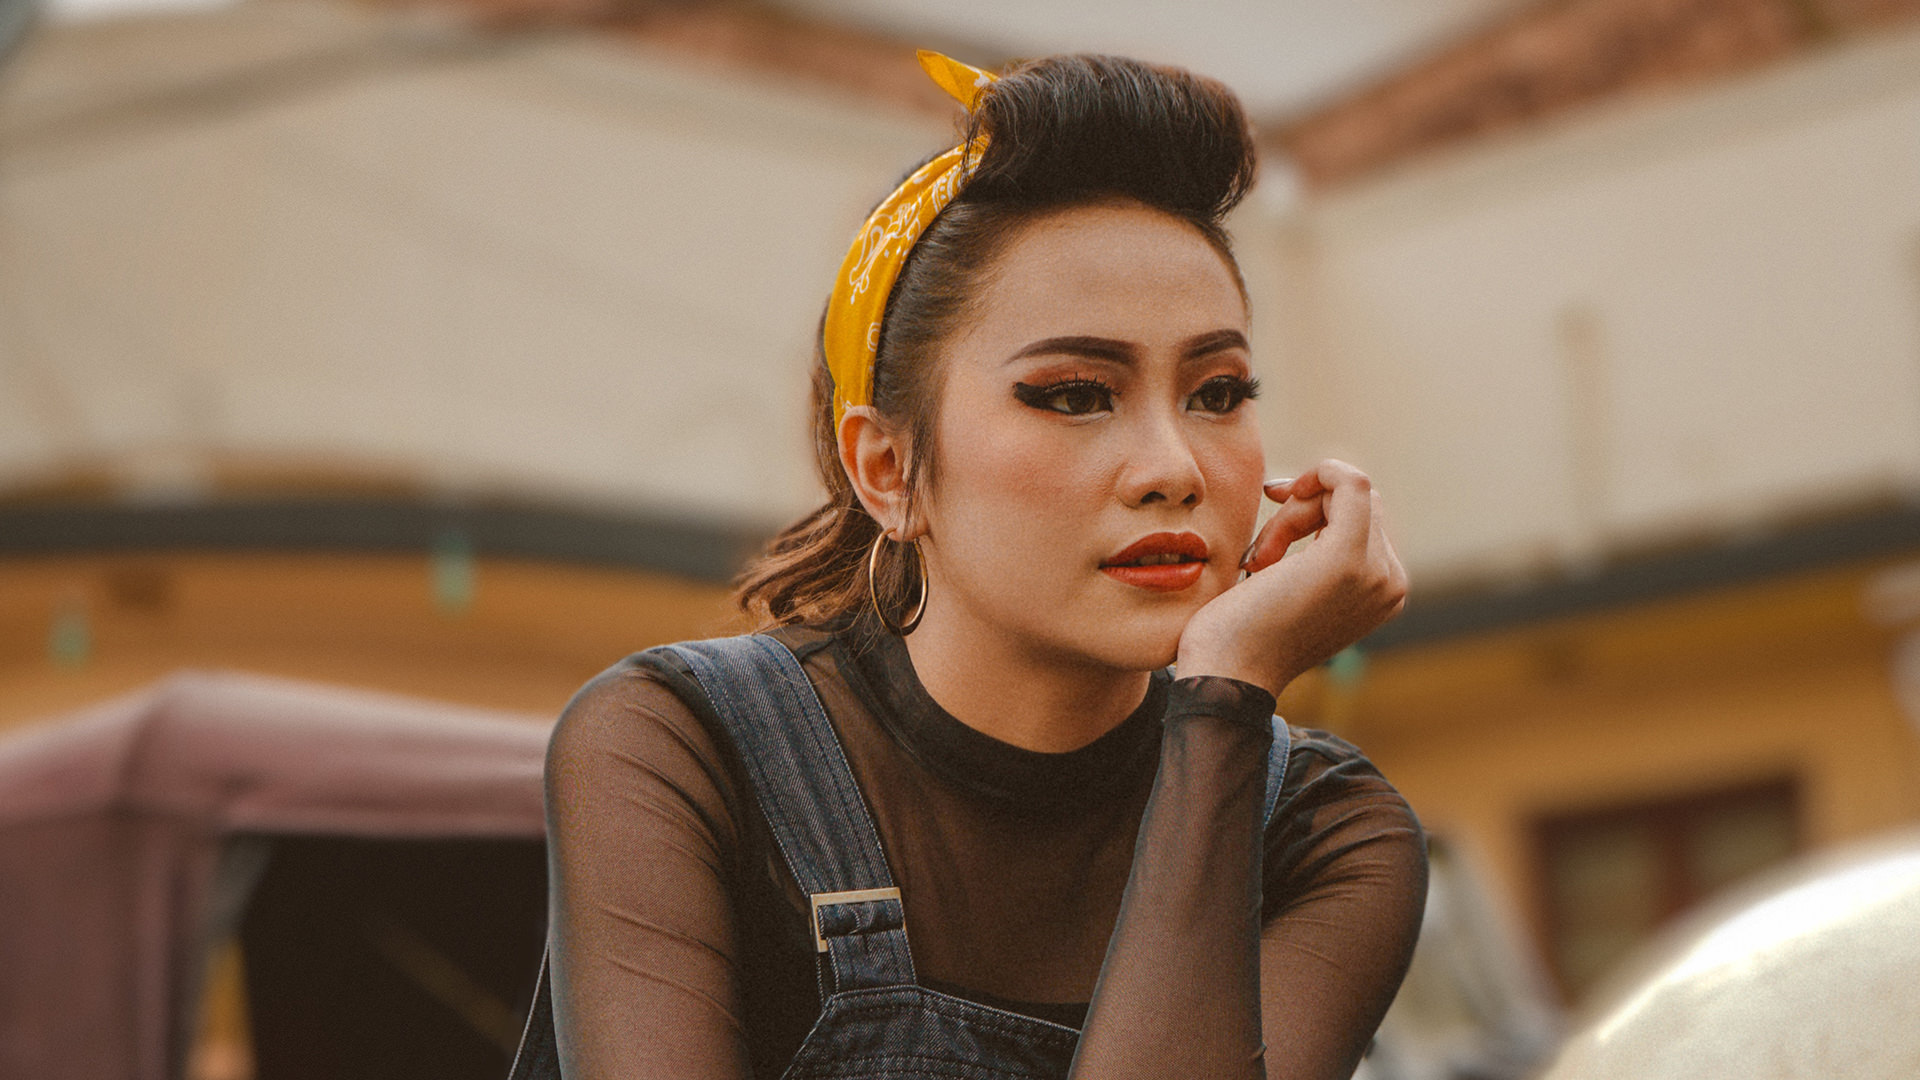
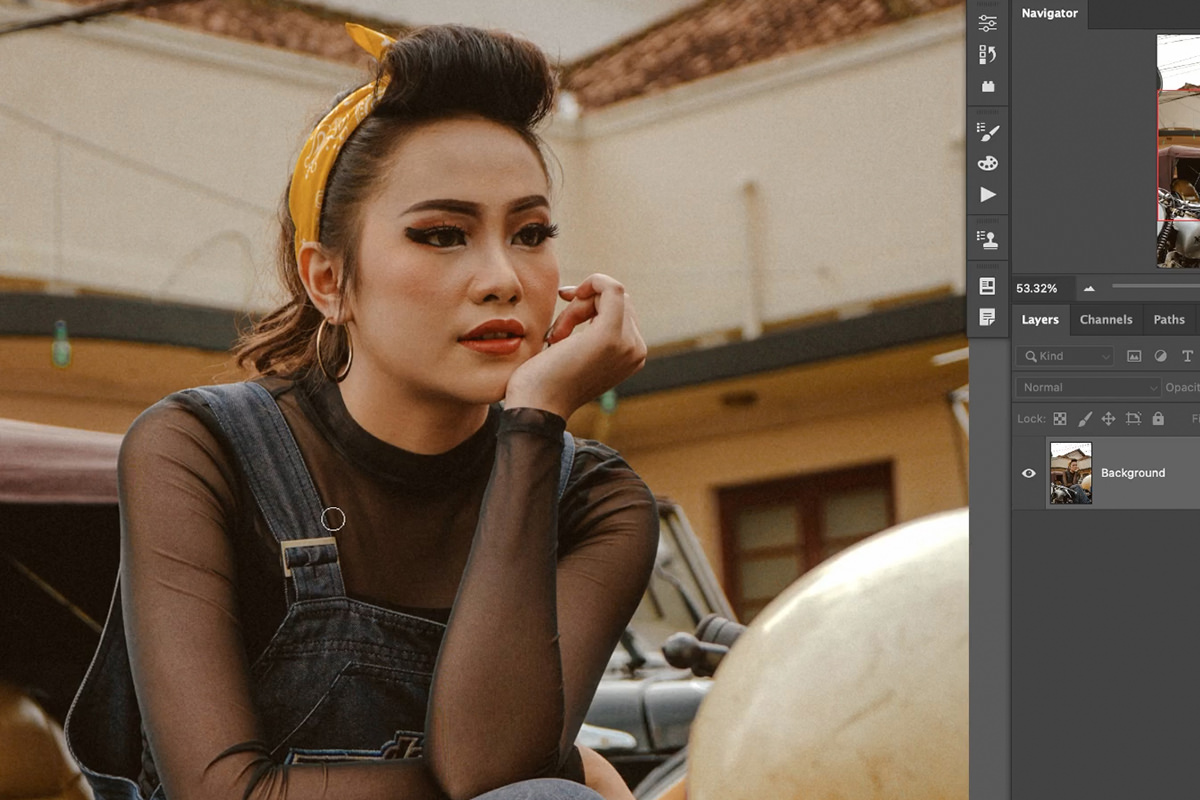
BEFORE
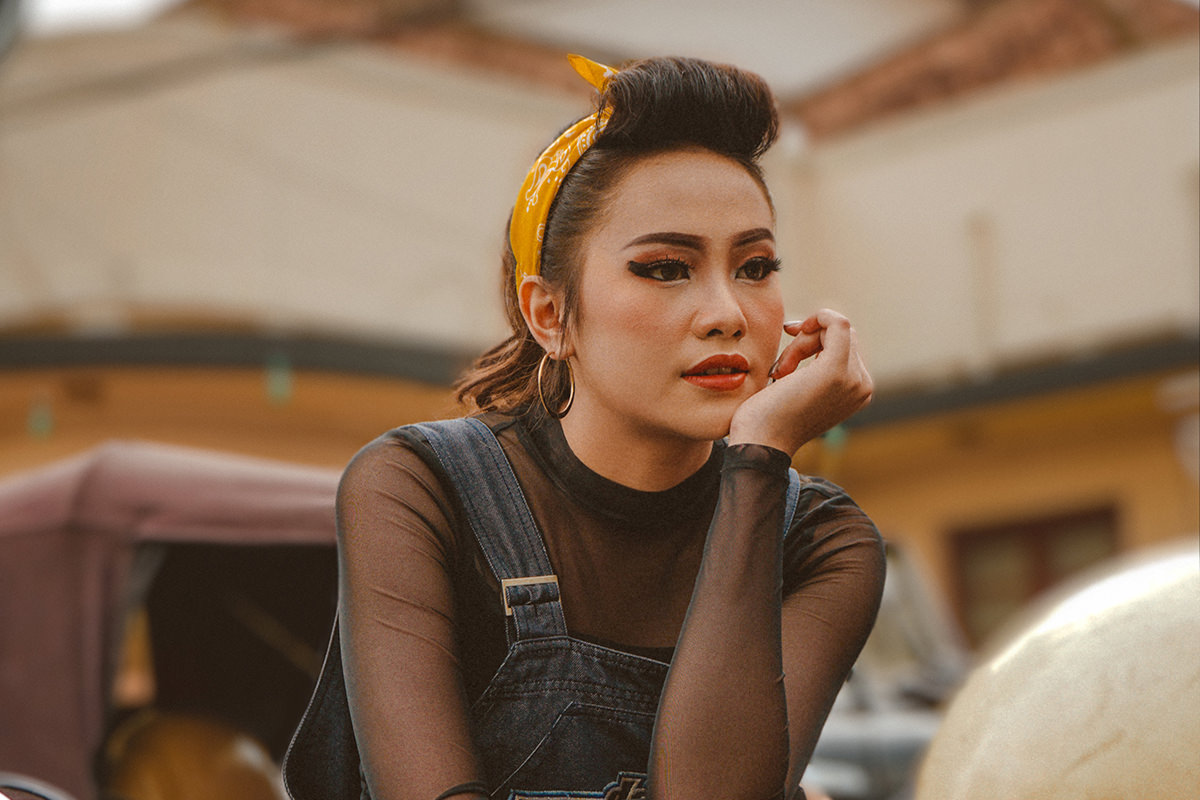
Blur Any Background in Photoshop
Neural Filters in Photoshop
Neural Filters are some of the latest tools designed to help us work faster than ever before, automating processes that would otherwise eat up a lot of our editing time.
We’re going to take a close look at the Depth Blur Filter, a tool designed to automatically blur backgrounds while helping our subjects stand out. Since this tool is still in beta development, you’ll need the latest version of Photoshop and an active internet connect to use it!
The Depth Blur Filter
Alright, so you’ve got a nice portrait, but you wish the subject was separated a little bit more from the background and environment.
Ideally, this would be done in-camera, opening up the aperture to create a more shallow depth of field. But sometimes, depending on the lens, lighting conditions, and other gear you have, it might not be possible to get this effect on-location.
It’s no surprise then that editors have figured out a number of tools and techniques to recreate this effect in Photoshop. But, to do it realistically, has always been equal parts difficult and time-consuming.
This is where the new Depth Blur Neural Filter comes in, promising to help us recreate the effect of a shallow depth of field, and in just a few clicks.
The Neural Filter Dialog
Open an image with a clear, in-focus subject and a background that you want to try and blur.
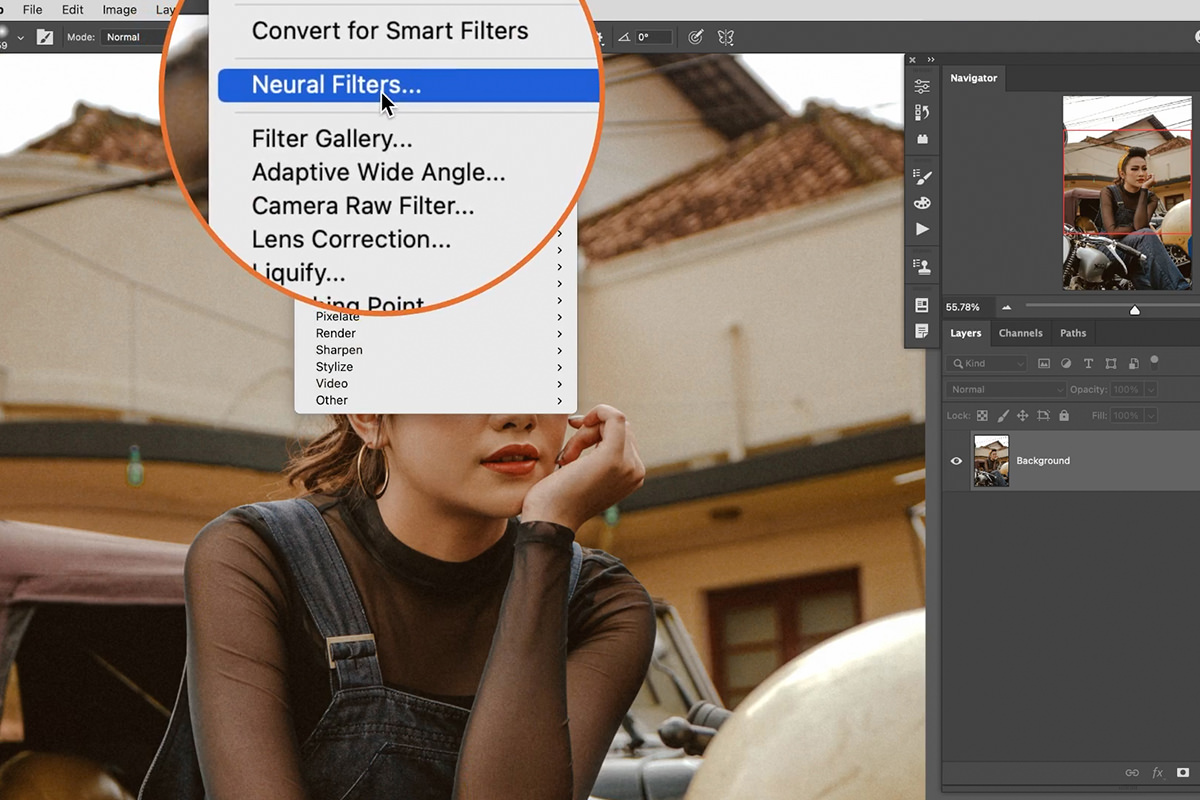
The Neural Filters dialog can be found under the Filters menu.
After opening the Neural Filters dialog, a variety of options will be available. You’ll see a list of Featured filters, and a list of Beta filters. Beta filters are actively being tested by Adobe, so they require an active internet connection if you want to try them out.
Find the Depth Blur option in the list of Beta filters and click on it.
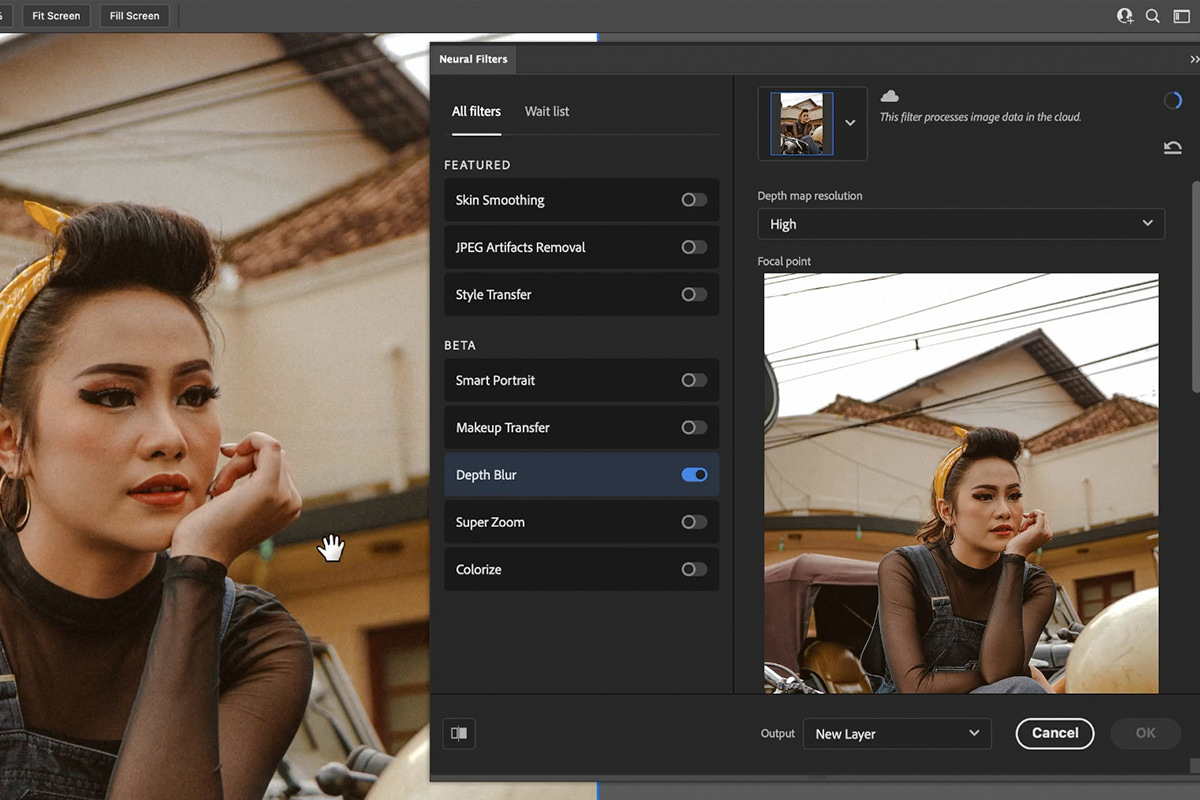
The Depth Blur Neural Filter
With the Depth Blur Neural Filter toggled, we have access to a variety of settings to adjust the effect, and a live preview window that helps us see what’s going on in the image.
The first thing you can do is just the focal point of the image. This allows you to set points to help Photoshop identify what you want to stay in focus and what areas should be blurred. Placing a few points on the subject of the photo, and on other objects that are about the same distance from the camera, should help you create a more realistic effect.
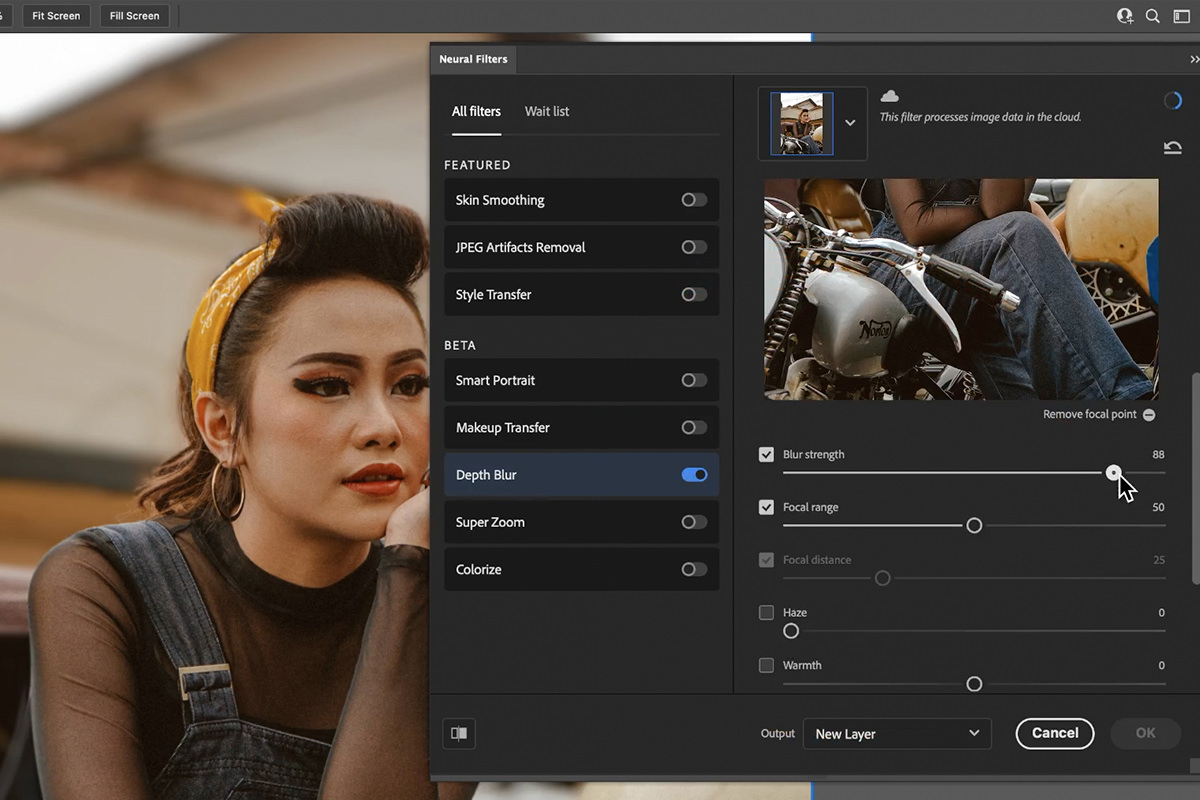
Additionally, you can adjust things like the Blur Strength and the Focal Range. These settings will help to recreate similar effects as adjusting the aperture setting on a camera.
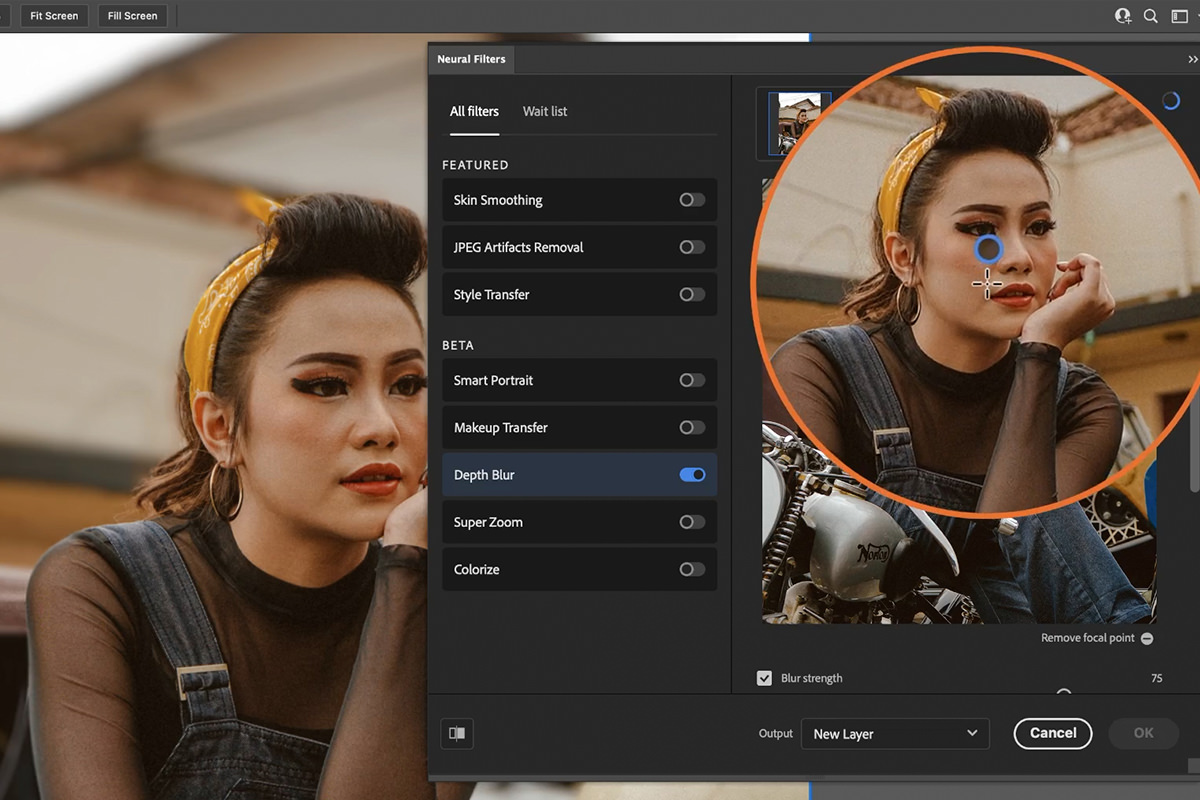
Adjust the settings to your taste. You may notice some problem areas, like clothing, that get blurred along with the background. Since this is an automated tool, some issues are to be expected, and we can take care of these spots pretty easily using some standard Photoshop tricks.
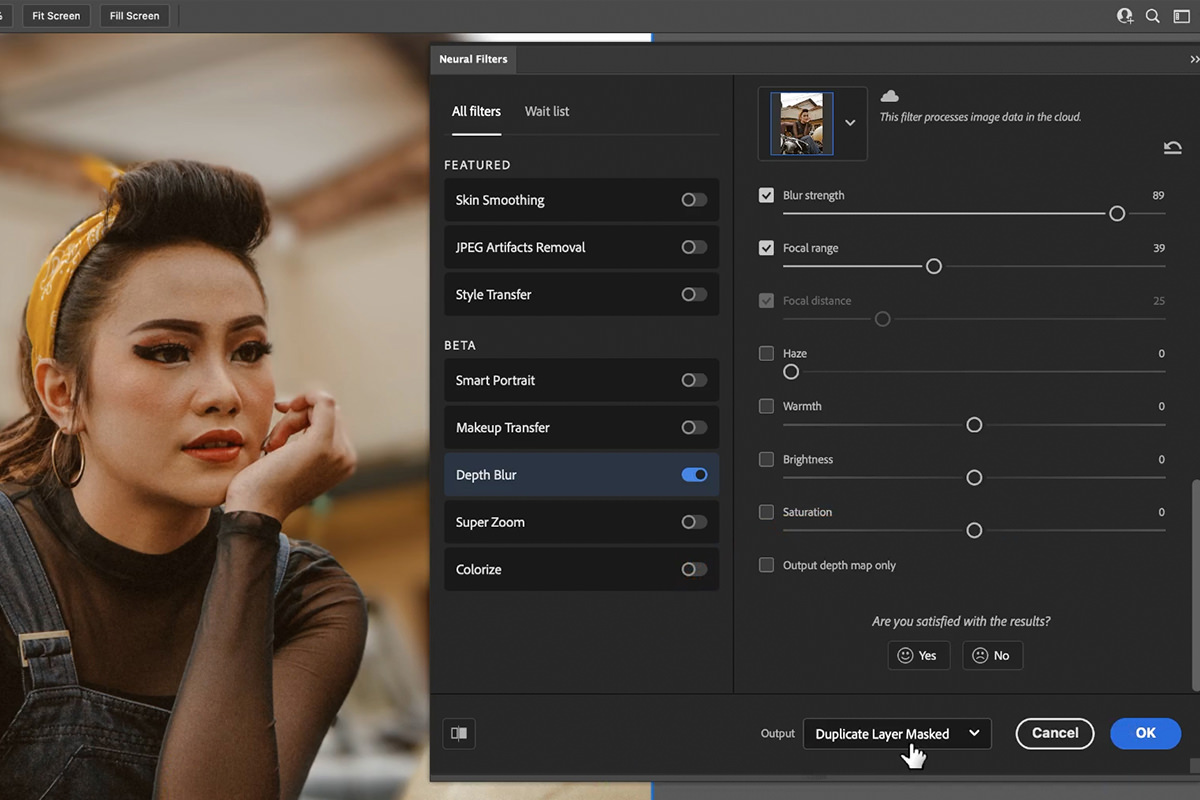
Once you’ve dialed in the effect, output it to Duplicate Layer Masked. Now let’s work with some Photoshop tools to fix up some of those small errors!
Refining the Depth Blur Filter
As we mentioned, automated tools are typically not going to yield a perfect result. Fortunately, we’ve got a variety of tools that can help us recover some of those areas that we don’t want blurred. And since we placed the blur effect on a new Layer, we still have our original image to pull that information from.
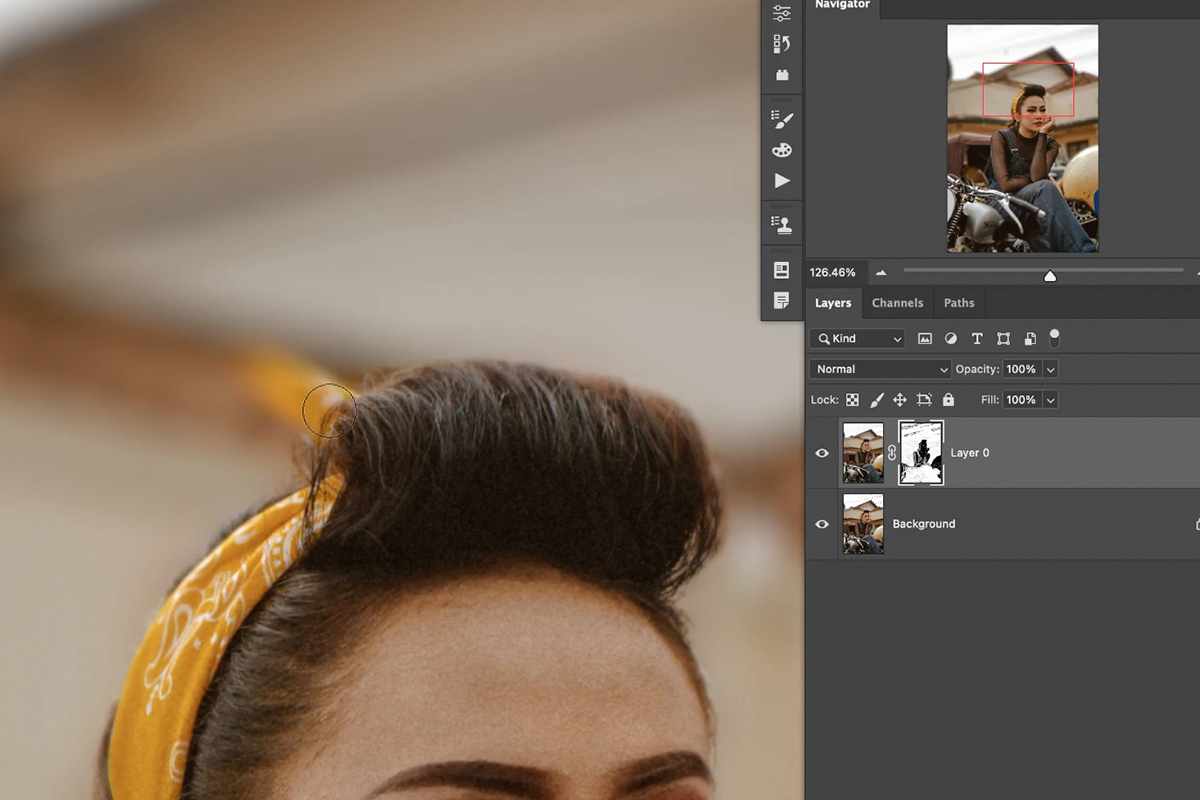
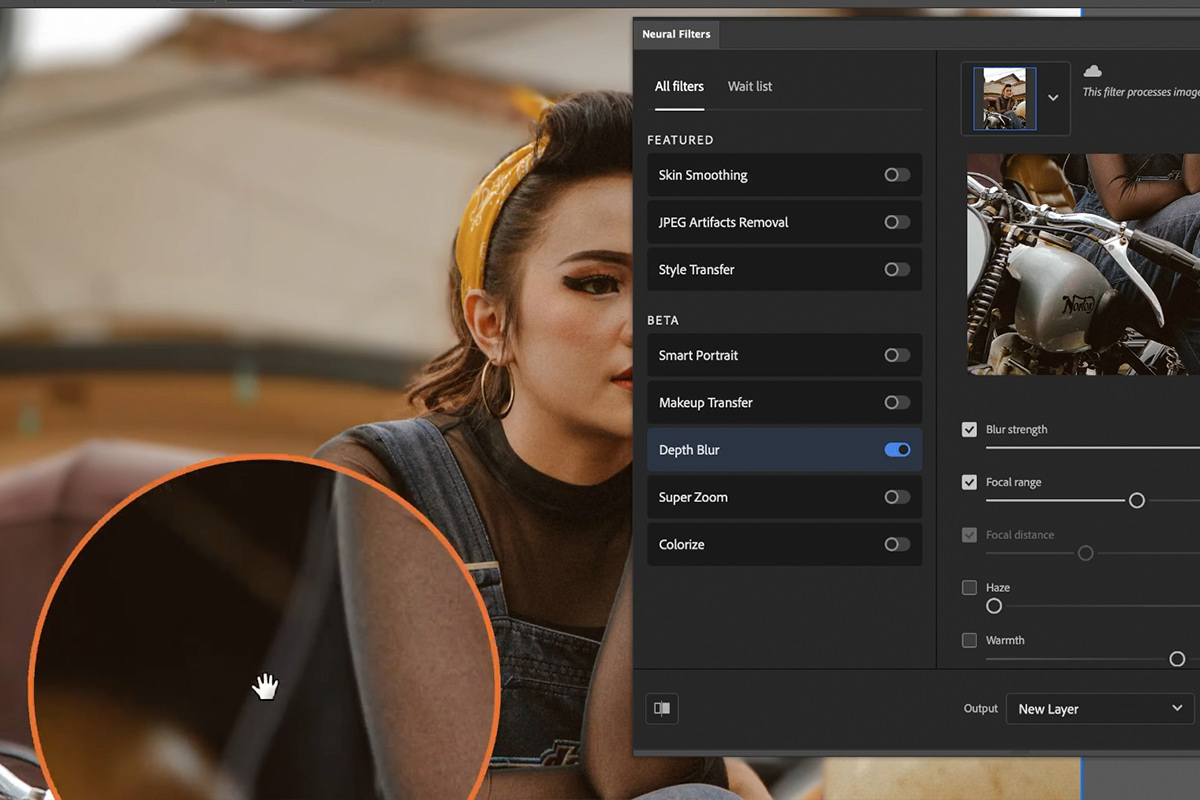
For example, take a look at the subject’s bandana. This should be in focus with the rest of the subject. Since the blur effect is on a new layer, and the original image underneath, we only need to hide the blur effect from this area using the Layer Mask associated with the blur effect.
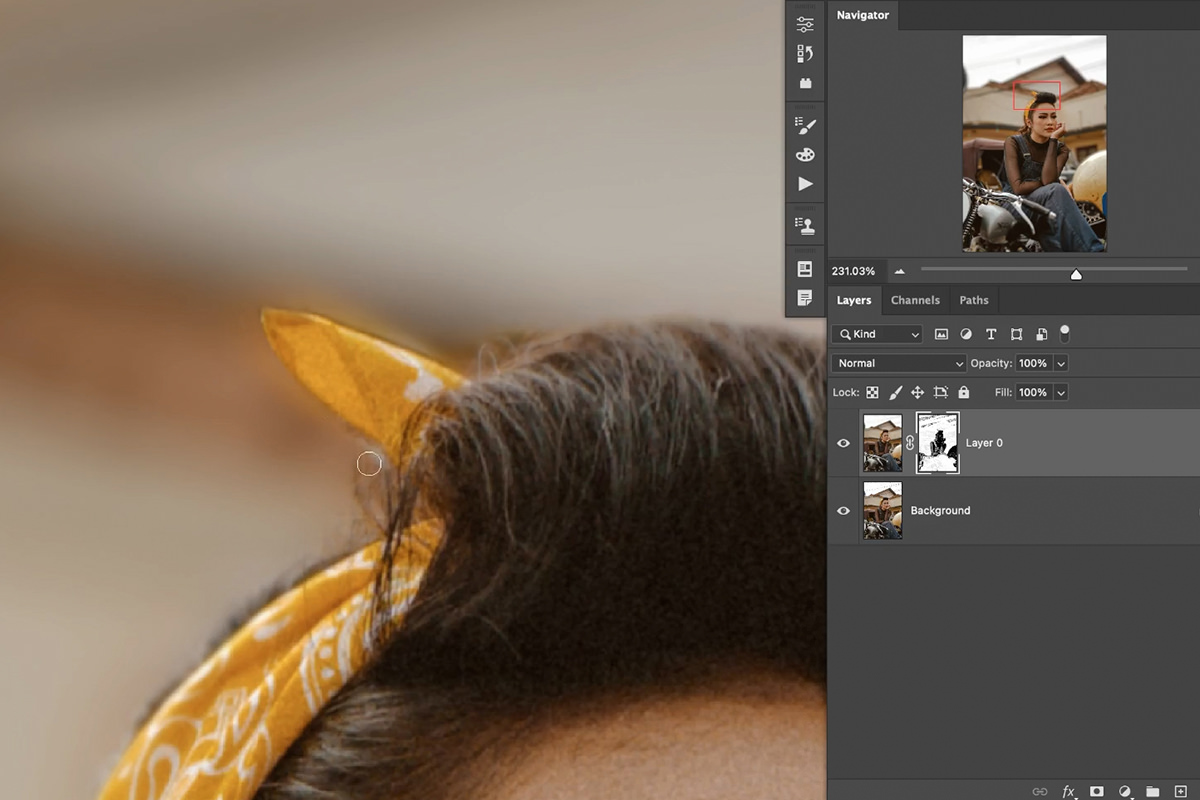
Click on the Layer Mask of the blur effect, select the Brush Tool, and set the color of the brush to black. Now, using a soft, round brush set to a low Flow, paint over the bandana. This will hide the blur effect, and reveal the original image underneath. Make sure to zoom in and adjust the brush size as needed. You can also switch the color of the brush to white and paint on the outside of the bandana if you accidentally removed too much of the blur.
Removing Halos with the Brush Tool
In addition to accidentally blurring areas we don’t want blurred, Photoshop may also create a bit of a halo around those areas.
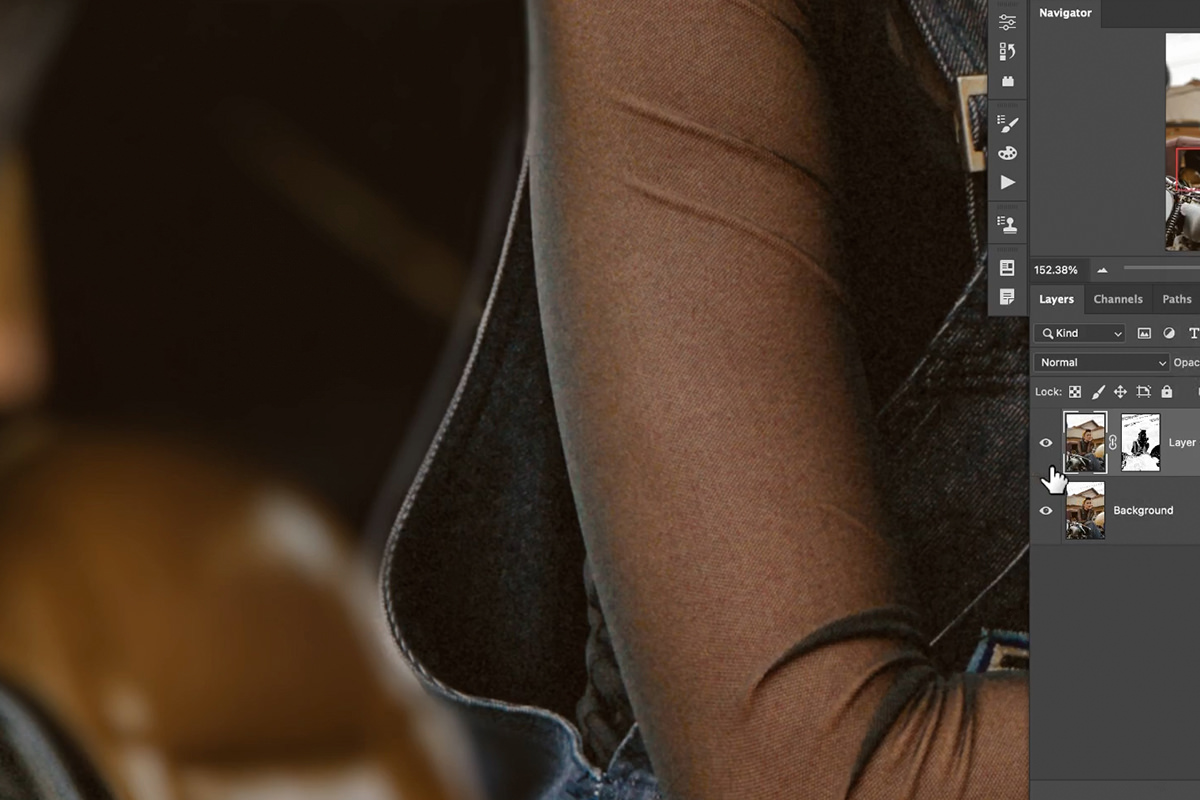
For example, this area of the subject’s clothing was blurred by the Neural Filter. But even after we fix the main problem, a visible halo is still visible from the blur effect.
The easiest way to fix this particular issue is to use the Brush Tool to paint over it.
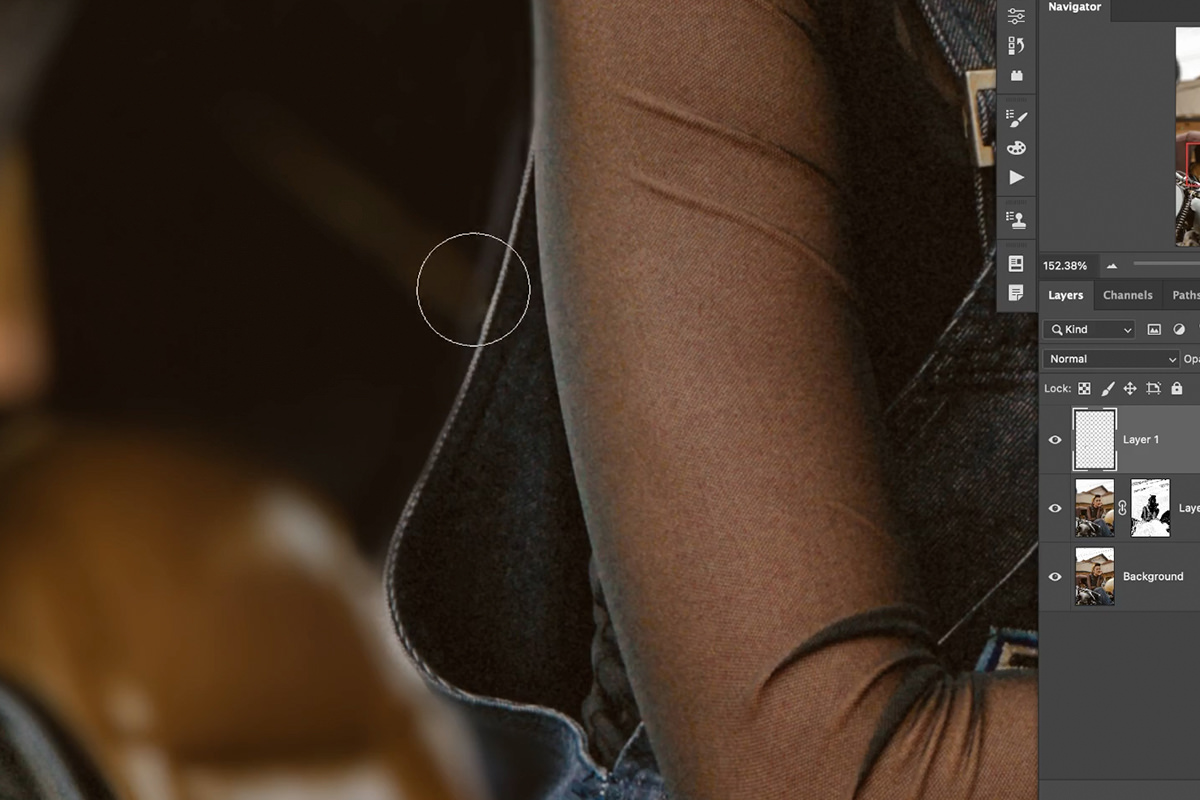
Create a New Layer, select the Brush Tool, and Sample a color from just outside of the halo area. Then simply paint over the halo until it starts to disappear. If you accidentally over-paint, use a Layer Mask to hide any excess.
Adding Noise
Now that we’ve fixed up the few problem areas, there’s one more thing we can do to make the overall blur effect look photorealistic.
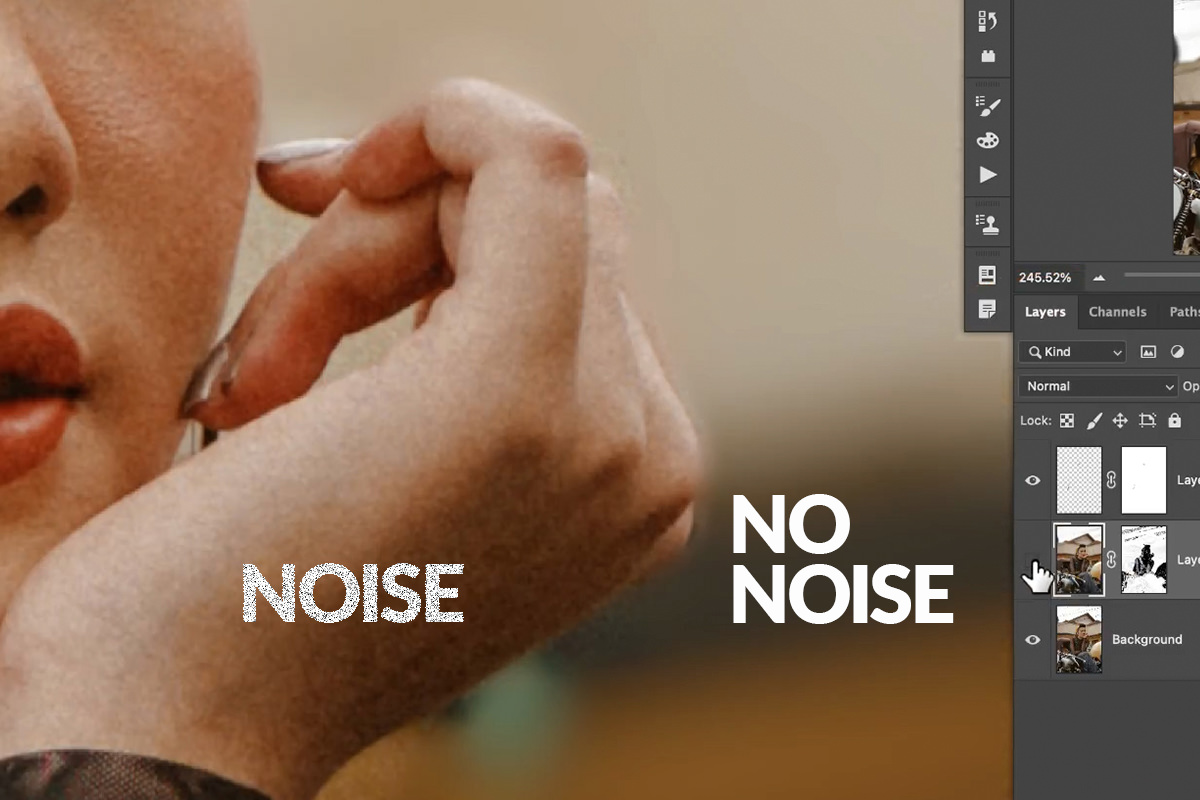
Zooming in, notice the noise in the original image and the lack of noise in the areas that have been blurred. If this were photographed, the blurred areas would still contain the same amount of noise as the in-focus areas.
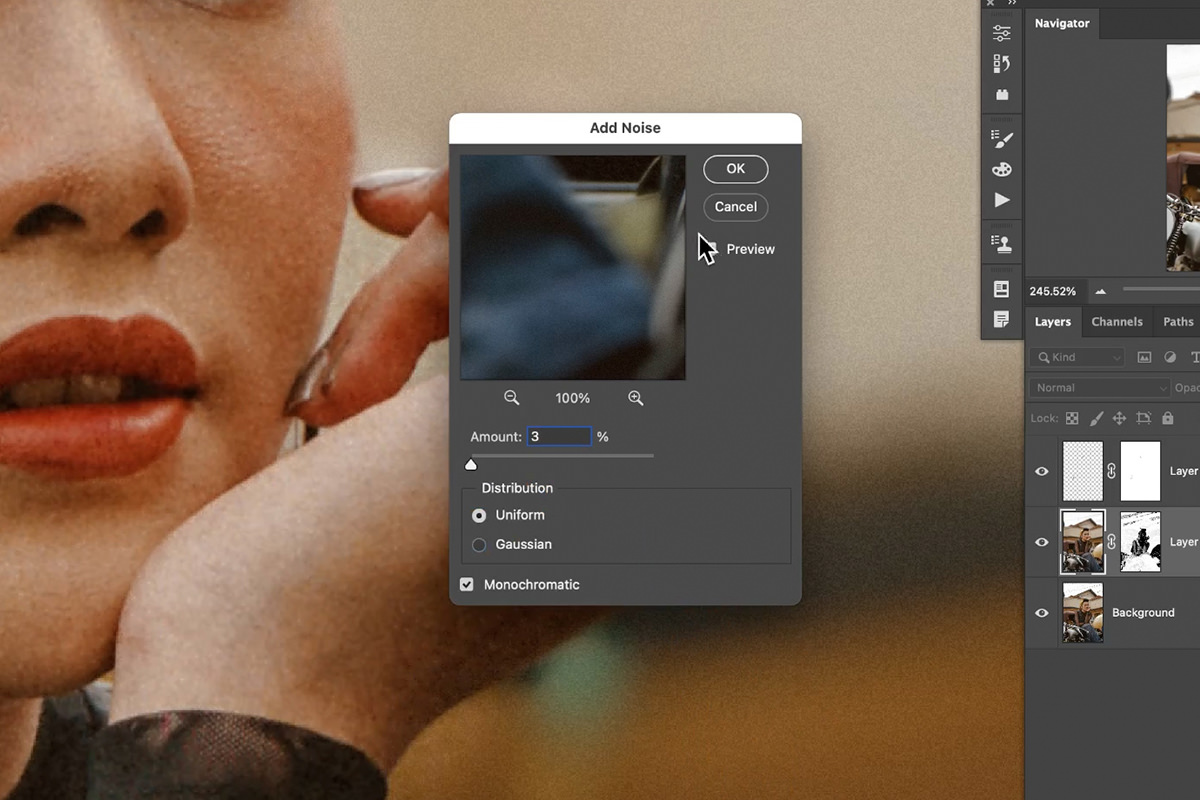
Click on the blur effect layer, open the Filter Menu, select Noise, and then click on Add Noise. Lower the effect until it matches the amount of noise present in the original photograph.
And you’re done! While the tool did require us to put some manual work in, the overall effect looks amazing and still saved us a ton of time.