Download Sample Images
Description
Opening Photoshop for the very first time can be overwhelming. Even if you’ve used the software before, there are likely some tools and features you’re yet to discover because they’re buried in a menu somewhere.
In our first day of 30 Days of Photoshop we take you on a tour of Adobe’s flagship software, explaining every major tool, menu, and option!
This is Day 1 of our 30 Days of Photoshop series. Follow along with all 30 episodes as we explore the the magic of Photoshop together!
Watch Next
30 Days of Photoshop

Sign up to receive email updates to keep you going, sample images to follow along, and a printable calendar to keep track of your progress!
Share
The Tour Begins Here.
What is Photoshop?
At its core, Photoshop is a software designed to help us edit photos. And when comparing it to other photo editing software, like Lightroom, Photoshop gives us a lot of the same capabilities. Exposure adjustments, color grading, and blemish removal are all possible in both. But Photoshop goes far beyond those relatively basic adjustments, offering a wide variety of tools that help us sculpt our images into anything our imaginations dream up.
Photoshop is powerful and versatile. Using it, we can remove every wrinkle from a piece of clothing, smooth out highlights and shadows on a person’s skin, create amazing illusions like double exposures or dispersion effects, and build surreal scenes of alien worlds or mysterious beings. But if you’ve never used Photoshop before, where do you start?
No matter what sort of images you want to make, whether they be beautiful wedding photos for clients or fantastic scenes for an art gallery, there are some common tools that will help you get started. But before we can get into those tools and techniques, we need to know how to get around this deep and robust program. So let’s take a look!
The File Menu
Like every other piece of software out there, Photoshop utilized a File Menu at the top of the screen which allows us to access any part of the software we need. Think of it like a table of contents. There are often faster ways to access certain tools or options, via keyboard shortcuts or more accessible buttons, but when we get lost or need to access less common items, the File Menu is our main support structure.
Here’s a basic breakdown of the File Menu* in Photoshop:
- Photoshop: Customize Photoshop preferences.
- File: Open, save, and manage files. Export your photos.
- Edit: Undo and redo. Transform options. Keyboard shortcuts.
- Image: Change image size and color mode.
- Layer: Create new Layers, group Layer, add Layer Masks, and merge and lock Layers.
- Type: Make changes and adjustments to text (change font etc).
- Select: Select specific parts of a photo.
- Filter: Apply blurs, noise, sharpening, liquify and other more stylized effects.
- 3D: Adjust settings for 3D elements.
- View: Change zoom, show rulers and guides, and turn on snap functionality.
- Window: Choose windows, tools, and panels that you want to be visible.
- Help: Get help using Photoshop. Search to find a specific tool or option.
*There will be slight differences between the Mac and Windows layouts. We’re using the Mac layout for reference.
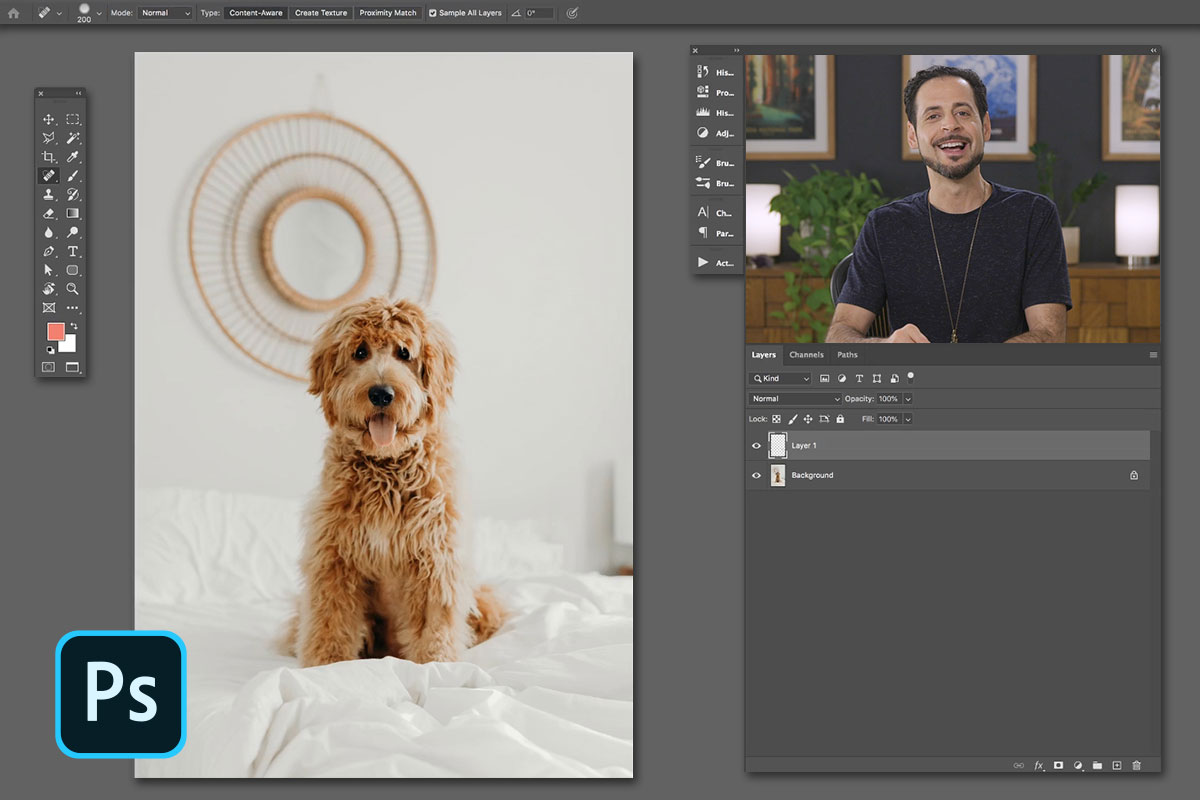
The Tool Menu
On the left side of the screen, you’ll find the tool menu. This menu provides quick access to all of the major tools by simply clicking on its associated icon (Almost all of the tools have a keyboard shortcut assigned to it for even quicker access.) It is also customizable, allowing you to add and remove tool shortcuts so that it only displays what you want.
Tool Options
When toggling a tool, the tool options menu (located just below the file menu) will provide a number of options to adjust how the tool will function. These are incredibly important (and we’ll cover a lot of these in-depth as we go through each day), providing an important level of flexibility and customization so that you get the exact effect you need.
Panels
The Layers Panel is the foundation of Photoshop. This window displays every Layer in your project, shows the order in which they appear (from top to bottom), and gives you options to change how they interact with one another. Once you understand how Layers work, you’ll be well on your way to mastering everything Photoshop has to offer (Which is why we cover Layers on Day 3 of 30 Days of Photoshop.)
Channels and Paths are the other two default panels in Photoshop. Though not used nearly as much as Layers, they provide advanced functionality, especially for making super accurate selections.