
Professionally Remove any Background from an Illustration, Text, or Graphic in Photoshop
-

-
Add to
favorites
Download Assets
This tutorial includes 2 sample images, 2 sample PSDs and 1 PDF guide. Downloads are free with a PHLEARN account.
- Download the sample images and PSDs from every free tutorial on PHLEARN
- New free tutorials published every week
- One free account — sign up once, then download anything
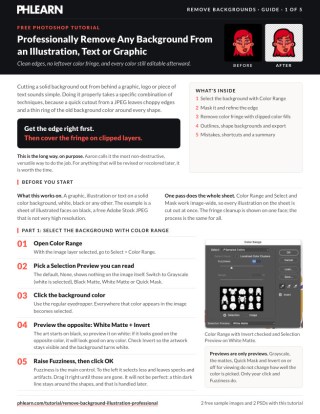
Free PDF Guide · 5 Pages
This Tutorial as a Step-by-Step PDF
The guide walks through Select > Color Range with Invert checked, masking the background, refining the edge in Select and Mask, removing color fringe with the Magic Wand, a 3-pixel Expand and clipped Solid Color fill layers, a 10-pixel outline, centering a shape, then cropping a copy and exporting a transparent PNG. Keep it next to your keyboard.
description
To remove background from an illustration properly, Select Color Range does the first pass and a clipping mask kills the color fringe the edge leaves behind.
Cutting a solid background out from behind a graphic, logo or piece of text sounds simple, but doing it properly — clean edges, no leftover color fringing, everything still editable afterwards — takes a specific combination of techniques. This covers the whole process: the initial cutout with Select Color Range, edge refinement in Select and Mask, a non-destructive way to kill color fringe using clipping masks and solid color fill layers, and exporting it correctly for the web.
Enjoying This Free Tutorial?
We publish a new free tutorial every week, each one with sample images and PSDs you can download and follow along with. Sign up and they land straight in your inbox, along with early word on sales, events and subscriber-only offers.
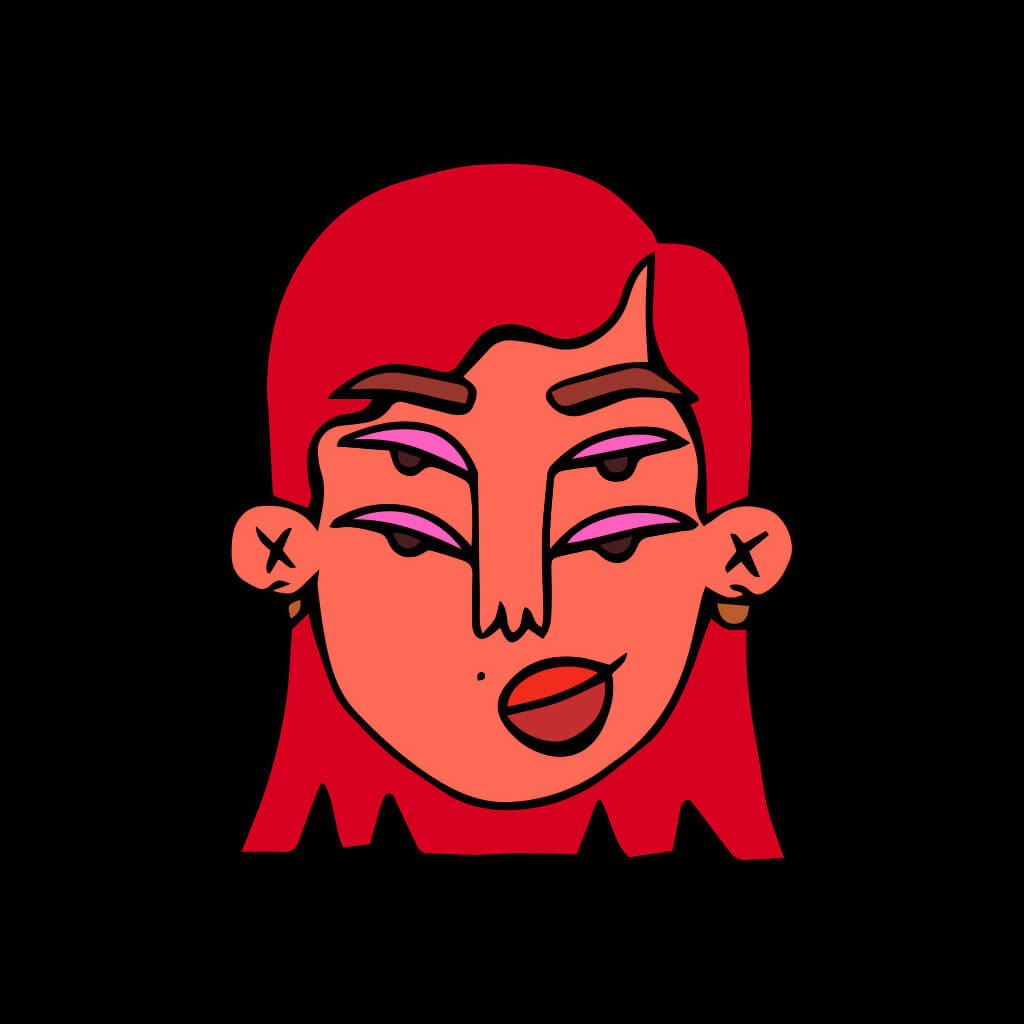
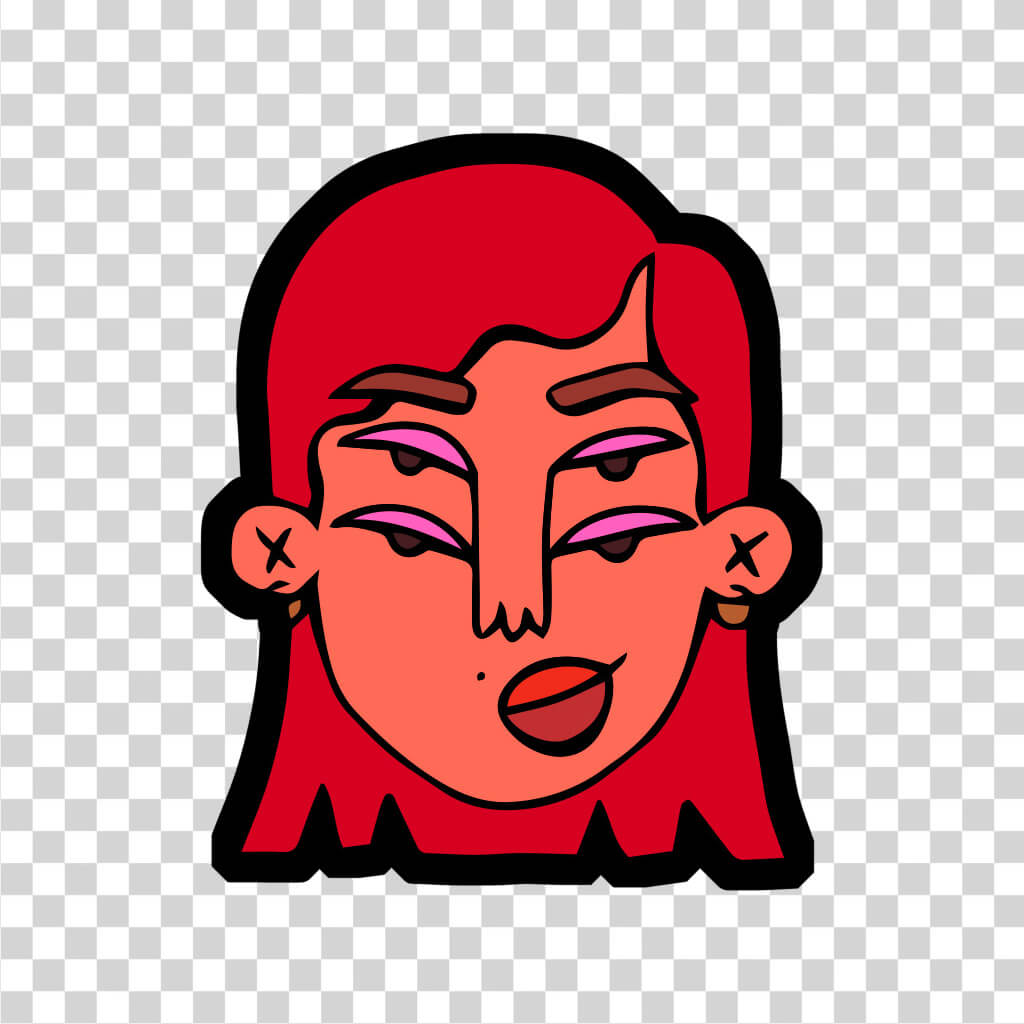
How to Professionally Remove a Background from an Illustration, Text, or Graphic
Cutting a solid background color out from behind a graphic, logo, or piece of text sounds simple, but doing it at a genuinely professional level — clean edges, no leftover color fringing, every element infinitely editable afterward — takes a specific combination of techniques. This walkthrough covers the complete process: an initial cutout with Select Color Range, edge refinement with Select and Mask, and then a non-destructive method for eliminating leftover color fringe using clipping masks and solid color fill layers, finishing with proper export for the web.
Remove Background With Select Color Range
Whether a graphic sits on a white, black, or any other solid background, Select Color Range is the starting point for isolating that background color as a selection.
-
Open Select Color Range
Go to Select > Color Range with your background layer active.
-
Set Selection Preview to Grayscale
Change the Selection Preview option to Grayscale so you can see exactly what’s selected (shown in white) and what isn’t (shown in black) as you click around the image.
-
Click the Background Color to Select It
Click directly on the background color with the regular eyedropper. Anywhere that same color appears throughout the image becomes selected.
-
Adjust Fuzziness for a Cleaner Selection
Drag the Fuzziness slider to the right to expand how much of the similar color range gets included, refining the selection until the background reads as fully white in the grayscale preview.
Using Invert and the Matte Preview Modes
Checking the Invert box flips which areas count as selected. Leave it checked, as in the video: with Invert on, the artwork stays selected and the background is left out, which is why the layer mask in the next step hides the background rather than the art. The White Matte and Black Matte preview modes show your selection composited against a solid white or black backdrop, giving a quick sense of how the cutout will actually look once the background is replaced.
Loading the Selection into a Layer Mask
Once the background color is accurately selected, turning that selection into a layer mask hides it non-destructively, leaving the original pixels untouched underneath.
-
Click the Layer Mask Icon
With your selection active, click the layer mask icon at the bottom of the Layers panel to hide the background.
-
Add a Separate Background Layer
Go to Layer > New Fill Layer > Solid Color to add a new background color layer beneath your cutout, rather than baking a background color directly into the original layer.
Refining the Edge with Select and Mask
A selection made from a lower-resolution or compressed source image often leaves a jagged, uneven edge that needs smoothing before it looks professional.
-
Open Select and Mask on Your Layer Mask
Click on your layer mask, then go to Select and Mask, and switch the view to On Layers for a real-time preview.
-
Raise Edge Detection Radius Slightly
In the Edge Detection section, raise the Radius a small amount to help smooth out choppy, jagged edge detail.
-
Balance Feather and Contrast
In Global Refinements, add a small amount of Feathering to soften the edge, then add back some Contrast to keep that softened edge from looking too blurry — the two work as a pair, not independently.
-
Shift the Edge In or Out as Needed
Use Shift Edge to nudge the boundary in or out slightly, watching for whether sharp corners start rounding out too much if you push the refinement too far.
-
Output to Your Existing Layer Mask
Set the Output Settings to Output To: Layer Mask so the refinement updates your existing mask rather than creating a new layer.
Why This Step Doesn’t Fully Solve the Problem
Select and Mask dramatically improves the quality of the edge itself, but on a lower-resolution source image it typically leaves a thin ring of the original background color visible around each shape — a leftover halo effect that needs its own dedicated fix, covered next.
Eliminating Color Fringe with a Clipping Mask
The thin edge of leftover background color left after Select and Mask needs to be covered up with fresh color, and a clipped layer is the non-destructive way to do it.
-
Create a New Layer Above Your Cutout
Add a new, empty layer directly above your masked subject layer.
-
Sample and Paint Over the Fringe
Press B for the Brush tool, hold Alt/Option to sample a nearby clean color, and paint roughly over the area with the color fringe on this new layer.
-
Turn the New Layer into a Clipping Mask
Right-click the new layer and choose Create Clipping Mask (or press Alt/Option + Ctrl/Cmd + G). This makes the painted layer visible only where the layer beneath it is already visible, so a rough paint job never spills outside your subject’s shape.
Why a Clipping Mask Beats Painting Directly on the Layer
Painting directly onto your original cutout layer permanently alters those pixels, with no easy way back to the unedited version. A clipped layer sits entirely separate from the original, so it can be hidden, deleted, or repainted at any time without any risk to the underlying image.
Using the Magic Wand and Expand Selection for Precision
Painting freehand over fringe works, but it risks accidentally covering fine detail; selecting the exact color first and expanding that selection slightly gives a far more precise, repeatable result across many shapes.
-
Select a Color Area with the Magic Wand Tool
Press W for the Magic Wand tool, set Sample Size to a 5×5 average, and make sure Sample All Layers is checked. Click a color area, holding Shift to add matching areas elsewhere in the image.
-
Expand the Selection by a Few Pixels
Go to Select > Modify > Expand and enter 3 pixels (Aaron tries 2, then settles on 3 so it clears the dark line everywhere) — just enough to push the selection out past the fringe without noticeably altering the shape.
-
Fill the Expanded Selection with the Sampled Color
On a new clipped layer, sample the correct color with the eyedropper and use Edit > Fill (or Shift + Delete) to fill the expanded selection precisely, covering the fringe with a clean edge.
Upgrading to Solid Color Fill Layers
Filling a selection directly with color works, but a solid color fill layer accomplishes the same fix while staying infinitely editable afterward.
-
Sample the Correct Color First
With the Magic Wand tool, select and expand the color area exactly as before, then sample that same color as your foreground color.
-
Add a Solid Color Fill Layer
Go to Layer > New Fill Layer > Solid Color. Because a selection was active, that color and mask both load automatically into the new fill layer.
-
Clip the Fill Layer to Your Subject
Right-click the new fill layer and choose Create Clipping Mask so it only affects the area of your cutout beneath it.
-
Repeat for Every Distinct Color Area
Work through each remaining color region — hair, skin, eyebrows, and so on — the same way: select with the Magic Wand, expand slightly, and clip a solid color fill layer on top.
The Real Advantage of Solid Color Fill Layers
Because each color area lives on its own solid color fill layer, double-clicking that layer’s color swatch at any point lets you change it instantly — turning red hair blue, for instance — without touching the underlying selection, mask, or edge quality at all. This turns what started as a flat, uneditable JPEG into a fully client-revisable graphic.
Adding Outlines and Centered Shape Backgrounds
With a clean cutout in hand, the same selection techniques can add finishing touches like a colored outline or a centered circular background for use as a social media icon.
-
Select Your Full Subject and Expand for an Outline
Hold Ctrl/Cmd and click your subject’s layer mask thumbnail to select its full shape, then expand that selection (10 pixels, for example) to create room for an outline.
-
Fill the Outline Selection Below Your Subject
Add a solid color fill layer from that expanded selection and position it beneath your subject layer, so it reads as an outline rather than covering the subject.
-
Add a Shape and Center It with Alignment Tools
Draw an ellipse or rectangle with the Shape tool, then Ctrl/Cmd-click your subject’s mask to reselect it, choose the Move tool, and use the alignment options to center the shape vertically and horizontally within that selection.
Cropping and Exporting for the Web
The final step is trimming the canvas to just your subject and saving out a file that preserves transparency. Do it in a copy: duplicate the layers into a new document first (see below), then crop and export that copy.
-
Select Your Subject and Crop to It
In the copy, hide the background layers and Ctrl/Cmd-click the outline layer’s mask to select the subject’s exact bounds, then go to Image > Crop to trim the canvas precisely to that selection.
-
Export as a PNG with Transparency
Go to File > Export > Export As, change the format from JPEG to PNG, and make sure the Transparency option is checked before saving.
-
Duplicate to a New Document Before a Permanent Crop
Do this before the crop above. To keep your original, uncropped working file intact, shift-click to select all the relevant layers, right-click and choose Duplicate Layers into a new document, and crop that separate copy instead of your master file.
Why Crop a Copy Instead of the Original
Using Image > Crop permanently discards any pixel information outside the crop boundary, unlike a non-destructive crop tool setting that can be undone later. Duplicating your finished layers into a new document before cropping means your original master file keeps every element intact and reusable for a different crop or layout down the line.
Common Mistakes to Avoid
The most common mistake is stopping after Select and Mask and assuming the edge is finished — the leftover color fringe from a compressed source image needs its own dedicated clipping-mask pass to fully disappear. It’s also easy to paint fringe-covering color directly onto the original layer instead of a clipped layer above it, which permanently alters the image instead of leaving it fully editable and reversible.
Why This Approach Works
The whole technique is built around one principle: never destroy information you might need again. Select Color Range and the Magic Wand tool identify exactly what needs to change without touching a single pixel directly; layer masks hide rather than delete; and clipping masks confine any color fix to precisely the shape it needs to cover, no matter how roughly it’s painted.
Solid color fill layers push that same idea one step further, turning a color choice into a setting you can revisit indefinitely rather than a decision baked permanently into pixels. That’s what separates a quick, disposable cutout from a genuinely professional deliverable — one where a client asking for a different hair color, a new background shape, or a fresh outline color is a five-second double-click away instead of a complete redo.
Final Thoughts
This is a longer, more involved process than a simple background removal, but every extra step is there to make the result infinitely more flexible afterward: Select Color Range and Select and Mask handle the shape and edge quality, clipping masks and solid color fill layers eliminate fringe while staying fully editable, and a duplicated, cropped copy keeps your original master file untouched. For a one-off graphic this might be more than you need, but for anything that’s going to be revised, recolored, or resized down the line, it’s worth the extra time up front.
Quick Reference: Keys, Menus and Settings
- Select the backgroundSelect > Color Range, click the background, raise Fuzziness, Invert checked
- Hide itLayer mask icon; Layer > New Fill Layer > Solid Color (white) underneath
- Refine the edgeSelect > Select and Mask: On Layers, Color Aware, small Radius, Feather with Contrast, Output To: Layer Mask
- Select one colorW, 5 by 5 Average, Sample All Layers; Shift-click to add; Select > Modify > Expand 3 px
- Clip a color fillSolid Color fill layer, then Alt/Option + Cmd/Ctrl + G
- Outline and shapeCmd/Ctrl-click the mask, Expand 10 px; V and the align buttons center a shape on a selection
- Crop and exportDuplicate Layers to a new document, Image > Crop, File > Export > Export As: PNG, Transparency checked
Free Downloads
Follow Along on the Same Illustration
Get the illustrated faces as a JPEG and a PNG, the finished layered PSD, the cropped PSD and the 5-page PDF guide. Free with a PHLEARN account.
Removing Backgrounds From Graphics: Common Questions
What kind of background does this technique remove?
A solid color background behind a graphic, illustration or text, whether it is white, black or any other color. The example is a sheet of illustrated faces on black, from a JPEG that is not very high resolution.
How do I select a solid background in Photoshop?
Go to Select > Color Range and click the background with the regular eyedropper. Drag Fuzziness to the right until the specks and artifacts are gone, then click OK.
Why is Invert checked in Color Range?
With Invert checked, the artwork stays selected and the background is left out, so clicking the layer mask icon hides the background. The previews (Grayscale, Black Matte, White Matte, Quick Mask) only change how you see the selection, not the selection itself.
Why is there a thin dark line around my cutout?
It is a ring of the original background color, common with compressed JPEGs. Select and Mask makes the edge smoother but does not remove it; cover it with fresh color on clipped layers.
What Select and Mask settings smooth a choppy edge?
Click the mask, open Select and Mask and set View to On Layers. Use Color Aware for flat graphics, raise the Edge Detection Radius a little, balance a little Feather with Contrast, and set Output To: Layer Mask. Too much Feather rounds off sharp corners.
Why use a clipping mask instead of painting on the layer?
Painting on the artwork layer alters it for good. A clipped layer shows only where the layer below is visible, so a rough fix never spills past the edge, and you can turn it off or delete it any time. The shortcut is Alt/Option + Cmd/Ctrl + G.
How far should I expand the selection to cover the fringe?
Go to Select > Modify > Expand. Aaron tries 2 pixels, then settles on 3 so it clears the dark line everywhere; 10 would run into neighboring shapes. Once the fill is clipped, the shape stays exactly as it was.
Can I change a color in the graphic later?
Yes, if each color is on its own clipped Solid Color fill layer. Double-click the layer’s swatch and pick a new color, red hair to blue for example, and the edges stay perfect.
How do I save the cutout with a transparent background?
Duplicate the layers into a new document first, hide the background layers, Cmd/Ctrl-click the outline mask and choose Image > Crop. Then go to File > Export > Export As, change the format to PNG and check Transparency.
Are the sample files free?
Yes, with a free PHLEARN account. You get 2 sample images, 2 sample PSDs and 1 PDF guide: the illustration as a JPEG and as a PNG, the finished layered document, the crop file used for the export and a 5-page guide to the steps.
Master Photoshop, Lightroom and Photography
Join PHLEARN PRO for $12.99 a month or $99.99 a year. Cancel anytime, with a 100% money-back guarantee.





