

description
Almost everybody does this the hard way: draw an elliptical marquee, add a layer mask, then discover the subject is off-centre and start over — because the mask and the image are now locked together.
The Frame Tool solves it properly. It creates a container that holds your image, and the two stay independent: move the picture inside the circle, move the circle around the picture, swap the photo entirely, or add a stroke, without committing to anything. Then export it as a transparent PNG. It’s the difference between cropping a photograph and building a reusable element.
Enjoying This Free Tutorial?
We publish a new free tutorial every week, each one with sample images and PSDs you can download and follow along with. Sign up and they land straight in your inbox, along with early word on sales, events and subscriber-only offers.
Image Source
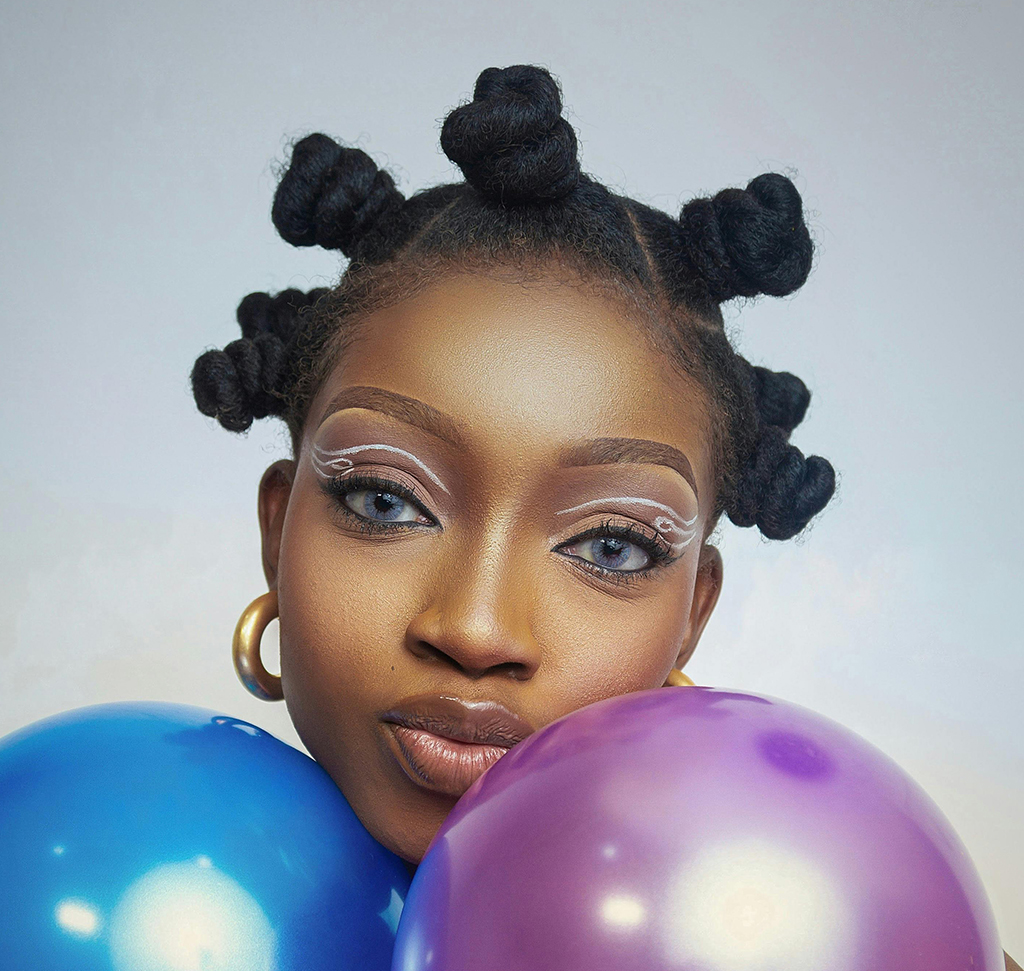

The Fastest Circle Crop in Photoshop Uses the Frame Tool
Almost everybody does this the hard way: draw an elliptical marquee, add a layer mask, then discover the subject is off-centre and start over, because the mask and the image are now locked together.
The Frame Tool solves that properly. It creates a container that holds your image, and the two stay independent — you can move the picture inside the circle, move the circle around the picture, swap the image entirely, or add a stroke, all without ever committing anything. It’s the difference between cropping a photograph and building a reusable circular slot.
Why a Frame Beats a Mask Here
The Image and the Crop Stay Separate
Click the frame and you’re moving the circle. Click the image thumbnail and you’re moving the photo inside it. That separation is exactly what an elliptical-marquee mask doesn’t give you.
Nothing Is Destroyed
The parts of the photo outside the circle are hidden, not deleted. Enlarge the frame later and they reappear.
The Frame Is Reusable
Once the circle is sized and positioned, you can drop a different photo straight into it. For a set of team headshots or a row of profile images, you build the frame once.
Build the Circular Frame
-
Unlock the Background Layer
Double-click the layer with the padlock icon and accept the name Layer 0. A locked background can’t go into a frame, and this is where most people get stuck before they’ve started.
-
Select the Frame Tool and Choose the Circle
Keyboard shortcut K. In the options bar at the top, pick the circular frame rather than the rectangular one.
-
Hold Shift and Drag to Draw a Perfect Circle
Zoom out slightly first so you have room outside the image to drag from. Shift constrains the frame to a true circle — without it you’ll get an ellipse, which is rarely what anyone wants for a profile picture.
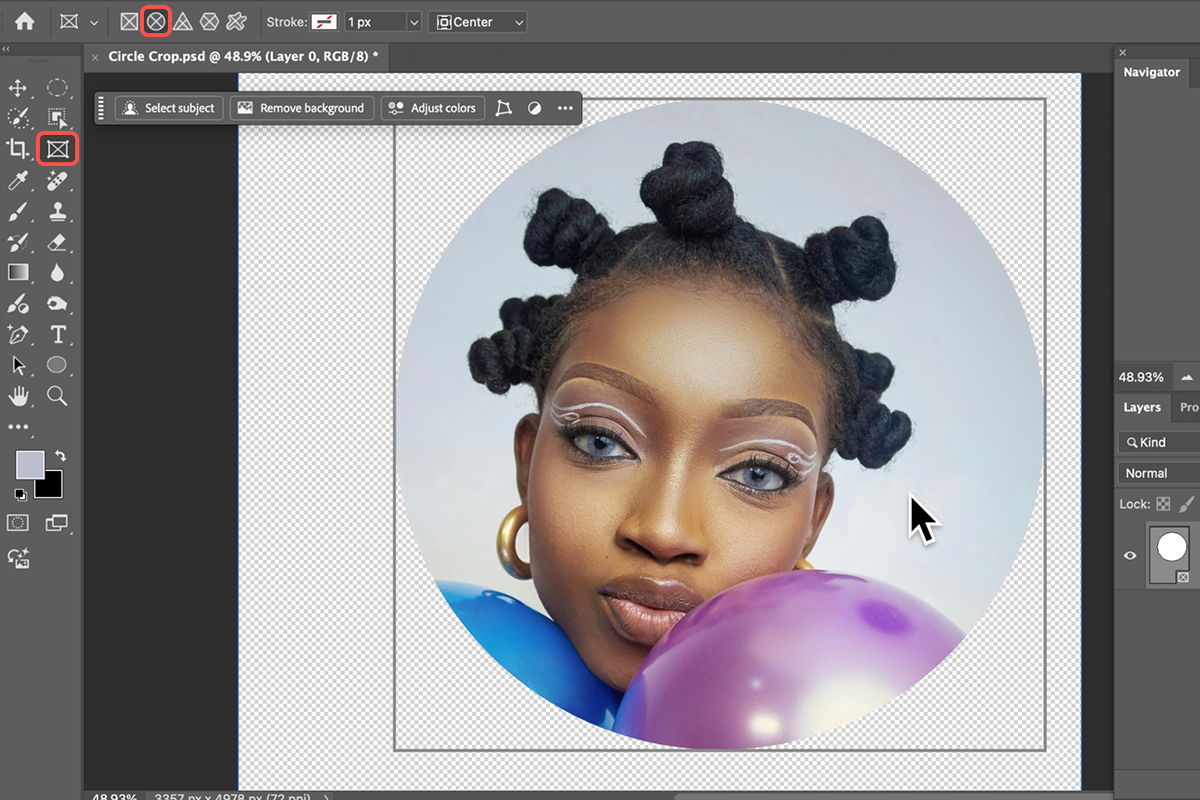
Position the Subject and Style the Edge
-
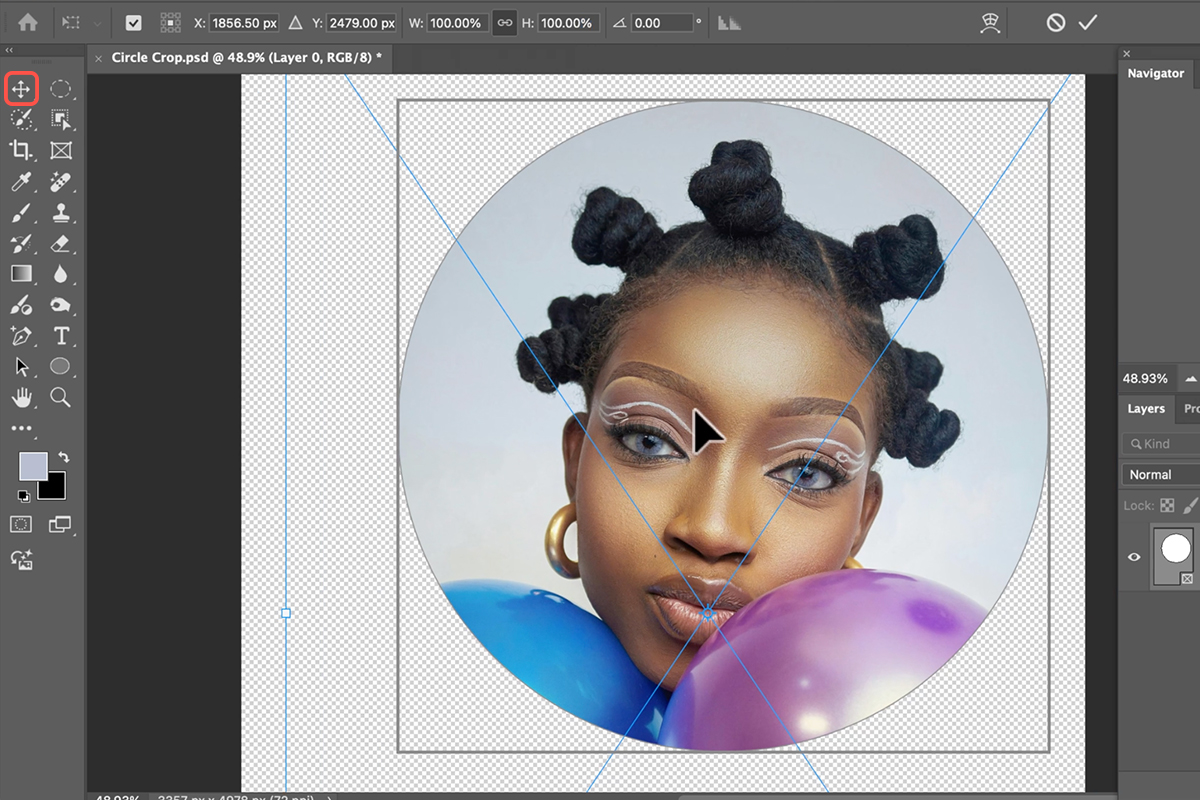
Move and Scale the Image Inside the Frame
The Move Tool (V) shifts the photo within the circle; Cmd/Ctrl + T resizes it. Watch the layers panel as you work — whether you have the frame or the image selected determines which one moves, and that’s the single most common source of confusion with this tool.
-
Add a Stroke From the Contextual Taskbar
If the taskbar isn’t showing, turn it on under Window > Contextual Taskbar. You can set the stroke’s colour, its weight, and whether it sits inside, centred on, or outside the frame edge. Outside keeps the full circle of image visible; inside crops into it slightly.
-
Swap the Image Whenever You Like
The same taskbar has a Replace Image option. The frame, its size, position and stroke all stay exactly as they are while a different photo drops into the slot — which is what makes this worth doing for a whole set rather than a single image.
Export With a Transparent Background
-
Select the Frame, Not the Image
In the Layers panel, the frame layer has two thumbnails. Click the one on the right — the frame — so it shows a white border. Selecting the image thumbnail instead exports the whole rectangular photo, which is the mistake that sends people back to redo this.
-
Right-Click the Layer and Choose Quick Export as PNG
PNG matters here: it’s the format that carries transparency. A JPEG will fill the corners with white and defeat the entire point.
-
Name It and Save
What comes out is a circular image with genuinely transparent corners, ready to drop onto a coloured background, a website, or a slide without a white box around it.
What Usually Goes Wrong
Forgetting to Unlock the Background
The Frame Tool simply won’t behave with a locked background layer. Double-click it first, every time.
Not Holding Shift
An ellipse that’s nearly circular looks like a mistake rather than a choice. Hold Shift while dragging.
Moving the Frame When You Meant the Image
Check which of the two thumbnails is selected before you drag. It’s the one thing about this tool that takes a few minutes to internalise.
Exporting as JPEG
No transparency, white corners, circle ruined. PNG, always — and check the frame is the selected thumbnail before exporting.
More Free Photoshop and Workflow Tutorials
If you’re building assets for the web or for print, these free tutorials go further:
- AI Dust Removal in Lightroom and Photoshop
- How to Add Color Gradients to Any Object
- How to Use Reference Image in Photoshop 2026
- How to Use Contrast and Clarity in Photoshop
Frames Are Worth Knowing Beyond Circles
The Frame Tool isn’t really a cropping tool — it’s a placeholder system. Build a layout with several frames, drop images into them, replace any of them at any point, and the layout never moves. That’s genuinely useful for mockups, contact sheets, social templates and anything you’ll produce more than once.
Which is the argument for learning it properly rather than reaching for the marquee-and-mask approach out of habit. Both make a circle; only one of them is still editable tomorrow.
Make One in the Next Two Minutes
Unlock the background, press K, pick the circle, hold Shift and drag, position the subject inside with the Move Tool, add a stroke from the Contextual Taskbar, then select the frame thumbnail and Quick Export as PNG. Download the two free sample images and follow it exactly — then build one frame and drop three different portraits through it, which is where the Frame Tool stops being a crop and starts being a template. For the rest of Photoshop’s layout and compositing toolkit, our PRO Photoshop Learning Path runs to 11 courses and 53 hours.







Enjoying This Free Tutorial? Go Further with PRO.
Unlock Full Sample Files, PSDs, and Hundreds of Masterclasses!

Download full project assets, original PSDs, and RAW images for every lesson
Unlimited access to our complete library of PRO Photoshop & Lightroom courses
Instant 4K Ultra HD streaming on all devices, anytime, anywhere
Full access to our entire library of Photoshop Actions, Presets, and LUTs
Flexible monthly and annual membership plans
Cancel anytime with zero hassle or commitments