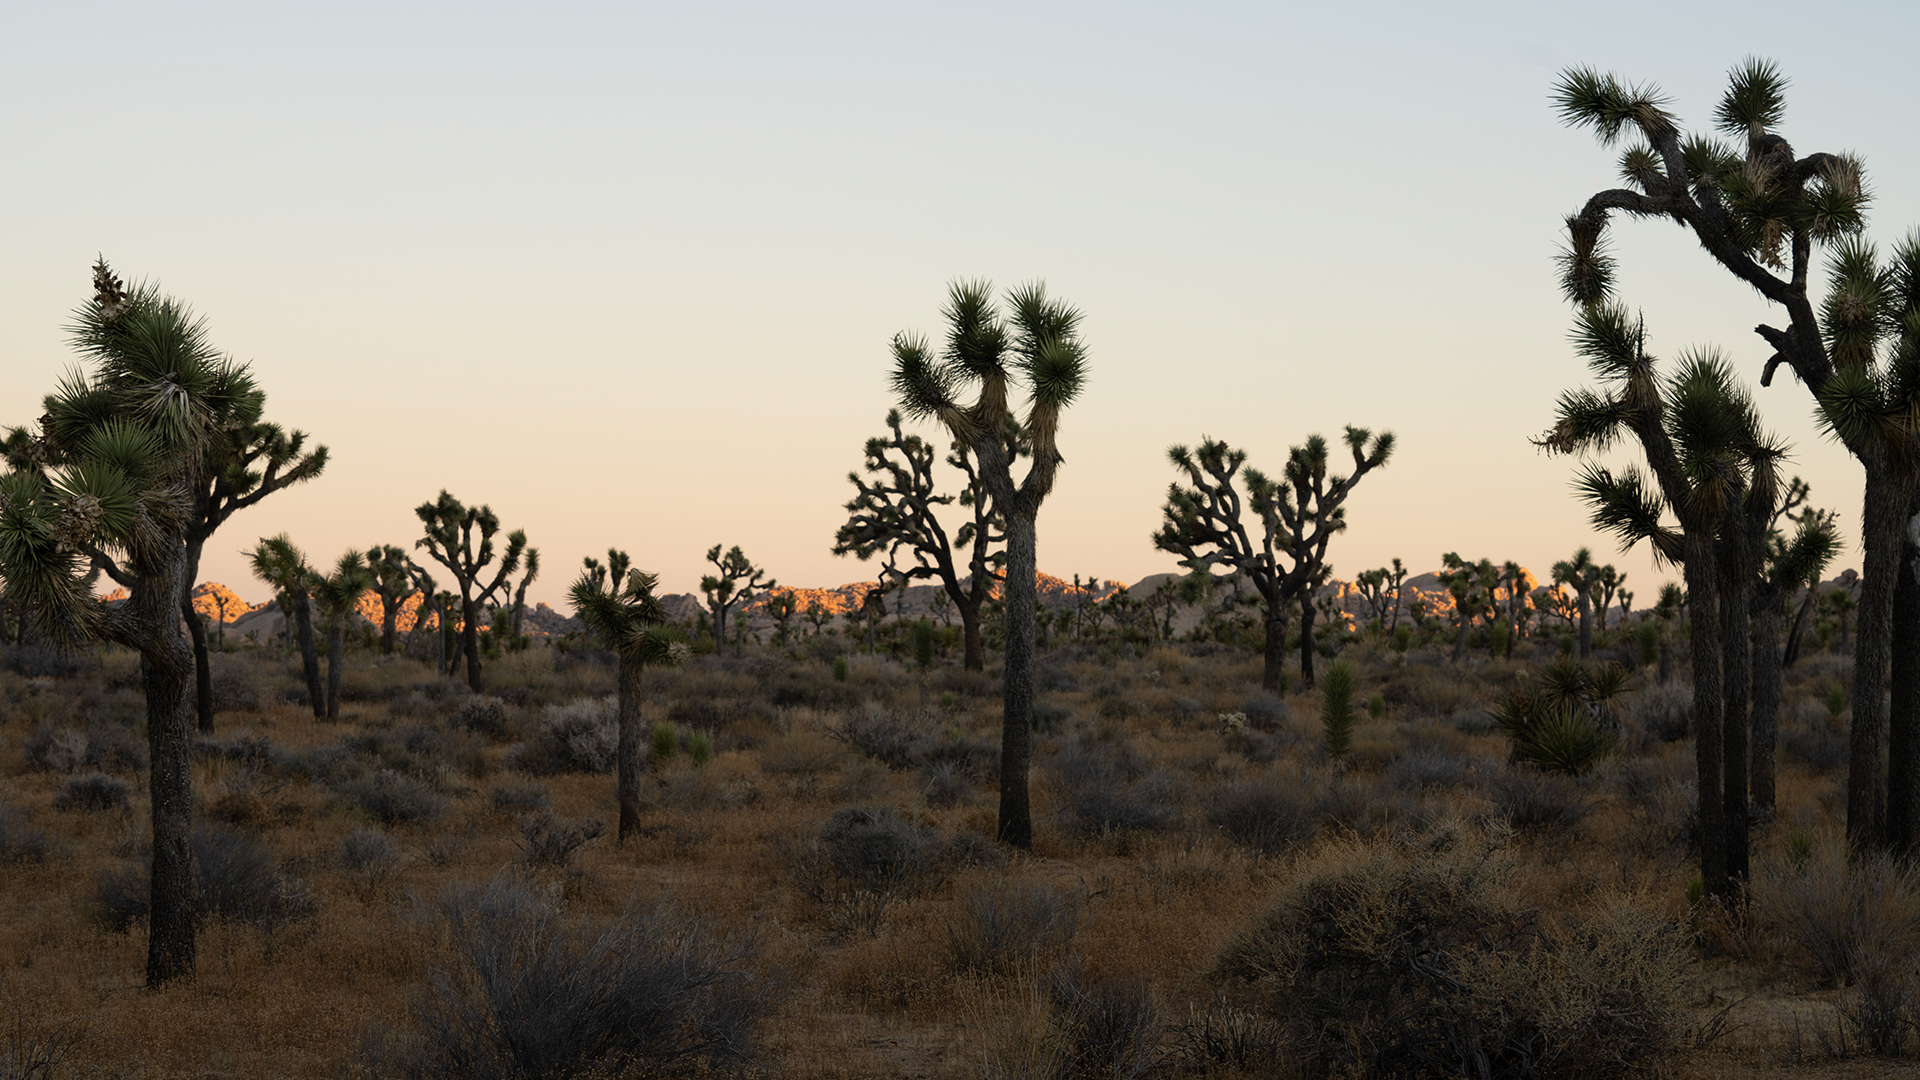

Clear every sensor dust spot in one click, then sync the detection across a whole shoot so each frame is scanned individually. Lightroom, Classic and Camera Raw.
Free practice files
Practice Files for This Tutorial
The 3 sample images, the Lightroom preset and the 3-page PDF guide from the video, so you can follow every step on the same files.
This tutorial includes 3 sample images (RAW files), 1 Lightroom preset and 1 PDF guide.

Create a free PHLEARN account to download, or log in if you already have one. One account gets you the files for every free tutorial.
description
Enjoying This Free Tutorial?
AI Dust Removal Finds Every Spot on the Sensor, in One Click
Sensor dust is the most tedious problem in photography. It’s invisible until you open the file, it appears in exactly the same place on every frame from that shoot, and cleaning it has always meant zooming to 100% and clicking your way across the sky one spot at a time.
Adobe’s dust removal feature scans the whole frame, finds every spot, and clears them in a single click. Better still, it syncs across an entire shoot — and because it re-runs on each image rather than copying a fixed set of positions, it catches the spots unique to each frame too. It’s in Lightroom, Lightroom Classic and Camera Raw, and works on both RAW and JPEG.
Why This Is Different From Syncing Spot Removals
The AI Re-Scans Every Image
Copying manual spot removals across a shoot pastes fixed coordinates, which only works if every frame is identical. Syncing dust removal tells each image to run its own detection, so each one gets cleaned according to what’s actually in it.
It Works on RAW and JPEG Alike
No conversion step, no restriction to camera-native files. Old JPEGs from a dusty trip clean up the same way.
It’s Non-Destructive Like Everything Else in the Panel
It’s a setting, not a bake-in. Toggle it off at any point and the spots come back — which is also the fastest way to check what it did.
Clean a Single Image
-
Open the Photo in Develop or Edit
The Develop Module in Lightroom Classic, or the Edit panel in Lightroom. Both have the same feature in the same place.
-
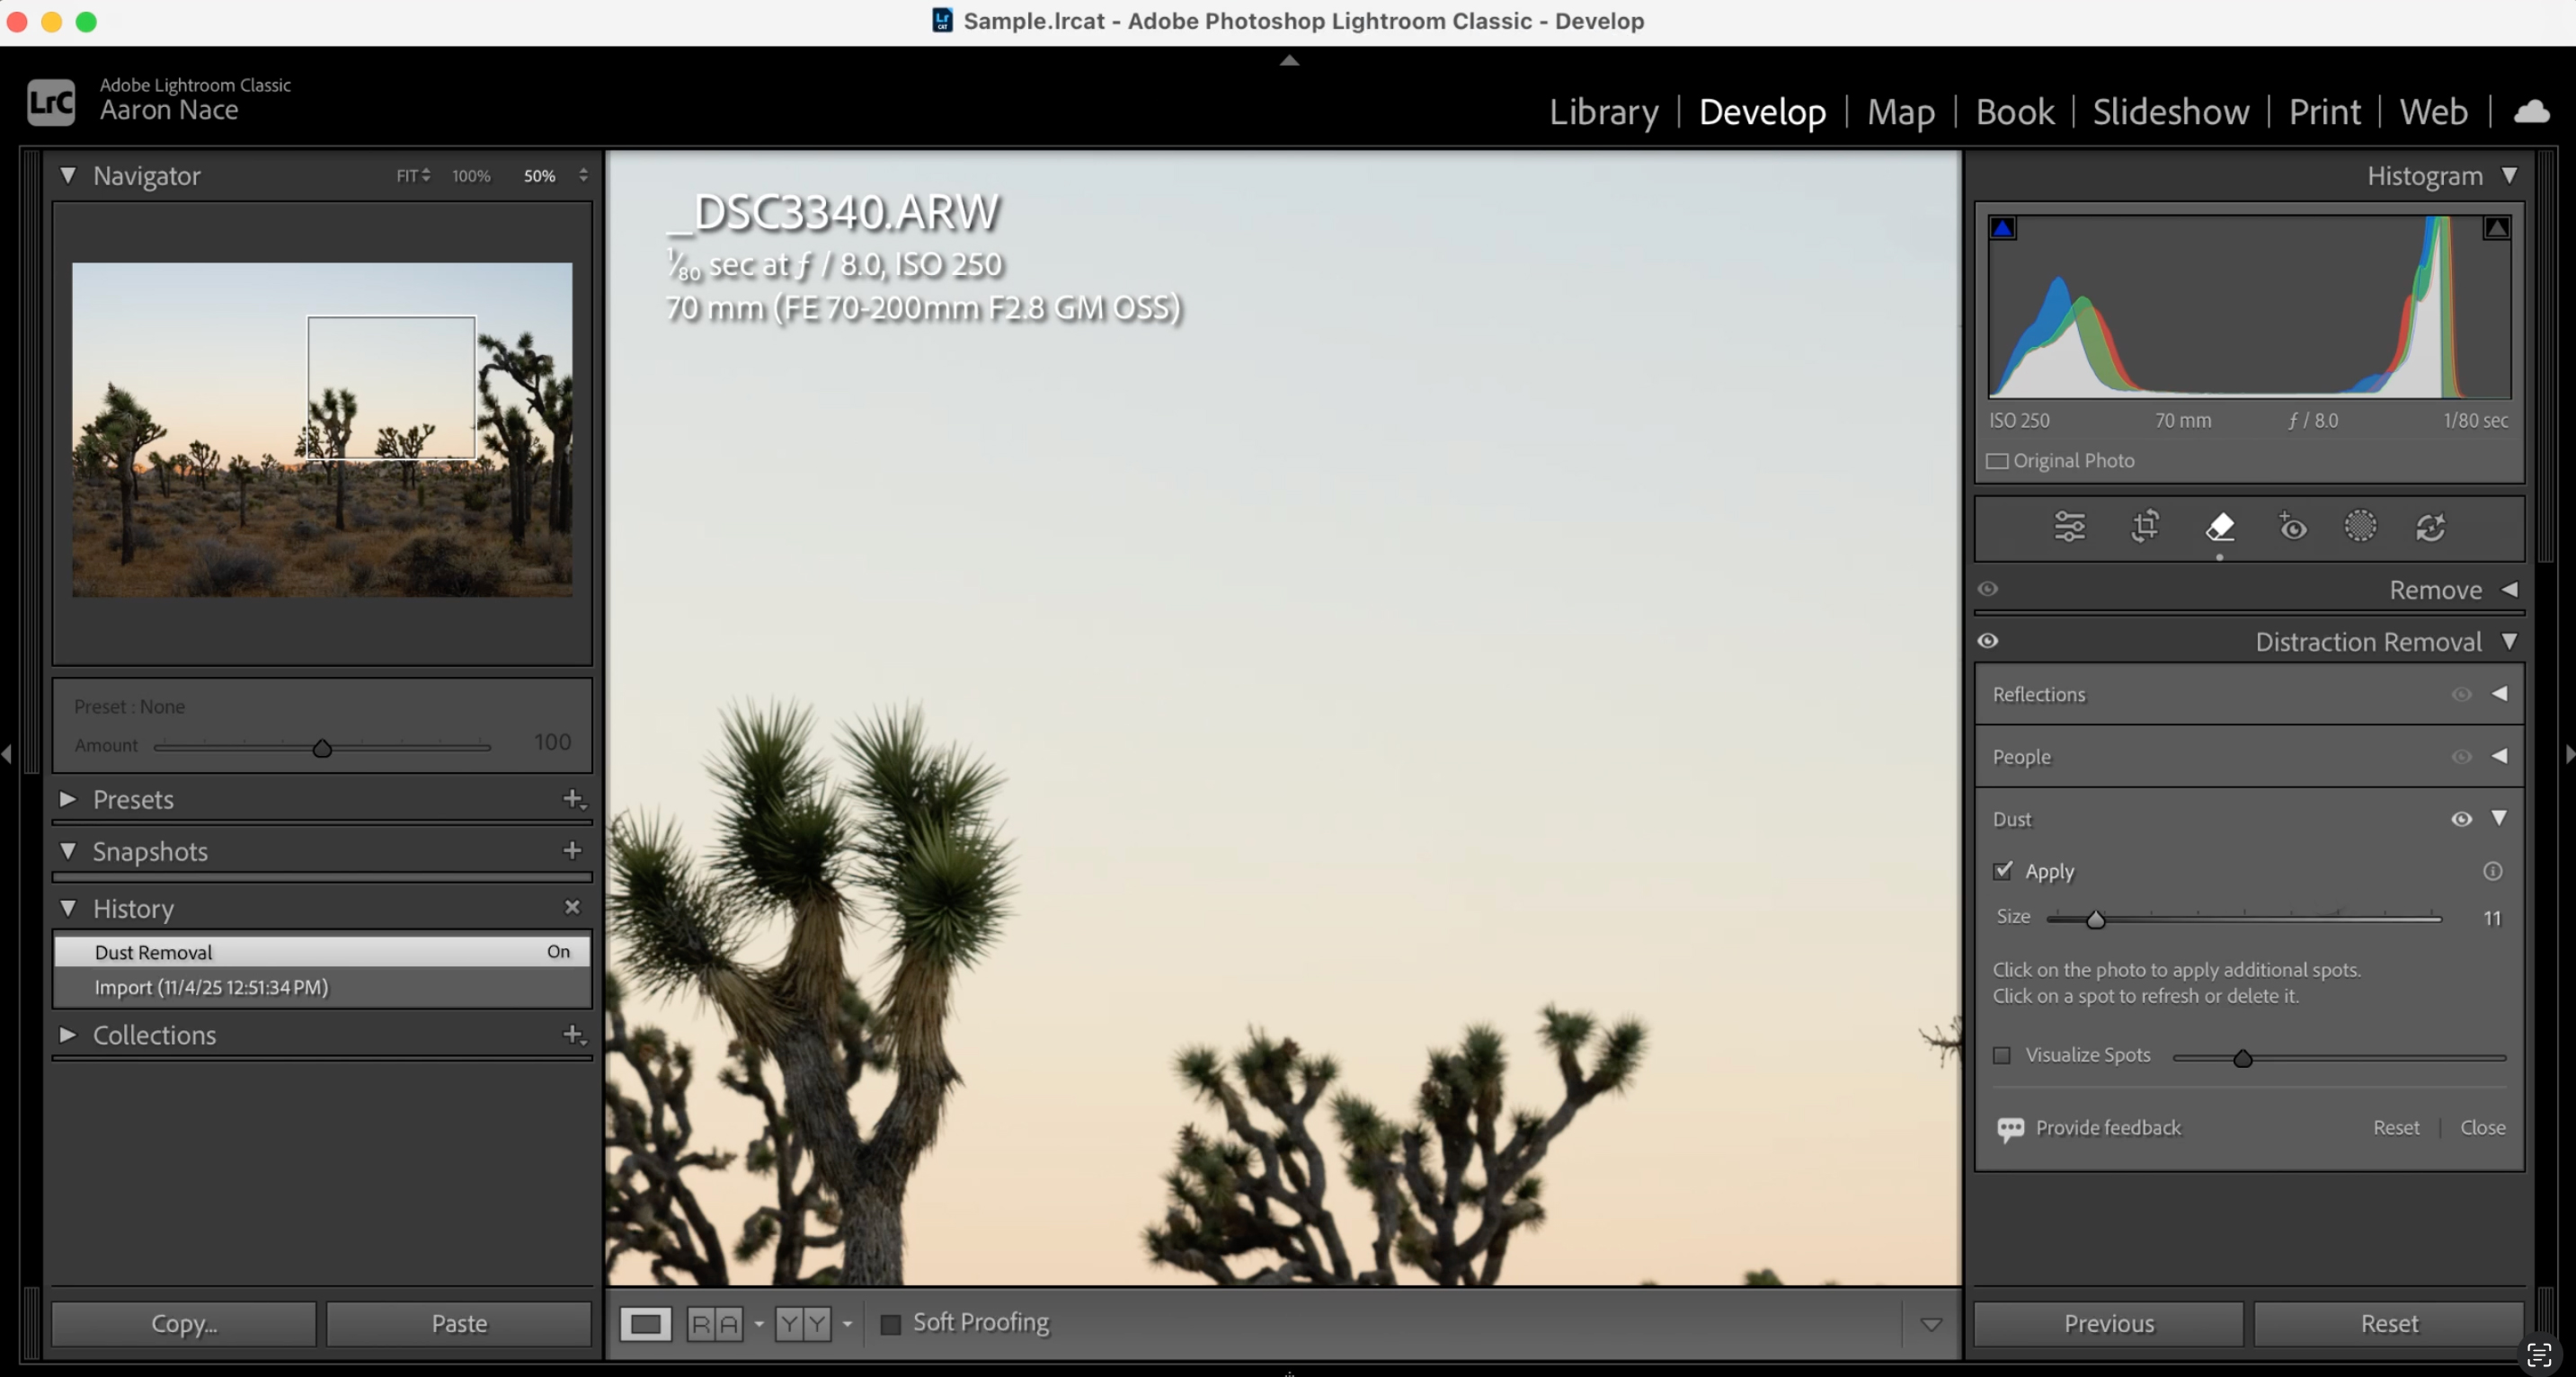
Select the Remove Tool
The spot-healing icon in the right-hand panel — the same tool you’d use for manual removals.
-
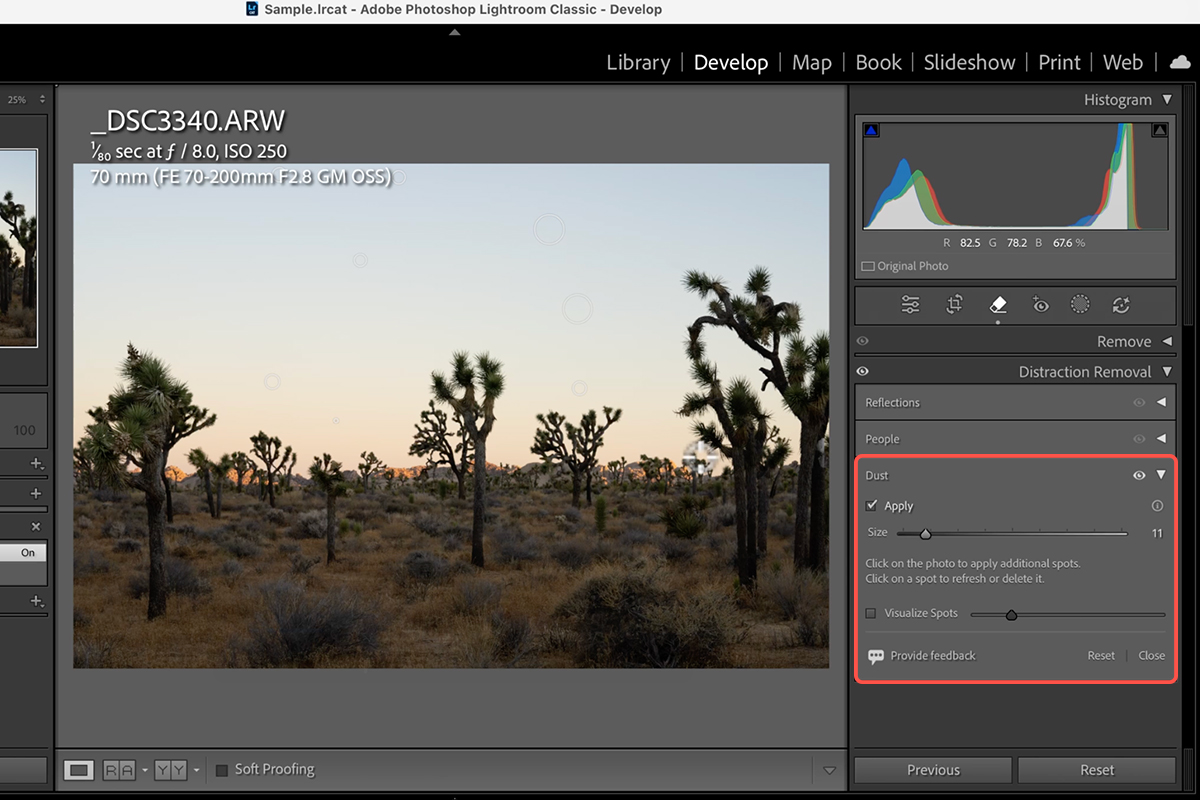
Find Dust Under Distraction Removal
The Distraction Removal section holds the automatic options. Dust is one of them.
-
Click Apply
Lightroom scans the whole frame and removes every spot it finds at once. On a sky with thirty spots this is the difference between four minutes and four seconds.
-
Zoom In and Check What It Caught
The removed spots are highlighted, so you can see exactly where it worked. Toggle the tool off and on to compare against the original — worth doing on the first image of a shoot to confirm it’s finding everything before you sync it across the rest.
Sync It Across the Whole Shoot
This is where the feature earns its place. Sensor dust affects every frame from the same session, so cleaning them one at a time is exactly the work worth automating.
-
Go Back to the Library Module
Grid view, in Lightroom Classic.
-
Select the Image You Already Cleaned
This is the master — the settings you sync come from whichever image you select first.
-
Ctrl/Cmd-Click the Rest of the Series
Add every other frame that needs the same treatment. All of them from that shoot, in practice.
-
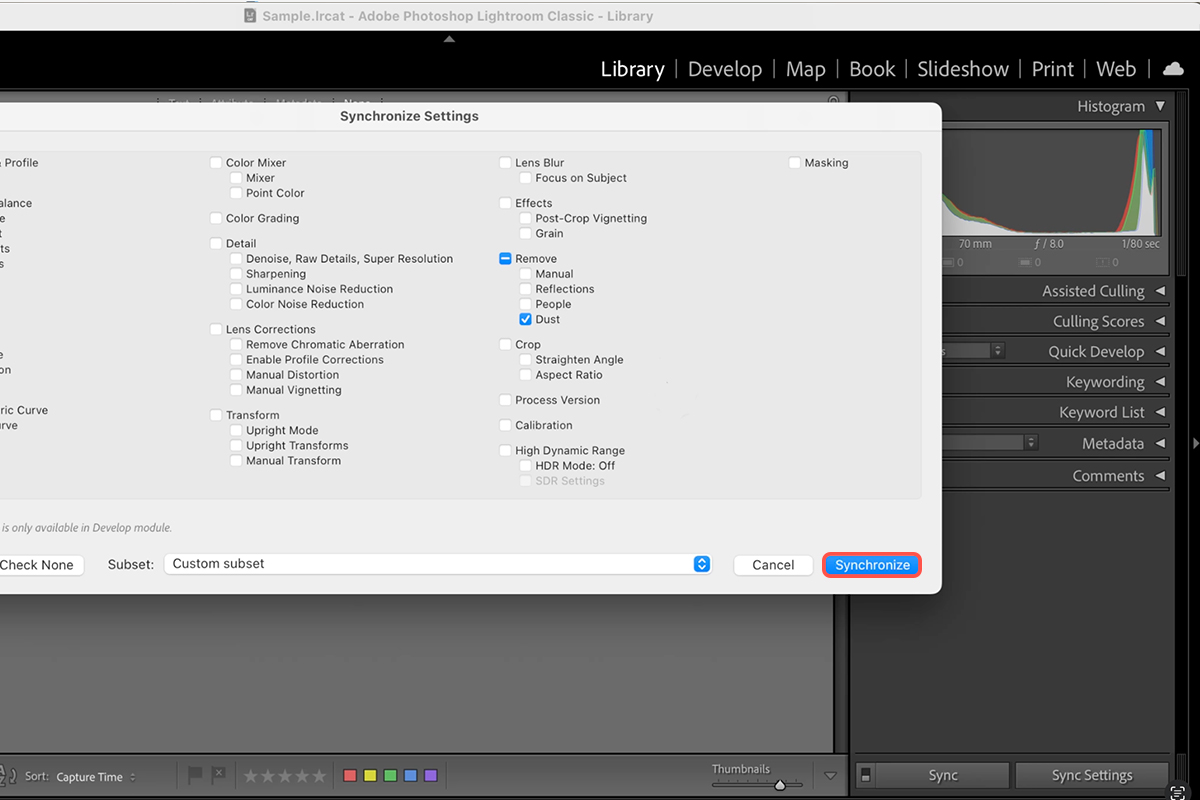
Click Sync Settings
Bottom right of the Library module.
-
Click Check None First
The most important step in this section. Sync Settings defaults to a large number of checkboxes, and leaving them on will push your master image’s exposure, white balance and crop onto every other frame. Clearing everything first is what makes this safe.
-
Check Only Dust, Under the Remove Section
One box. Everything else about each image stays exactly as it was.
-
Click Synchronize
The AI now runs on each selected image individually, removing the spots specific to that frame rather than copying the master’s removals. A hundred-frame shoot cleans in one action.
The Same Thing in Camera Raw
-
Drag Your Files Into Photoshop
RAW or JPEG, into Photoshop 2026 or newer. They open in Adobe Camera Raw automatically, and multiple files appear together in the filmstrip.
-
Select an Image and Open the Remove Tool
Same spot-healing icon, same right-hand panel. Under Distraction Removal, click Apply next to Dust.
-
Copy and Paste the Edit Settings Across the Filmstrip
Right-click the cleaned thumbnail and choose Copy Edit Settings, then select the others, right-click, and choose Paste Edit Settings. Camera Raw’s equivalent of the sync above.
Where This Goes Wrong
Forgetting to Click Check None
By some distance the most damaging mistake here, because it silently overwrites the individual edits on every frame you selected. Clear the checkboxes before you touch anything else.
Not Verifying on the First Image
Thirty seconds checking the master at 100% tells you whether the detection is catching everything. Syncing first and checking later means finding out across a hundred frames.
Expecting It to Remove Everything Unwanted
This finds dust. A bird in the sky, a lens flare or a smudge on the front element are different problems — use the Remove tool manually for those.
Treating It as a Reason Not to Clean the Sensor
Software fixes the file; it doesn’t fix the camera. Heavy dust still costs you detail where it sat, and it’s still worth a blower before the next shoot.
Automate the Part That Was Never Creative
There’s a reasonable argument that automating parts of photography costs you something. It’s harder to make about dust. Nobody’s photographic voice was ever expressed through clicking at sensor spots, and the twenty minutes this saves per shoot go straight back into the parts of the edit that are actually decisions.
And it costs no generative credits — this is detection and repair, not generation, so it sits in the free tier of Adobe’s AI alongside the masking and selection tools.
Run It on Your Last Shoot
Open one frame, select the Remove tool, apply Dust under Distraction Removal, check it at 100%, then go to the Library, select the master and the rest of the series, hit Sync Settings, click Check None, tick only Dust, and synchronise. Download the three free sample RAW files and work through it first — then point it at a set from a windy day, which is where you’ll see what it’s worth. For the rest of a professional editing workflow, our PRO Photoshop Learning Path is where to go next.
Quick Reference: Keys, Menus and Settings
- Lightroom ClassicDevelop > Object Removal > Distraction Removal > Dust > Apply
- See what it removedZoom in and toggle the removal
- A whole series (Classic)Library, Cmd/Ctrl-click the other photos, Sync Settings > Check None > Removal: Dust > Synchronize
- Lightroom desktopRemoval > Dust > Apply; Copy Edit Settings, select the others, Paste Edit Settings
- PhotoshopDrag the RAW files in; Camera Raw opens: Removal > Dust > Apply; right-click > Copy Edit Settings, select the rest, Paste Edit Settings
- ThenOpen in Photoshop, Done, or save as a JPEG from Camera Raw
Works on RAW files and JPEGs.
Free Downloads
Follow Along on the Same RAW Files
Get the three RAW files from the video, the Lightroom preset with the dust removal settings, and the PDF guide. Free with a PHLEARN account.
AI Dust Removal: Common Questions
What does the dust removal tool do?
It finds sensor dust spots across the whole photo and removes them in one click, including spots too small to notice until you zoom in. It’s in Lightroom Classic, Lightroom desktop, Lightroom mobile and Camera Raw in Photoshop.
Where is it in Lightroom Classic?
Develop module, Object Removal, then Distraction Removal at the bottom, where Dust is the new option. Click Apply.
How do I see what it removed?
Zoom in and toggle the removal off and on. In Lightroom desktop and Camera Raw you also get an overlay marking every spot it found.
Can I apply it to a whole shoot at once?
Yes. In Classic, select the other photos in the Library, click Sync Settings, Check None, tick Dust under Removal and Synchronize. In Lightroom desktop and Camera Raw, Copy Edit Settings from the first photo and Paste Edit Settings onto the rest.
Does it work in Photoshop?
Yes, through Camera Raw. Drag the RAW files into Photoshop 2026, they open in Camera Raw 18, and the Removal panel has the same Dust option. From there, open into Photoshop, click Done, or save a JPEG.
Does it need RAW files?
No. It works on RAW photographs and JPEGs. The download is the RAW series from the video.
Does it use generative credits?
The video doesn’t show any credit use for dust removal. Check the credits information in your app if you’re unsure for your plan.
Are the sample files free?
Yes, with a free PHLEARN account. You get the three RAW files, the Lightroom preset and the PDF guide.
Master Photoshop, Lightroom and Photography
Join PHLEARN PRO for $12.99 a month or $99.99 a year. Cancel anytime, with a 100% money-back guarantee.





