
Download Assets
This tutorial includes 1 PDF guide. Downloads are free with a PHLEARN account.
- Download the sample files from every free tutorial on PHLEARN
- New free tutorials published every week
- One free account: sign up once, then download anything
Free PDF Guide · 3 Pages
This Tutorial as a Step-by-Step PDF
This three-page guide walks through evening out light and dark with masked Curves layers painted at about 20% Flow, removing redness with a Hue/Saturation layer set to Reds (Hue right 5 to 10), and replacing the scar texture with the Healing Brush or Clone Stamp Tool on new layers. Keep it next to your keyboard.
description
A scar is really three problems at once: the skin around it reads too light or too dark, it often carries extra redness, and the scar itself has its own texture. Aaron works through them in that order, masked Curves layers for tone, a range-limited Hue/Saturation layer for the red, and the Healing Brush or Clone Stamp Tool last, which is what makes the retouch blend instead of looking patched.
Enjoying This Free Tutorial?
We publish a new free tutorial every week, each one with sample images and PSDs you can download and follow along with. Sign up and they land straight in your inbox, along with early word on sales, events and subscriber-only offers.
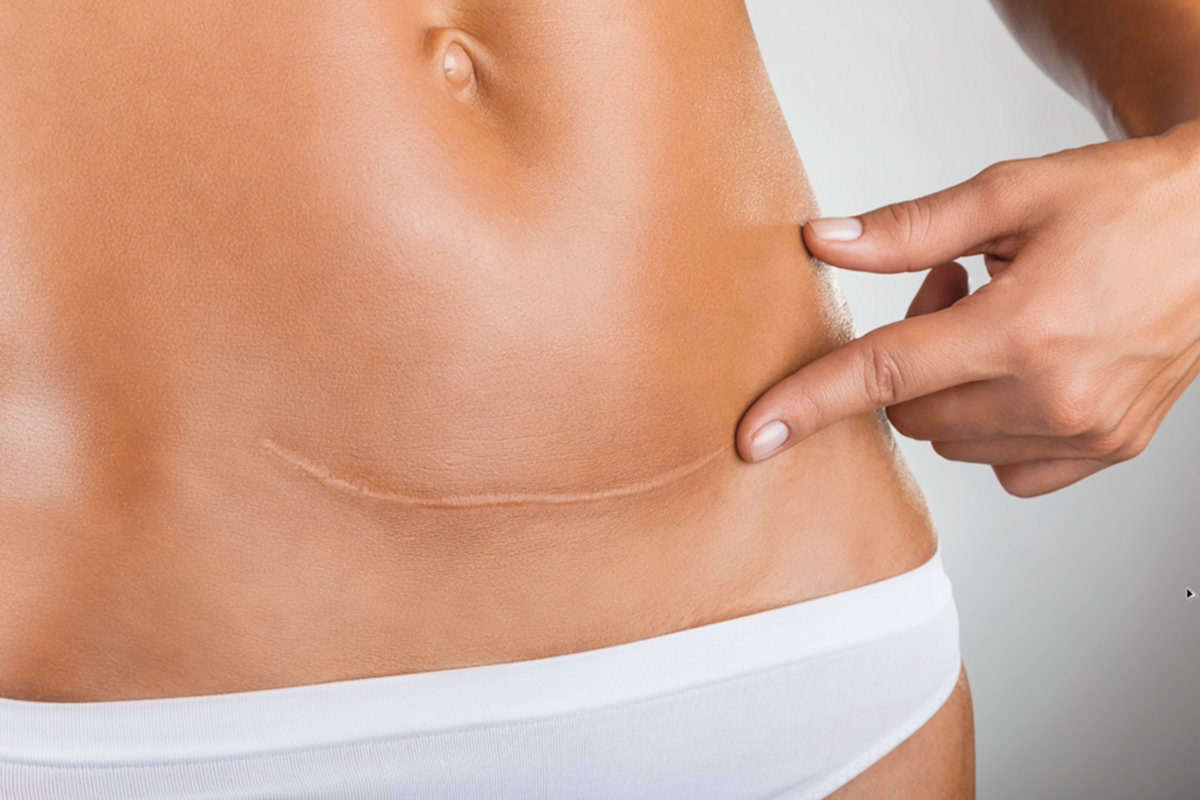
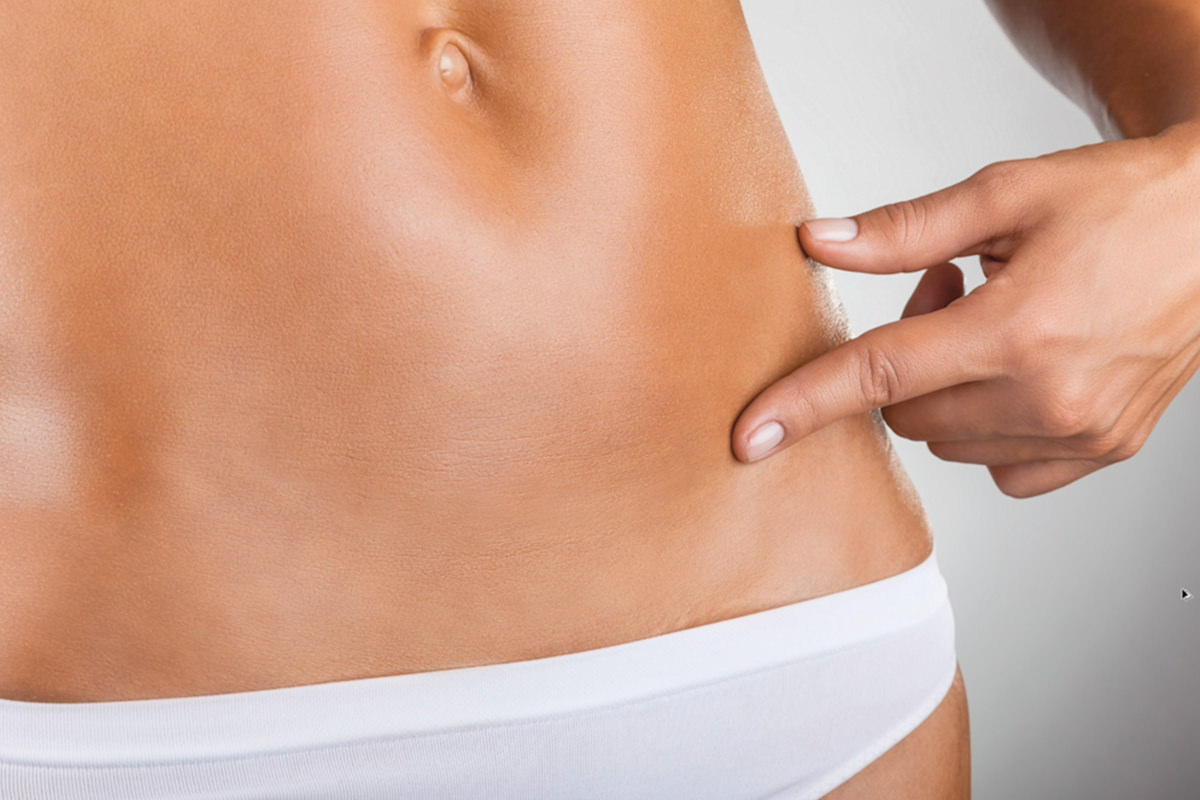
Removing a scar or similar blemish is rarely just one step. There’s usually a lightness or darkness problem in the surrounding skin, sometimes a redness problem, and always a texture problem underneath. Working through all three in order — tone, color, then texture — gets a much cleaner result than jumping straight to the Healing Brush or Clone Stamp Tool.
Getting Started
This same sequence works for scars, blemishes, or any small area of skin that’s discolored or textured differently from what’s around it — not just literal scar tissue.
Checking Light and Dark with a Black and White Adjustment Layer
Before touching texture at all, it helps to see exactly where the area around a scar reads too light or too dark.
-
Add a Black and White Adjustment Layer to Check Values
Go to Layer > New Adjustment Layer > Black & White. With it visible, look closely around the scar for patches that are noticeably darker or lighter than the surrounding skin — that’s usually the first thing to fix, before removing any texture.
Lightening Dark Areas with a Masked Curves Layer
A Curves adjustment layer, masked to affect only the area you paint, is the tool for correcting those tonal patches.
-
Add a Curves Layer, Brighten It, and Fill Its Mask with Black
Add a Curves adjustment layer and drag the middle of the curve up slightly to brighten. Go to Edit > Fill on its layer mask and fill it with black, which hides the brightening effect everywhere.
-
Paint White at Low Flow to Lighten Dark Areas
Select a large, soft-edged brush, lower its Flow to around 20%, and paint over the darker patches. The low flow builds the effect up gradually so it blends rather than creating a hard, obvious edge.
-
Fine-Tune by Double-Clicking the Curves Thumbnail
Double-click the Curves adjustment layer’s thumbnail at any time to reopen it and adjust how much lighter the affected area gets, until it blends seamlessly with the surrounding skin.
Why Fill the Mask with Black First
Filling the mask black before painting means the adjustment starts completely hidden, and painting white only reveals it exactly where you choose. This gives you full control over where a Curves adjustment applies, rather than having it affect the whole image and needing to be painted back out.
Darkening Light Areas the Same Way
Some spots need the opposite correction, and the process mirrors what you just did.
-
Repeat with a Darkening Curves Layer for Light Areas
Add another Curves adjustment layer, this time dragging the curve down to darken. Fill its mask with black, then paint white with a smaller brush directly over any lighter patches to bring them back down to match the surrounding tone.
This Is Dodge and Burn, Even If You Didn’t Know It
Lightening dark spots and darkening light spots with masked adjustment layers is exactly the dodge and burn technique, just under a different name. It’s one of the most useful general retouching skills, and it applies well beyond scar removal.
Targeting and Removing Redness with Hue/Saturation
If the skin around a scar carries some redness, a targeted Hue/Saturation adjustment can neutralize it without affecting the rest of the skin tone. The scar in the video isn’t very red, so Aaron adds redness first for the demo: a new layer, red painted around the scar with the Brush Tool, and the blend mode set to Soft Light. If your scar is already red, skip that.
-
Add a Hue/Saturation Layer and Target Reds with the Eyedropper
Add a Hue/Saturation adjustment layer, click the channel dropdown (defaulting to Master), and switch to Reds. Use the eyedropper within the panel to click directly on the reddened area you want to target.
-
Narrow the Affected Range with the Falloff Sliders
Temporarily push Hue and Saturation to extreme values so you can clearly see which parts of the image are affected. Drag the small range sliders at the bottom of the panel inward to narrow the selection down to just the red you actually want to change, then set Hue and Saturation back to zero.
-
Shift Hue, Lower Saturation, and Raise Lightness to Neutralize Red
Nudge the Hue slider to the right a small amount (often just 5–10 points) to shift the targeted red toward the surrounding skin tone, lower Saturation somewhat, and raise Lightness slightly. In the video the layer also changed the color of the hand, so fill the layer mask with black and paint white only over the scar area.
Reading the Hue/Saturation Range Sliders
The colors shown along the bottom of the panel represent what’s being targeted; the wide central section is fully affected, while the narrower zones at each end feather the effect into neighboring colors. Dragging the outer handles inward tightens that feathered range, which is what lets you isolate a very specific shade of red rather than affecting reds broadly across the photo.
Removing the Scar Texture with the Healing Brush Tool
With tone and color corrected, removing the raised or textured part of the scar itself comes last.
-
Sample and Paint with the Healing Brush Tool
Create a new empty layer, then select the Healing Brush Tool and set its Sample option to Current Layer and Below. Hold Alt on PC (Option on Mac) to sample nearby clean skin, then paint over the scar — the tool blends the sampled texture with the color already underneath your brush stroke, which usually produces a smooth, natural result.
Switching to the Clone Stamp Tool for Heavier Texture
The Healing Brush’s automatic blending can sometimes work against you on skin with a lot of visible texture.
-
Switch to the Clone Stamp Tool for Heavier Texture
If the Healing Brush leaves visible blending artifacts, create another new layer and switch to the Clone Stamp Tool instead. It copies sampled pixels exactly, without trying to blend them, which can look cleaner on skin with pronounced texture. Sample and paint in short passes, re-sampling frequently from the cleanest nearby skin.
Zoom Out to Check Your Work
Working zoomed in makes it easy to miss how the retouch reads at normal viewing size. Periodically zoom back out to check that everything blends convincingly from a natural viewing distance, not just up close.
When you’re done, select all your retouching layers and press Ctrl+G (Cmd+G on Mac) to group them, then press F for full screen and turn the group off and on for a before and after.
Common Mistakes to Avoid
The most common mistake is jumping straight to the Healing Brush or Clone Stamp Tool without first correcting the surrounding tone and color — texture removal alone doesn’t fix a patch of skin that’s still too dark, too light, or too red. A second is reaching only for the Healing Brush regardless of the situation; on heavily textured skin, its automatic blending can actually create more visible artifacts than the Clone Stamp Tool would. And working only zoomed in, without periodically zooming out to check the overall result, can leave a retouch that looks fine up close but obvious from a normal viewing distance.
Why This Effect Works
Treating a scar as a tone problem, a color problem, and a texture problem, in that order, is what makes the final result blend in rather than look patched. Masked Curves layers fix uneven lightness without touching color or texture. A range-limited Hue/Saturation layer fixes color without touching lightness or texture. And by the time the Healing Brush or Clone Stamp Tool is used to remove the actual texture, the surrounding skin already matches in tone and color, so the retouched area has far less work left to blend into.
Final Thoughts
This same tone-color-texture sequence applies to almost any localized skin imperfection, not just scars — blemishes, bruising, uneven redness, small marks. Fix the light and dark first with masked Curves layers, correct any lingering color with a targeted Hue/Saturation adjustment, and only then move on to actually removing texture with the Healing Brush or Clone Stamp Tool, switching between the two depending on how much surrounding texture you’re working with.
Quick Reference: Keys, Menus and Settings
- Check valuesLayer > New Adjustment Layer > Black & White
- Lighten or darkenCurves layer, Edit > Fill the mask with black, paint white with a soft brush at 20% Flow
- Fine-tuneDouble-click the Curves layer’s thumbnail
- Target the redHue/Saturation: Master > Reds, eyedropper on the red, range sliders inward
- Neutralize itHue 5 to 10 to the right, Saturation down, Lightness up
- Remove textureNew layer, Healing Brush sampling current and below; Alt/Option-click to sample
- Heavy textureClone Stamp Tool, Alt/Option-click to sample; zoom out to check
No AI, no generative credits.

Free Downloads
Take the Guide With You
Get the PDF guide with every step for removing a scar with masked Curves layers, a targeted Hue/Saturation layer, the Healing Brush and the Clone Stamp. Free with a PHLEARN account.
Removing Scars: Common Questions
Where do I start when removing a scar?
With tone, not texture. Even out the light and dark areas around the scar first, then any redness, and only then remove the scar texture with the Healing Brush or Clone Stamp Tool.
Why add a Black & White adjustment layer?
It hides color so you see only light and dark values, which makes the darker patches around a scar easy to spot. Turn it off when you are done.
How do I limit a Curves layer to the scar?
Click its mask, go to Edit > Fill and fill it with black so the adjustment is hidden. Then paint white with a large soft brush at about 20% Flow over just the dark areas.
Can I change how much lighter it gets afterward?
Yes. Double-click the Curves layer’s thumbnail and move the curve up or down until the area blends with the skin around it.
What about spots that are too light?
Add a second Curves layer, drag the curve down, fill its mask with black and paint white with a small brush over the light patches. Lightening dark areas and darkening light ones is dodging and burning.
How do I remove redness around a scar?
Add a Hue/Saturation layer, change Master to Reds and click the red area with the panel’s eyedropper. Narrow the range sliders, then move Hue to the right about 5 to 10 points, lower Saturation and raise Lightness.
How do I see which colors Hue/Saturation will change?
Push Hue and Saturation all the way up for a moment so the affected areas stand out. Drag the range sliders in until only the red is changing, then set both back to zero.
Why does the Healing Brush do nothing on my new layer?
It is sampling only the empty layer. Set its Sample option to include the current layer and below, then Alt/Option-click clean skin and paint over the scar.
Healing Brush or Clone Stamp: which should I use?
Start with the Healing Brush, which takes texture from where you sample and color from where you paint. When heavy skin texture leaves smeared edges, switch to the Clone Stamp Tool, which copies pixels exactly.
Is there a free download?
Yes, with a free PHLEARN account. You get 1 PDF guide with the tone, color and texture steps for removing a scar.
Master Photoshop, Lightroom and Photography
Join PHLEARN PRO for $12.99 a month or $99.99 a year. Cancel anytime, with a 100% money-back guarantee.





