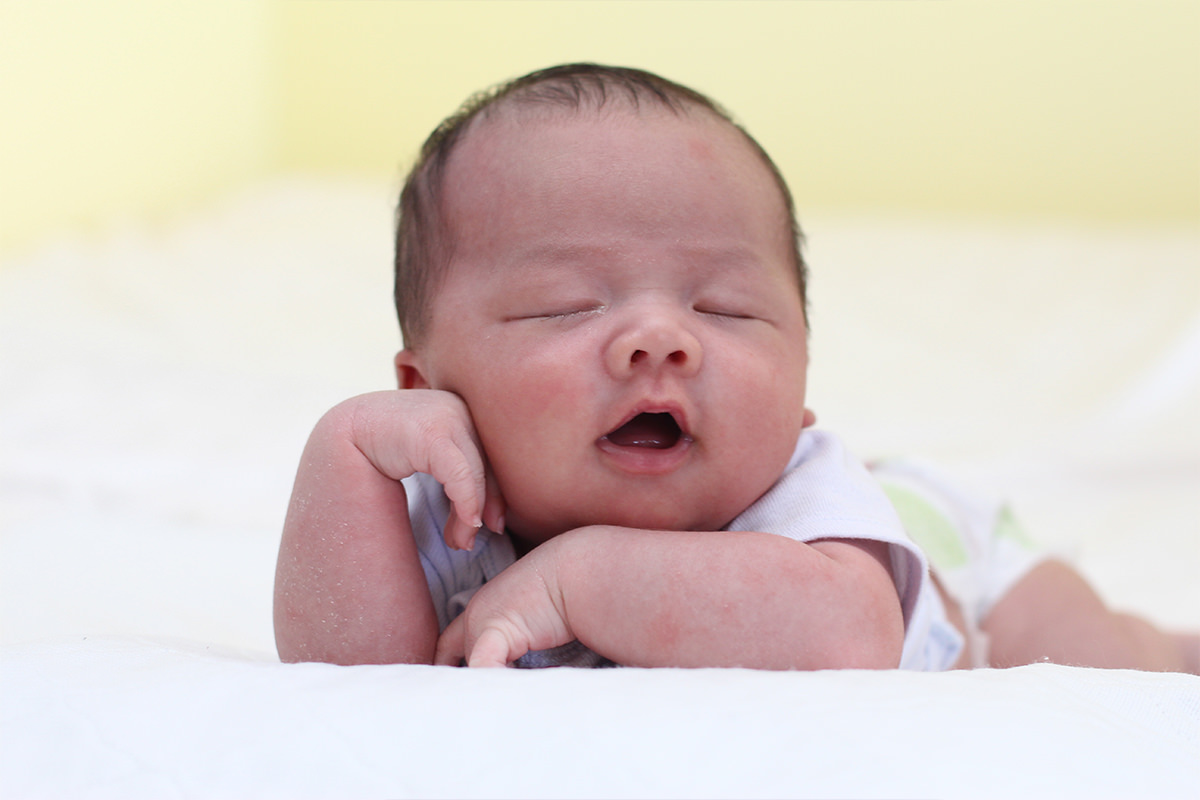
BEFORE RETOUCH
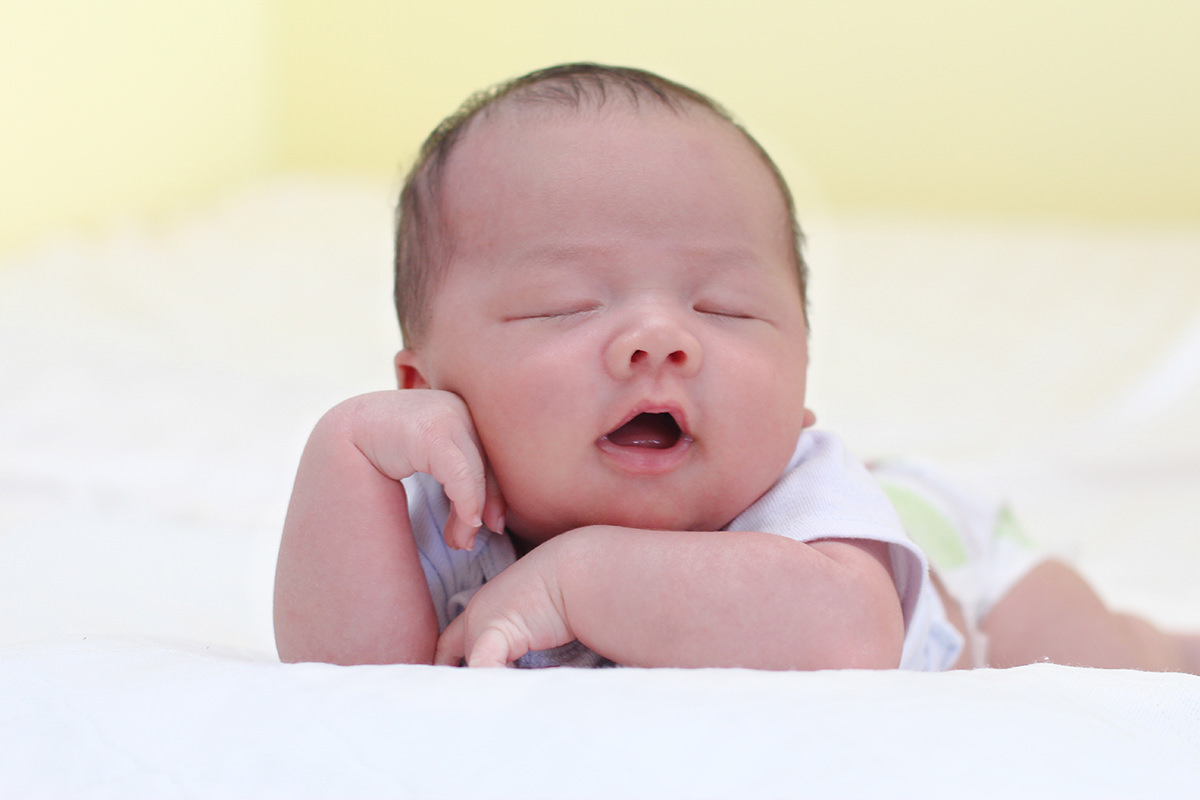
AFTER RETOUCH
Download Sample Images
Click the link below to download the sample images and follow along with this tutorial.
DownloadA Quick Guide for Helping Newborns Look Their Best
Welcoming a new life into the world is a profound moment that deserves to be captured and shared. In this tutorial, we cover some of the common traits of newborns and how to apply some light retouching in Photoshop to help them look their best. From adjusting red, blotchy areas to cleaning up dry, flaky skin, we’ll walk you through some techniques that anyone can learn to help capture memories that will last a lifetime.
Using Channels
We first want to reduce some of the redness in the subject’s skin. Rather than tackle each area individually, we can target areas of high contrast using Channels and then make a selection of the parts of the skin that appear darker.
By using Channels, we can make an incredibly accurate selection based off of the amount of contrast present in an image. To view the different color channels, click on the Channels tab. You’ll see three channels listed; one for red, one for green, and one for blue. Our goal is to identify the channel that has the most contrast between the light and dark areas of the photo. This will allow us to select the darker areas, which we can then adjust using an Adjustment Layer. To find the channel that has the most contrast, simply click on each and make a judgement based off of what you see.
If the image appears flat, that channel likely won’t be of much help. If the image has areas of light and dark, it will contain the information necessary for us to isolate the areas of skin that we want to retouch.
Making the Selection
In this case, the green channel has the most contrast. In order to get an accurate selection, we need to exaggerate the contrast in the green channel. First, duplicate the green channel by selecting it and hitting CTRL or CMD + J. Then hit CTRL or CMD + L to bring up the Levels dialog. You’ll see a graph showing the distribution of highlights, midtones, and shadows along with sliders underneath for each. Drag the right most slider about one-third of the way towards the middle. Then move the slider for the midtones just a bit to the left of the first. You should see the background change to pure white and the blotches on the baby’s skin should now appear greatly exaggerated.
Now that we’ve created enough contrast in the skin, we can turn those areas into a selection. Hold CTRL or CMD and click on the duplicated green channel. This will create a very accurate selection of that channel. Switch back to the Layers panel then go to Layer, New Adjustment Layer, and then to Curves. Photoshop will load the selection we made into the Layer Mask of our new Adjustment Layer. If you hold ALT or OPTN and click on the Curves Layer Mask thumbnail, you’ll notice the image will look just like the Channel that we were working with earlier.
Adjusting Skin Tones
With the Curves Adjustment Layer combined with the Layer Mask targeting the darker areas of the newborn’s skin, we can pretty easily make adjustments to smooth out the skin tones. In the Curves Adjustment Layer dialog, drag the center of line up until the darker areas of the skin closely match the lighter areas of the skin. To further blend any inconsistencies in the skin, create a New Layer, switch to the Brush Tool (B), and hold ALT or OPTN to sample an area of skin that has the color you want. Simply paint on the new layer in any areas that you feel could use a bit of blending.
Dry Skin and Other Blemish Removal
In this particular photo, there are some areas of dry skin on the baby’s arm. Fortunately, these are incredibly easy to touch up using the Spot-Healing Brush Tool. On a new layer, paint over portions of the skin that could benefit from a bit of blemish removal.
Add Shape and Definiton
After our adjustments so far, you might noticed that the image looks a little flat. We can enhance some of the highlights in the image which will help return some shape and definition to the subject’s face. On a new layer, select the Brush Tool. Using a large, soft brush paint white over every bit of the subject’s skin. Don’t worry about being precise, as we’ll be using Blend If along with Blending Modes to tell Photoshop specifically where we want these highlights to appear.
Once you’ve finished painting, double click on the Layer that you’ve been painting on. Under the Blending Options dialog, locate the Blend If sliders near the bottom of the panel. Holding ALT or OPTN to split the slider, drag the right half of the slider in the shadows all the way to the right. Then take the left half of that slider and drag it to about the middle. This will tell Photoshop that you don’t want this layer to affect any of the darker areas of the image. Change the Blending Mode to Soft Light and adjust the Opacity until you get a subtle effect that you like.