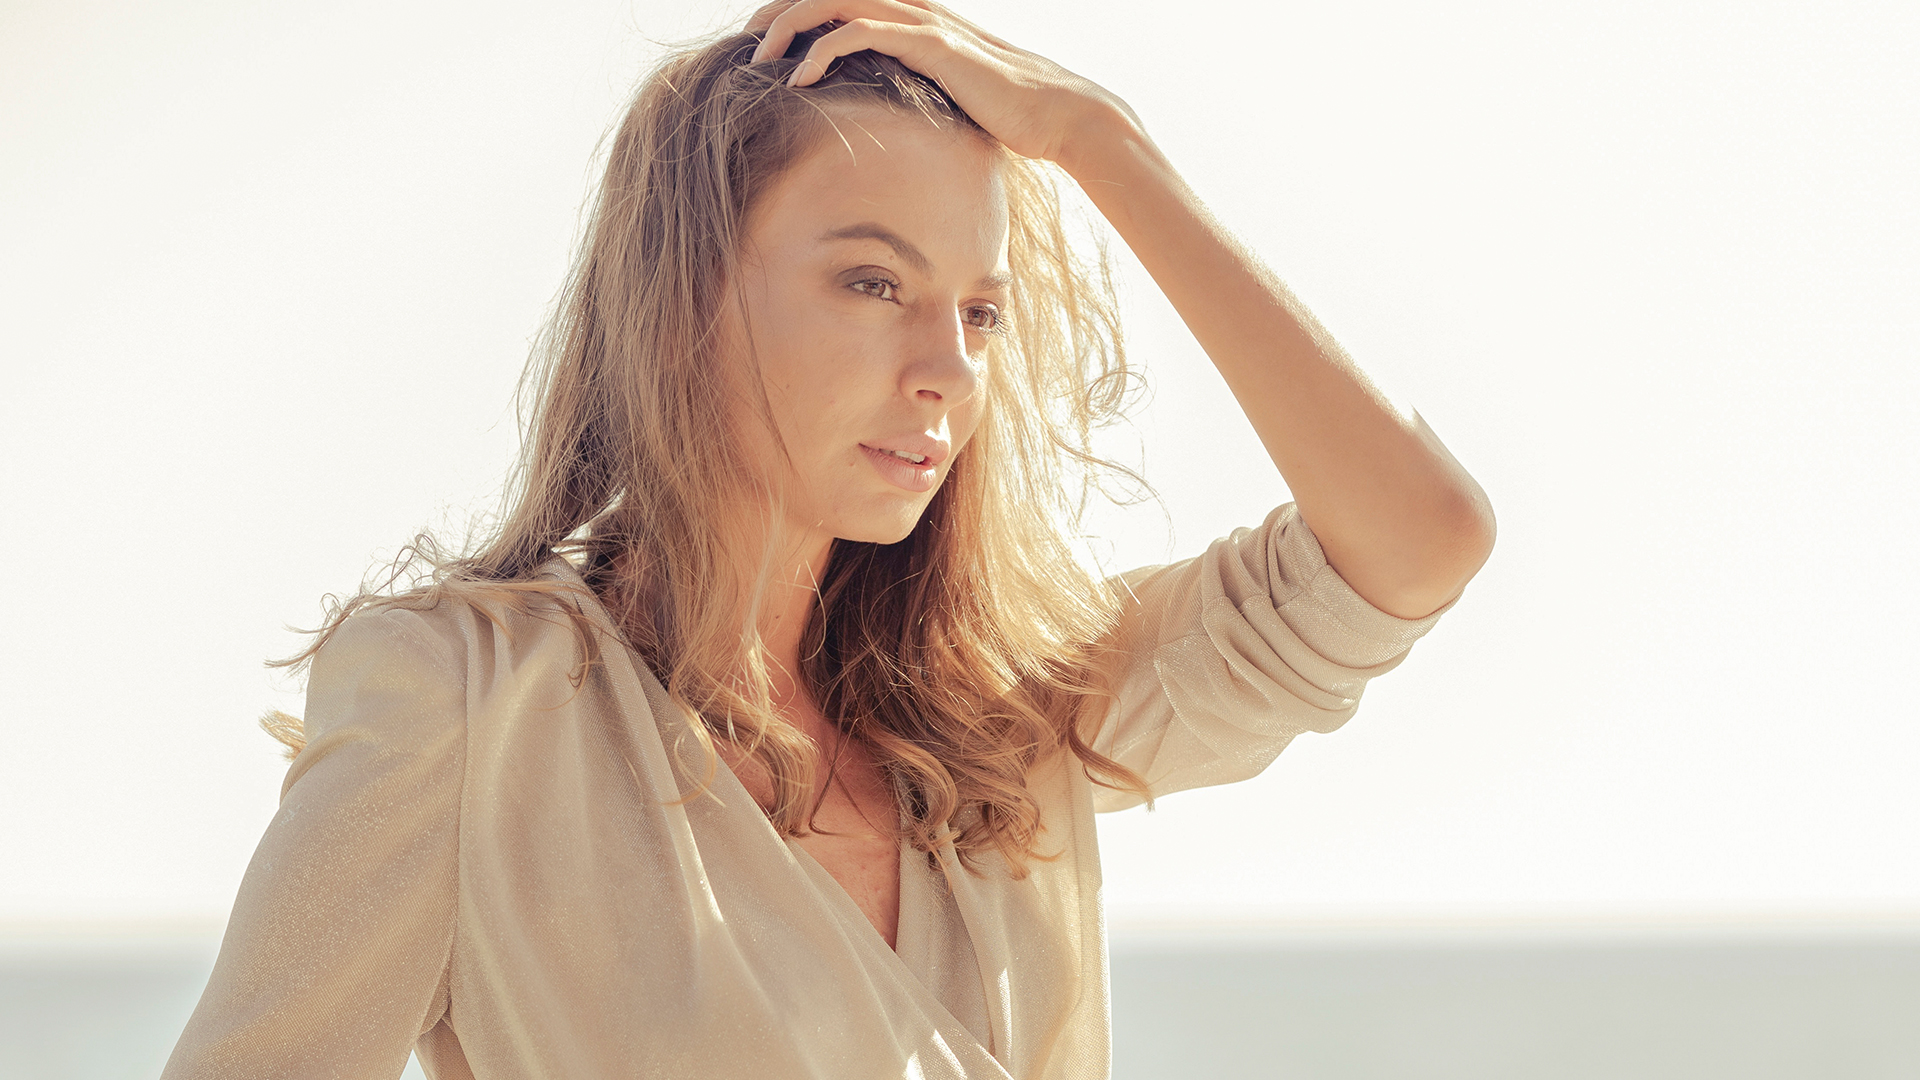

Download Assets
This tutorial includes 12 sample images, 3 Lightroom presets and 1 PDF guide. Downloads are free with a PHLEARN account.
- Download the sample images and PSDs from every free tutorial on PHLEARN
- New free tutorials published every week
- One free account — sign up once, then download anything
Free PDF Guide · 3 Pages
This Tutorial as a Step-by-Step PDF
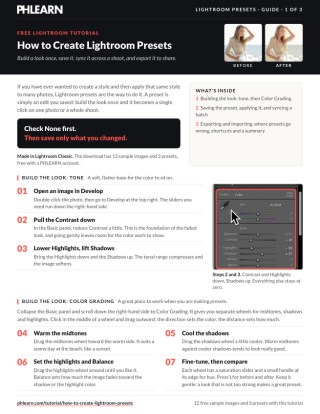
Walks through the whole preset workflow in Lightroom Classic: Contrast and Highlights down, Shadows up, warm midtones and cooler shadows in Color Grading, then Presets > plus icon > Create Preset with Check None, applying it, Sync Settings > Synchronize for a batch, and Export or File > Import Develop Profiles and Presets. Keep it next to your keyboard.
description
A preset is simply an edit you saved. Build a look once in the Develop module and it becomes a single click you can apply to one photo, a whole shoot, or every image in a catalog — and because Lightroom stores it as a small file, you can move it between computers or hand it to someone else.
This tutorial builds a warm, low-contrast look with the Color Grading wheels, saves it as a user preset, syncs it across a batch of images, and exports it so it can travel. It also covers the one button in the save dialog that decides whether your preset layers cleanly over existing edits or quietly overwrites them.
Enjoying This Free Tutorial?
We publish a new free tutorial every week, each one with sample images and PSDs you can download and follow along with. Sign up and they land straight in your inbox, along with early word on sales, events and subscriber-only offers.
Image Source


How to Create Lightroom Presets
A preset is just an edit you saved. Once you have one, a look you spent ten minutes building becomes a single click you can apply to a photo, a shoot, or every image in a catalog — and because Lightroom stores it as a small file, you can move it between computers, hand it to someone else, or sell it.
This walkthrough builds one from scratch in Lightroom Classic: a warm, low-contrast look made with the Color Grading wheels, saved as a user preset, applied across a batch with Sync Settings, then exported so it can travel. The most important part is not the look — it is a single button in the save dialog that decides whether your preset plays nicely with other photos or quietly wrecks them.
Getting Started
Everything happens in the Develop module. The edit itself is deliberately restrained, and that restraint is the point — you are building something you will reuse, not finishing one photo.
-
Open an Image in Develop
Double-click your photo and switch to the Develop module. All the sliders you need are down the right-hand side. If the module is new to you, editing photos in Lightroom Classic covers the basics.
-
Pull the Contrast Down
In the Basic panel, reduce contrast slightly. This is the foundation of a faded look, and going gently here leaves room for the color work to show.
-
Lower Highlights, Lift Shadows
Bring the highlights down and the shadows up. The tonal range compresses, the image softens, and you get the flatter base that film-style looks are built on.
Building the Look With Color Grading
Color Grading is where a preset earns its personality. It sits near the bottom of the right-hand panel and gives you three wheels — shadows, midtones and highlights — each able to push color into that part of the tonal range independently.
-
Warm the Midtones
Click in the center of the midtones wheel and drag outward. The direction sets the hue, the distance sets how much. Dragging toward the warm side gives you the sunlit, golden cast that suits an outdoor or beach image.
-
Cool the Shadows
On the shadows wheel, drag toward the blues. Warm midtones against cool shadows is the split that makes a grade read as deliberate rather than as a color cast — it is the oldest trick in color work and it still does the heavy lifting.
-
Refine With Balance, Saturation and Hue
Each wheel has a saturation slider for strength and a hue control at its edge for fine-tuning the exact color. The Balance slider underneath shifts weight between the shadow and highlight grades, so you can decide which end of the range dominates. Toggle the backslash key at any point to compare against the original. The Color Grading tool has more depth than it first appears, and PHLEARN PRO members can go further in How to Use Color Grading Presets in Adobe Camera Raw.

Keep the Edit Gentle
It is worth resisting the urge to push this hard. A preset is applied to photos you have not seen yet, shot in light you did not plan for, and a heavy edit that flatters one image will break the next. A restrained starting point survives that; an aggressive one has to be undone every time. If you want a stronger look on a particular photo, apply the preset and then push further on that image alone.
Saving It as a Preset
Presets live in the left-hand panel of the Develop module, alongside Snapshots, History and Collections. Anything you make goes into User Presets, kept separate from the sets Lightroom ships with.
-
Open the Presets Panel
On the left, expand Presets. You will see your favorites at the top, then User Presets, then Lightroom’s built-in collections underneath.
-
Create a New Preset
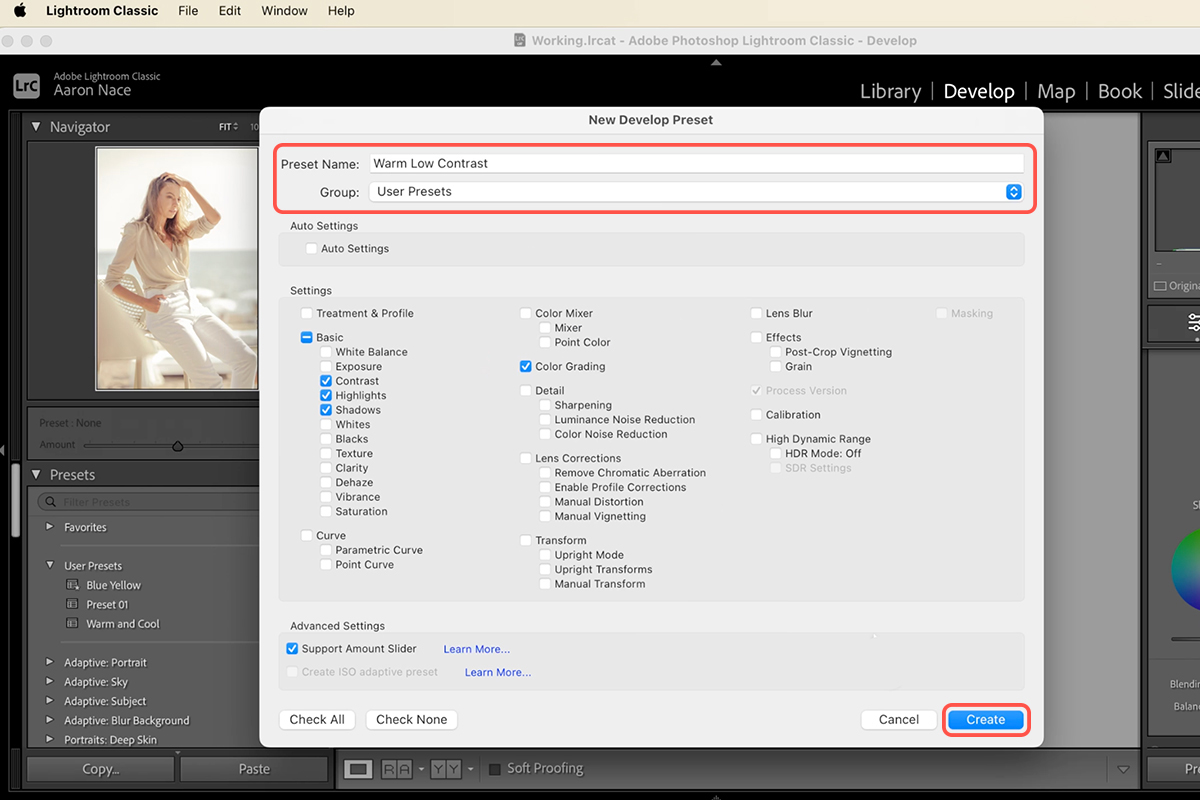
Click the plus icon at the top of the panel and choose Create Preset. The New Develop Preset dialog opens with every adjustable setting listed as a checkbox.
-
Name It and Choose a Group
Give it a name and leave the group set to User Presets, or make a new group if you are building a family of looks that belong together.
Name It for What It Does
Descriptive names beat evocative ones. “Summer Day” tells you nothing six months later; “Warm Low Contrast” tells you exactly what will happen when you click it. Once you have twenty presets in the panel, the difference between naming conventions is the difference between a library you use and a list you scroll past.
The Setting That Makes or Breaks a Preset
By default the save dialog has a great many boxes ticked, and most people click Create without looking. That is the single biggest mistake in preset building, because every ticked box is a setting your preset will impose on any photo you apply it to — including settings you never touched.
-
Click Check None
At the bottom of the dialog, click Check None to clear every box. Start from nothing rather than from everything.
-
Tick Only What You Actually Changed
Go back and select just the adjustments you made — here that is contrast, highlights, shadows and color grading. Then click Create.
Why This Matters More Than the Look
Say you leave exposure ticked because it was on by default. Apply that preset to a photo you already exposed correctly and your careful exposure is overwritten by whatever the original image happened to need. The same goes for white balance, cropping, lens corrections and everything else in that dialog. A preset that only carries the four settings you deliberately changed lays your look over existing work instead of replacing it — which means you can stack it on top of per-image adjustments and keep both.
Applying It to Other Photos
With the preset saved, using it is trivial — and this is the moment the time you spent starts paying itself back.
-
Pick Another Image
Press G for the Library grid view and select a different photo, then return to the Develop module.
-
Click the Preset
Find it under User Presets and click once. The whole look applies instantly, and because you were disciplined about the checkboxes, nothing else about the image changes.
Syncing a Whole Batch
Clicking a preset once per photo is fine for a handful. For a full shoot, Sync Settings copies your adjustments across every selected image in one move.
-
Select Your Reference Image First
Click the photo you have already edited — the one you want everything else to match. Lightroom syncs from the most-selected image, so this order matters.
-
Add the Rest
Hold Shift to extend the selection across a run of photos, or Cmd on Mac (Ctrl on PC) to pick them individually.
-
Sync the Settings You Want
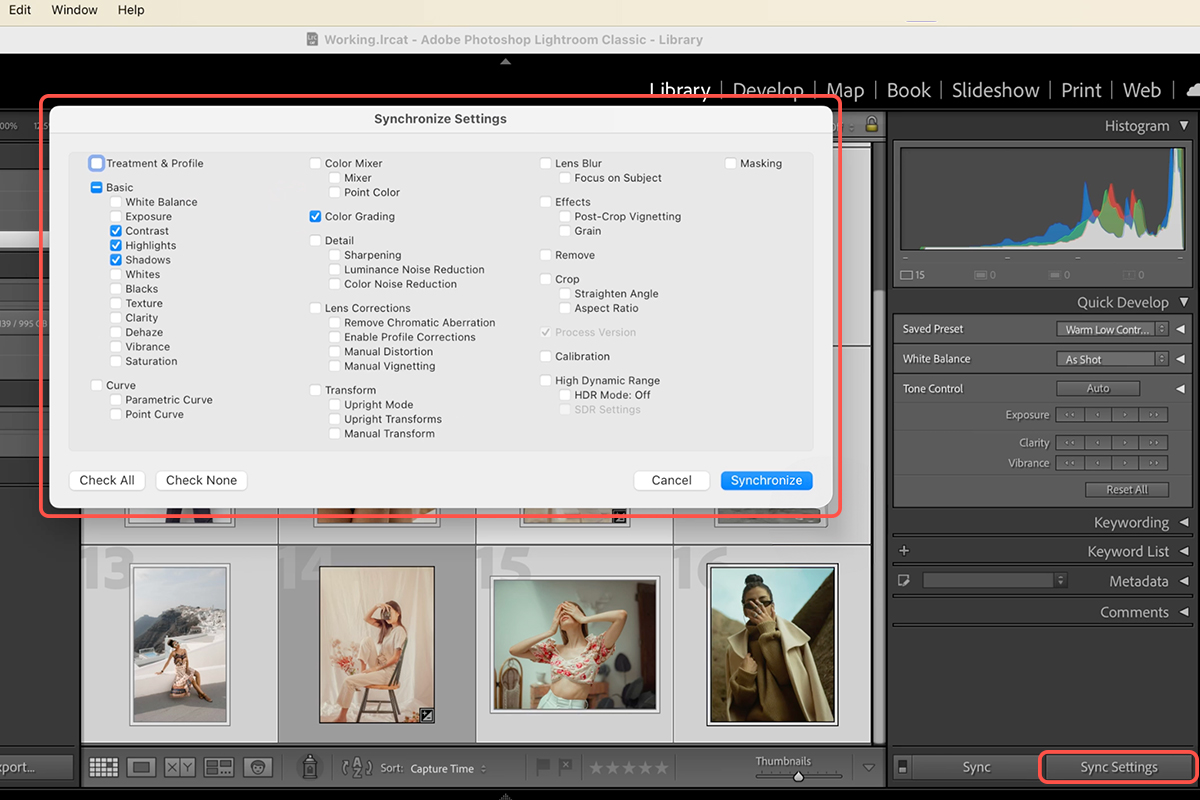
Click Sync Settings at the bottom right. The dialog is the same checkbox grid as before, so tick contrast, highlights, shadows and color grading, then click Synchronize. Every selected image takes the look at once. There is more on this in how to sync settings in Lightroom and batch editing in Lightroom Classic.
Exporting, Sharing and Importing Presets
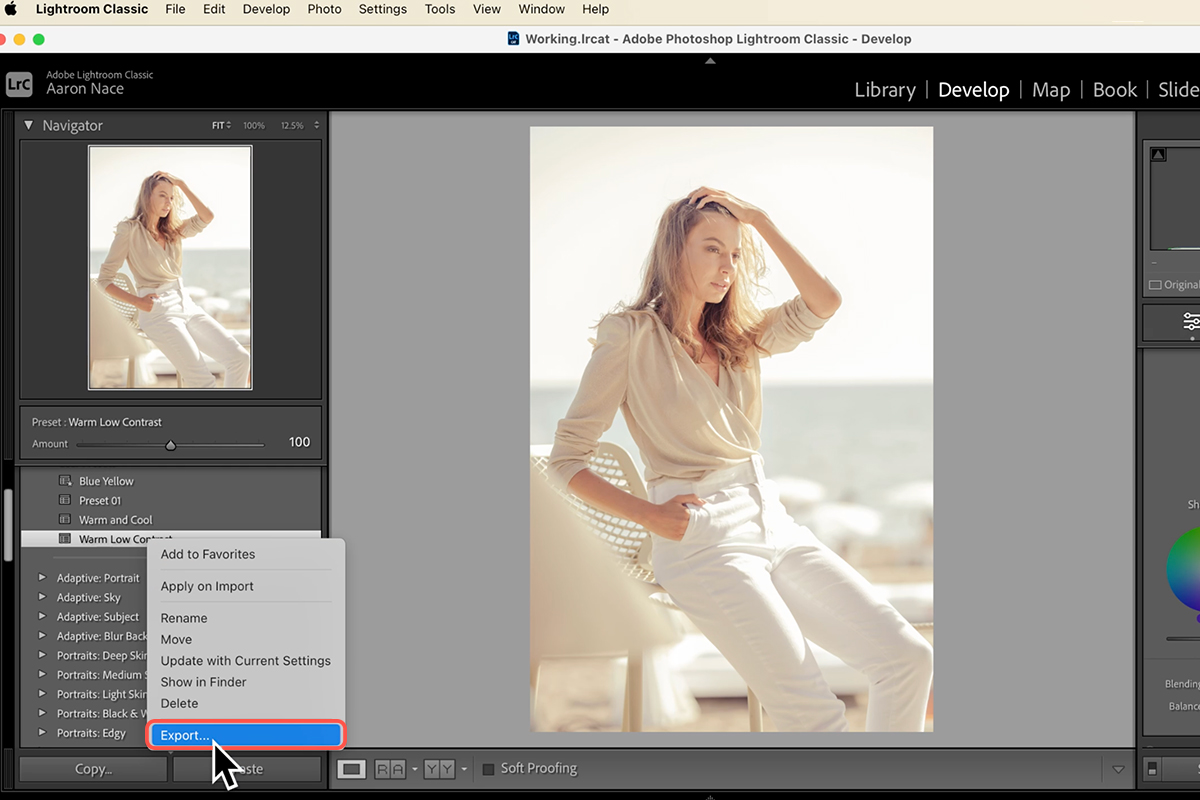
A preset stays inside your catalog until you export it. Exporting turns it into a file you can back up, move to another machine, send to a colleague, or package up and sell.
-
Export the Preset
Right-click the preset in the Presets panel and choose Export. Pick a location, give the file a name and save. That file is the preset — nothing else is needed to reproduce the look elsewhere.
-
Import One In
To bring a preset into Lightroom, go to File > Import Develop Profiles and Presets, select the file and click Import. It appears under User Presets ready to use.
-
Try It With a Ready-Made Pack
If you would rather start from something finished and reverse-engineer it, the How to Create Lightroom Presets installs the same way. So do the beach presets, the film vibes presets and the airy wedding presets — open one, look at which settings it carries, and you learn a lot about how other people build them.
Where Presets Usually Go Wrong
Almost every disappointing preset comes down to one of three things. The first is saving every checkbox, so the preset overwrites work it was never meant to touch. The second is building the look on an unusual photo — something badly exposed or lit oddly — which produces a preset that only ever suits that one file. The third is syncing from the wrong image, because Sync Settings copies from the most-selected photo, not from the first one you clicked.
A Preset Is a Starting Point
Even a well-built preset will not land perfectly on every frame, and it is not supposed to. Exposure varies between shots, skin tones react differently to a color grade, and a look tuned on a bright outdoor image will need easing back indoors. Apply it, then adjust that photo — the preset has still saved you the ten minutes of building the grade from nothing. PRO members can see how this fits a full pipeline in How to Edit in Photoshop from Lightroom Classic.
What Makes a Preset Worth Reusing
The value of a preset is not that it saves clicks. It is that it makes a set of photos look like a set. A gallery edited image by image drifts — slightly warmer here, a little more contrast there — and the drift is visible the moment the photos sit side by side. One preset applied across the whole take removes that variation before anyone notices it was possible.
The second thing it buys you is a record. A preset is a written description of a look, in the only language that matters: the exact settings that produce it. Six months on you will not remember how far you pushed the midtones, but the preset does, and you can open it, read the values back and build a variation from there rather than starting over.
Build a Small Library You Actually Use
Two or three presets you reach for constantly are worth more than fifty you scroll past. Start with the look you already apply most often without thinking about it, build it carefully, save only the settings you changed, and give it a name that says what it does.
Then let it grow from real work. Every time you finish an edit and think you would happily use this again, that is a preset. Save it while the settings are still in front of you, keep the naming honest, and within a few months you will have a small, personal set of looks that fits how you actually shoot — which is worth considerably more than any pack you could buy.
Quick Reference: Keys, Menus and Settings
- Build the toneDevelop > Basic: Contrast down, Highlights down, Shadows up
- Add colorColor Grading: warm midtones, cooler shadows, then Balance; \ for before and after
- Save the presetPresets panel > plus icon > Create Preset; Check None, then check only what you changed
- Apply itG for the Library grid, pick a photo, then click the preset under User Presets in Develop
- Sync a batchEdited photo first, Shift-click or Cmd/Ctrl-click the rest, Sync Settings > Synchronize
- Export and importRight-click the preset > Export; File > Import Develop Profiles and Presets
No AI, no generative credits.
Free Downloads
Follow Along on the Same Photos
Get the 12 sample images, the 3 finished Lightroom presets and the 3-page PDF guide, so you can build the same look and compare. Free with a PHLEARN account.
Lightroom Presets: Common Questions
What is a Lightroom preset?
A preset is an edit you saved. Build the look once in the Develop module and it becomes a single click on one photo or a whole shoot.
How do I create a preset in Lightroom Classic?
Edit a photo in Develop, open the Presets panel on the left, click the plus icon and choose Create Preset. Name it, leave the Group on User Presets and click Create.
Which settings should I check when saving a preset?
Click Check None at the bottom of the New Develop Preset dialog, then check only what you changed. Here that is Contrast, Highlights, Shadows and Color Grading.
Why does my preset change the exposure of other photos?
Exposure was checked when you saved it, so the preset imposes that value on every photo. Save the preset again with only the settings you actually adjusted.
How do I get a warm, low-contrast look?
In the Basic panel, lower Contrast and Highlights and lift Shadows. In Color Grading, drag the midtones wheel toward warm and the shadows wheel a little cooler, then set Balance.
What should I name my presets?
Name them for what they do. “Warm Low Contrast” tells you what will happen to the image; “Summer Day” does not once you have a panel full of them.
How do I apply a preset to many photos at once?
Click the edited photo first, then Shift-click or Cmd/Ctrl-click to add the rest. Click Sync Settings at the bottom right, check the same four settings and click Synchronize.
Why did Sync Settings copy the wrong edit?
Sync copies from the main image, the one that shows lighter than the rest of the selection. Click the photo that already has the look before you add the others.
How do I export or import a Lightroom preset?
Right-click the preset and choose Export to save it as a file you can share or sell. To bring one in, go to File > Import Develop Profiles and Presets, select the file and click Import.
Are the sample files free?
Yes, with a free PHLEARN account. You get 12 sample images, 3 Lightroom presets and 1 PDF guide: the photos to edit, the finished presets to compare against and the step-by-step guide.
Master Photoshop, Lightroom and Photography
Join PHLEARN PRO for $12.99 a month or $99.99 a year. Cancel anytime, with a 100% money-back guarantee.





