
Download Assets
This tutorial includes 1 PDF guide. Downloads are free with a PHLEARN account.
- Download the sample files from every free tutorial on PHLEARN
- New free tutorials published every week
- One free account: sign up once, then download anything
Free PDF Guide · 3 Pages
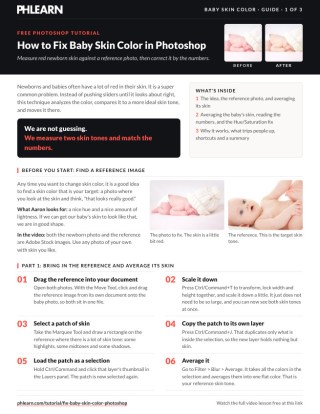
This Tutorial as a Step-by-Step PDF
The guide walks through matching red newborn skin to a reference photo: Marquee a skin patch on each, copy it with Ctrl/Command+J, run Filter > Blur > Average, read Hue, Saturation and Brightness in the Color Picker, then type the difference into a Hue/Saturation layer set to Reds. Use it on any portrait.
description
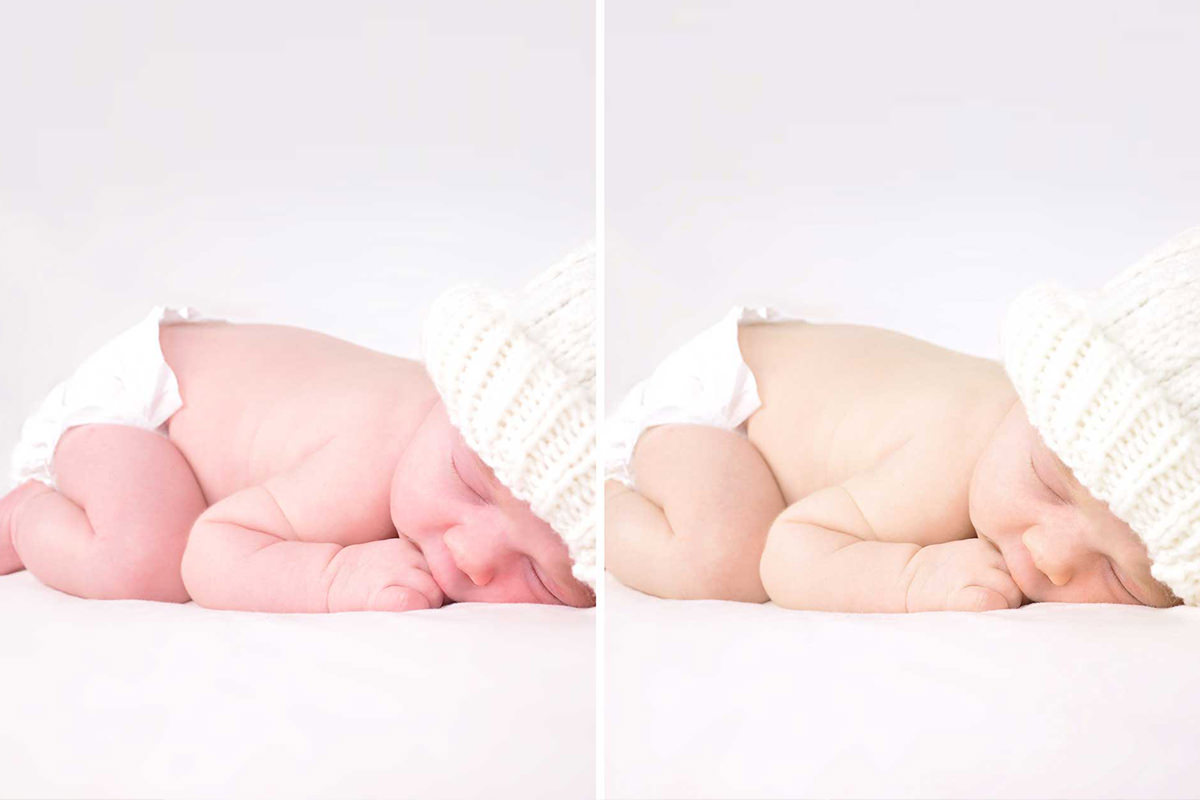
Red, blotchy newborn skin does not have to be fixed by eye. This tutorial shows how to measure it instead: bring in a reference photo with the skin tone you want, use the Average blur filter to reduce a patch of skin from each image to a single color, read the Hue, Saturation, and Brightness values of both, and type the exact difference into a Hue/Saturation layer targeted at reds.
Enjoying This Free Tutorial?
We publish a new free tutorial every week, each one with sample images and PSDs you can download and follow along with. Sign up and they land straight in your inbox, along with early word on sales, events and subscriber-only offers.
Newborn skin often reads as too red or blotchy, and rather than guessing at a fix, this technique measures the actual color difference between the problem skin and a reference skin tone, then transfers that exact difference with Hue/Saturation. This tutorial covers finding a reference image, averaging skin tone samples from both photos, reading their Hue, Saturation, and Brightness values in the color picker, and using those precise numbers to correct the color.
Finding a Reference Image With an Ideal Skin Tone
Bringing in a second photo with skin tone that already looks natural gives this technique a concrete target color to measure against, rather than adjusting by eye alone.
-
Choose a Reference Image
Find a separate photo whose skin tone already looks like a good target, ideally with similar lighting and hue.
-
Bring the Reference Into the Working Document
Use the Move tool to drag the reference image into the same document as the photo being corrected.
-
Scale the Reference Image Down
Press Cmd/Ctrl+T, lock width and height together, and scale the reference image down to a more manageable size.
Averaging the Reference Image’s Skin Tone
The Average blur filter reduces an entire selected area of skin down to a single representative color, giving a clean sample to compare against.
-
Select an Area of Clean Skin
Use the Marquee tool to draw a rectangle over an area of the reference image with a good mix of highlights, midtones, and shadows in the skin.
-
Duplicate the Selection to a New Layer
Press Cmd/Ctrl+J to duplicate just the selected area onto its own new layer.
-
Turn the New Layer Into a Selection
Hold Cmd/Ctrl and click the new layer’s thumbnail to load its content as a selection.
-
Apply the Average Blur Filter
Go to Filter > Blur > Average to reduce the selected skin area down to a single averaged color.
Why the Average Filter Gives a More Reliable Sample Than a Single Eyedropper Click
Clicking a single spot with the Eyedropper only samples one pixel, which can easily land on an unusually bright highlight or a shadow rather than a representative overall tone. Averaging an entire selected area of skin, including its full mix of highlights, midtones, and shadows, produces a single color that much more accurately reflects the true overall skin tone of that region.
Averaging the Same Area on the Original Photo
Repeating the exact same selection, duplication, and averaging process on the photo that needs correcting produces a matching reference color to compare against.
-
Select the Same Kind of Skin Area
On the original background photo, draw a similar selection over a clean area of skin, avoiding things like a hat that would skew the average.
-
Duplicate and Convert to a Selection
Press Cmd/Ctrl+J to duplicate the selection, then hold Cmd/Ctrl and click its thumbnail to load it as a selection again.
-
Apply Average Blur
Go to Filter > Blur > Average to reduce this second sample to its own single averaged color.
Why Comparing Both Skin Tones in the Same Color Space Matters
Hue, Saturation, and Brightness break color down into terms that map directly onto Hue/Saturation’s own sliders, making the measured difference immediately usable. Reading the same colors in RGB, CMYK, or Lab would still describe the same two colors accurately, but wouldn’t translate as directly into the adjustment values actually needed for the fix.
Reading Hue, Saturation, and Brightness for Both Colors
Opening the color picker’s eyedropper on each averaged color swatch reveals the exact Hue, Saturation, and Brightness numbers needed to calculate precisely how far apart the two skin tones actually are.
-
Open the Color Picker
Click the foreground color swatch to open the Color Picker.
-
Sample the Original Skin Tone
Use the eyedropper to click the averaged color swatch from the original photo and note its Hue, Saturation, and Brightness values.
-
Sample the Reference Skin Tone
Click the averaged color swatch from the reference image and note its Hue, Saturation, and Brightness values.
-
Calculate the Difference
Subtract the two values for each measurement to find exactly how many degrees of hue and how many percentage points of saturation and brightness separate the two skin tones.
Applying the Measured Hue Shift
Typing the exact calculated hue difference into a Hue/Saturation adjustment layer, targeted at reds, shifts the problem skin tone precisely onto the reference color’s hue.
-
Add a Hue/Saturation Adjustment Layer
Add a Hue/Saturation adjustment layer above the background.
-
Switch From Master to Reds
Change the dropdown from Master to Reds so the adjustment targets the reddish tones typical of baby skin.
-
Widen the Targeted Red Range
Widen the range sliders enough to make sure the adjustment covers all the reds actually present in the baby’s skin.
-
Enter the Calculated Hue Value
Type the exact degree difference calculated earlier directly into the Hue field to shift the color onto the reference tone.
Matching Saturation and Brightness the Same Way
Applying the same measured differences to Saturation and Lightness on the same adjustment layer completes the color match beyond just hue.
-
Enter the Calculated Saturation Value
Adjust the Saturation slider on the Reds range by the calculated percentage difference between the two skin tones.
-
Enter the Calculated Lightness Value
Adjust the Lightness slider by the calculated brightness difference to finish matching the two tones.
-
Compare Before and After
Toggle the adjustment layer off and on to compare the original reddish skin tone against the corrected result.
Why Widening the Red Range Matters Before Entering the Hue Value
A default, narrow Reds range in Hue/Saturation might miss some of the more orange or pink tones actually present across a baby’s skin. Widening the range sliders before entering the calculated hue shift makes sure the correction reaches every part of the skin that needs it, not just the most saturated red areas.
Why This Approach Works
Averaging an entire selected area of skin, rather than sampling a single pixel, is what produces a reliable representative color to measure in the first place, since one stray highlight or shadow pixel could throw off the whole calculation. Reading exact Hue, Saturation, and Brightness values from both skin tones turns color correction from a guessing game into simple subtraction, since the precise difference between the two colors can be typed directly into Hue/Saturation. Targeting the adjustment specifically at reds, rather than the whole image, is what keeps the correction focused on the actual problem area without shifting unrelated colors elsewhere in the photo.
Final Thoughts
What makes this method reliable is that it replaces visual guesswork with actual measured numbers, comparing one averaged skin tone against another and transferring the exact calculated difference. The same average-and-measure approach works for correcting skin tone in any portrait, not just newborns, whenever a good reference image with the desired tone is available.
Quick Reference: Keys, Menus and Settings
- Bring in the referenceMove tool drag; Cmd/Ctrl + T with width and height linked
- Copy a skin sampleMarquee tool rectangle, then Cmd/Ctrl + J
- Select the sampleCmd/Ctrl-click the new layer’s thumbnail
- Average itFilter > Blur > Average
- MeasureForeground swatch > Color Picker; eyedropper on each swatch; note H, S, B
- CorrectHue/Saturation layer on Reds, range widened: Hue +17, Saturation +2, Lightness -5 in the video
Free Downloads
Take the Guide With You
Get the PDF guide with every step for measuring a reference skin tone and matching a red newborn’s skin to it with Hue/Saturation. Free with a PHLEARN account.
Fixing Baby Skin Color: Common Questions
Why does my newborn’s skin look so red?
It is a very common problem: newborns and babies often have a lot of red in their skin. Instead of guessing, this technique measures how far the skin is from a better skin tone and corrects by exactly that much.
Do I need a reference photo?
Yes. Find a photo whose skin tone is the look you want; both images in the video are from Adobe Stock. Drag it into your document with the Move tool, then press Cmd/Ctrl + T and scale it down with width and height linked.
How do I get one average color from an area of skin?
Draw a rectangle with the Marquee tool over skin with highlights, midtones and shadows, press Cmd/Ctrl + J to copy it to a new layer, Cmd/Ctrl-click that layer’s thumbnail to select it, then go to Filter > Blur > Average.
What should I leave out of the sample?
Anything that isn’t skin, like the baby’s hat. It would change the average color. Sample the same kind of area on both photos.
How do I read the color values of each sample?
Click the foreground color swatch to open the Color Picker. Move outside the dialog and the cursor becomes an eyedropper; click each averaged swatch and note its H, S and B numbers.
Why compare Hue, Saturation and Brightness instead of RGB?
Those three numbers line up with the sliders in Hue/Saturation, so the difference can be typed straight in. The Color Picker also shows RGB, CMYK and Lab if you prefer to compare those.
What numbers were used in the video?
The baby’s skin read a hue of 1 degree and the reference 18 degrees, so Hue went to +17. Saturation was 2% higher on the reference and brightness 5% lower, so Saturation +2 and Lightness -5.
Why change the Reds instead of Master?
Switching Hue/Saturation from Master to Reds limits the change to the red tones in the skin. Widen the range sliders a little so it covers all the reds in the baby’s skin.
Does this work on anything other than babies?
Yes. The same average-and-measure method works for skin tone in any portrait, as long as you have a reference image with the tone you want.
Is there a free download?
Yes, with a free PHLEARN account. You get 1 PDF guide with the averaging, measuring and Hue/Saturation steps from this tutorial.
Master Photoshop, Lightroom and Photography
Join PHLEARN PRO for $12.99 a month or $99.99 a year. Cancel anytime, with a 100% money-back guarantee.





