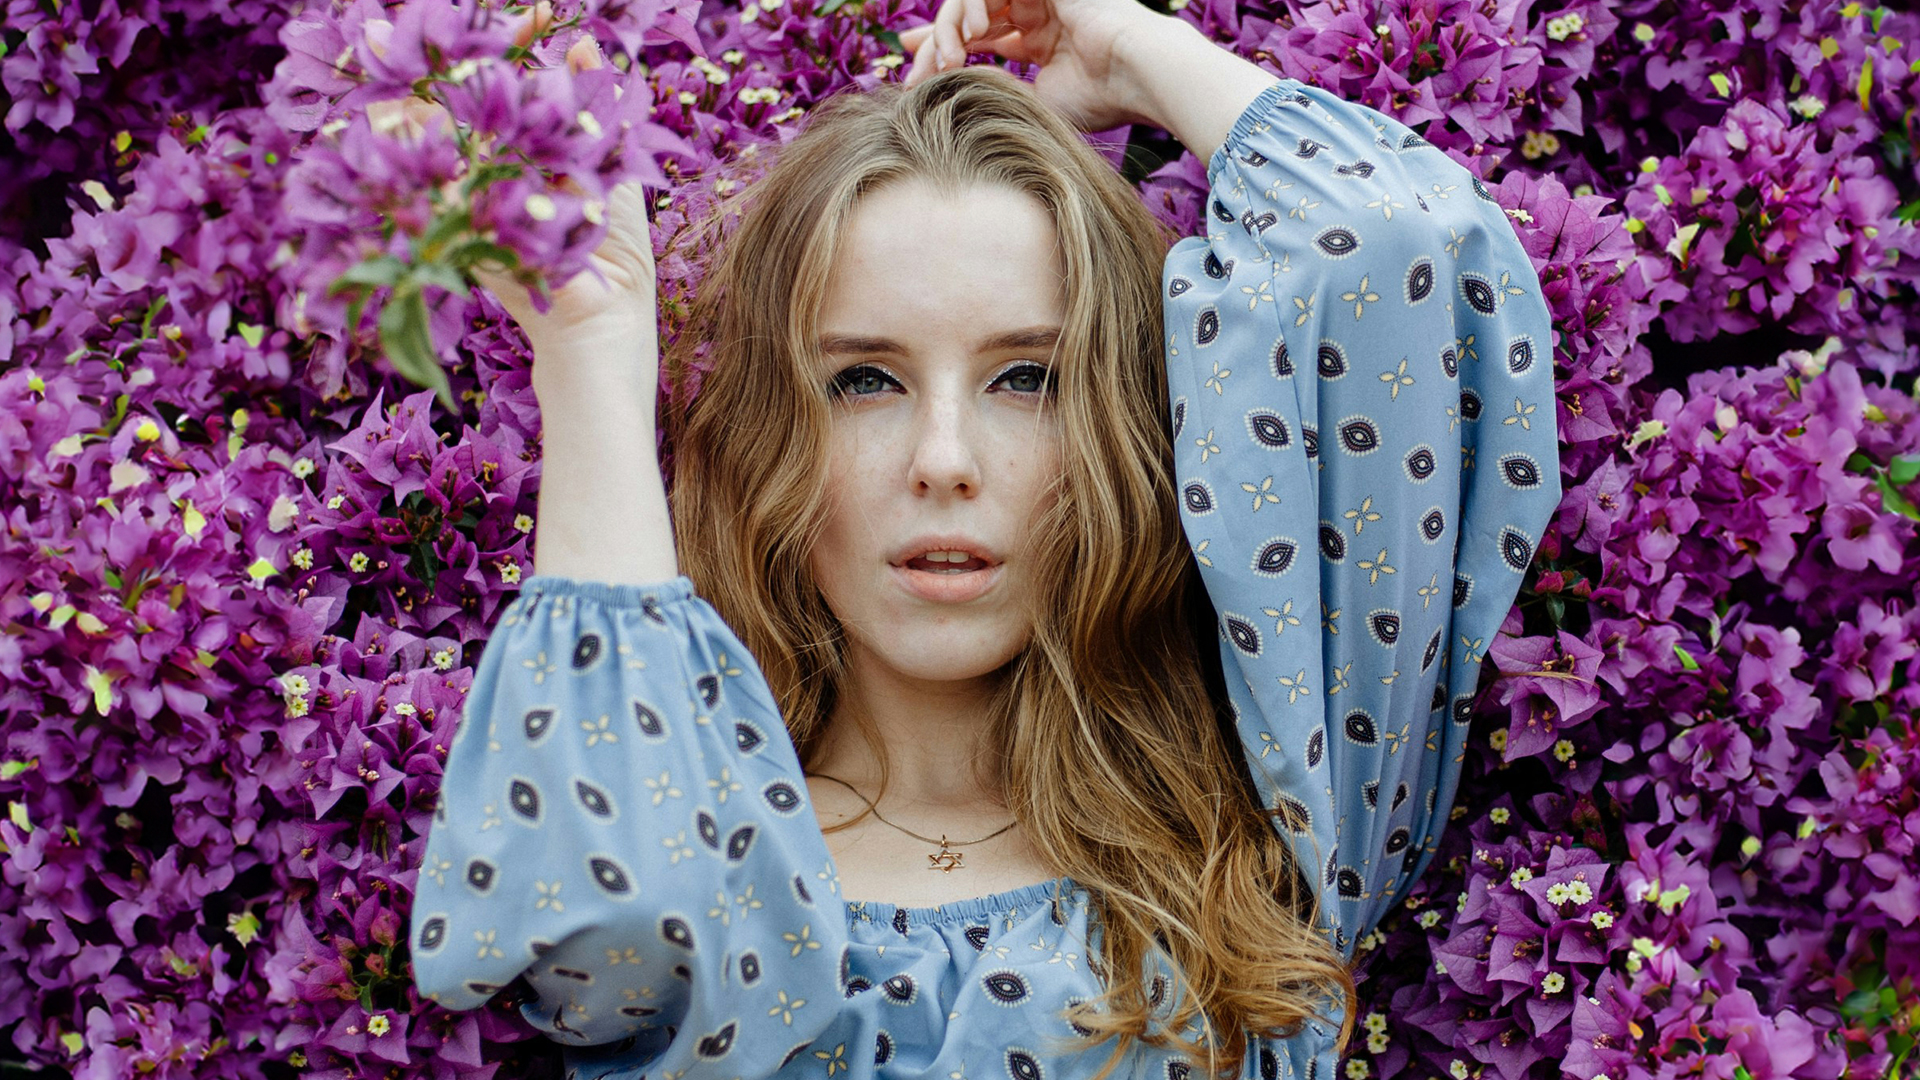

Download Assets
This tutorial includes 2 sample images, 2 sample PSDs and 1 PDF guide. Downloads are free with a PHLEARN account.
- Download the sample images and PSDs from every free tutorial on PHLEARN
- New free tutorials published every week
- One free account — sign up once, then download anything
Free PDF Guide · 4 Pages
This Tutorial as a Step-by-Step PDF
Walks through cropping to any ratio and expanding with AI: C for the Crop Tool, Delete Cropped Pixels unchecked, Fill set to Generative Expand, a 1 : 1 square, 5 : 7, 16 : 9 flipped vertical with the swap icon, a typed 8 and 10, and Generative Fill for leftover gaps. Keep it next to your keyboard.
description
Expand aspect ratios in Photoshop instead of cropping into them: set the Crop Tool to the ratio you need, drag past the edge of the photograph, and let Generative Expand build what was never there.
Learn how to effortlessly crop your images to any aspect ratio! In this tutorial, we’ll show you how to use Photoshop’s crop tool to expand the images to your desired ratio, but also how to use generative fill to add stunning details beyond the original image, perfect for printing, social media, and more!
Enjoying This Free Tutorial?
We publish a new free tutorial every week, each one with sample images and PSDs you can download and follow along with. Sign up and they land straight in your inbox, along with early word on sales, events and subscriber-only offers.
Image Source
How to Crop to Any Aspect Ratio and Expand with AI in Photoshop
Cropping to a fixed ratio has always meant losing something. A frame is 8×10, your photograph is not, and the only way to make them agree is to cut into the composition until it fits. Sometimes that is fine. Often it means sacrificing the space around a subject that made the shot work.
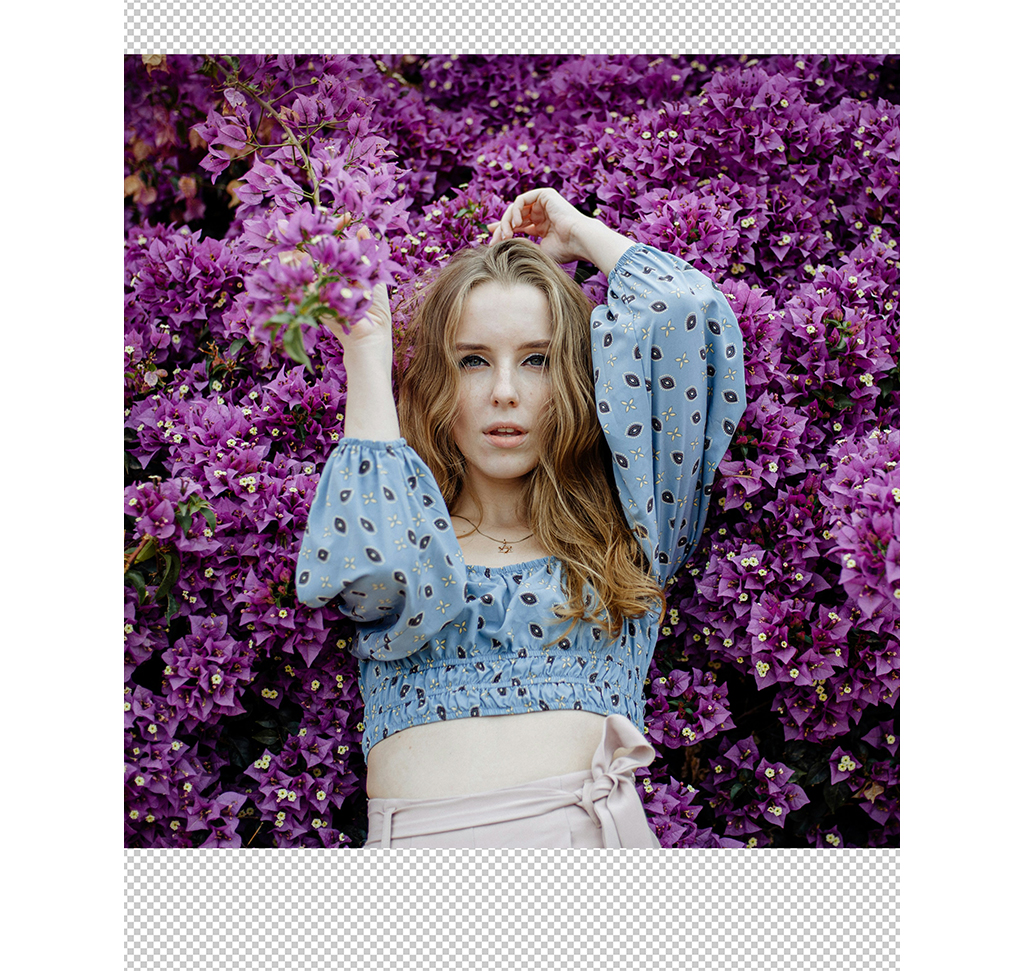
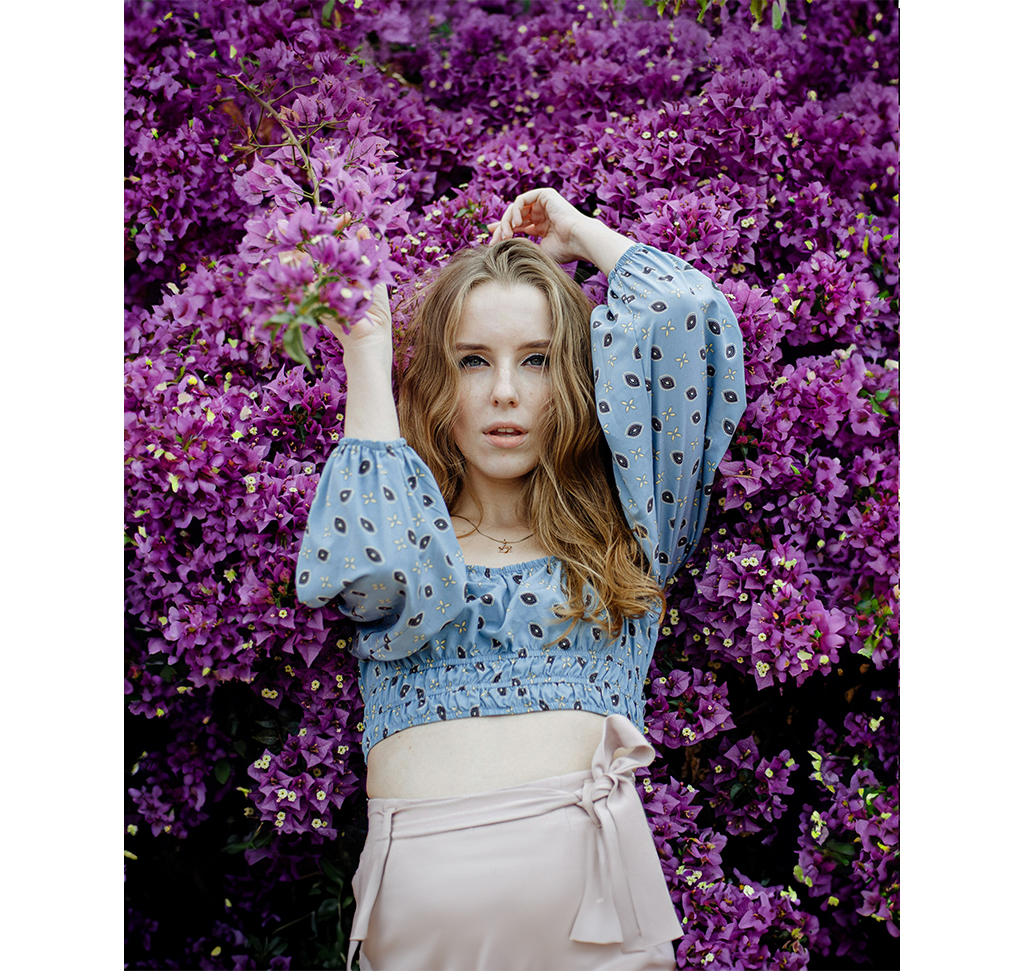
Generative Expand inverts the problem. Instead of cropping inward and throwing pixels away, you crop outward to the ratio you need and let Photoshop build the extra space. The composition survives intact and the file comes out at exactly the dimensions you wanted.
Setting Up the Crop Tool
-
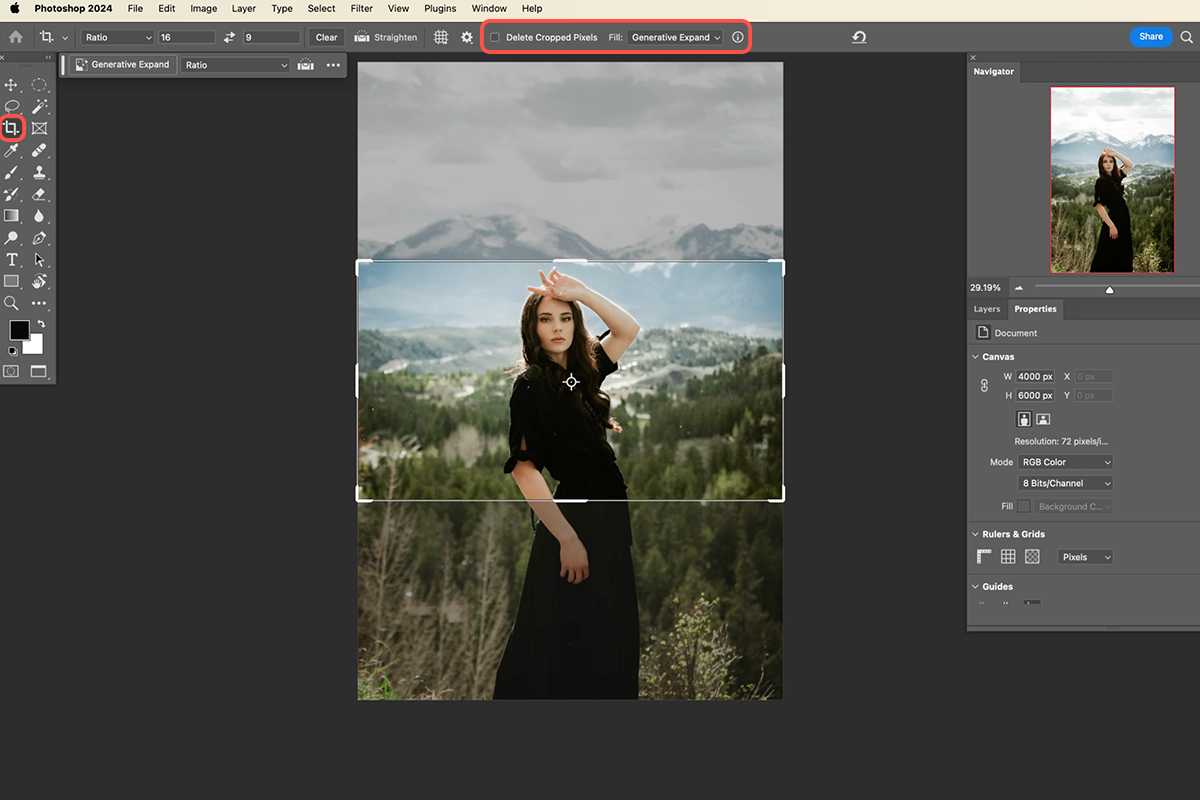
Press C for the Crop Tool
The options bar changes to show the ratio and fill controls.
-
Uncheck Delete Cropped Pixels
This is the setting that matters most, and it is covered below.
-
Set the Fill dropdown to Generative Expand
Without this, any area outside your original image is left empty rather than generated.
-
Choose your ratio
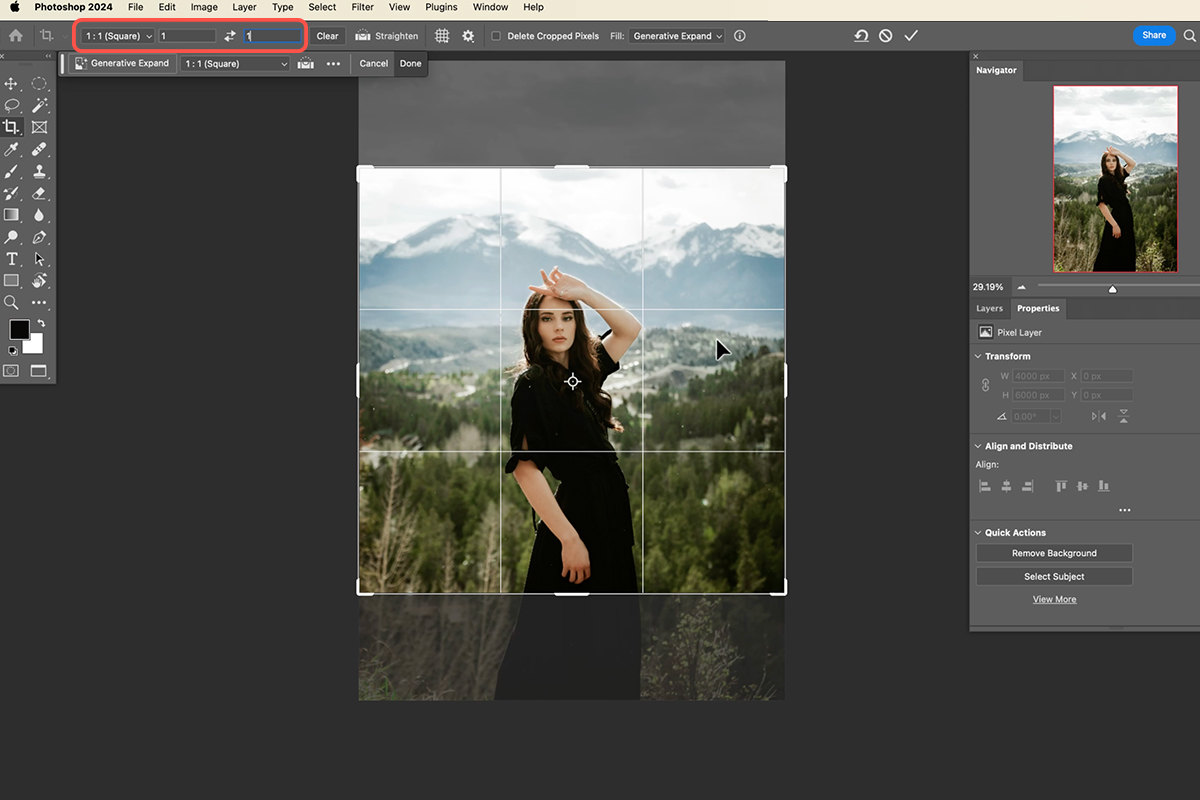
Pick a preset, or type one in — 8×10, 5×7, 4×6, 16×9, whatever you need.
-
Drag the crop box outward past the edges of your photo
The area beyond the original image shows as empty space waiting to be filled.
-
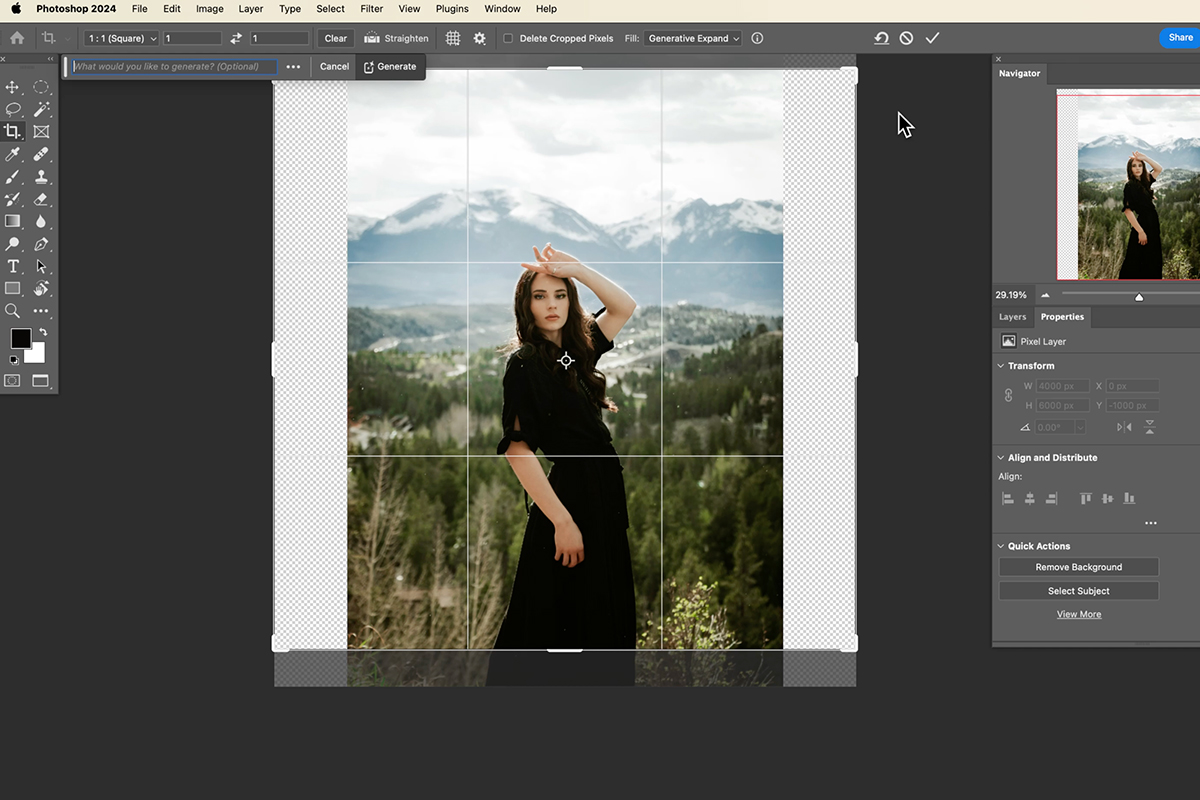
Press Enter and let it generate
Photoshop builds the new area and offers variations to choose between.
Why Delete Cropped Pixels must stay unchecked
With this ticked, Photoshop permanently discards everything outside the crop the moment you press Enter. Unticked, the cropped-away content is retained — hidden, but still in the file.
That means the crop stays adjustable. Come back later, grab the Crop Tool again, and you can pull the boundary back out to reveal what you had cut off. On a job where the client changes their mind about the format, this is the difference between a small adjustment and a redo.
Entering a custom ratio
The presets cover the common cases, but you can type any two numbers into the width and height fields. Note the distinction: entering plain numbers like 8 and 10 sets a ratio, while adding units — 8 in, 10 in, or pixel values — sets an actual size. For matching a frame or a print, the ratio is usually what you want, with the final resolution handled separately.
The orientation toggle
The small double-arrow icon between the width and height fields swaps them. Faster than retyping when you need 10×8 rather than 8×10, and easy to miss.
Positioning Before You Generate
Where you place the existing image inside the new frame determines what Photoshop has to invent, and this is worth thinking about for a moment rather than accepting the default.
Expanding evenly on all sides gives a balanced result but asks the AI to generate on every edge. Expanding mostly in one direction — pushing the subject off-center, adding room above a figure, extending a sky — often produces a better image and gives the AI a simpler job.
Hold Alt or Option while dragging a corner handle to expand equally in all directions from the center. Drag a single edge to expand in one direction only.
Generally, expand into the simplest parts of the scene. Extending a plain sky or an out-of-focus background is nearly always convincing. Extending a detailed foreground, a crowd, or architecture with strong straight lines is where results get unreliable.
Filling Anything Left Over
Occasionally a generation leaves a transparent sliver at an edge, or fills an area in a way you do not like. You do not have to redo the whole crop.
Take the Rectangular Marquee, select the problem area plus a margin of good image around it, and run Generative Fill with an empty prompt. It regenerates just that patch, blending into what is already there.
This is a useful general habit with generative tools: fix the specific area that failed rather than rerolling the entire operation.
Where This Is Genuinely Useful
Print sizes. Standard frames come in ratios that rarely match what a camera produces. Expanding to fit means the print shows the photograph you composed rather than a tighter version of it.
Repurposing one shot for several formats. A single image can become a 16×9 banner, a 4×5 social post and a 9×16 story without three separate destructive crops. Each one expands into different space rather than cutting into the subject.
Rescuing a tight composition. Shots where you did not have room to step back — a subject cramped against the frame edge — can be given the breathing space the scene needed.
Limitations Worth Knowing
Generated areas have a resolution ceiling
Generated content comes back at a capped resolution, so on a large file an expanded edge can be softer than the original photograph. Expanding a little is safe; expanding an image to several times its original size will show. Photoshop’s Upscale option helps, and keeping the expansion modest helps more.
Straight lines and structure
Architecture, horizons and repeating patterns are the hard cases. A generated wall may not continue at quite the right angle, and the eye catches that immediately. Check any expansion containing a strong straight line carefully.
It is inventing, not recovering
Worth being clear about: the expanded area was never photographed. That is fine for a portrait background or a sky, and it is worth thinking about for documentary or journalistic work, where adding content that was not in the scene is a different kind of decision.
Why This Is Better Than Cropping In
The old approach to a ratio mismatch was subtractive — decide what to lose. This one is additive, and the composition you actually shot survives.
With Delete Cropped Pixels left unchecked, it is also entirely reversible. You can produce three different formats from one file, change your mind about any of them, and go back to the original framing at any point. That combination — non-destructive and additive — is what makes it worth changing your habits for.
Quick Reference: Keys, Menus and Settings
- Crop ToolC; F for full screen so there is room to drag outward
- Set it upOptions bar: Delete Cropped Pixels unchecked, Fill: Generative Expand
- Pick a ratioRatio menu: type 1 and 1 for a square, or a preset like 5 : 7 or 16 : 9; Enter/Return to commit
- Expand past the photoAlt/Option-drag a corner or edge, leave the prompt empty, click Generate
- Flip orientationSwap icon between the two number fields
- Custom ratioType 8 in the first field and 10 in the second
- Fill leftover gapsRectangular Marquee over the gap, Generative Fill, empty prompt, Generate

Free Downloads
Follow Along on the Same Photos
Get the 2 sample images, the 2 finished PSDs and the 4-page PDF guide, so you can crop to the same ratios and expand the same edges. Free with a PHLEARN account.
Crop and Expand to Any Ratio: Common Questions
How do I crop to a specific aspect ratio in Photoshop?
Press C for the Crop Tool, open the ratio menu at the left of the options bar and choose Ratio or a preset such as 5 : 7. Type 1 and 1 for a square, then press Enter/Return or click the check mark.
Can I change the aspect ratio without cutting into my photo?
Yes. Set Fill in the options bar to Generative Expand, then drag the crop outward past the edge of the photo. Photoshop fills the new area with AI instead of leaving it empty.
Should Delete Cropped Pixels be checked?
No. It is checked by default and throws away everything outside the crop. Unchecked, the cropped-away area stays in the file, so you can click the image with the Crop Tool later and pull it back.
Do I have to type a prompt for Generative Expand?
No. Leave the prompt empty and click Generate to let Photoshop work out what belongs there. You get a few variations each time to choose from.
How do I expand the crop evenly on all sides?
Hold Alt/Option while you drag a corner or edge. Without it, the crop grows only in the direction you drag.
How do I switch a 16 by 9 crop to vertical?
Click the small swap icon between the two number fields in the options bar. The same ratio turns upright, ready for something like an Instagram Story.
How do I set a custom ratio like 8×10?
Type 8 in the first number field and 10 in the second. Plain numbers set a ratio; adding units such as inches or pixels sets an actual size.
What if the crop leaves transparent areas?
You do not need to redo the crop. Select the gap with the Rectangular Marquee Tool, click Generative Fill, leave the prompt empty and click Generate. Repeat on any small corner it missed.
Where does Generative Expand struggle?
Architecture, horizons and repeating patterns are the hard cases, and expanding a long way can look softer than the original. Plain skies and out-of-focus backgrounds are nearly always convincing.
Are the sample files free?
Yes, with a free PHLEARN account. You get 2 sample images, 2 sample PSDs and 1 PDF guide: the photos for both examples, the finished files and the step-by-step guide.
Master Photoshop, Lightroom and Photography
Join PHLEARN PRO for $12.99 a month or $99.99 a year. Cancel anytime, with a 100% money-back guarantee.





