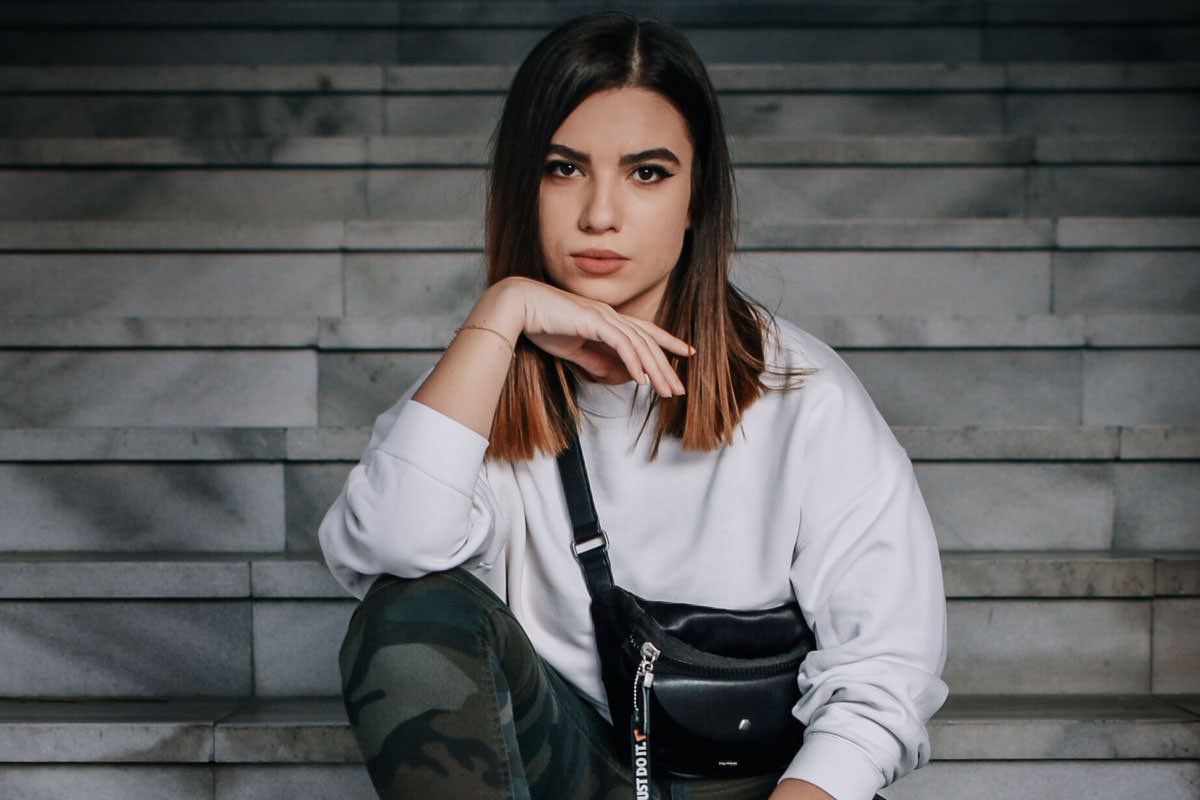

BEFORE
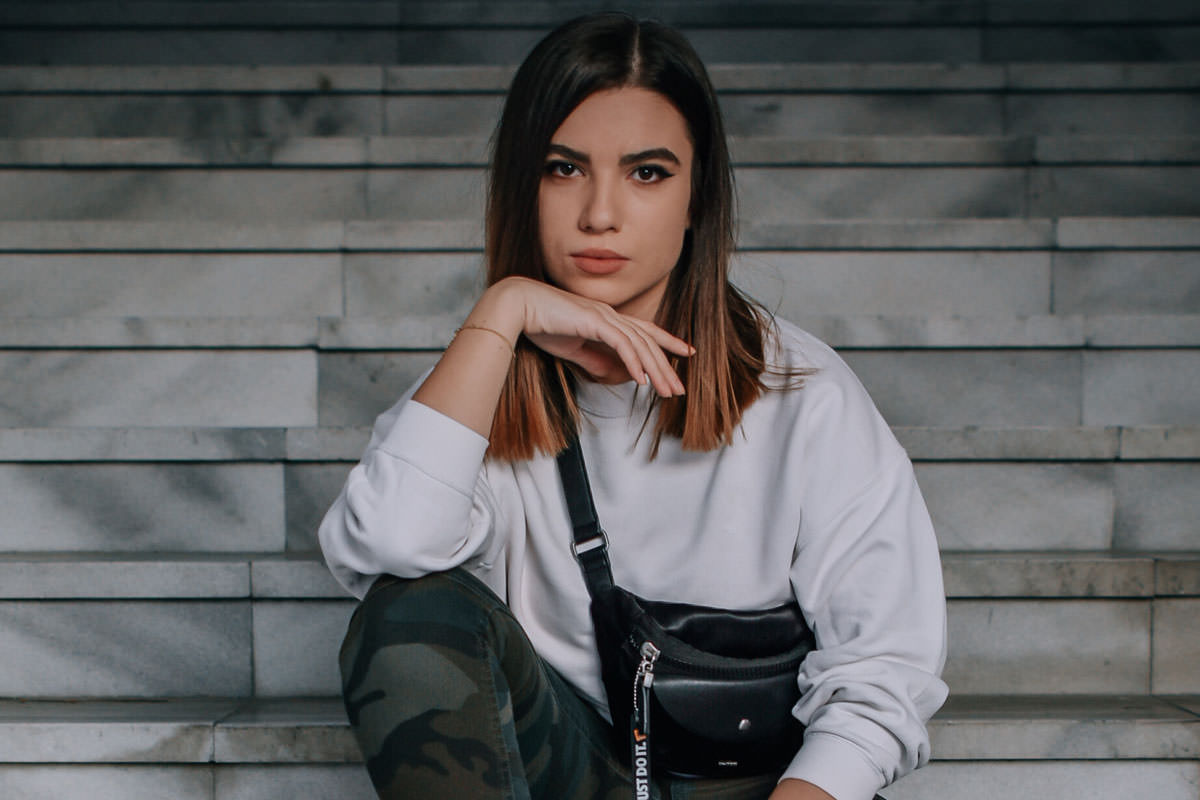
AFTER
Download Sample Images
Click the link below to download the sample images and follow along with this tutorial.
DownloadIf you haven’t tried dodging and burning before, now is your chance! Follow along as Aaron shares an incredibly simple method using Curves to brighten the highlights and darken the shadows of any image, adding more dimension and drawing more attention to your subject.
What is Dodging & Burning
A descendant of film photography, dodging and burning is the practice of targeting areas of a photo to brighten and darken. By brightening certain highlights and darkening certain shadows, you can add beautiful shape and dimension to what would otherwise be a flat-looking image. Best of all, dodging and burning can be applied quickly and easily with one tool in Photoshop; Curves Adjustment Layers!
All About Curves
Curves Adjustment Layers are an extremely powerful tool that allow you to fix exposure and adjust the highlights and shadows in an image. Most importantly, they are entirely non-destructive, meaning you can make changes to them, turn them on or off, or remove them completely to get back to the original photo. If you’re a working photo professional, a non-destructive workflow is key so that you never lose your original work.
When you add a Curves Adjustment Layer, the Curves properties dialog will appear. The main part of the tool we’ll be using is the center graph with the histogram. If you click near the center of the diagonal line, you can add a point and drag it either up or down. As you do this, you’ll notice that your image will either become brighter, if you drag the point up, or darker, if you drag the point down.
That’s pretty much all you need to know about the Curves tool to begin dodging and burning. It is important to note that we will dodge and burn separately, using two different Curves Adjustment Layers. One for the highlights and one for the shadows.
How to Dodge & Burn
Let’s start with dodging. With your first Curves Adjustment Layer, create a point in the middle of the histogram and drag it up slightly to increase the overall exposure of the image. This will brighten up our subject, which is exactly what we want. Unfortunately, it also brightens up the background, flattening out the photo. Let’s take our new Curves Adjustment Layer and make it a little more precise in where it brightens the image.
Select the layer mask of the Curves Adjustment Layer and hit CTRL or CMD + I. This will invert the mask, changing it from white to black and making it invisible. Then, use the Brush Tool to paint with white on the layer mask only where you want your subject to be brighter. In our example, we focus on her face and upper body. Now our subject is brighter, but the effect is a bit too obvious. To blend it more naturally, select the Curves layer mask and go to Image and to Apply Image. Using the default settings, this will apply the light and dark information from the image directly to the layer mask, making the new highlights appear only in the lighter areas of the image.
Repeat the same process for the burn step. Create a new Curves Adjustment Layer and simply drag the center point down to darken the image. Invert the layer mask, paint where you want to darken the photo (in our example we chose to darken the edges of the image for a vignette effect), and use the sample apply image technique.
Our final result has a subject that is nice and bright, with natural looking highlights, and a darker background which helps draw more attention to the subject. Use this dodge and burn technique on any photo and we’re certain that you’ll see an immediate improvement!