
Download Assets
description
Learn the basics of Blending Modes! In this tutorial we’ll show you how to combine two images, hide dark or light backgrounds, and apply artistic color effects with overlay blend modes. Plus, discover keyboard shortcuts to quickly cycle through groups like Darken, Lighten, and Overlay for creative photo composites.
Go PRO:
Dive deeper into the world of Blending Modes with our in-depth PRO tutorial Master Blending Modes for Compositing in Photoshop 2025 . In this tutorial we’ll cover Aaron’s must-know blending modes to help you create seamless composites in no time!.
Image Source
- Andreas Gusicov
- Jonas Thomann
- Matt Richmond
Image sourced from Pexels.
Share


AFTER
BEFORE
Get the Blending Edge
Color toning, exposure correction, image sharpening, photo compositing, and unique special effects are all just a few clicks away. Blending Modes are a powerful tool that allow you to blend Layers together in a variety of ways. Follow the steps below to get started!
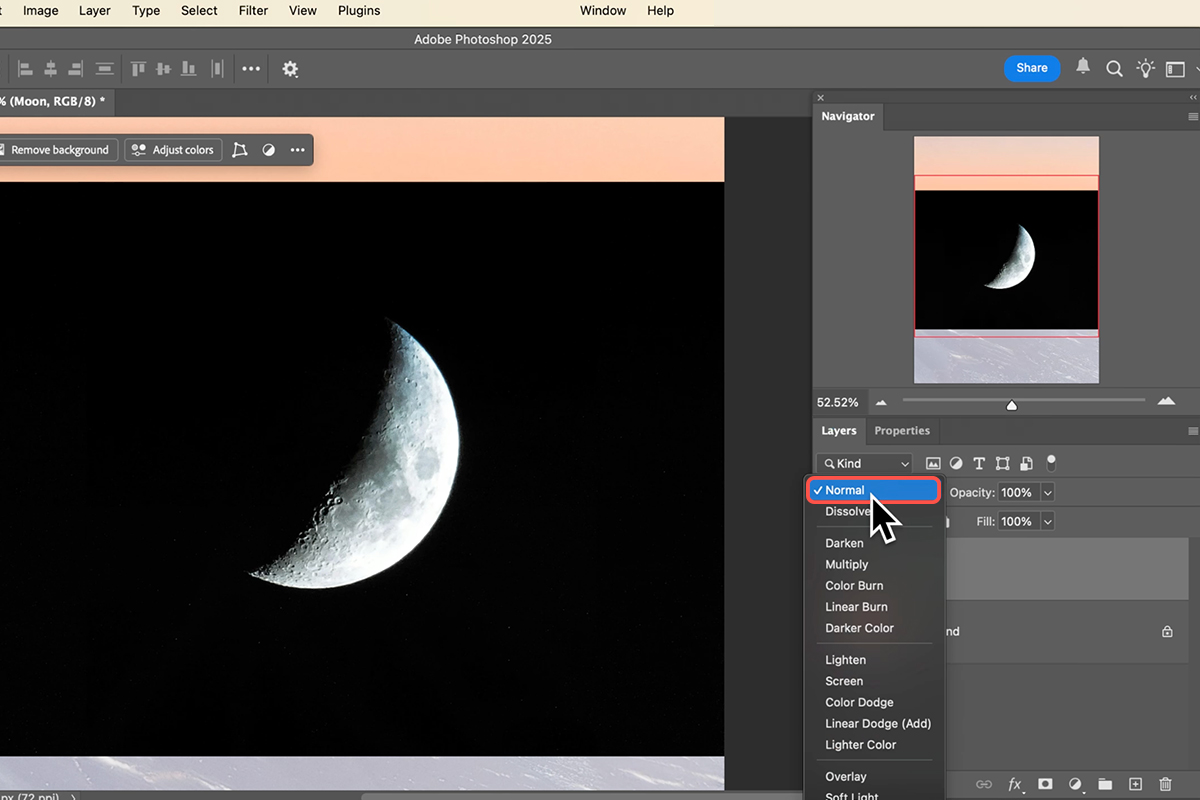
Set Up Layers
1. Open your desired background image in Photoshop.
2. Next, import your second image (the moon) by dragging it into the document, placing it on a new layer above the background.
3. Your goal is often to hide unwanted areas (like the black background) on this top layer. Locate the Blending Modes dropdown on the top of the Layers Panel (default is “Normal”). Hover over the modes to instantly preview the blending effect.
Dark & Light Integration
Blending modes are grouped by function. Use the Darken Group (e.g., Multiply) to make light areas invisible and keep only the dark areas visible, perfect for integrating dark subjects. Conversely, use the Lighten Group (e.g., Screen) to make dark areas invisible and keep only the light areas, ideal for integrating light subjects. If a light background isn’t completely invisible when using a darken mode, use a Levels adjustment (Ctrl/Cmd + L) to make those light areas even brighter, forcing them to disappear completely.

Color & Experimentation
The Overlay Group (Overlay and Soft Light) is fantastic for non-destructively blending highlights, shadows, and colors, which is perfect for adding a solid color fill layer to color-tone your entire image. To rapidly cycle through all blending modes and find the best fit, first ensure you have the Move Tool selected by pressing V, and then use the keyboard shortcut Shift + Plus (+) or Shift + Minus (?). Remember, you can always adjust a layer’s Opacity to fine-tune the intensity of any blending effect.
Blending modes are a powerful, non-destructive alternative to masks and cutouts, allowing you to create complex and artistic photo composites with just a few clicks. Experiment with the different groups and keyboard shortcuts to quickly unlock new creative possibilities in Photoshop.


