Download Assets
description
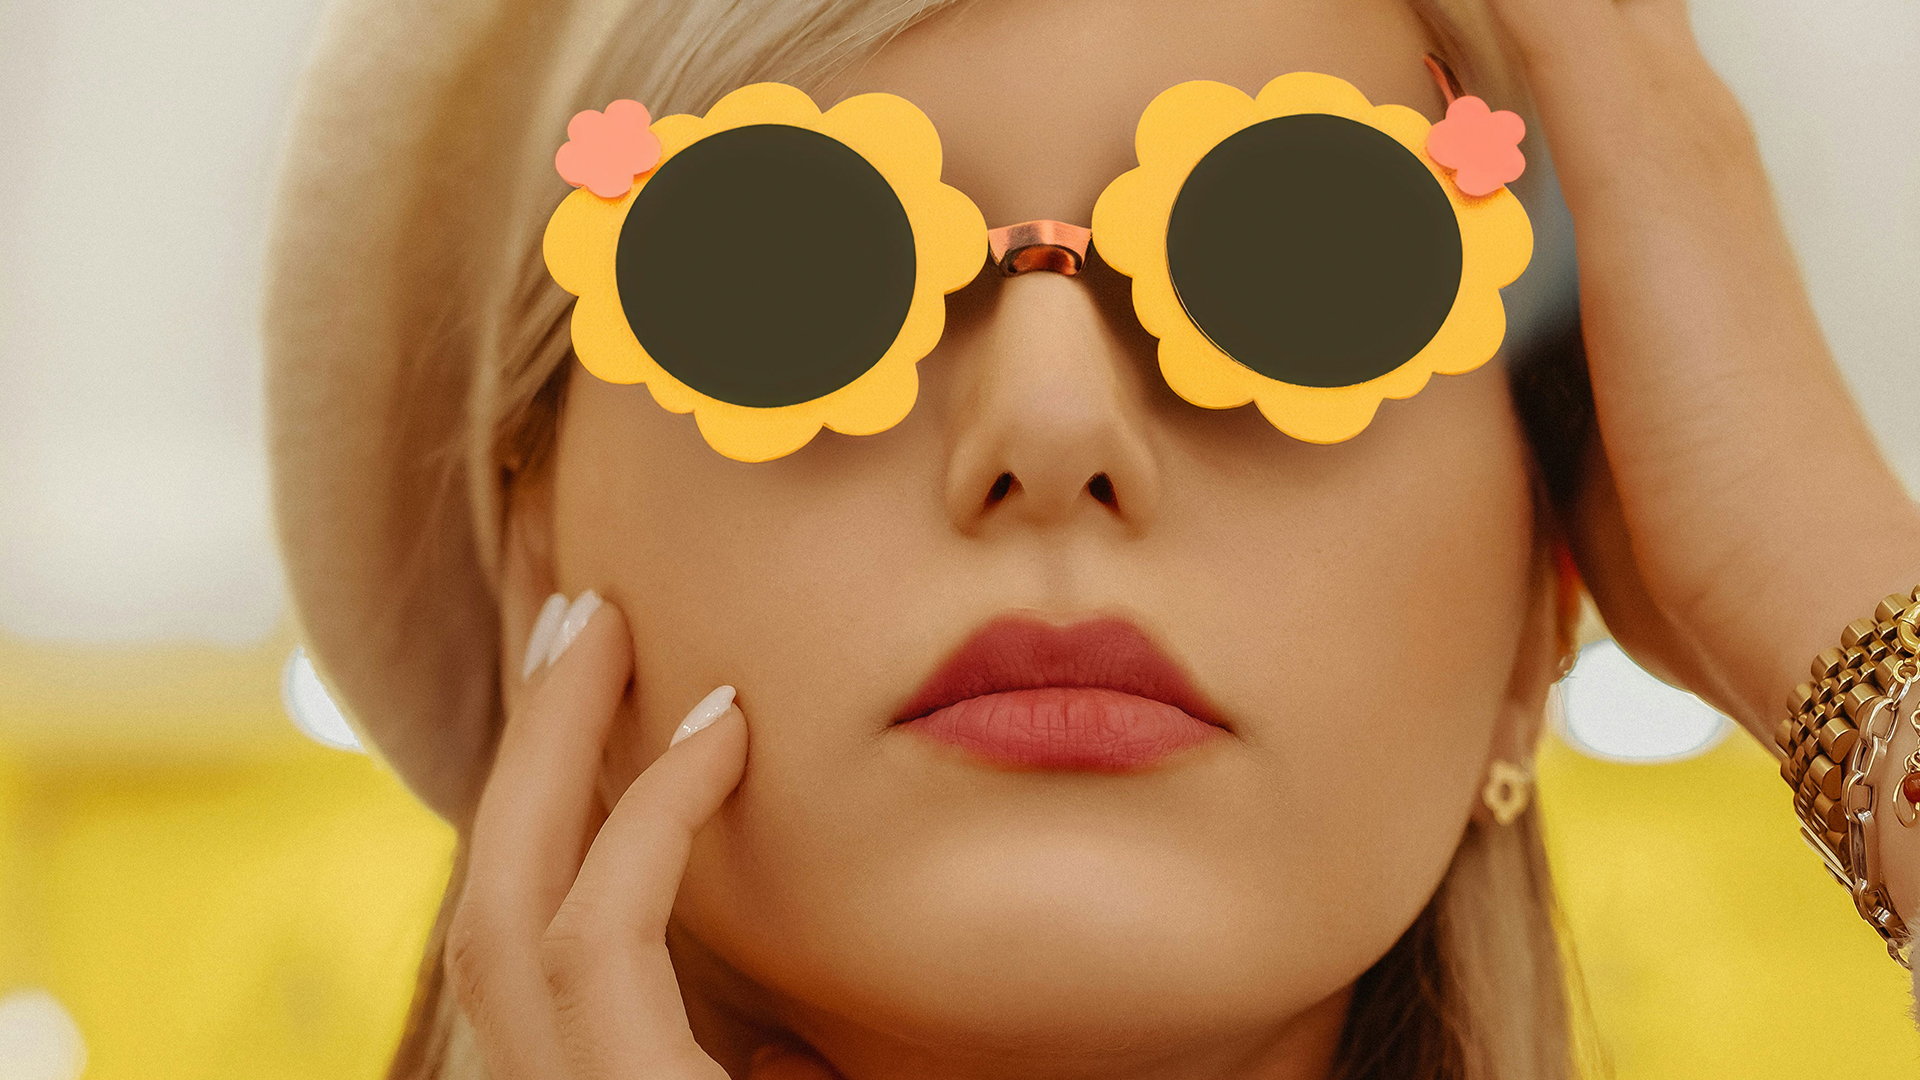
Tired of generic AI edits? This tutorial dives into Photoshop Beta’s groundbreaking AI Reference Image tool. Learn how to add precise details to your photos, from custom sunglasses to one-of-a-kind accessories, all guided by a simple reference picture.
Go PRO:
Learn the ins and outs of AI with our in-depth PRO tutorialThe Ultimate Guide to AI in Photoshop: Generative Fill & More.
Artist Credit
- Omid Armin
Images sourced from Unsplash.
Share
AFTER
BEFORE
Goodbye Generic, Hello Specific.
Photoshop’s beta version boasts a groundbreaking AI Reference Image feature, letting you add specific details with incredible accuracy.
Making Precise Selections
1. Open your photo in Photoshop (ensure you have the beta version).
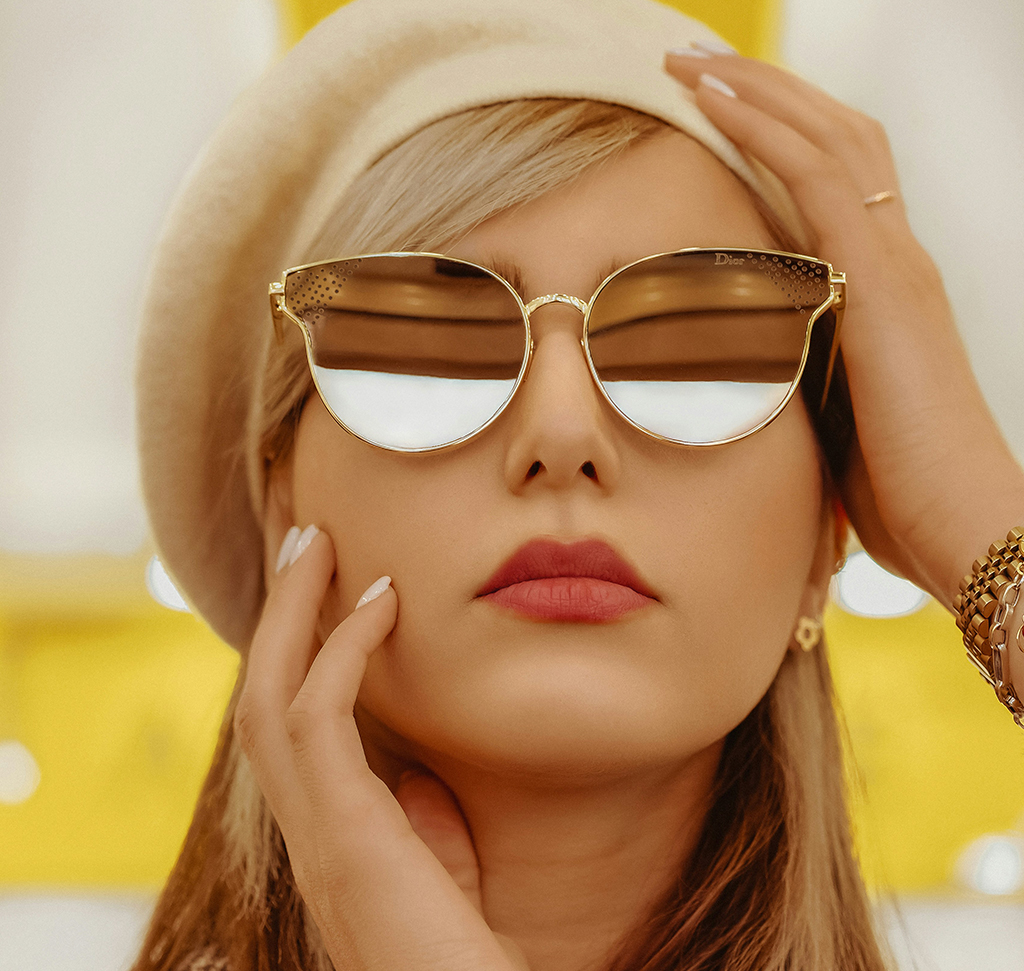
2. Have a separate image ready that showcases the exact detail you want to add (e.g., specific sunglasses).
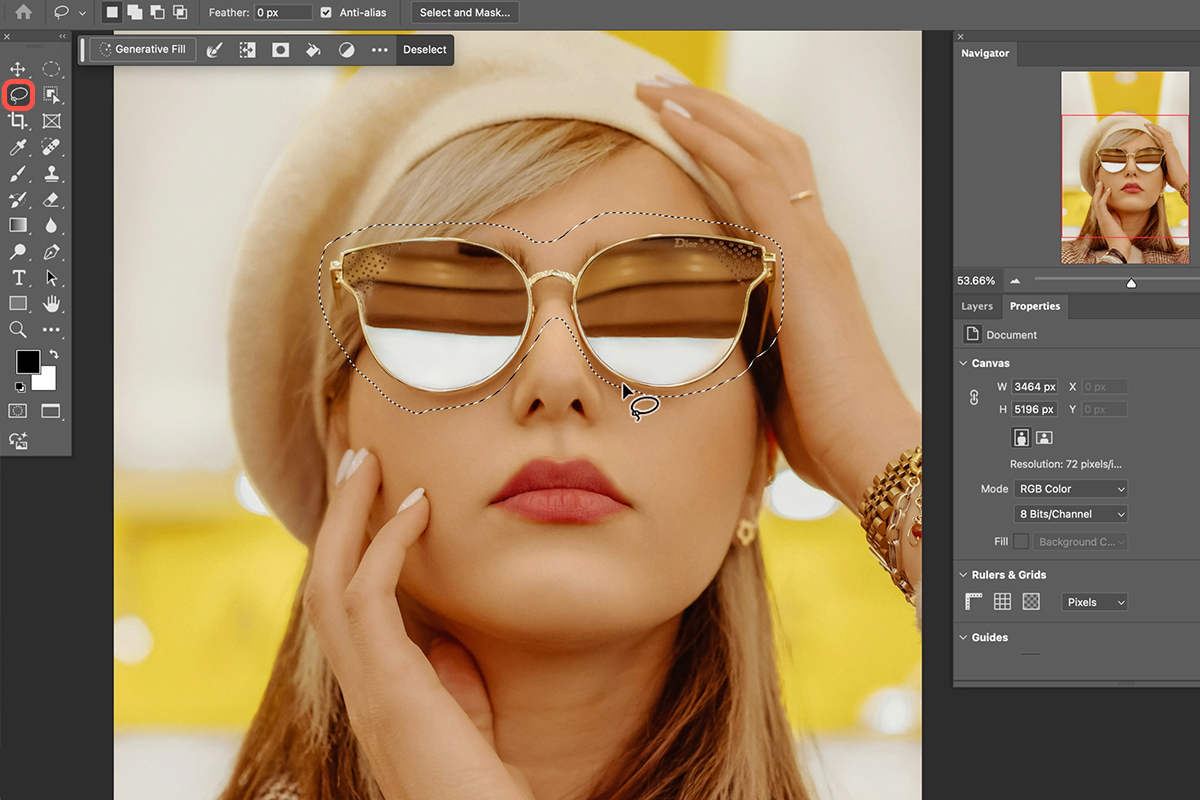
3. Using the lasso tool, carefully outline the area you want to replace.
Leverage the Power of AI
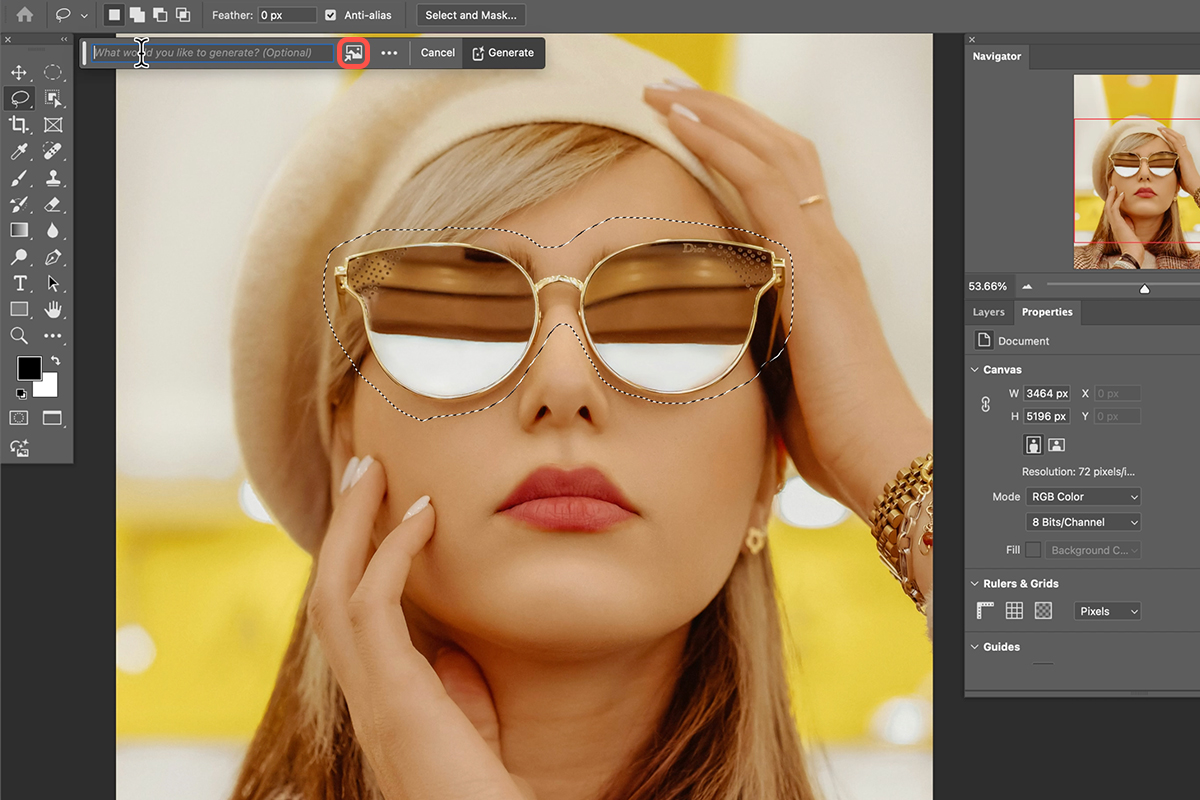
4. Click on Your Generative Fill Bar. If you don’t see it, go to “Edit” > “Fill” > “Generative Fill.”
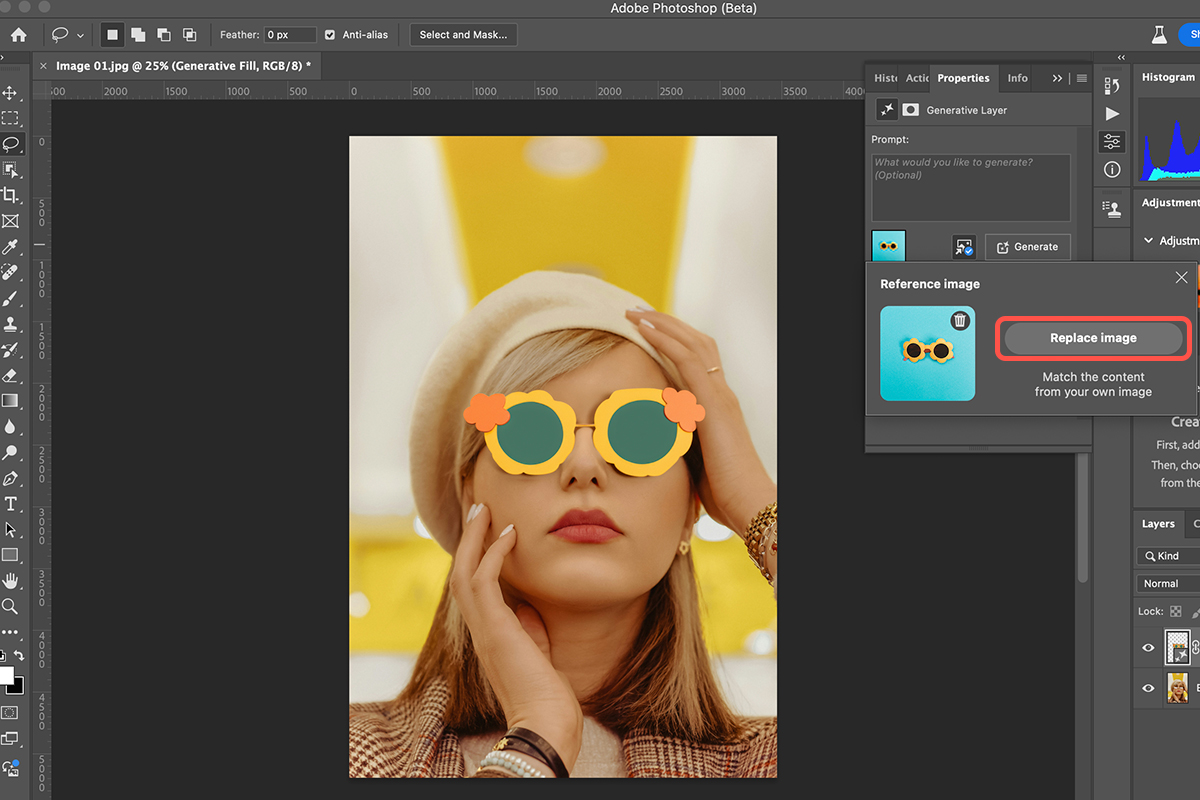
5. Click the new “Reference Image” icon.
6. Choose your reference image from your files.
7. Click “Generate” to see the AI populate your selection with variations based on your reference!
Refine Further
If your initial reference image isn’t quite perfect, you can easily adjust it by clicking the reference image icon again. Here, you’ll have the option to “Replace Image” and choose a different reference altogether. Don’t need a reference anymore? No problem! Simply click “Delete” to remove it entirely and let the AI work its magic based on its own understanding of the element you described.
Bonus Tip
If your reference image has a lot of elements in it, remember to isolate the desired object from your reference image beforehand for even more precise control.
You’re all set! You can use Photoshop’s AI Reference Images to add anything you can dream of to your photos, from unique accessories to specific details. Happy editing!
