
Download Assets
Download Assets
This tutorial includes 7 sample images and 1 sample PSD. Downloads are free with a PHLEARN account.
- Download the sample images and PSDs from every free tutorial on PHLEARN
- New free tutorials published every week
- One free account — sign up once, then download anything
Watch the Full Series
30 Days of Photoshop · 2025 EditionOur most-watched series, updated for 2025 — watch all 30 free
description
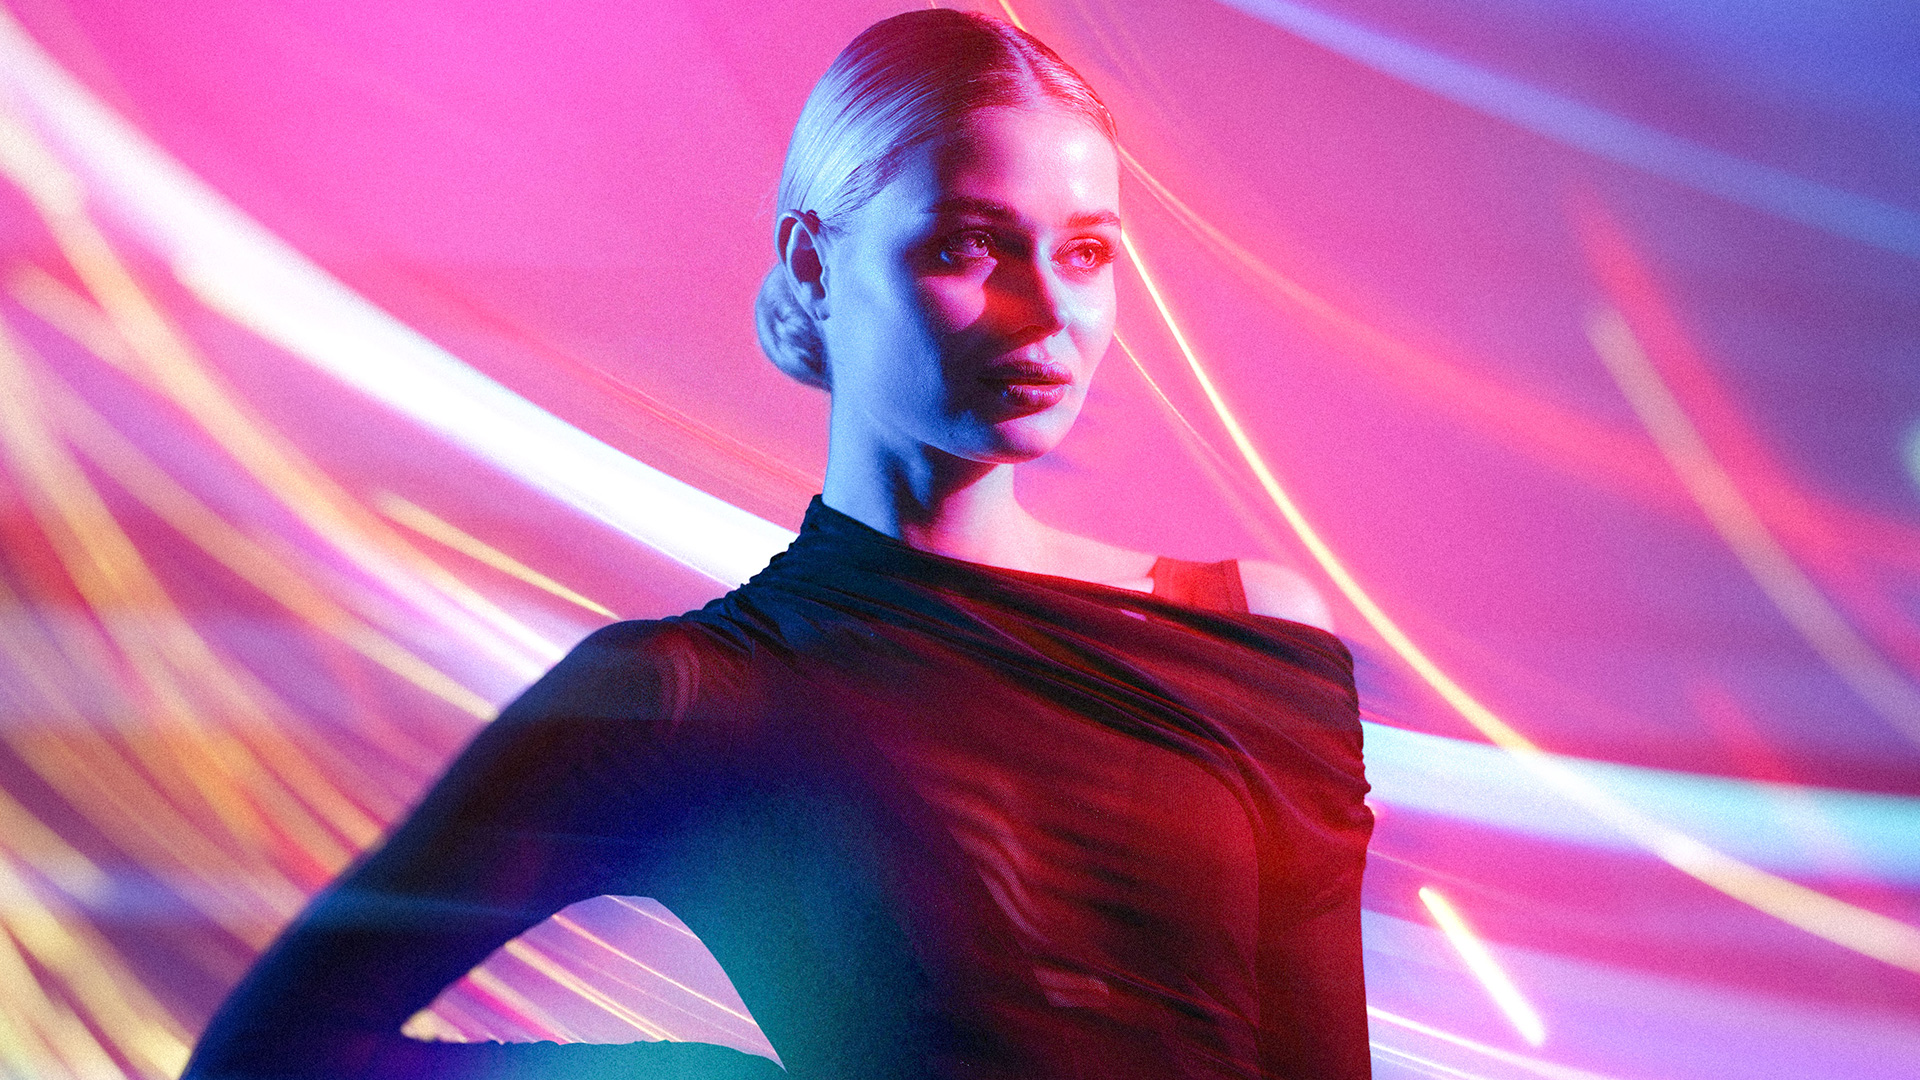
Create a composite in Photoshop that reads as one photograph. The final day of 30 Days of Photoshop, and it exists to prove a point: almost nothing in it is a new technique. Blend modes, Select Subject, layer masks, Smart Objects and the Camera Raw Filter have all appeared earlier in the series.
A composite is what happens when you stop learning them one at a time and put four of them in a row. Blend the light streaks in with Screen so there is nothing to cut out, mask them around your subject so the light passes behind as well as in front, embellish, then unify everything with a single Camera Raw pass. The order is the lesson.
This is Day 30 of 30 Days of Photoshop, 2025 Edition — our most-watched series, rebuilt from the ground up for today’s tools.
JOIN 30 DAYS OF PHOTOSHOP (FOR FREE!)
You’re still on time to join! Sign up and we’ll email you a printable calendar and daily class schedule so you can get started right away.
Image Source
Jay Soundo,
Ingmar,
Hiroshi Kimura,
Egor Litvinov,
Dima Solomin,
Codioful,
Bogomil Mihaylov
via Unsplash

Create a Composite That Reads as One Photograph, Not Several
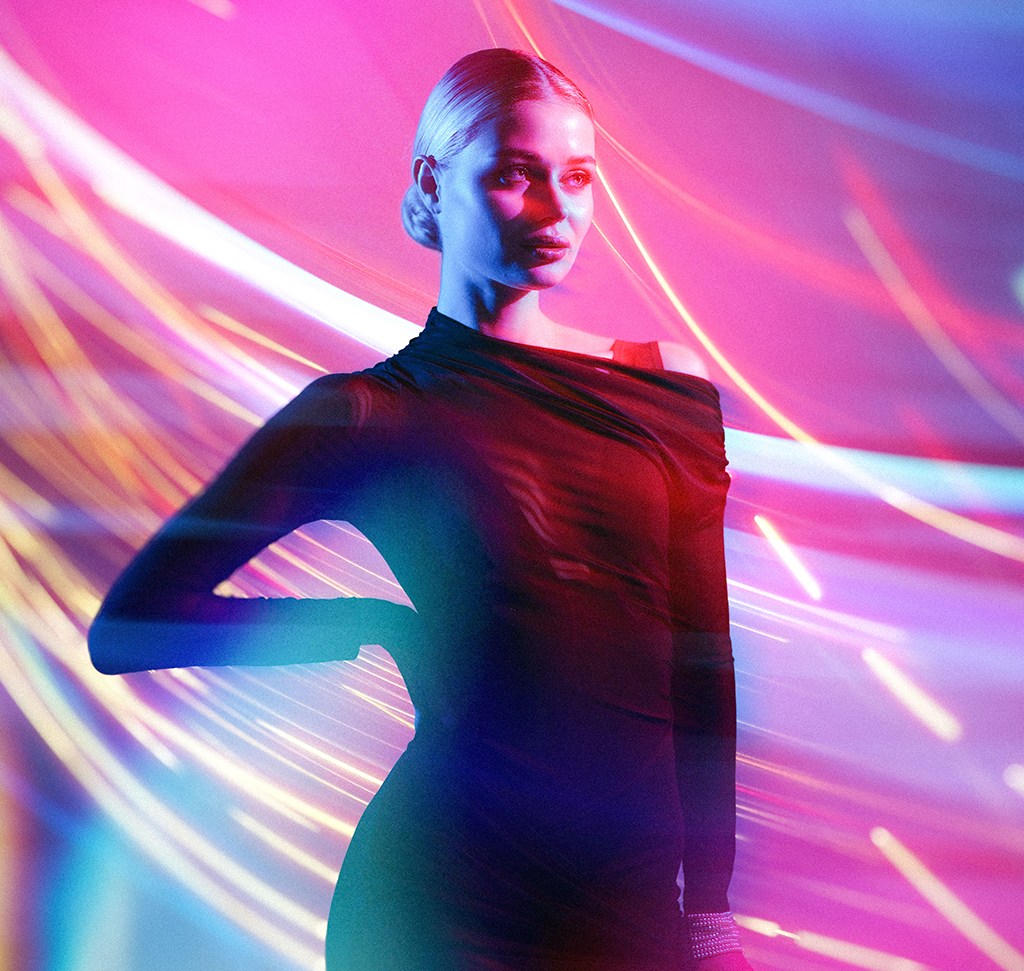
This is the final day of 30 Days of Photoshop, and it exists to prove a point: almost nothing here is a new technique. Blend modes, Select Subject, layer masks, Smart Objects and the Camera Raw Filter have all appeared earlier in the series. The composite is what happens when you stop learning them one at a time and put four of them in a row.
The goal is a portrait wrapped in light streaks that looks like it was captured that way, rather than assembled. Everything that follows serves that single test — and the order you create a composite in matters more than any individual step.
What Makes a Composite Convincing
Nothing Gets Cut Out
The light streaks arrive on black backgrounds and blend modes remove that black. No selections, no erasing, no edges to give the game away.
Light Passes Behind and In Front
A streak that runs only over the subject looks stuck on. Making some pass behind them is what puts the person inside the effect rather than under it.
One Treatment at the End Unifies Everything
Individually adjusted layers still read as separate. A single pass over the flattened result is what makes the whole thing feel photographed.
Drop In the Light Streaks
-
Open Your Subject Image and Drag the Streaks In
Photoshop imports dragged files as Smart Objects automatically, which matters later when you start copying filters between them.
-
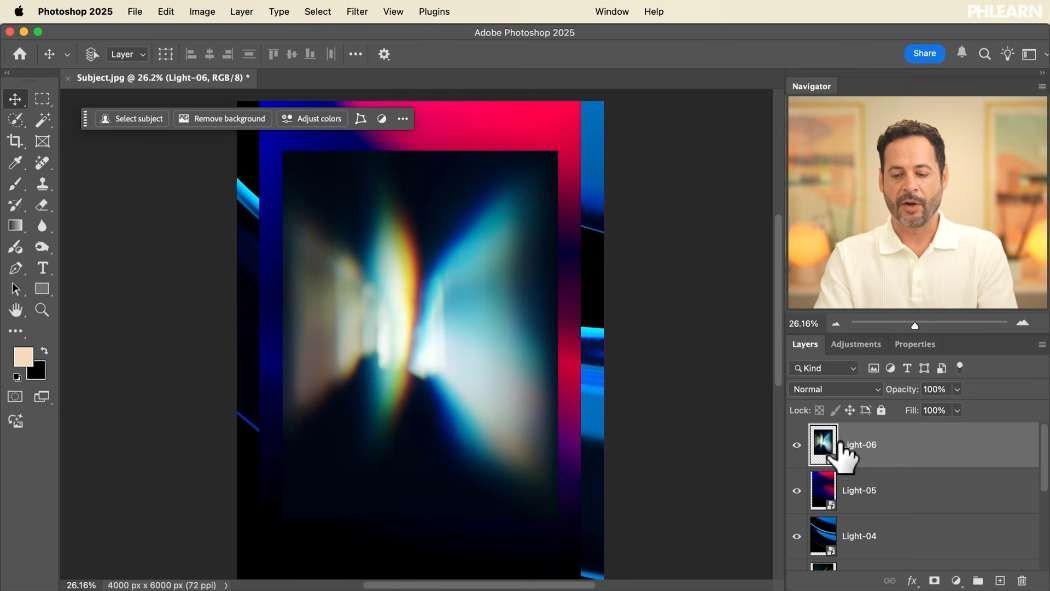
Set Each Streak Layer to Screen
Screen makes black invisible and keeps the bright parts. This is the whole reason light-streak images ship on black backgrounds — the “cut-out” is free.
-
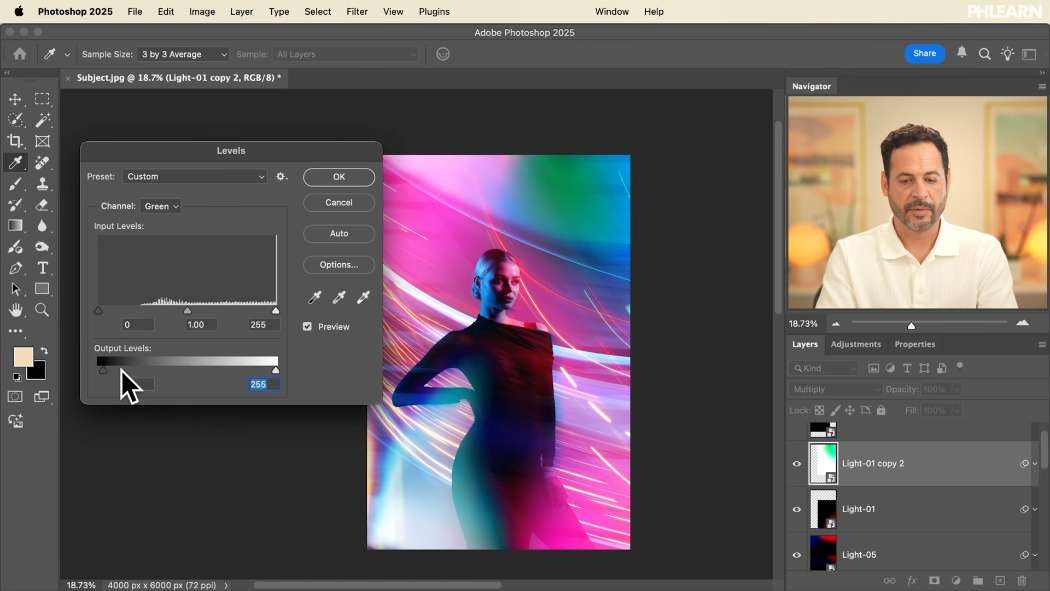
Clean Up Any Visible Edges With Levels
Cmd/Ctrl + L, then drag the black input slider right until the near-black areas go fully black and disappear. A faint rectangle around a streak is always this — the source isn’t quite black enough, and Levels fixes it in two seconds.
Wrap the Light Around the Subject
-
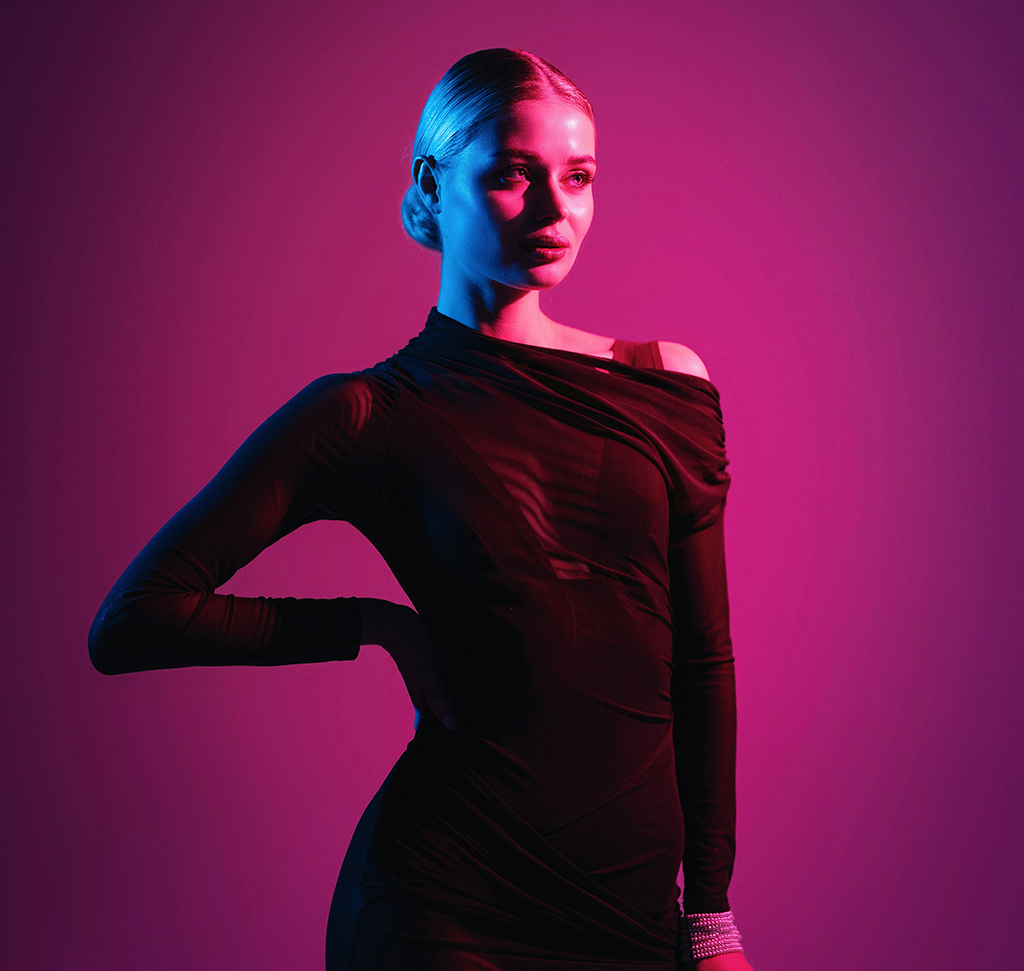
Select the Background Layer and Run Select Subject
You need the selection to come from the layer that actually contains the person.
-
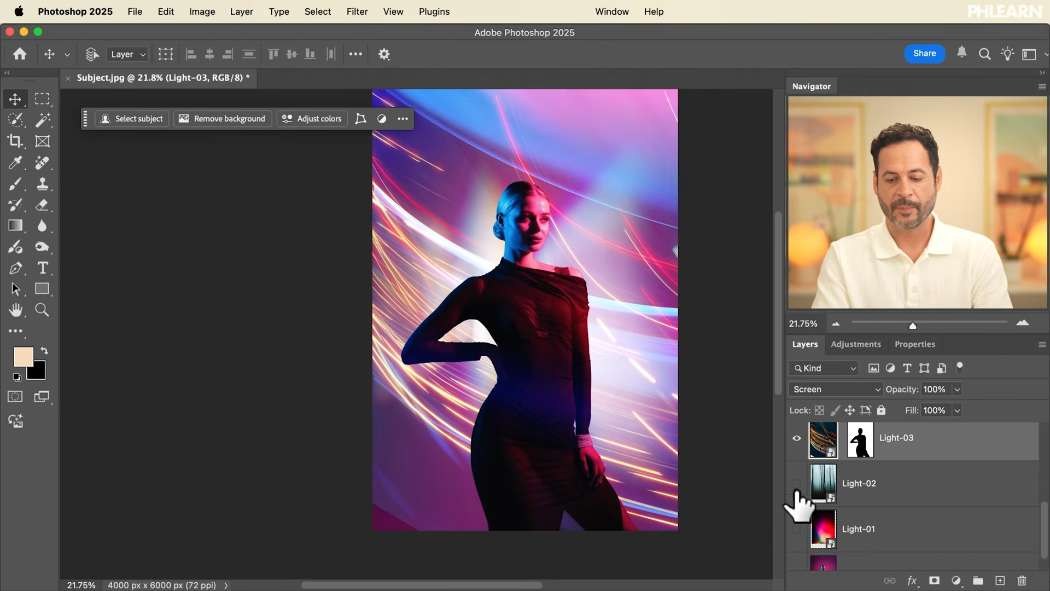
With the Selection Live, Click the Layer Mask Icon on a Streak Layer
That streak now appears only on the subject — light falling across them.
-
Press Cmd/Ctrl + I to Invert for the Opposite Effect
Now the streak appears everywhere except the subject, so it passes behind them. Do this on some layers and not others: the interleaving of in-front and behind is what creates depth.
-
Unlink the Mask to Move the Streak Independently
Click the chain icon between the layer thumbnail and its mask. You can now Cmd/Ctrl + T and reposition the light while the mask stays exactly where the subject is. This is the small piece of layer mechanics that makes the whole composite adjustable.
Push It Further
-
Try Multiply on Some Layers
The inverse of Screen — light areas vanish, dark ones stay. Useful for adding shadow or texture rather than glow.
-
Copy a Smart Filter Between Layers by Alt/Option-Dragging It
Hold Alt/Option and drag the Smart Filter icon from one Smart Object onto another. Set an effect up once, then apply it to five layers in five seconds.
-
Duplicate the Subject and Use Advanced Blending for Colour Separation
Cmd/Ctrl + J, then double-click the layer to open Layer Style and turn off individual channels under Advanced Blending. A slight offset produces the chromatic-aberration look, and it’s subtle enough that people read it as lens character.
-
Add Motion Blur to That Duplicate
Filter > Blur > Motion Blur on the duplicated subject layer, masked back where you want it.
Unify the Whole Thing at the End
-
Go to Image > Apply Image at the Top of the Stack
This builds a single flattened copy of everything below it without merging your layers. Everything underneath stays editable.
-
Convert That Layer to a Smart Object and Open the Camera Raw Filter
Now you’re treating the composite as a photograph rather than a stack.
-
Add a Vignette, a Radial Gradient and a Little Lens Blur
Darken the edges, lift the centre, and let a small amount of blur soften the light effects. That last one is what makes generated light read as photographed light — real light isn’t perfectly sharp.
Where Composites Fall Apart
Every Streak In Front
Flat. Invert half the masks so light passes behind the subject too.
Visible Boxes Around the Streaks
The source black isn’t black. Levels, black slider, right.
Skipping the Final Camera Raw Pass
This is the step that converts a collection of layers into an image. Don’t stop before it.
Flattening Instead of Apply Image
Flattening ends the edit. Apply Image gives you the same flattened pixels while keeping everything underneath alive.
Too Many Streaks
Three placed thoughtfully beat nine. Composites fail from excess far more often than from restraint.
Why the Last Lesson Is a Project, Not a Technique
Thirty days of individual tools teaches you what each one does. It doesn’t teach you the thing that actually distinguishes people who are good at Photoshop, which is knowing which four of those tools to reach for and in what order.
That’s why the final day is a composite. The order here is not arbitrary — blend first because it removes the need to select, mask second because you now know where the subject is, embellish third because the structure is settled, and unify last because unifying is only possible once there’s something whole to unify. Learning to see that shape in a job you haven’t done before is the skill the whole series was building towards.
Create a Composite of Your Own Today
Drag your light streaks in, set them all to Screen, and clean the edges with Levels. Download the seven free sample images and the sample PSD and take it through properly — Select Subject on the background, mask each streak, invert half of them so they pass behind, unlink the masks so you can move the light freely, then finish with Apply Image and one Camera Raw pass for the vignette and lens blur. For compositing built by hand from the ground up, our PRO Ultimate Guide to Manual Compositing is where to go next.
Quick Reference: Keys, Menus and Settings
- Blend the streaksDrag the files in, blend mode Screen; Cmd/Ctrl + L, black input slider right
- Light behindSelect Subject on the background, layer mask icon, Cmd/Ctrl + I to invert
- Move the lightChain icon to unlink, Cmd/Ctrl + T; Cmd/Ctrl + ] brings a layer up
- Reuse a maskAlt/Option-drag it to another layer; Cmd/Ctrl + J duplicates a streak
- Ghost the subjectCmd/Ctrl + J, double-click > Advanced Blending channels; Filter > Blur > Motion Blur
- UnifyNew layer, Image > Apply Image, Filter > Convert for Smart Filters, Camera Raw Filter: vignette, radial gradient, grain, Lens Blur
- Copy smart filtersAlt/Option-drag the smart filters onto a new Apply Image layer
Free Downloads
Follow Along on the Same Photos
Get the portrait and every light streak image that goes into it, plus the finished layered PSD with every mask and adjustment editable. Free with a PHLEARN account.
Light Streak Composites: Common Questions
How do I get rid of the black background on light streak images?
Set the layer’s blend mode to Screen. Screen keeps the lighter pixels and makes the darker ones invisible, so there is nothing to cut out.
Why can I still see the edge of the light streak image?
The background isn’t quite black. Press Cmd/Ctrl + L and drag the black input slider to the right until the edge disappears. Because the streak is a smart object, that Levels stays editable.
How do I make the light pass behind my subject?
Click the background layer, run Select Subject, then click the layer mask icon on the streak. Press Cmd/Ctrl + I, or use Invert Mask in the Contextual Task Bar, so the light shows everywhere except on the subject.
How do I move the light without moving the mask?
Click the chain icon between the layer and its mask to unlink them. Select the layer thumbnail and use Cmd/Ctrl + T to scale, flip or move the light while the mask stays on the subject.
Do I need to run Select Subject for every streak?
No. Hold Alt/Option and drag the mask from one layer onto another to copy it. Shift-click a mask to turn it off and put that light in front of the subject instead.
How do I change the color of a light streak?
Press Cmd/Ctrl + L on the streak layer and work in the color channels. Dragging the white slider left in Red pulls the light toward cyan, in Green toward magenta, and in Blue toward yellow.
How do I make the colored ghost effect around the subject?
Select Subject, press Cmd/Ctrl + J, then double-click the new layer and uncheck channels under Advanced Blending. Convert it for Smart Filters and add Filter > Blur > Motion Blur. Converting can drop the channel setting, so check it again afterwards.
How do I make the composite look like one photograph?
Add a new layer at the top and choose Image > Apply Image. Convert it for Smart Filters, open the Camera Raw Filter and add a vignette, a brighter radial gradient on the subject, a little grain and Lens Blur.
What if I change a layer after the Camera Raw pass?
Make a new Apply Image layer at the top and convert it to a smart object. Then hold Alt/Option and drag the smart filters from the old layer onto the new one to copy every Camera Raw setting.
Are the sample files free?
Yes, with a free PHLEARN account. You get 7 sample images and 1 sample PSD: the portrait, the light streak images that go into it, and the finished layered composite.
Master Photoshop, Lightroom and Photography
Join PHLEARN PRO for $12.99 a month or $99.99 a year. Cancel anytime, with a 100% money-back guarantee.





