Download Assets
description
Learn to use the powerful AI Lens Blur feature in Photoshop! This tutorial shows you how to achieve professional-looking depth of field effects within Photoshop using the Camera Raw filter, including subject detection and advanced refinement techniques.
Go PRO:
Learn the ins and outs of Adobe Camera Raw 2024 with our exclusive PRO tutorial Master Adobe Camera RAW 2024. Learn everything from basic adjustments to advanced color grading.Explore the new masking features to edit specific areas and create stunning focus. We’ll even show you how to utilize AI Noise Reduction and the brand new Lens Blur tool.
Image Source
- Chermiti Mohamed
Images sourced from Pexels.
Share
AFTER
BEFORE
Blur the Lines
While Lightroom offers convenient tools for blurring backgrounds, Photoshop provides unparalleled control and flexibility, especially when dealing with complex scenes or achieving specific artistic effects. This tutorial will walk you through the process of using the AI-powered Lens Blur filter in Photoshop to create professional-looking depth of field with ease and precision.
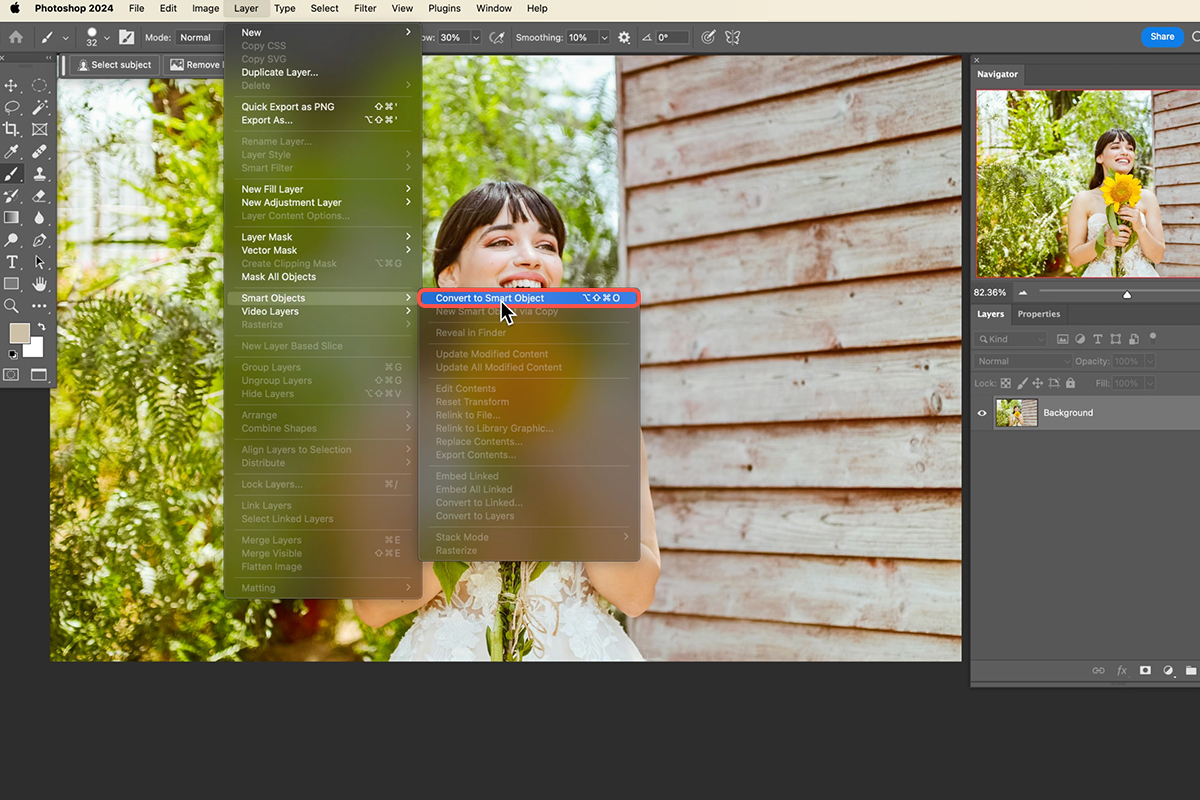
Convert to Smart Object
1. Import the image you want to edit into Photoshop.
2. Convert the layer to a Smart Object. This will allow you to apply non-destructive filters and effects. Go to Layer > Smart Objects > Convert to Smart Object. You can also right-click on the layer in the Layers panel and select “Convert to Smart Object” from the context menu.
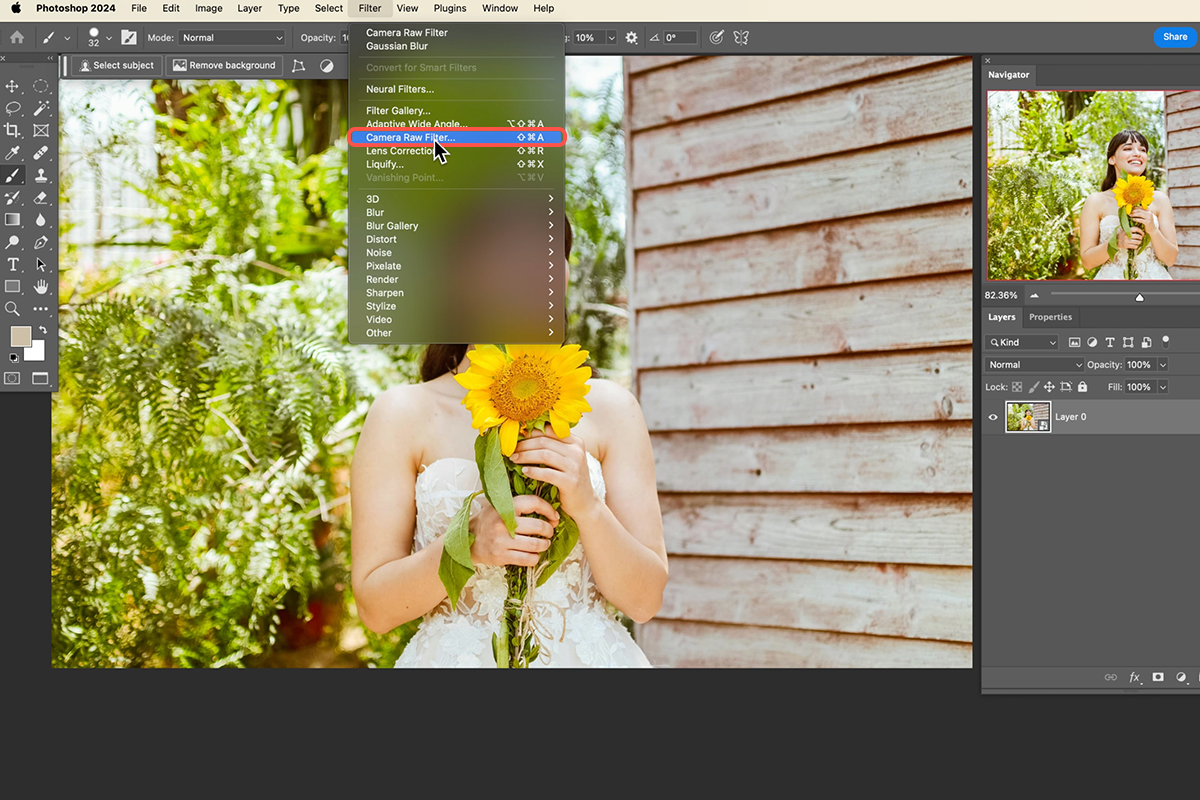
Access Adobe Camera Raw
3. Go to Filter > Camera Raw Filter.
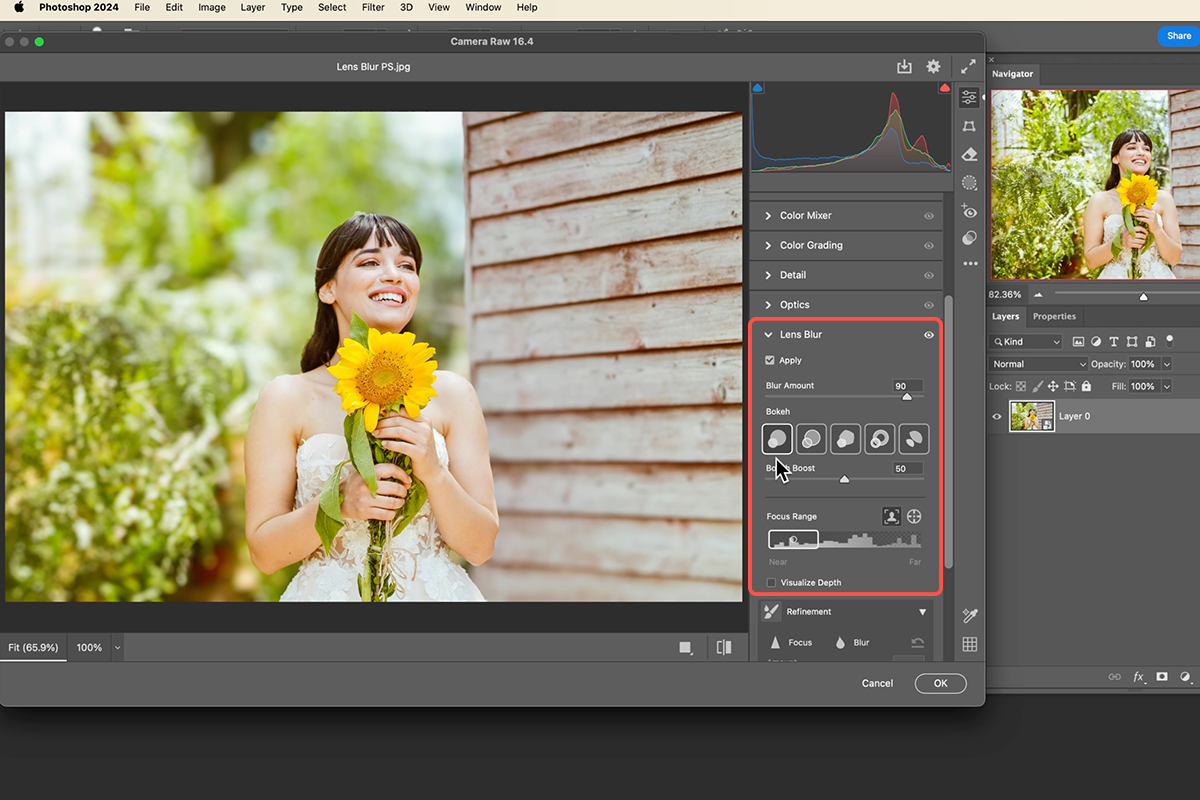
4. Locate the Lens Blur option within the Camera Raw filter.
5. Check the Apply box to enable the lens blur effect.
Applying The Blur Effect
6. Use the target icon to manually select your subject.
7. Click and drag the target icon over your subject’s face. The software will automatically adjust the blur based on your selection.
8. Use the Blur Amount slider to control the intensity of the blur.
9. Experiment with different Bokeh options to achieve the desired background effect.
10. Adjust Highlights to enhance the brightness of highlights in the image.
Refine The Results
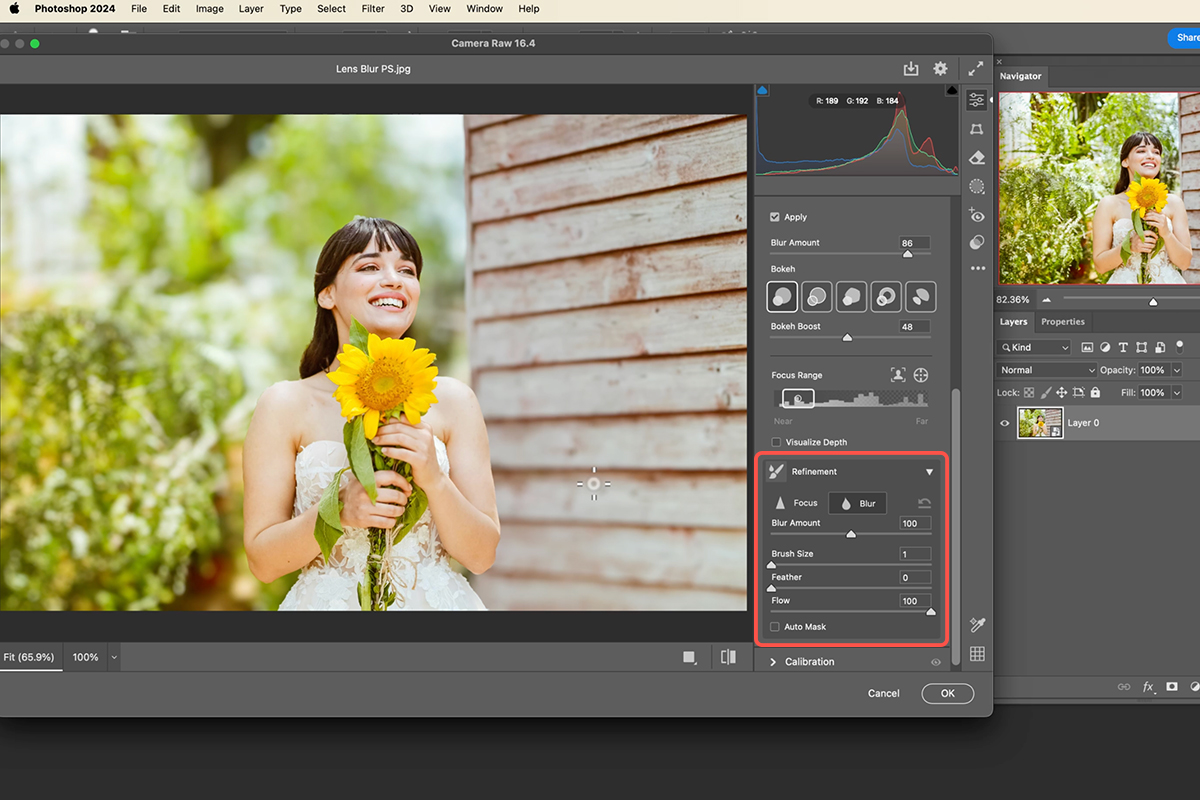
To further refine the blur effect, open the Refinements panel within the Lens Blur settings. This panel provides two brushes: Blur and In-Focus. Use the Blur brush to selectively increase the blur in specific areas, such as the background or parts of the image you want to appear more out of focus. Conversely, use the In-Focus brush to bring back sharpness to areas that were inadvertently blurred, such as important details within the subject. Once you’re happy with the results click OK to apply the lens blur to your image.
Additional Tips
For additional refinement, utilize a layer mask. This is particularly helpful around delicate areas like hair or edges where the blur might appear overly pronounced. By painting black on the layer mask, you can selectively reduce or eliminate the blur in those specific areas.
Remember the lens blur effect is fully editable. Simply double-click on the Camera Raw Filter layer at any time to re-enter the Camera Raw settings and make adjustments to the blur amount, bokeh shape, or any other parameters as needed.


