

Download Assets
This tutorial includes 1 sample image, 1 sample PSD and 1 PDF guide. Downloads are free with a PHLEARN account.
- Download the sample images and PSDs from every free tutorial on PHLEARN
- New free tutorials published every week
- One free account — sign up once, then download anything
Free PDF Guide · 4 Pages
This Tutorial as a Step-by-Step PDF
Every step from the video in order: Convert for Smart Filters, the Color Grading panel, the before-and-after view, shadows then midtones then highlights with saturation up and back down, Blending and Balance, resets, and changing the filter’s opacity and blend mode in Photoshop. Keep it next to your keyboard.
description
Color grade in Photoshop the non-destructive way, using the color wheels hidden inside the Camera Raw Filter to tint shadows, midtones and highlights separately.
Enjoying This Free Tutorial?
We publish a new free tutorial every week, each one with sample images and PSDs you can download and follow along with. Sign up and they land straight in your inbox, along with early word on sales, events and subscriber-only offers.
Image Source
Photo by Daniel Snipes via Unsplash

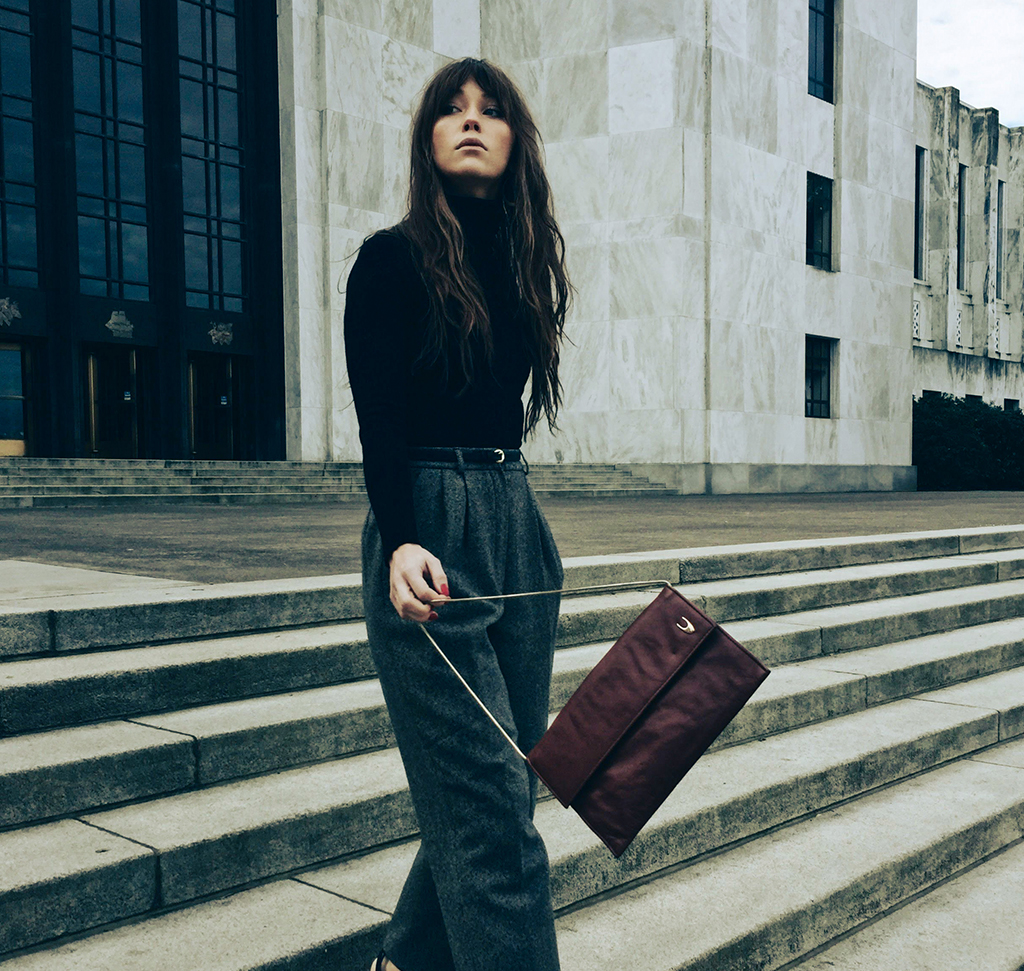
Color Grade in Photoshop Without Stacking Adjustment Layers
Most people color grade in Photoshop by piling up Curves, Color Balance and Selective Color layers until something looks right, then can’t remember which one did what. There’s a better tool sitting inside Photoshop that almost nobody opens: the Color Grading panel of the Camera Raw Filter.
It gives you three color wheels — shadows, midtones, highlights — and lets you tint each range independently in a single, editable step. Convert to a Smart Object first and the whole grade stays adjustable forever.
Why the Camera Raw Filter Beats a Layer Stack
Three Tonal Ranges, One Panel
Separate wheels for shadows, midtones and highlights mean you can put teal in the shadows and warmth in the highlights without either bleeding into the other. Doing the same with adjustment layers takes masks and luminosity selections.
It Stays Editable
As a Smart Filter, every slider you moved is still there tomorrow. Reopen it, nudge one hue, close it. Nothing is baked in.
You Can Judge It Side by Side
Camera Raw has a before/after view built in. Grading without one is how people end up pushing color twice as far as they meant to.
Set It Up Properly
Two steps before any color, and skipping either one costs you later.
-
Convert to a Smart Object First
Right-click the layer and choose Convert to Smart Object. This is the whole reason the workflow is non-destructive — it turns Camera Raw into a Smart Filter you can reopen. Apply it to a flat background layer instead and your grade is permanent the moment you click OK.
-
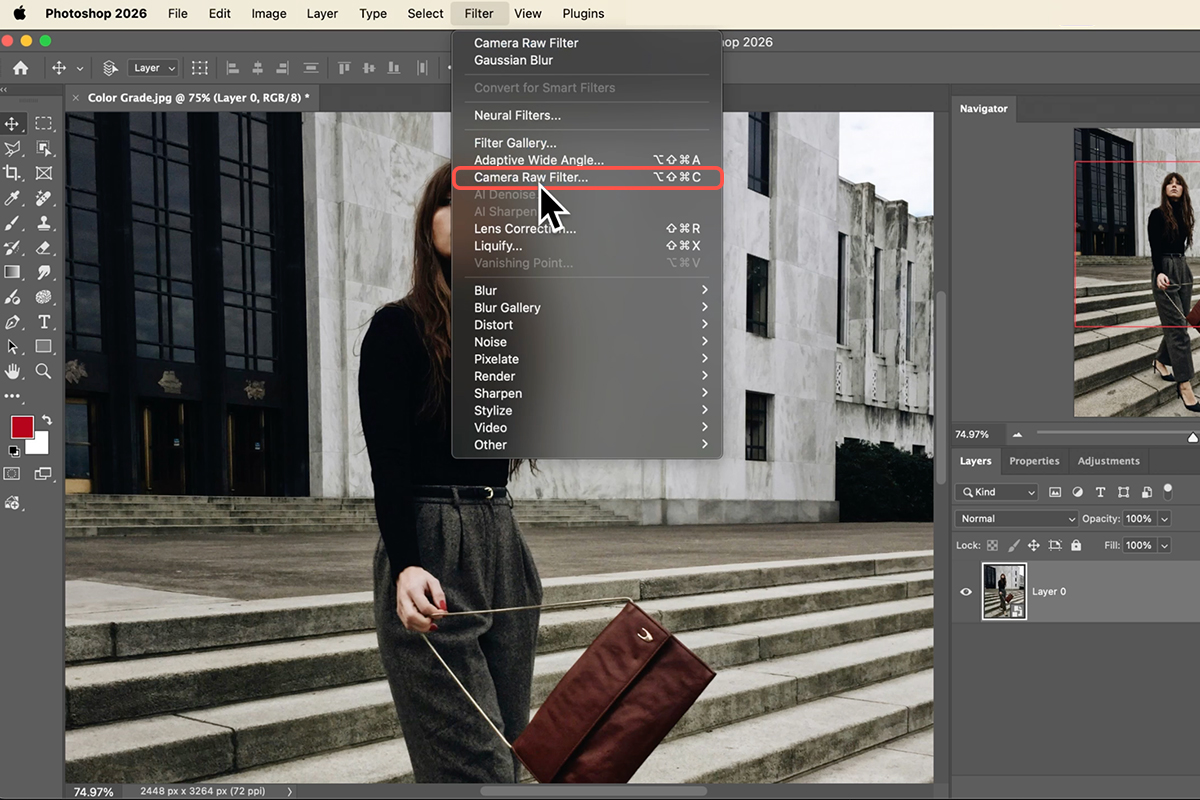
Open Filter > Camera Raw Filter
Same engine that handles your RAW files, running on any layer in Photoshop. Lightroom-grade color control without leaving the document.
-
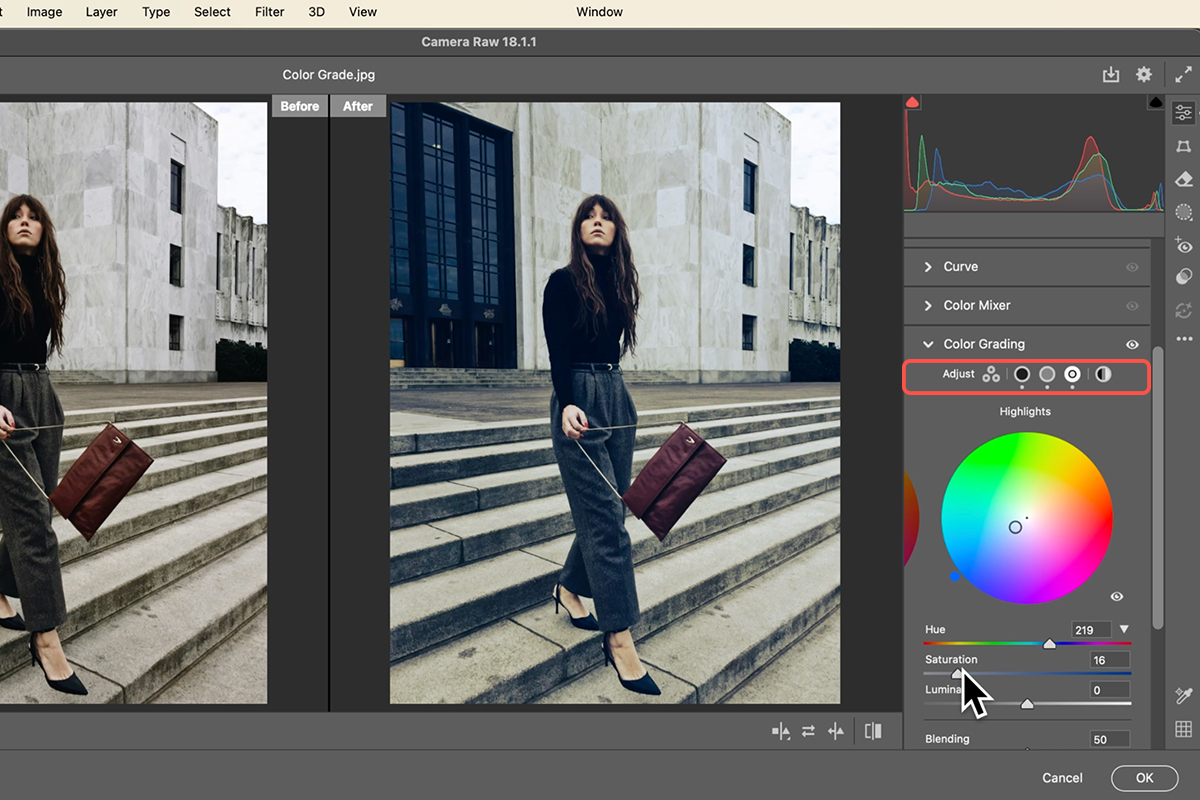
Go to Color Grading and Turn On the Split View
Find the Color Grading tab, then click the Cycle Between Views icon at the bottom right for a side-by-side comparison. Keep it on the entire time you’re grading.
Dial In the Color
-
Start With the Shadows — and Overshoot on Purpose
Push the saturation slider well past where you want it. You cannot pick a hue accurately when the effect is subtle, so make it obvious, find the color you actually want, then pull the saturation back down. Ending up somewhere gentle is the goal; getting there through an exaggerated version is the fastest route.
-
Work Midtones and Highlights the Same Way
Same overshoot-then-retreat method on each wheel. Cool shadows against warm highlights is the classic cinematic split, but the point is that you are choosing each range deliberately rather than tinting the whole image at once.
-
Reset Cleanly When You Go Too Far
Double-click any slider’s marker to reset that one control. To wipe the entire grade and start over, hold Alt/Option — the Cancel button becomes Reset. Worth knowing before you spend ten minutes undoing by hand.
Blend the Grade Back In
A grade that looks right inside Camera Raw often looks heavy once you’re back in Photoshop against the original. This is where you fix that.
-
Click OK and Look at It in Context
You’re back in Photoshop with a Smart Filter listed under the layer. Toggle its visibility a couple of times and judge it honestly.
-
Open the Blending Options for the Filter
Double-click the small settings icon to the right of “Camera Raw Filter” in the Layers panel. Drop the Opacity to dial the whole grade back, or change the Blend Mode — Soft Light and Overlay both add contrast along with the color, which often suits a grade better than Normal at reduced opacity.
What Usually Goes Wrong
Grading a Background Layer
No Smart Object means no Smart Filter, which means no going back. It takes two seconds to convert and there is no reason not to.
Choosing Hues at Low Saturation
At a subtle setting every hue looks roughly the same. Overshoot, pick, retreat — in that order.
Tinting All Three Ranges the Same Color
That’s just a photo filter, and it flattens the image. The separation between ranges is what makes a grade read as intentional.
Never Checking Against the Original
Your eye adapts within about a minute. Without the split view you’ll keep pushing, and the version you thought was subtle won’t be.
The Habit Worth Taking From This
The technique here is small — three wheels and an opacity slider. What actually changes your results is the order: make it non-destructive, exaggerate to decide, then reduce to taste, then blend against the original.
That sequence works well beyond color grading. Any effect where the right amount is subtle is easier to judge by going too far first and walking it back, because the decision and the calibration are two different problems and trying to solve them at once is what makes it feel like guesswork.
Grade One of Your Own
Smart Object, Camera Raw Filter, Color Grading tab with split view on, overshoot each wheel and pull it back, then blend with opacity or Soft Light. Download the free sample image and PSD and follow the exact grade — then run it on a photo of your own shot in flat light, where a grade does the most work. For the full non-destructive pipeline, our PRO Ultimate Guide to Non-Destructive Editing covers everything around it.
Quick Reference: Keys, Menus and Settings
- Set upFilter > Convert for Smart Filters, then Filter > Camera Raw Filter
- The panelColor Grading on the right; click the Shadows, Midtones or Highlights icon to work on each one
- See what you’re doingThe before/after icon under the preview: before on the left, after on the right
- Pick a colorSaturation slider up so you can see it, Hue slider to the color that suits the photo, then Saturation back down; Luminance to taste
- The wheel insteadDrag the center marker outward for saturation, the outer marker for hue
- Blending and BalanceBlending spreads the color beyond its range; Balance weights shadows against highlights; double-click a slider to reset it
- Reset everythingOption/Alt-click Reset Color Grading; the eye toggles the whole panel
- Edit again or fade itDouble-click Camera Raw Filter under the layer to reopen; double-click the icon to its right for the filter’s opacity and blend mode
Mac first, then Windows where they differ.
Free Downloads
Follow Along on the Same Photo
Get the sample image, the PSD with the Camera Raw Smart Filter and its color grade, and the PDF guide. Free with a PHLEARN account.
Color Grading in Camera Raw: Common Questions
Why convert the layer for Smart Filters first?
So the grade stays editable. Filter > Convert for Smart Filters makes the layer a Smart Object; Camera Raw then sits under it as a Smart Filter you can toggle, reopen or fade at any time.
Where should I start?
Shadows first, then midtones, then highlights. Click the before/after icon under the preview so you can see the original beside your version while you work.
Why push saturation up and then back down?
With saturation high you can actually see the hue you’re choosing. Once the hue is right, bring saturation back down until the color is subtle; too much looks processed. Then set luminance.
Which colors should I use?
There’s no right answer. Aaron likes cool blue shadows, a warm midtone and teal highlights on this photo, but pick what complements your image; your taste can be different.
What do Blending and Balance do?
Blending controls how far each color spreads beyond its tonal range; to the right the shadow color starts covering most of the image. Balance shifts the whole grade toward the shadow color or the highlight color. Aaron generally leaves both alone.
How do I reset?
Double-click a slider to reset just that one. Hold Option/Alt and click Reset Color Grading to reset the whole panel. The eye icon on the panel turns the grade off and on.
Can I fade the grade after I’ve applied it?
Yes. In the Layers panel, double-click Camera Raw Filter to reopen it with your settings intact, or double-click the small icon to its right to change the filter’s opacity and blend mode (Multiply, Soft Light, Screen and so on) without going back in.
Are the sample files free?
Yes, with a free PHLEARN account. You get the sample image, the PSD and the PDF guide.
Master Photoshop, Lightroom and Photography
Join PHLEARN PRO for $12.99 a month or $99.99 a year. Cancel anytime, with a 100% money-back guarantee.





