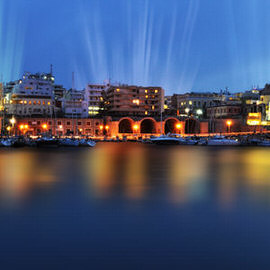

A flat landscape usually needs three things: contrast, more dynamic water, and a bit of atmospheric light. Learn how to fake a long-exposure water effect by stacking Gaussian and Motion Blur on a stamped copy and masking it down to the water alone, how scattered random selections add believable ripple detail, and how a masked Radial Blur turns distant lights into a natural-looking glow.
We publish a new free tutorial every week, each one with sample images and PSDs you can download and follow along with. Sign up and they land straight in your inbox, along with early word on sales, events and subscriber-only offers.
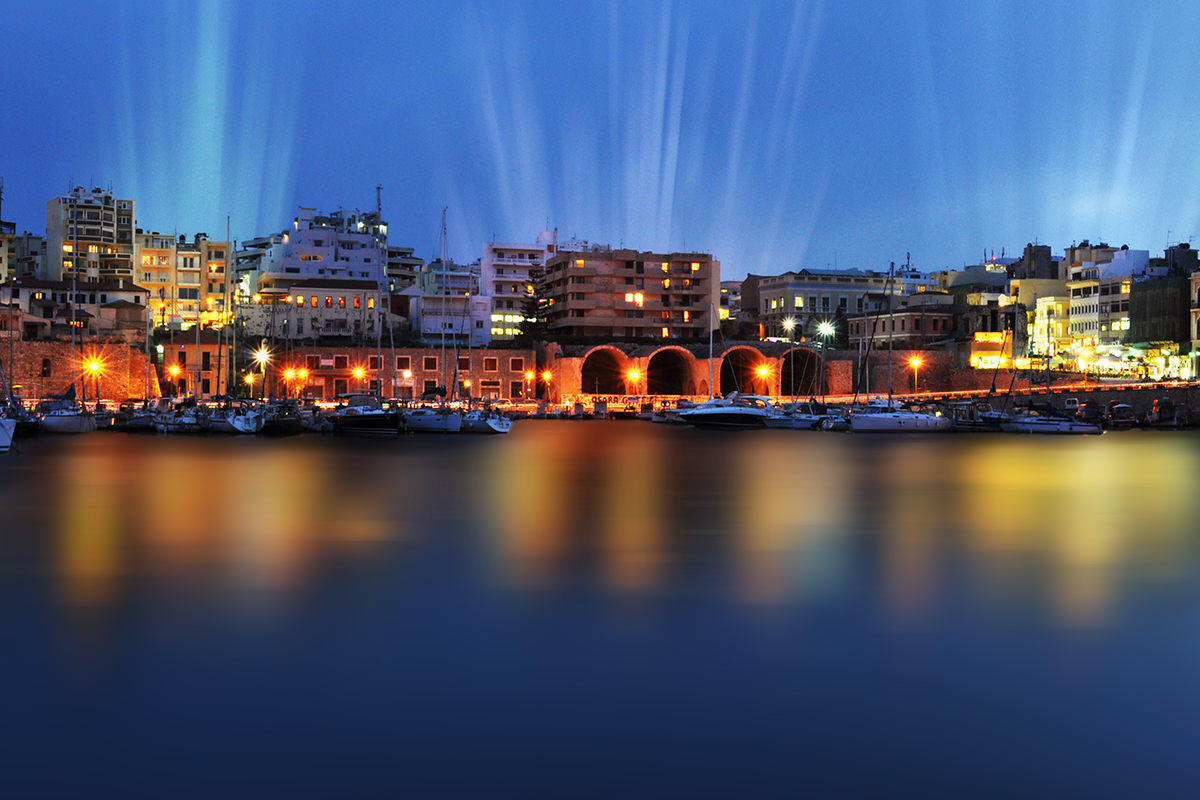
Tips to Create an Awesome Landscape in Photoshop
A good landscape photo does not need a dramatic overhaul to look striking. It just needs the right combination of contrast, a more dynamic sky or water, and a bit of atmospheric light. This walkthrough takes a solid but slightly flat landscape shot and pushes it considerably further, mostly by faking a long-exposure water effect and adding glowing light flares.
Adding Initial Contrast With Curves
Before touching anything else, the fastest way to make a slightly dull landscape pop is a simple contrast boost.
-
Add a Curves Adjustment Layer
Create a Curves adjustment layer and pull the dark end of the curve down slightly while pushing the light end up. This simple S-shape adds contrast and makes the whole image feel less flat right away.
Faking a Long-Exposure Look on the Water
Rather than reshooting with a slow shutter speed, a long-exposure water effect can be built entirely in Photoshop using a blurred, duplicated layer.
-
Create a Stamp Visible Layer
Press Shift + Option + Command + E to stamp a flattened copy of everything visible onto a new layer.
-
Apply a Gaussian Blur
Go to Filter > Blur > Gaussian Blur and apply enough blur to soften the water’s texture.
-
Apply a Motion Blur
Go to Filter > Blur > Motion Blur and set the angle so the blur streaks horizontally, mimicking the direction water would smear during a real long exposure.
Why Two Different Blurs Are Used Together
Gaussian Blur alone softens the water’s detail evenly in every direction, while Motion Blur adds directional streaking that mimics the smear of a genuinely long shutter speed. Combined, the two filters recreate the look of a slow-shutter water shot without ever changing your camera settings.
Masking the Blur to Just the Water
The blurred layer needs to be visible only over the water. Everywhere else in the frame should stay sharp.
-
Add a Layer Mask
Add a layer mask to your blurred layer and paint with black using a hard-edged brush everywhere that is not water, revealing the sharp layer underneath.
Fixing the Edges Where the Mask Meets Solid Objects
Blurring compresses your highlights and shadows together, which often creates a visible mismatch right where the water meets boats or other solid objects. Those edges can look either too light or too dark compared to the rest of the scene.
-
Clip a Curves Layer to Fix the Shadows
Add a new Curves layer, drag it down to darken, then press Option + Command + G to clip it to the blurred water layer. Invert its mask with Command + I, then paint back in white over areas like the shadows underneath boats where the blur has lightened things too much.
-
Clip a Second Curves Layer to Fix the Highlights
Repeat with another clipped Curves layer, this time brightening and pulling down the blue channel slightly, painting it in over areas where the blur made the water too dark.
-
Reapply the Motion Blur to Match
Press Command + F on each new adjustment to reapply the same Motion Blur filter, keeping the shadow and highlight fixes consistent with the surrounding blur.
Adding Fake Ripple and Wave Detail
A single flat blur can look like the water was simply smeared rather than genuinely long-exposed. Adding small, randomly placed detail breaks that up.
-
Create Another Stamp Visible Layer
Stamp a new flattened copy of the image with Shift + Option + Command + E.
-
Make Small Random Selections
Hold Shift and click with a selection tool to make a scattering of small, random selections across the water, favoring the lighter areas.
-
Duplicate the Selections to a New Layer
Press Command + J to copy the selected areas to their own layer.
-
Apply Motion Blur and Lower Opacity
Apply another Motion Blur to this new layer and lower its opacity so it reads as subtle ripple detail rather than an obvious pattern.
Why Randomness Sells the Effect
Real ripples and waves do not follow a predictable pattern, so deliberately random, scattered selections read as far more convincing than anything uniform or evenly spaced. The goal is texture that looks incidental, not designed.
Adding Atmospheric Light Flares
The final major step brings a glowing, atmospheric quality to specific light sources in the frame using a Radial Blur zoom effect.
-
Group Your Work and Add a New Curves Layer
Group everything done so far, then add a new Curves adjustment layer and boost the green and red channels slightly to warm the color.
-
Invert the Mask and Paint In a Light Source
Invert the layer’s mask with Command + I, then paint white with your brush tool around a bright area you want to glow, such as lights from a nearby village.
-
Apply a Radial Blur Set to Zoom
Go to Filter > Blur > Radial Blur, set the blur method to Zoom with an amount around 41, and center it on your light source.
-
Refine and Repeat for Additional Light Sources
Paint black or white on the mask to control where the glow shows, reapply the filter with Command + F as needed, and repeat the whole process on any other light source in the frame, adjusting each Curves layer’s color to match its surroundings.
Adjusting Color If a Light Flare Looks Wrong
If a light flare comes out looking too green, too magenta, or otherwise off, that Curves layer can simply be reopened and its channel values adjusted until the color matches the surrounding scene. There is no need to redo the Radial Blur itself.
More Free Photoshop Tutorials
If you enjoyed this landscape edit, these free tutorials cover related color and detail techniques worth exploring next:
- How to Color Grade in Photoshop Using Camera Raw
- How to Color Correct Photos in Adobe Camera Raw
- Easy Tips to Adjust the Colors of a Landscape
Why This Approach Works
Every technique here is built around the same core idea: stamp a copy, blur or select it, then mask it back in only where it belongs. That is what lets you fake a slow shutter speed on water without ever touching your camera settings, and it is the same layer-and-mask logic that makes the light flares believable. A Radial Blur zoom applied broadly would look like a mistake, but masked down to just a bright light source, it reads as a natural glow. Building each effect on its own layer, clipped and masked rather than applied destructively, also means you can go back and adjust the color, opacity, or strength of any single piece without redoing the whole edit.
Final Thoughts
None of these individual techniques are complicated on their own, whether a blur here, a clipped Curves layer there, or a Radial Blur masked down to a light source, but stacked together they turn a decent landscape shot into something considerably more dramatic. The best way to get comfortable with this workflow is to try it on one of your own landscape images and see how far you can push the water and light effects before they start to look overdone.
Related Tutorials
New Free Tutorials View All »






Enjoying This Free Tutorial? Go Further with PRO.
200+ PRO courses. 1,000+ practice files. One membership.

Unlimited access to every PRO course
New PRO courses every month
Layered PSDs and RAW files to follow along
100+ Lightroom Presets, LUTs, Actions and Brushes
Stream in up to 4K, with captions and chapters
Watch on any device: desktop, tablet or phone
4.93 average from 3,900+ reviews · 2M+ students