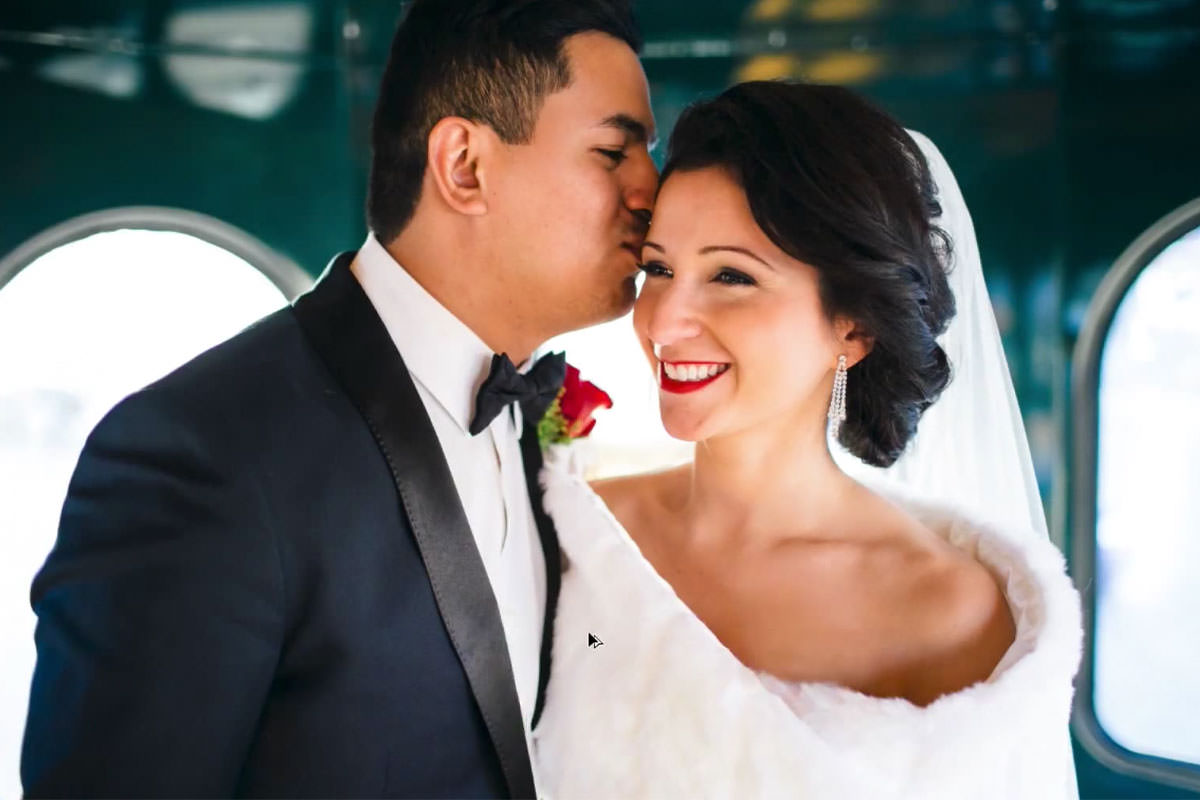

description
Learn how to master the Clone Stamp tool in Photoshop, starting with the settings that actually matter: a new layer set to sample Current and Below, and the Option/Alt+Shift preview instead of a permanent overlay. From there it removes a stray hair, replaces a lapel microphone using Warp, blends mismatched tone by locking transparency and painting in Soft Light, and clones hair convincingly with a rotated, non-round brush.
Enjoying This Free Tutorial?
We publish a new free tutorial every week, each one with sample images and PSDs you can download and follow along with. Sign up and they land straight in your inbox, along with early word on sales, events and subscriber-only offers.
How to Master the Clone Stamp Tool in Photoshop
The Clone Stamp tool is simple on the surface, but its sample settings, preview options, and a few less obvious tricks make the difference between a rough fix and one that’s genuinely invisible. This tutorial works through the Clone Stamp dialogue’s real options, then applies them to remove distracting details, replace a larger object with Warp, and blend mismatched tones using a locked-transparency dodge and burn technique.
Choosing the Right Sample Setting
Working on a new layer with the sample setting changed to Current and Below keeps every Clone Stamp edit flexible and separate from the original background.
-
Avoid Working Directly on the Background
Avoid clone stamping directly onto the background layer, since that permanently alters the original image data.
-
Create a New Layer First
Create a new layer to clone stamp onto instead.
-
Change Sampling to Current and Below
Change the Sample dropdown from Current Layer to Current and Below, which allows the tool to read pixel data from the layers beneath an otherwise empty new layer.
Why a New Layer Beats the Background Every Time
Clone stamping directly onto the background permanently changes that original image data with no way back except undo. Working on a new layer instead means every clone stamp edit stays separate, adjustable, and removable at any point, without ever putting the original photo at risk.
Understanding the Clone Source Panel’s Preview and Transform Options
The Clone Source panel’s Show Overlay option previews exactly what will be painted before committing to it, and its width, height, and angle controls are rarely worth using compared to transforming a layer afterward.
-
Open the Clone Source Panel
Click the Clone Source button or go to Window > Clone Source to open the panel.
-
Turn Off Show Overlay by Default
Uncheck Show Overlay so the live preview of the sampled area doesn’t stay visible and get in the way while painting.
-
Use the Preview Shortcut When Needed
Sample a point, then hold Option/Alt+Shift to temporarily see the overlay preview without leaving Show Overlay checked permanently.
-
Skip the Width, Height, and Angle Options
Leave the panel’s width, height, and angle stretching options alone, since transforming a cloned result on its own layer afterward is usually more flexible.
Why a Temporary Preview Beats Leaving Overlay Always On
Leaving Show Overlay checked keeps a live preview visible constantly, which can get in the way of seeing the actual image clearly while working. Holding the Option/Alt+Shift shortcut instead brings that same preview up only when it’s actually needed, keeping the canvas clear the rest of the time.
Using Multiple Clone Sources
The Clone Source panel can store several different sample points at once, though simply resampling with Option/Alt as needed is often just as practical.
-
Sample a Point Into the First Clone Source Slot
Sample a point while the first clone source icon is selected.
-
Switch Slots and Sample Again
Click a different clone source icon and sample a new point, keeping the first sample point saved and switchable at any time.
-
Resample Directly as a Simpler Alternative
Alternatively, stick with a single clone source and just hold Option/Alt to resample a new point whenever a different area is needed.
Removing a Small Distracting Detail
A quick sample-and-paint, aided by the temporary preview shortcut, removes a small distraction, like a thin spot in the groom’s hair, cleanly.
-
Sample Near the Distraction
Hold Option/Alt and sample an area near the small distracting detail.
-
Preview the Match Before Painting
Hold Option/Alt+Shift briefly to preview how well the sampled area will match before committing to the stroke.
-
Paint to Remove the Detail
Paint over the distraction to remove it, adjusting the sample point as needed for the best match.
Replacing a Larger Object With Warp
Sampling and painting a larger object in sections, then using Warp to reshape the cloned pixels, can completely replace something like a lapel microphone.
-
Create a New Layer
Create a new layer to clone stamp the replacement onto.
-
Sample and Paint in Sections
Sample a matching area and paint over the object in a couple of separate sections, using the preview shortcut to help match the pattern.
-
Transform and Warp Into Place
Press Cmd/Ctrl+T to rotate the cloned area as needed, then right-click and choose Warp to reshape the pixels so they align naturally with the surrounding fabric or texture.
-
Mask Away Any Excess
Add a layer mask and paint away any excess cloned area that extends past where it’s actually needed.
Blending Mismatched Tones With a Locked-Transparency Dodge and Burn Technique
Locking a clone stamp layer’s transparency and painting with a Soft Light brush lightens or darkens only the cloned pixels, blending them seamlessly into surrounding tone variations.
-
Lock the Layer’s Transparency
Select the clone stamp layer and click the Lock Transparent Pixels option.
-
Switch the Brush to Soft Light
Select the Brush tool with a soft edge and change its blend mode from Normal to Soft Light.
-
Paint White to Lighten
Paint with white to lighten areas of the cloned pixels that need to match a brighter part of the surrounding image.
-
Paint Black to Darken
Press X to swap to black and paint over areas that need to match a darker part of the surrounding image.
Why Locking Transparency Makes This Trick Safe
Without locking transparency, painting on a clone stamp layer would also add color and tone outside the actual cloned pixels, spilling onto areas that should stay untouched. Locking transparency first restricts every brush stroke to exactly where the cloned pixels already exist, which is what makes this dodge-and-burn-style blending trick reliable rather than risky.
Removing a Distracting Element From an Open Area
Cloning over a distracting element that sits in a simple, evenly lit area, like an open background, is one of the fastest and most reliable uses of the tool.
-
Create a New Layer
Create a new layer set to sample Current and Below.
-
Sample From a Similar, Simple Area
Sample an area with similar, simple lighting nearby, such as more of a plain light background.
-
Paint Over the Distracting Element
Paint over the distracting element, which blends in especially well in flat, evenly lit areas.
Blending a Directional Shadow-to-Highlight Transition
Sampling along the same direction a shadow or highlight naturally travels, then adjusting opacity, flow, and a mask, cleans up an area that transitions gradually from light to dark.
-
Sample Along the Shadow’s Direction
Sample a point that follows the same gradual light-to-shadow transition as the area being fixed, still holding Option/Alt and adding Shift to preview the placement before painting.
-
Adjust Opacity or Flow if Too Strong
Lower the Clone Stamp tool’s opacity or flow if too much texture or color is being laid down at once.
-
Mask to Feather Any Rough Areas
Add a layer mask and use a small brush, set back to Normal mode, to feather in any remaining rough transitions.
-
Add Back a Touch of Shadow if Needed
Create another layer, lower the flow, and sample a bit of shadow back in to keep the area looking realistic.
Cloning With Custom-Shaped and Rotated Brushes
The Clone Stamp tool works with any brush shape, size, or rotation, which makes it possible to clone irregular shapes like hair far more naturally than with a plain round brush.
-
Right-Click to Access Brush Options
Right-click on the canvas to access brush size, hardness, and shape controls.
-
Choose or Rotate a Non-Round Brush
Select an oval or custom-shaped brush and rotate it to match the direction of the detail being cloned, such as a strand of hair.
-
Clone Stamp With the Custom Shape
Sample and paint using that custom brush shape, which follows the natural direction and form of the detail far more convincingly than a basic round brush.
Why This Approach Works
Working on a new layer with sampling set to Current and Below is what keeps every single Clone Stamp edit separate, adjustable, and safely removable without ever risking the original background. Locking transparency and painting with a Soft Light brush is what turns simple dark-and-light blending into a precise tool that only affects the exact pixels already placed by the Clone Stamp tool. Using custom and rotated brush shapes, rather than defaulting to a plain round brush, is what allows the tool to convincingly clone irregular details like hair instead of leaving behind an obviously circular patch.
Final Thoughts
None of these techniques require anything beyond the Clone Stamp tool that’s already built into Photoshop, just a better understanding of its sample settings, preview options, and a couple of blending tricks. Applied together, they turn a tool most people already think they know into something capable of removing or replacing far more than a quick blemish fix.
Quick Reference: Keys, Menus and Settings
- Clone StampS; Mode Normal, Aligned checked, Sample: Current and Below on a new layer
- SampleAlt/Option-click
- Quick previewShow Overlay unchecked in Window > Clone Source; hold Alt/Option + Shift
- Reshape a patchCmd/Ctrl + T, right-click > Warp
- Match the toneLock transparent pixels; Brush mode Soft Light, white lightens, X for black darkens
- Less at onceLower Opacity or Flow in the options bar
- Brush shapeRight-click on the image: size, hardness, roundness, angle
No AI, no generative credits.
The Clone Stamp Tool: Common Questions
Why does the Clone Stamp tool do nothing on my new layer?
Sample is set to Current Layer, and the new layer is empty. Change Sample to Current and Below in the options bar. All Layers works too, but it also samples layers above.
Can I clone stamp right on the background layer?
You can, but the video recommends never doing it. Clone onto a new layer so every fix stays separate and you can mask, transform or delete it later.
How do I see what I’m about to clone without the overlay in the way?
Uncheck Show Overlay in the Clone Source panel (Window > Clone Source). After sampling, hold Alt/Option + Shift for a quick preview that disappears when you let go.
What are the multiple clone source buttons for?
Each one remembers its own sample point, so you can switch between them. Aaron rarely uses them; he just Alt/Option-clicks a new point whenever he needs one.
Should I use the width, height and angle settings?
The video skips them. It’s easier to clone onto a new layer and transform that layer afterwards with Cmd/Ctrl + T.
How do I remove a larger object like a lapel mic?
Clone over it in a couple of sections on a new layer, painting a bit more than you need. Then press Cmd/Ctrl + T, rotate, right-click > Warp to line it up with the jacket, and mask or erase the extra.
My cloned patch is lighter or darker than the area around it. How do I fix it?
Lock the layer’s transparent pixels, pick a soft brush and set the brush mode to Soft Light. Paint white to lighten and black to darken; only the cloned pixels change.
The clone stamp lays down too much texture. What can I change?
Lower the tool’s Opacity or Flow in the options bar, and use a layer mask with a small brush to soften rough edges. Set the brush mode back to Normal first.
Can I clone with a brush that isn’t round?
Yes. Right-click on the image to change size, hardness, roundness and angle, or pick any brush, even a custom one. An oval rotated along the hair copies hair far better than a round brush.
New Free Tutorials View All »










Enjoying This Free Tutorial? Go Further with PRO.
200+ PRO courses. 1,000+ practice files. One membership.

Unlimited access to every PRO course
New PRO courses every month
Layered PSDs and RAW files to follow along
100+ Lightroom Presets, LUTs, Actions and Brushes
Stream in up to 4K, with captions and chapters
Watch on any device: desktop, tablet or phone
4.93 average from 3,900+ reviews · 2M+ students