

download sample images
Download Assets
This tutorial includes sample images and a PDF guide. Downloads are free with a PHLEARN account.
- Free sample files with every tutorial on PHLEARN
- New tutorials published every week
- Unlimited downloads with your free PHLEARN account
description
2020 Edition
This lesson is from the original 30 Days of Photoshop. Photoshop has changed a great deal since — there is an updated version of this lesson in the 2025 Edition: How to Crop, Straighten and Expand Photos in Photoshop, Day 13.
Whether you need a photo to be the perfect size to share on Instagram or you just want to nail the perfect composition, the Crop Tool and resizing options in Photoshop can help you get there!
This is Day 10 of our 30 Days of Photoshop series. If you enjoyed it, follow along with all 30 episodes as we explore the magic of Photoshop together!
Continue Watching 30 Days of Photoshop
Enjoying This Free Tutorial?
We publish a new free tutorial every week, each one with sample images and PSDs you can download and follow along with. Sign up and they land straight in your inbox, along with early word on sales, events and subscriber-only offers.
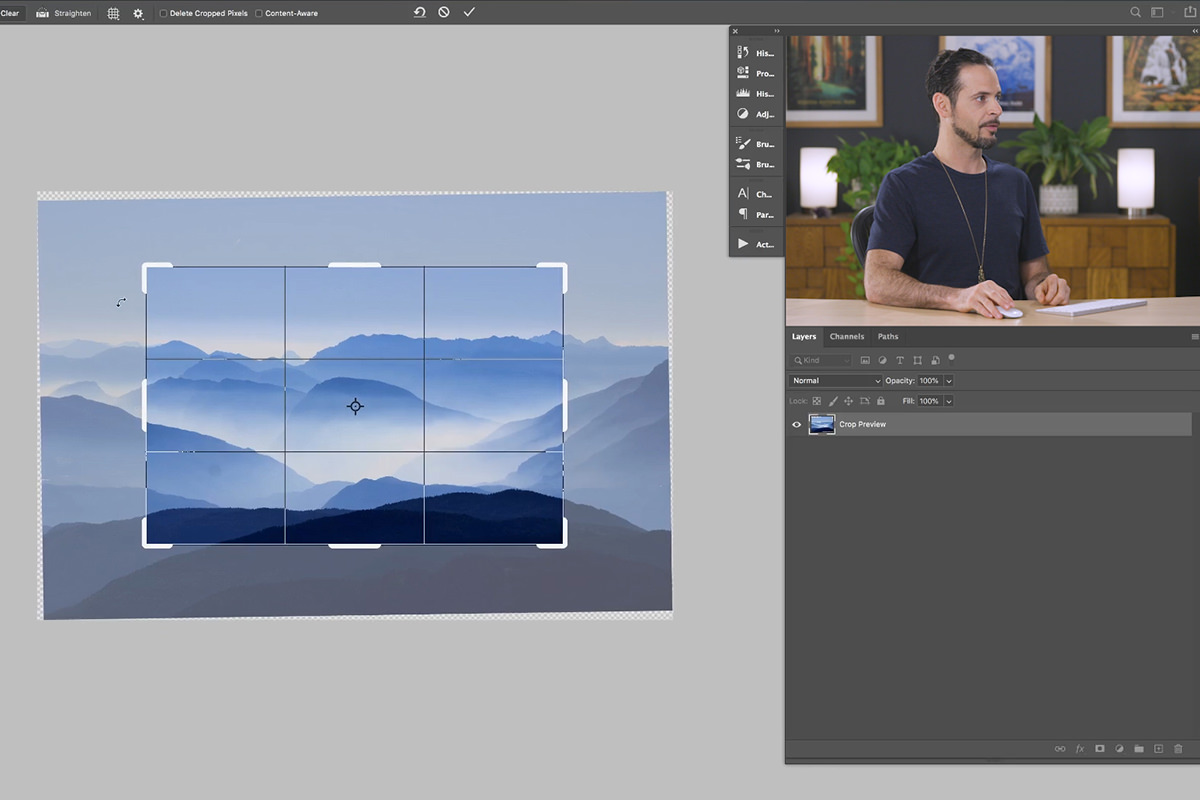
Crop, Resize and Extend a Photo with the Crop Tool
The Crop Tool does a lot more than trim a photo. It can change the aspect ratio, straighten a horizon, resize the document to exact print dimensions, guide your composition, and, with Content-Aware enabled, invent new image area to turn a wide photo into a vertical one. This lesson walks through every option in the toolbar.
Set an Aspect Ratio
-
Select the Crop Tool
Press C or click the Crop Tool in the toolbar. Handles appear around the whole image.
-
Choose or Type a Ratio
The dropdown at the top left of the options bar holds common presets like 1:1, 4:5 and 16:9. You can also type your own numbers in the two fields next to it, for example 1 and 1.25. Click the swap arrows to flip between vertical and horizontal.
-
Drag the Handles
Drag any corner to resize the crop; the ratio stays locked. Hold Alt/Option to crop from the center instead of the opposite corner. Click Clear to remove the ratio and crop freely.
Never Delete Cropped Pixels
-
Uncheck Delete Cropped Pixels
Before you commit any crop, make sure Delete Cropped Pixels in the options bar is unchecked. With it checked, the area outside the crop is thrown away and cannot be recovered. Unchecked, Photoshop simply hides it.
-
Get It Back with Reveal All
If you ever need the hidden area again, go to Image > Reveal All and the full original comes back.
Straighten and Preview
-
Straighten a Horizon
Click the Straighten button in the options bar and drag a line along the horizon. Photoshop rotates the image to level it. You can also drag just outside a corner handle to rotate by hand.
-
Adjust the Crop Shield
The gear icon controls the crop shield, the darkened area outside the crop. You can match it to the canvas color and change its opacity, which makes it easier to judge what you are cutting off.
Use the Overlays for Composition
-
Pick an Overlay
The overlay dropdown offers Rule of Thirds, Golden Ratio, Golden Spiral and more. Press O to cycle through them while cropping.
-
Let the Grid Guide You
With Rule of Thirds, try placing the horizon on the top or bottom third line rather than dead center. The Golden Spiral can help you place a focal point, but only use it when the composition actually supports it.
Resize While You Crop
-
Switch the Dropdown to W x H x Resolution
A plain ratio only changes the shape. To set real dimensions, choose W x H x Resolution from the dropdown and type values with units, for example 10 in by 10 in at 300 ppi, or a pixel size.
-
Commit the Crop
Drag the crop into place and press Enter. Check Image > Image Size: the document is now exactly the size you typed. This is the fastest way to prepare a print at a specific size.
Add Image Area with Content-Aware Crop
Traditionally cropping only made photos smaller. Content-Aware Crop lets you make them bigger by generating new pixels that match the edges of the frame. It works best on simple backgrounds like sky, water or grass; complex scenes may repeat visibly.
-
Turn On Content-Aware
With the Crop Tool active, check Content-Aware in the options bar and clear any ratio.
-
Drag Past the Edge
Drag the top handle above the image to add more sky, or a side handle outward to widen the frame. The area outside the original photo shows as empty for now.
-
Commit and Check
Press Enter. Photoshop fills the new area based on what is nearby. On a clear sky the result is nearly invisible; on textured areas expect to do a little Clone Stamp cleanup.
Why This Matters
Content-Aware Crop means a landscape can become a vertical banner, or a photo that is slightly too tight can gain the breathing room a print needs, without reshooting. Adding 20% more canvas to a simple scene is realistic. In tomorrow’s lesson we put text on a photo with the Type Tool.
Related Tutorials






Enjoying This Free Tutorial? Go Further with PRO.
200+ PRO courses. 1,000+ practice files. One membership.

Unlimited access to every PRO course
New PRO courses every month
Layered PSDs and RAW files to follow along
100+ Lightroom Presets, LUTs, Actions and Brushes
Stream in up to 4K, with captions and chapters
Watch on any device: desktop, tablet or phone
4.93 average from 3,900+ reviews · 2M+ students