Download Sample Images & Brush (145 MB)
Download the PSD
Due to the file size, we created a separate download for the PSD. You can download it here!
description
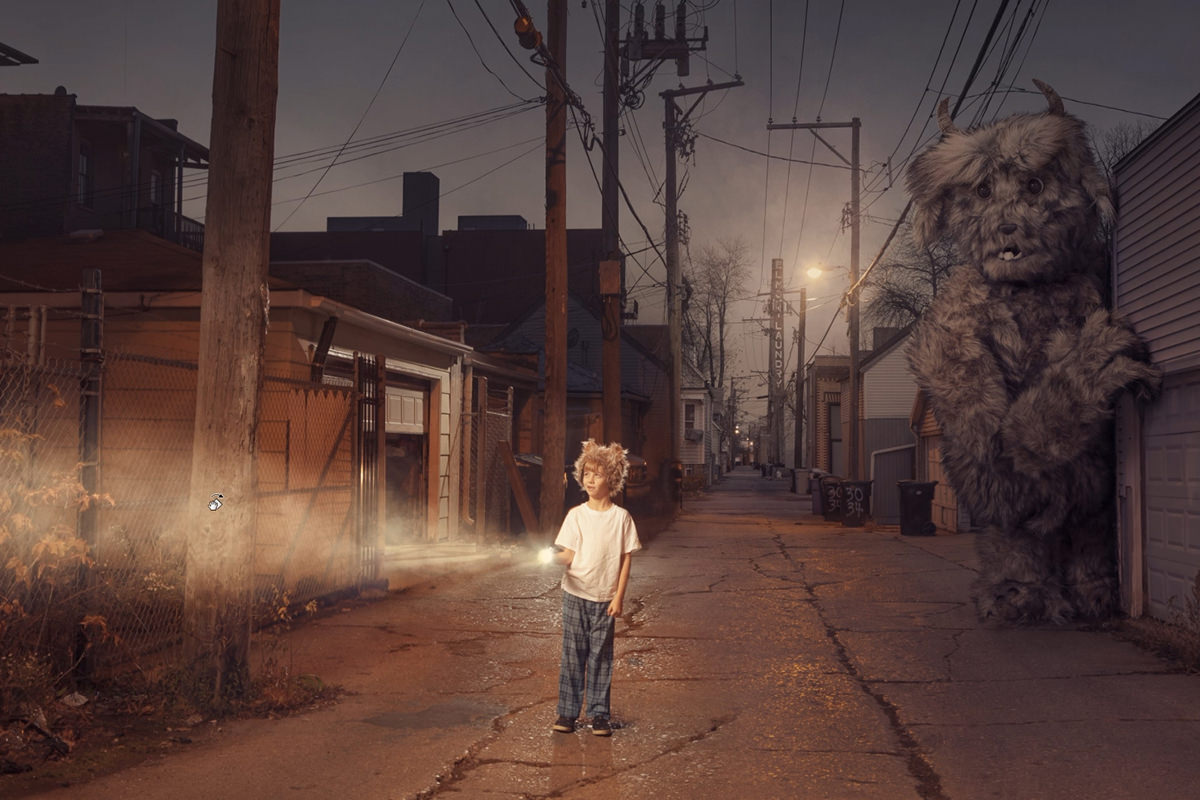
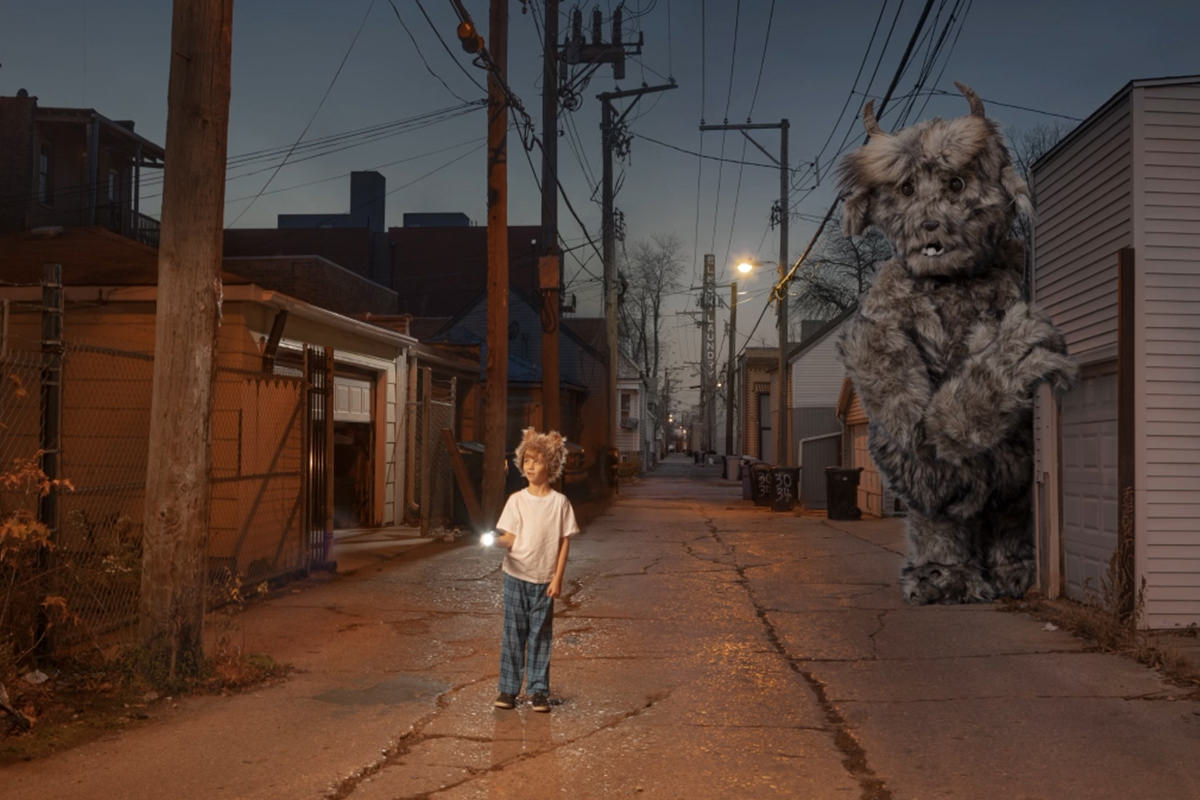
In Part 2 of our Fantasy Composite Series, we introduce the lovable and furry star of our show: Bakster! Learn how to make a complex cutout of hair and fur, paint in new realistic hair with a custom Photoshop Brush, match lighting and color, and create realistic shadows.
If you missed Part 1, be sure to check it out! We combined multiple images together to build the background of the scene while carefully matching the light and color of each photograph.
Watch Next
This episode is part of our FREE Fantasy Compositing series where we show you how to create this extraordinary image from scratch!
- Bakster Part 1: Creating the Background
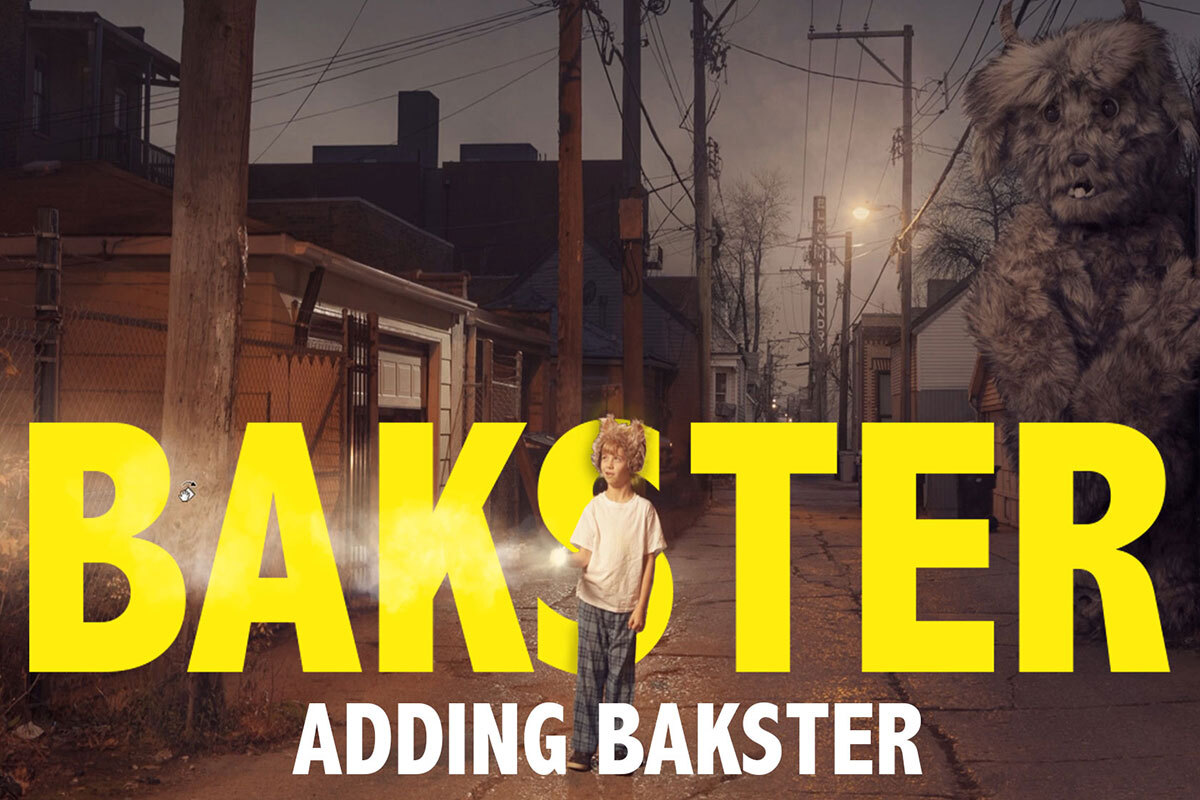
- Bakster Part 2: Adding Bakster
- Bakster Part 3: Color Toning & Finishing
Share
Advanced Cutouts & Color Matching
Getting Started with Compositing
Before we dive in it’s important to note that this is an advanced compositing tutorial! So if you feel lost, don’t worry–this series covers a lot of tools and techniques that even some savvy Photoshop artists might not be comfortable with. If you’re new to the world of compositing, we recommend checking out the following PHLEARN courses:
PRO Courses
- Photoshop Compositing: Essential Tools & Techniques
- Intro to Photoshop Compositing for Beginners
- Photoshop Compositing: Masking and Cutting Out Subjects
FREE Tutorials
- How to Match Colors for Compositing in Photoshop
- How to Composite Photos in Photoshop
- Create a Simple Composite in Photoshop
These courses will help you brush up on the fundamentals of compositing, but throughout the Bakster series, we do our best to break everything down for creators of all skill levels. If you want to jump right in, go for it!
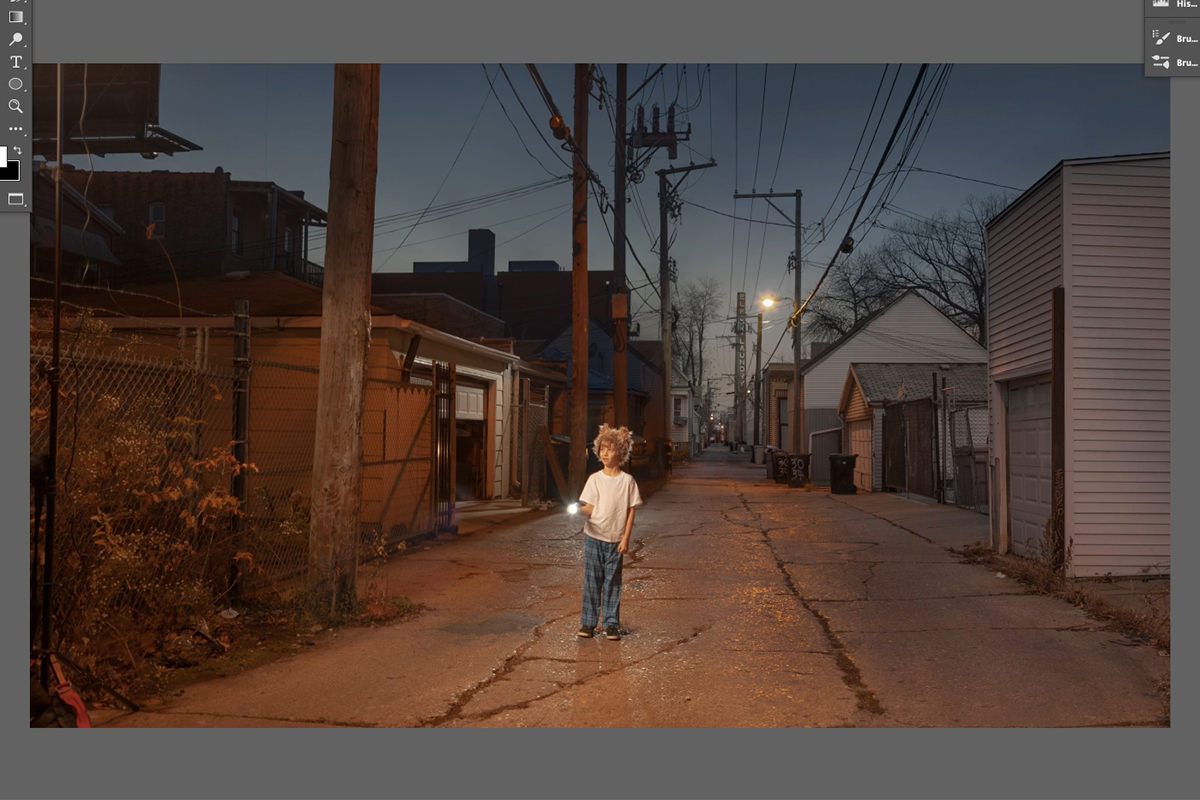
Where we left off after Part 1 of the series
Cutting Bakster out of the Background
With the background set and ready to go, it’s time to bring in Bakster! Locate the Group and Layers named Bakster_01. This image of Bakster was photographed in the studio and, for right now, it looks a lot different than the rest of our scene. We’ve got a lot of work ahead of us to integrate him into the environment, and it all starts with cutting him out of the background.
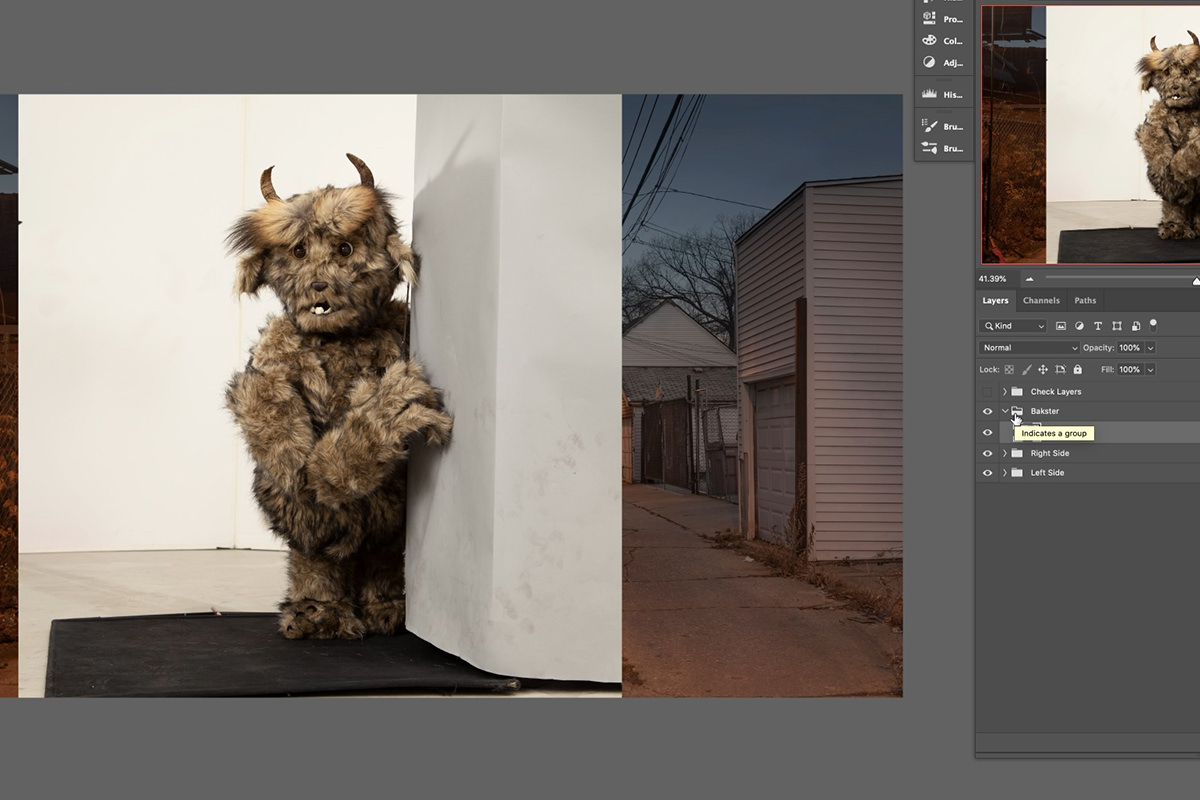
Click on the Layer Mask of Bakster_01 and then use Marquee Tool to select all of the empty space around Bakster and fill those areas with black to make them invisible. Then lower the Opacity of the Layer and use the Transform Tool to make him a little bit smaller. Move him alongside the garage on the right side of the image–the goal is to line up the garage as closely as possible with the white cardboard Bakster was photographed next to in the studio. Get the bottom corners of each lines up, and then use the Move Tool and Transform Tools to make additional adjustments until it looks like it fits.
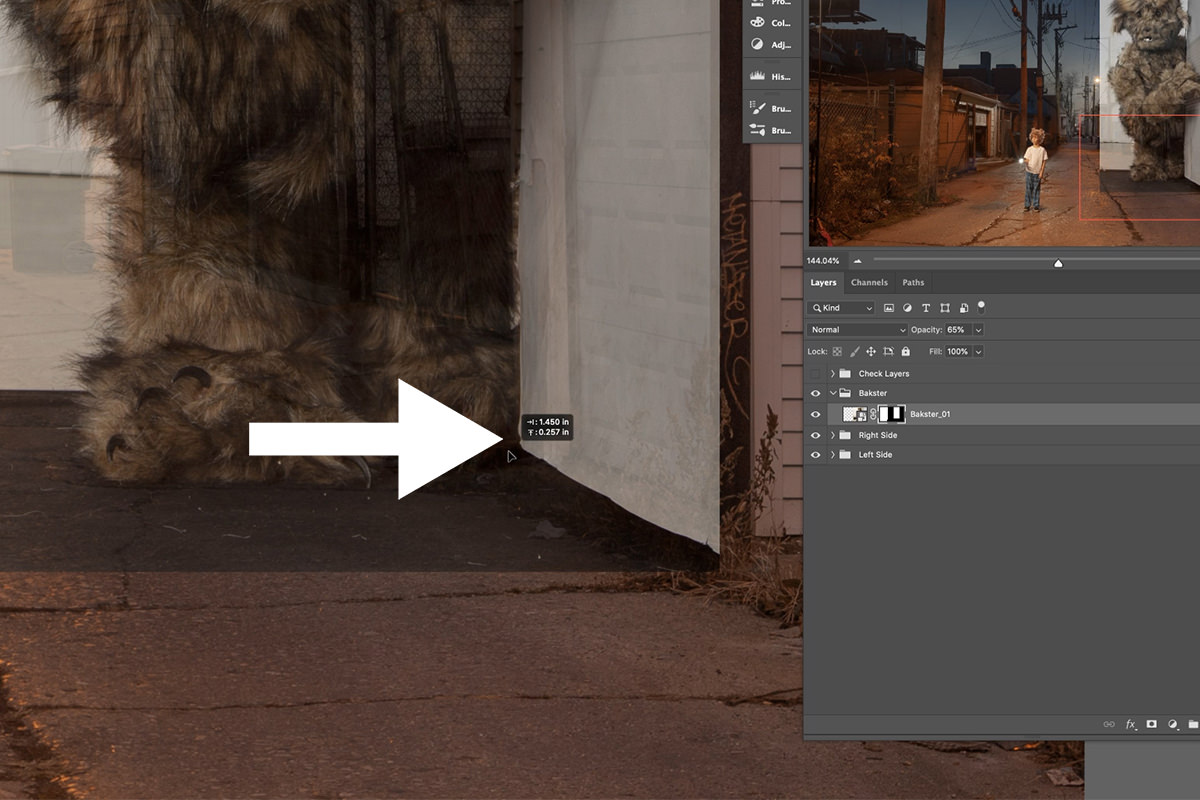
Once he’s in place, restore the Opacity of the Layer back to 100%. Now it’s time to make a very rough cutout of our fuzzy friend.
Some Magic Wand Magic
Grab the Magic Wand Tool and set the Tolerance to around 26. With the Layer Mask of Bakster_01 active, use the Magic Wand Tool to select large areas of the background and then fill them with black to make them invisible. You can also use the Brush Tool to paint with black to remove any areas that the Magic Wand has trouble with.
Repeat this process until only Bakster remains. There will still be some background visible around his hair, but we’ll take care of this shortly!
Hair is one of the most difficult things to cut out in Photoshop. Fortunately, we have a lot of tricks up our sleeve to take care of it. Let’s start refining the cutout with the most accurate selection tool in Photoshop–Channels!
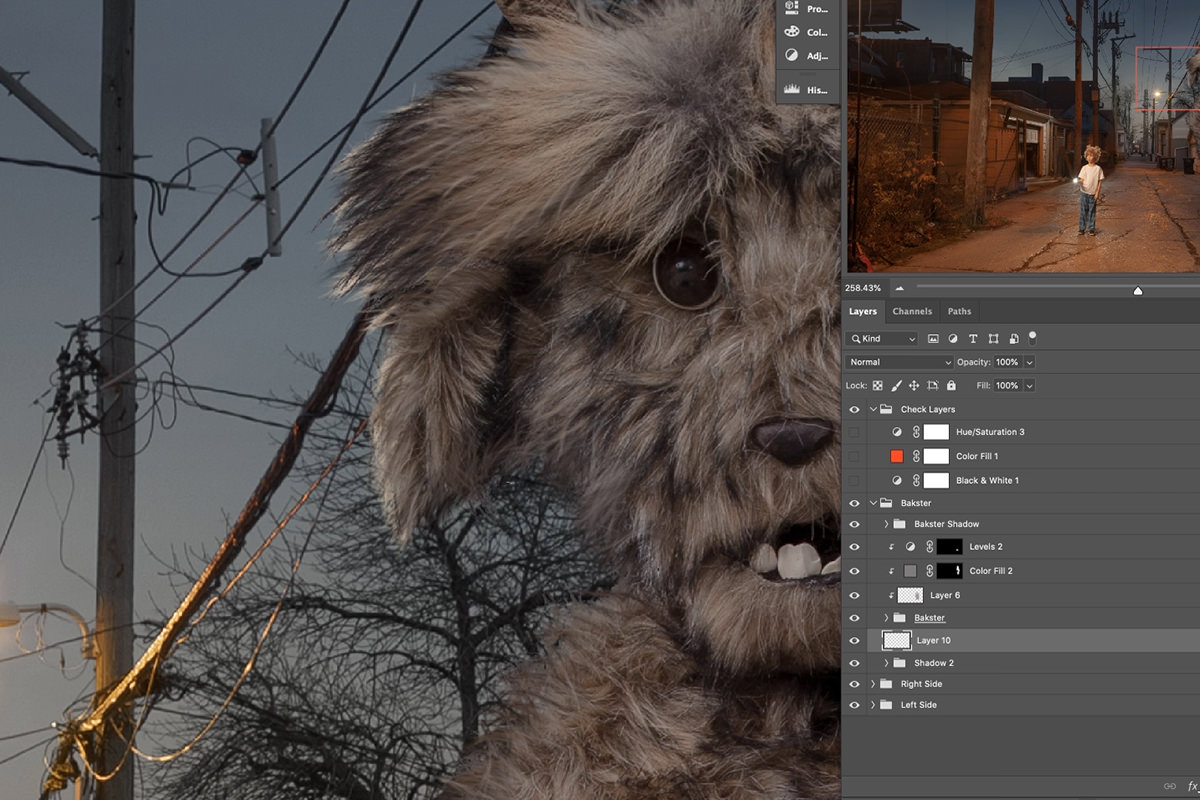
Refining the Selection with Channels
Whenever you need to make a detailed selection of hair, Channels should be your go-to tool. Channels gives us the ability to select areas of an image based off of contrast. So, to make a selection of hair, we just need a way to create more contrast between the hair and the background of the image.
Start by disabling the Layer Mask of Bakster_01 by holding SHIFT and clicking on the Layer Mask icon. Then, switch over the the Channels Tab. You’ll see a list of color channels that includes RGB, Red, Green, and Blue. We need to find the Channel that contains the most contrast and, in the case of our Bakster image, it ends up being the Blue Channel. We’re looking to get the biggest difference between light and dark, so we need to exaggerate the contrast even more if we want to get a well-defined selection. Duplicate the Blue Channel and then hit CTRL or CMD + L to create a Levels Adjustment. Make the darks even darker and the lights even lighter until you end up with Bakster appearing nearly pure black and the background pure white.
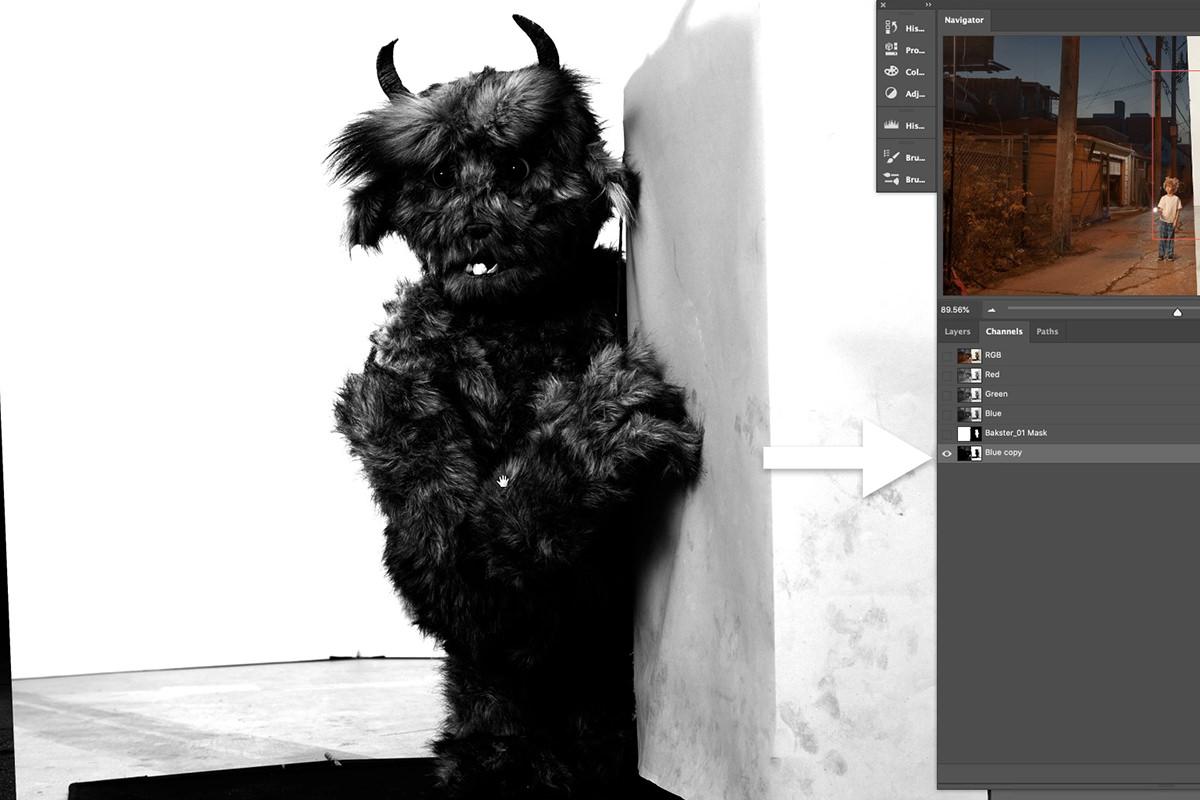
Now that we have enough contrast, we can turn this copied Channel into a new selection. Just hold CTRL or CMD and click on the Channel preview icon. You should see marching ants appear displaying the new selection. With this selection active, click on the top RGB Channel to restore the original colors, and then go back to the Layers Panel and click on the Layer Mask of Bakster_01.
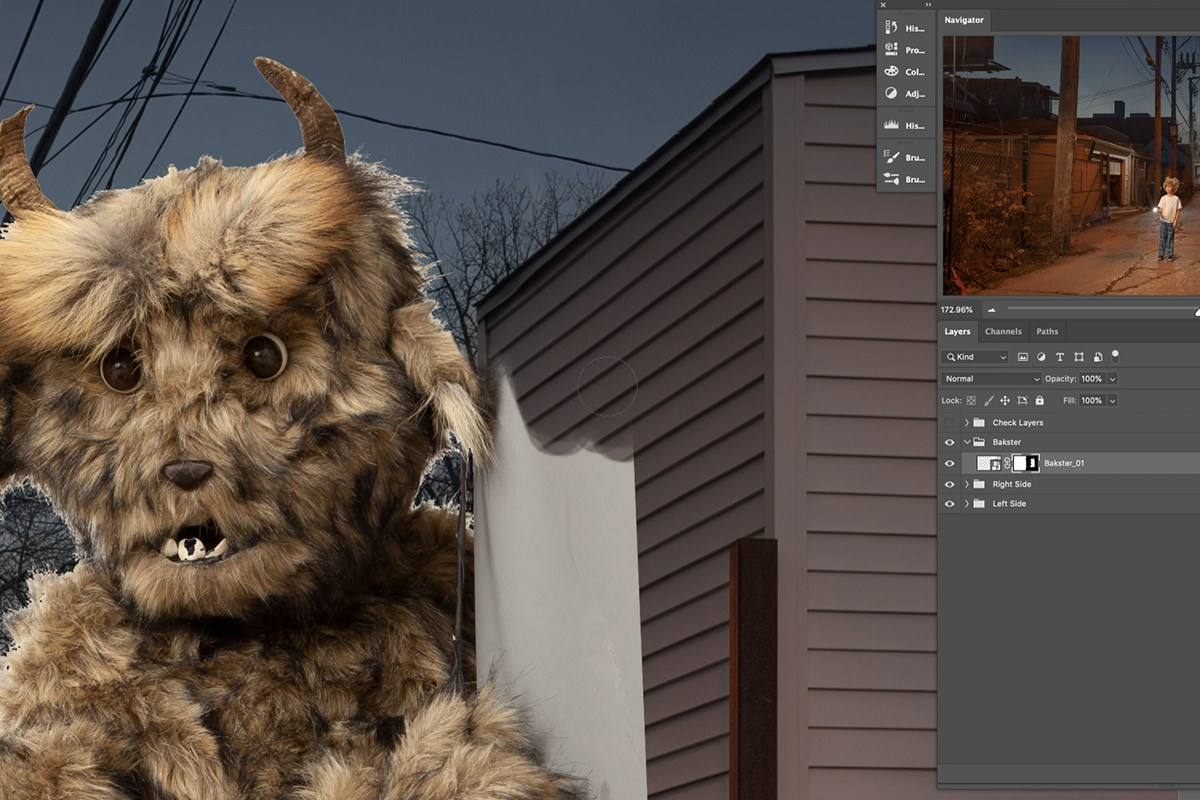
Now we have a super-detailed selection that we can use to fill in the Layer Mask with more precision. The background is currently selected, so we can paint with black along the edges of Bakster (on the Layer Mask) to hide more of the background. Once we’ve removed most of the fringing, we can Inverse the selection by hitting CTRL or CMD + I. Now only Bakster is selected. Paint with white on the Layer Mask along the edges of Bakster to restore some of the original hair detail.
If you’re following along, you should be left with a cutout that looks similar to the image above. Is it perfect? No way! But it will be soon. For now, let’s switch gears to color correction.
Matching Light & Color
If you made it through Part 1, you should have a good idea of what we’ll be doing next. Since Bakster was photographed in a totally different environment, we need to start matching the lighting, saturation, and color of his Layer to the rest of the environment. We’ll be using the same Check Layers we created in the first tutorial and, since we opened up of the RAW images as Smart Objects, we can easily get back into Adobe Camera RAW to make the adjustments we need.
Matching Light
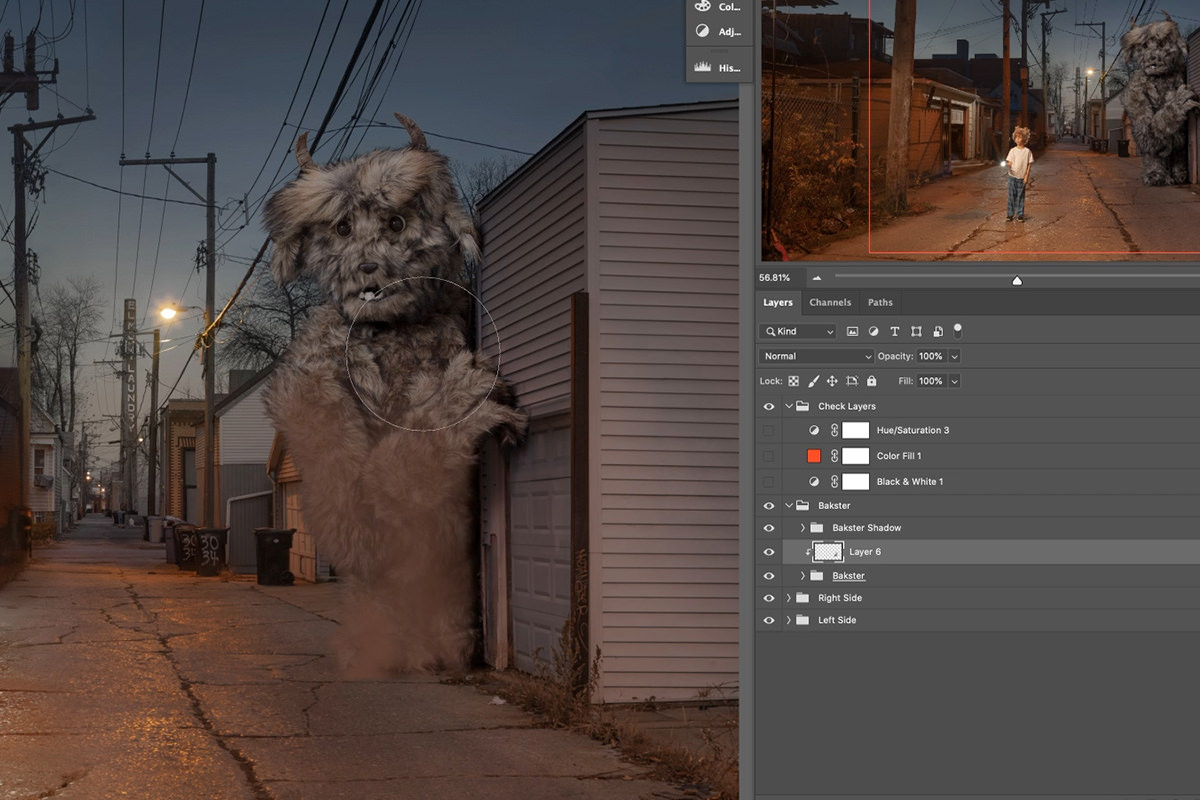
Find the Check Layers Group and make the Black & White Adjustment Layer visible. This will help us see the relative light levels throughout the scene so we can make informed decisions about what to adjust. We want to focus specifically on Bakster here since he’s the only new element that’s been added.
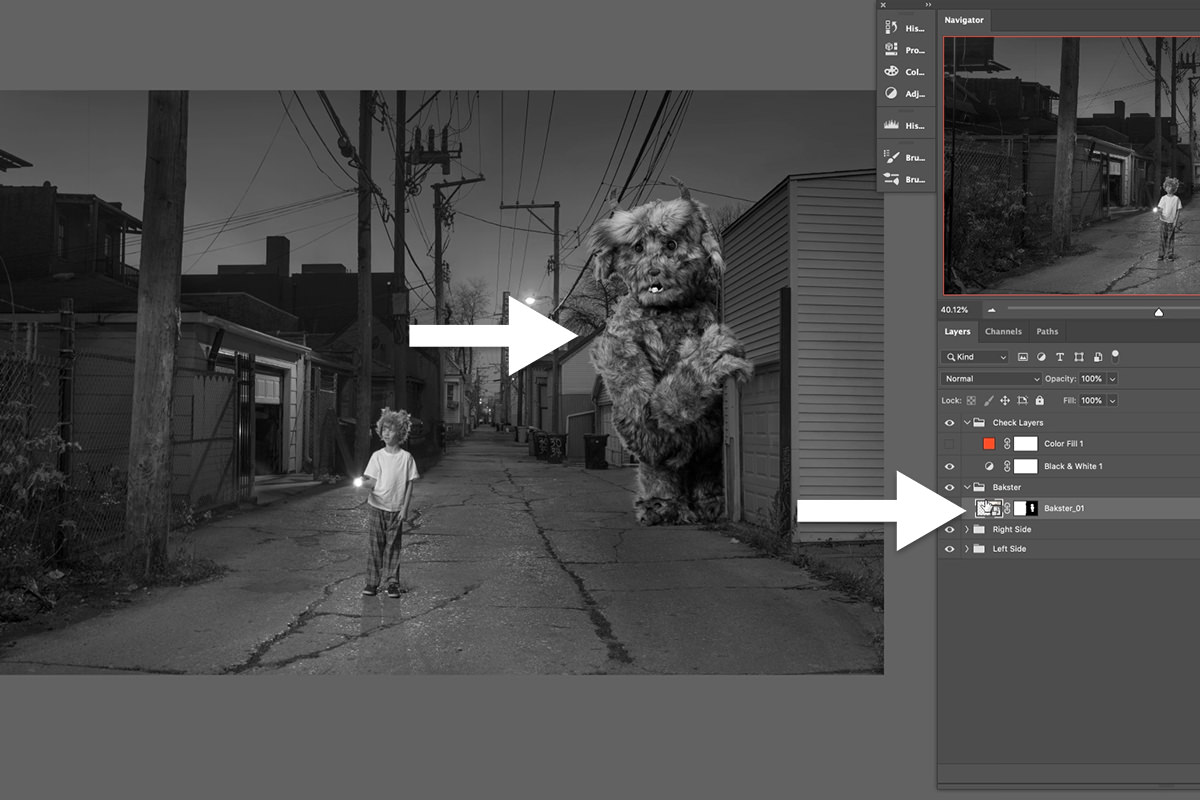
We can see that he’s a little too bright and has a little too much contrast compared to the rest of the scene.
Double-click on the Bakster_01 preview icon to open Adobe Camera RAW. Lower the Exposure, Contrast, and Highlights until Bakster starts to match the rest of the image.
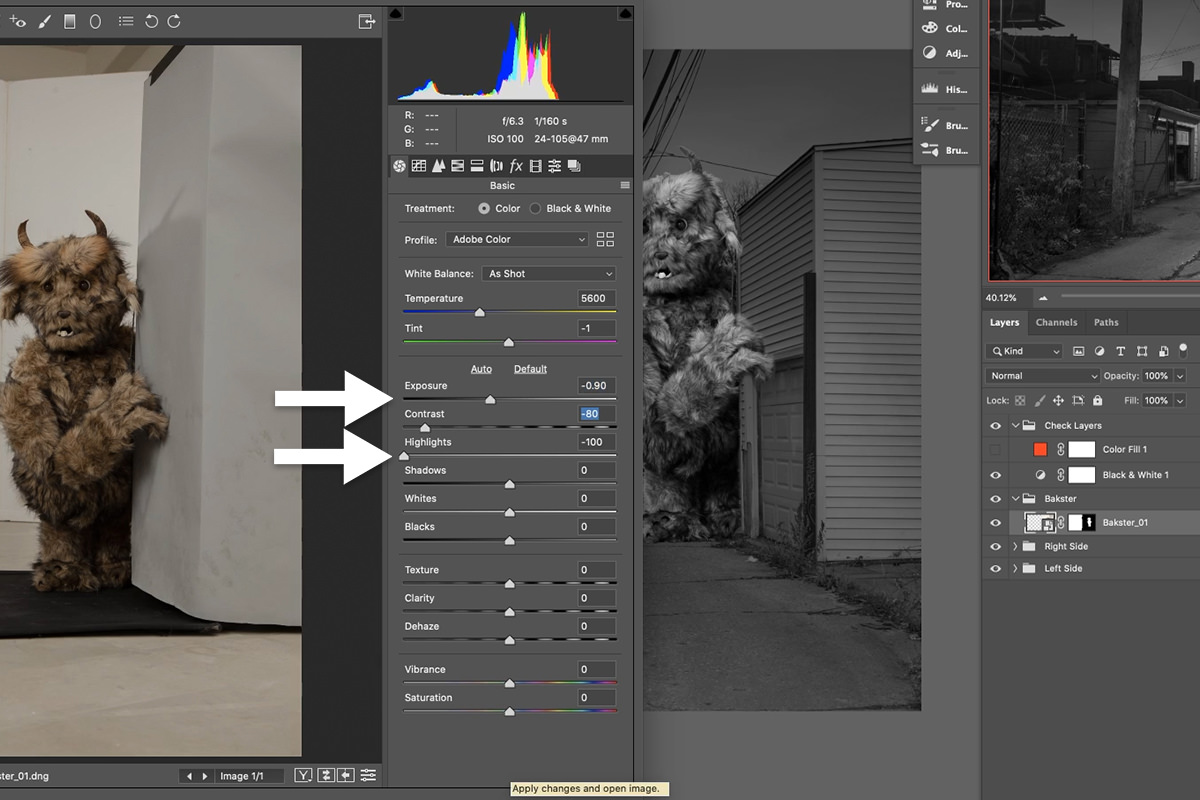
You should end up with a result that looks like this:
Much better! Again, we’ll be coming back to this later to make further refinements, but this gives us a great foundation to start matching the saturation and hue.
Matching Saturation
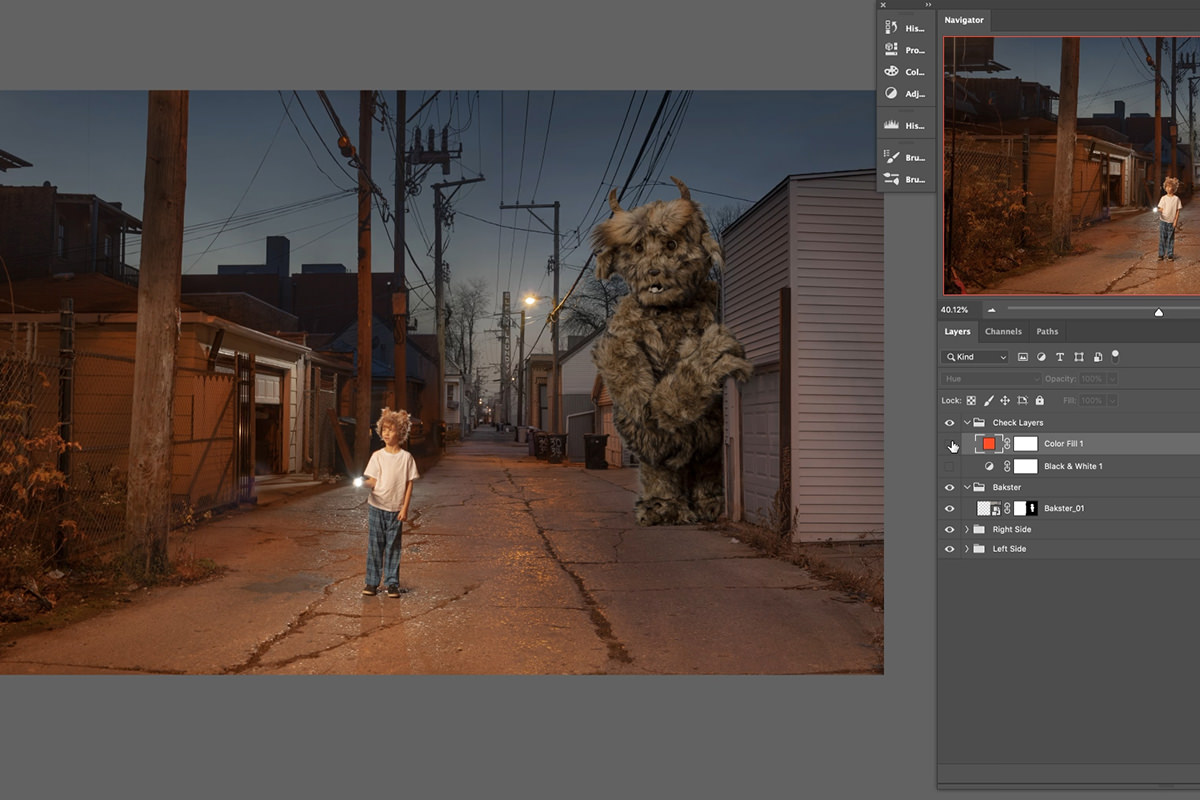
Like we did with matching light, we’ll be using the Check Layers to guide our editing decisions with saturation. Make the Solid Color Fill Layer in the Check Layers Group visible. Remember that this is set to a Hue Blending Mode, making every pixel in the image the same hue and making it easier for us to see the relative saturation.
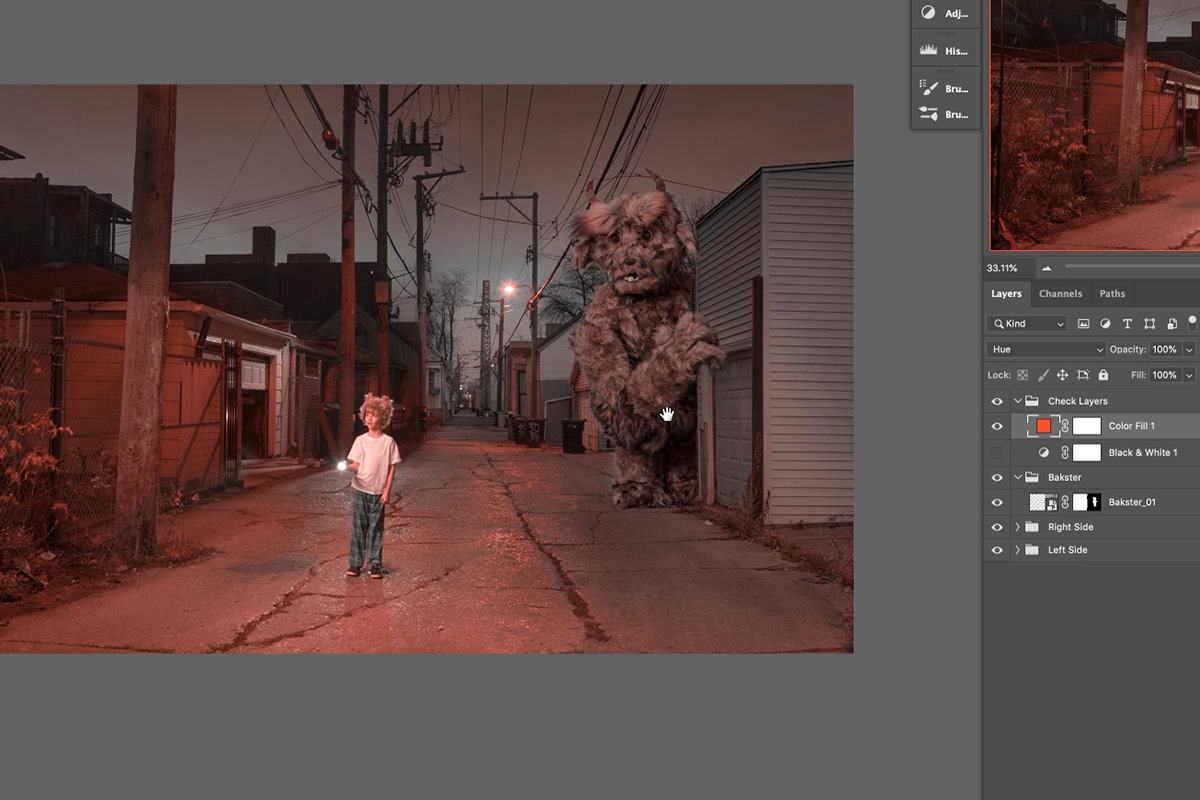
Bakster looks to be a little too saturated (Which makes sense since he was brighter–remember that brighter exposures will be more saturated, darker exposures will be less saturated.) Again, pop into Adobe Camera RAW to lower the saturation of Bakster_01.

We’re getting closer! Next up is matching the hue.
Matching Hue
We’re going to modify one of the Check Layers to better see the differences in hue throughout the scene. Select the same Solid Color Fill Layer but set it to the Luminosity Blending Mode. This will set every pixel in the scene to the same light levels so that we can better see differences in hue and saturation.
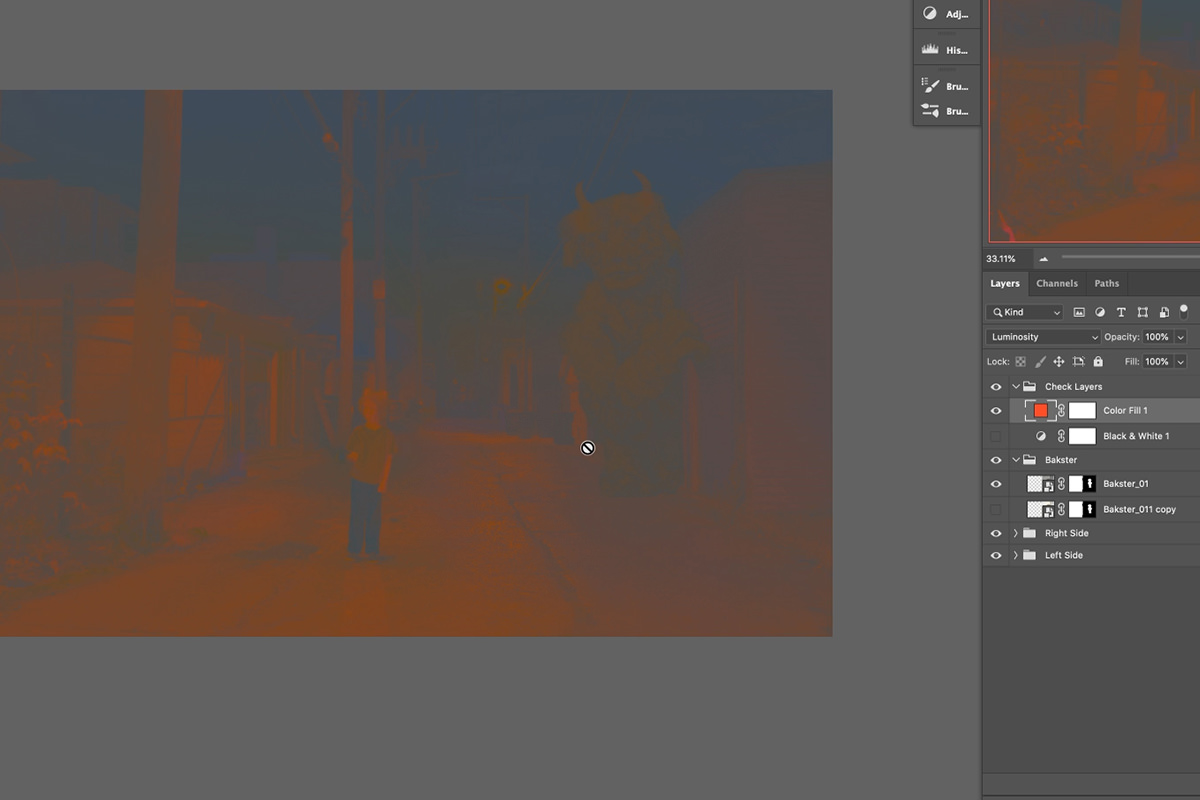
Now we can see that Bakster looks a little bit too green and too yellow compared to the environment. Back in Adobe Camera RAW push the Color Temperature slider towards blue, and the Tint slider towards magenta. Now the colors should more closely match the rest of the environment.
And we’re done with the initial light, saturation, and color matching! We’ll come back around later to fine-tune, but now we’re going to move on to something completely new: creating realistic shadows!
Creating the Shadow
Creating shadows from scratch is tough. Although we will need to paint some new shadows in a little later, we have a special trick to create the main shadow Bakster is casting on the garage: using the shadow from the original image of Bakster in the studio!
This is a powerful compositing technique that requires a lot of planning before the first image is ever captured. Since Aaron knew how Bakster would be positioned in the scene, he photographed the doll in the studio in a way that would create shadows that would be usable in post-production.
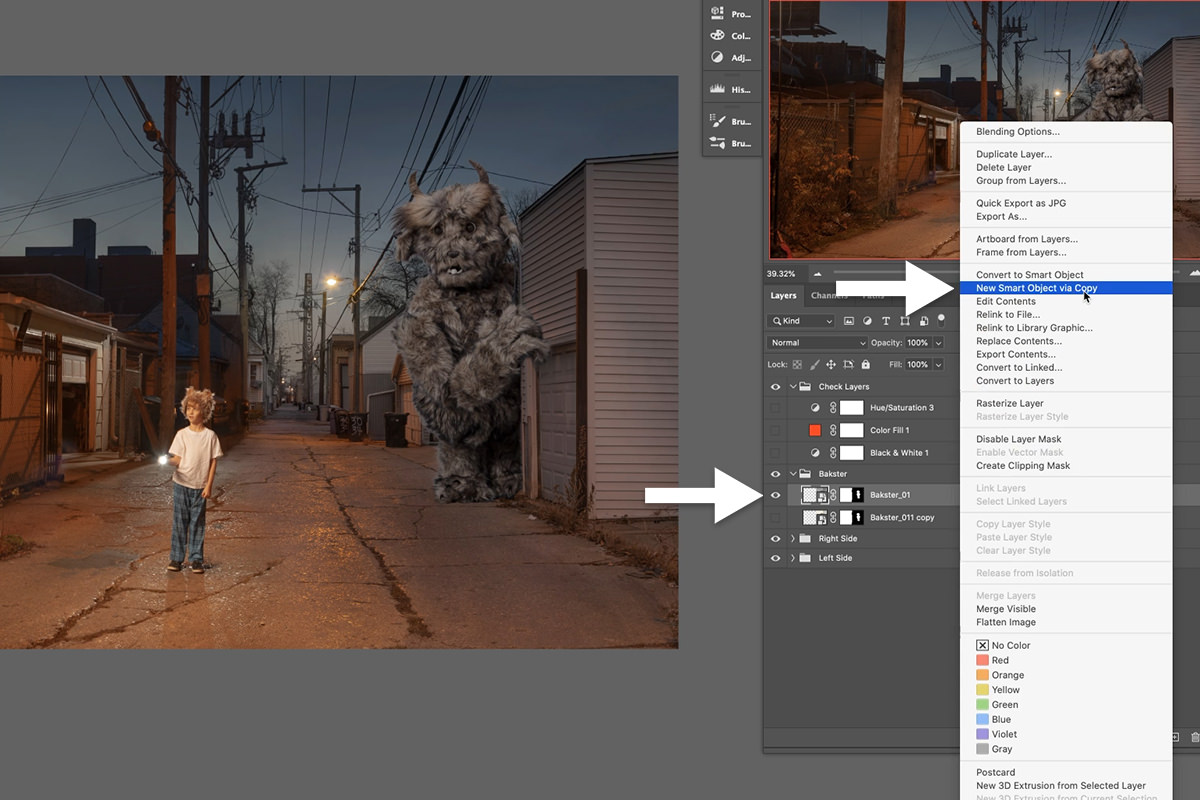
To start the process, right-click on the Bakster_01 Layer and select Create New Smart Object via Copy. This create a copy of the RAW image that can adjust separately from the main image of Bakster. Since we only need the shadow, fill the Layer Mask of the new copy with black, and then use the Brush Tool to pain white on Layer Mask only where the shadow appears along the Bakster’s right side.
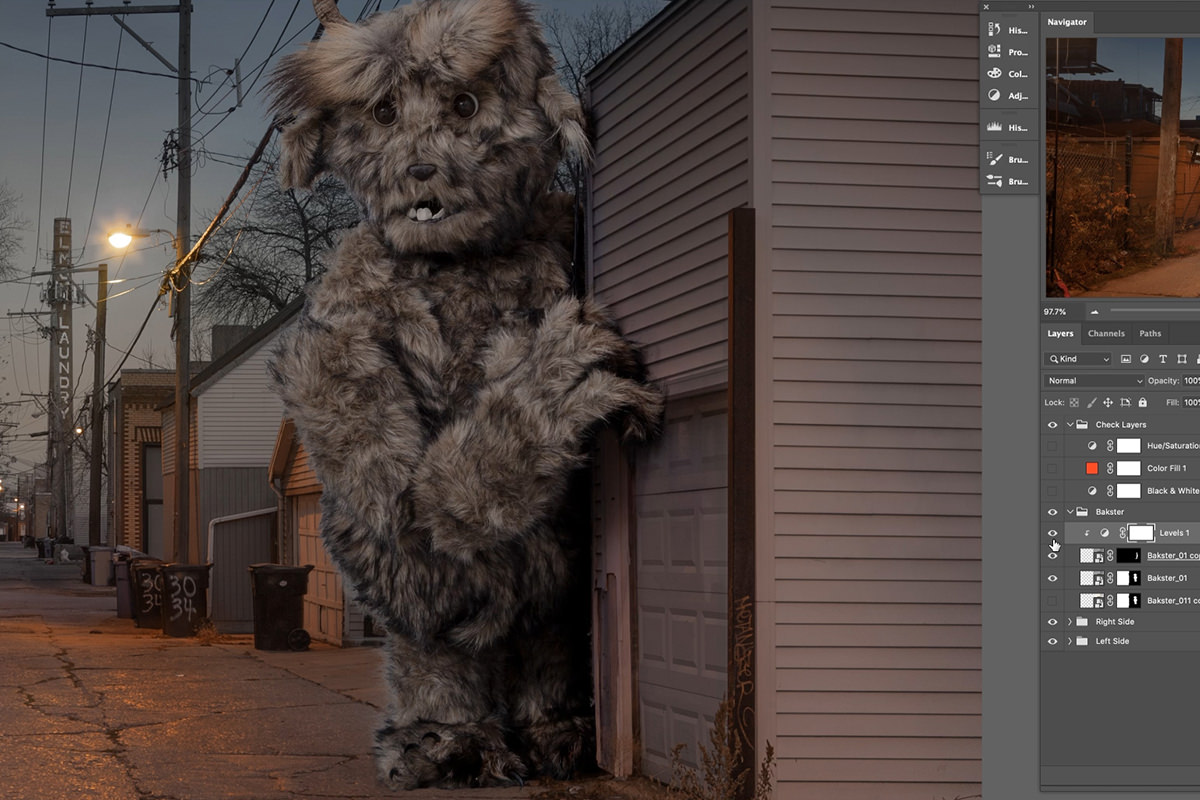
Since the shadow consists of a lighter area (the white wall) and a darker area (the shadow cast by Bakster), we can use Blending Modes to hide and show those different areas based on the light levels. Set the Blending Mode of the shadow Layer to Multiply. This will make lighter areas invisible while keeping the darker areas visible. You’ll notice that it doesn’t look very good. This is because the light and dark areas of the photo aren’t very well defined. We can use the same trick we used earlier to use Levels to exaggerate the light levels a little bit.
Create a Levels Adjustment Layer above the new copy, Clipping it to the copy Layer. Then use the Levels Adjustment Layer to make the light levels even lighter. This will create more contrast and make the shadow areas more well-defined while making the lighter areas less invisible.

Now we have real photographed shadows in the image!
Painting Fur & Refining the Cutout
Things are looking great! Now it’s time to return to our original cutout of Bakster to make it perfect. There are countless methods for selecting and cutting out hair, but there’s one in particular that we prefer more than all others: painting new hair in with the Brush Tool. You heard us right, painting hair!
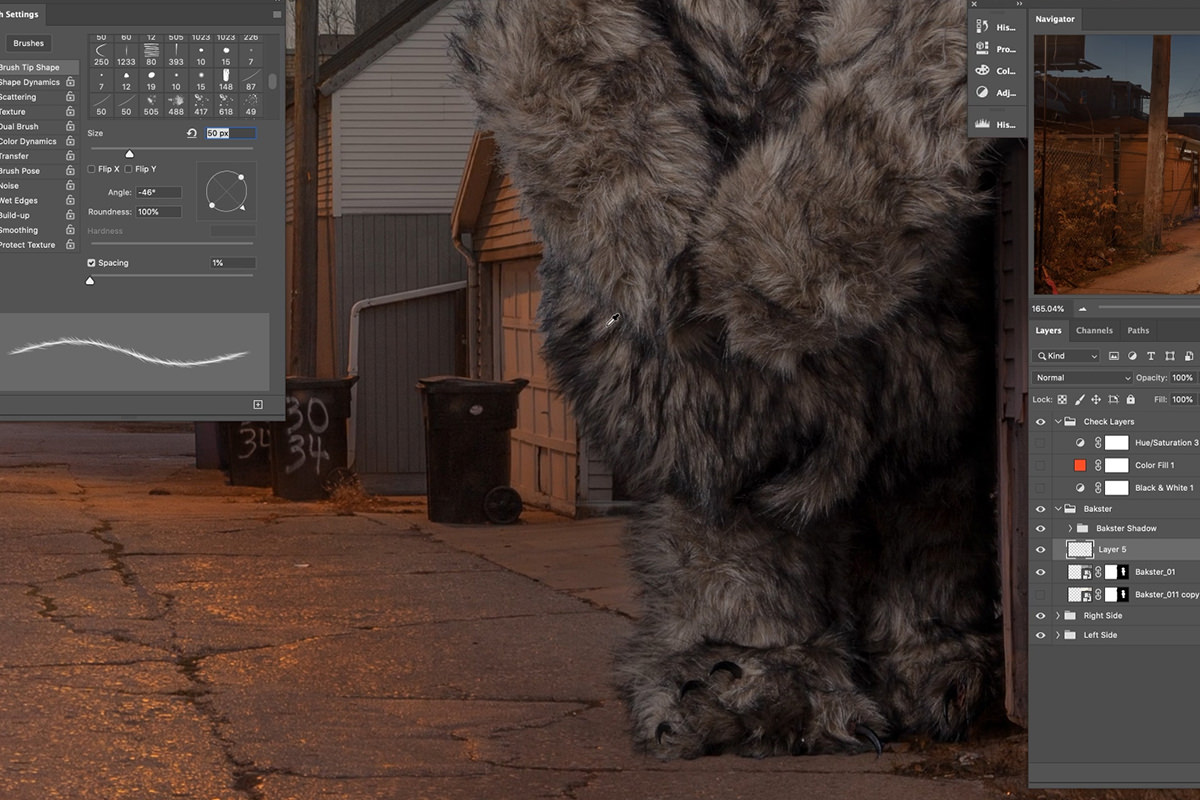
We’ve included a custom Photoshop Brush called Bakster. If you followed along through Part 1, it should already be available in the Brushes Window, but if you’re yet to install them you can find instructions here.
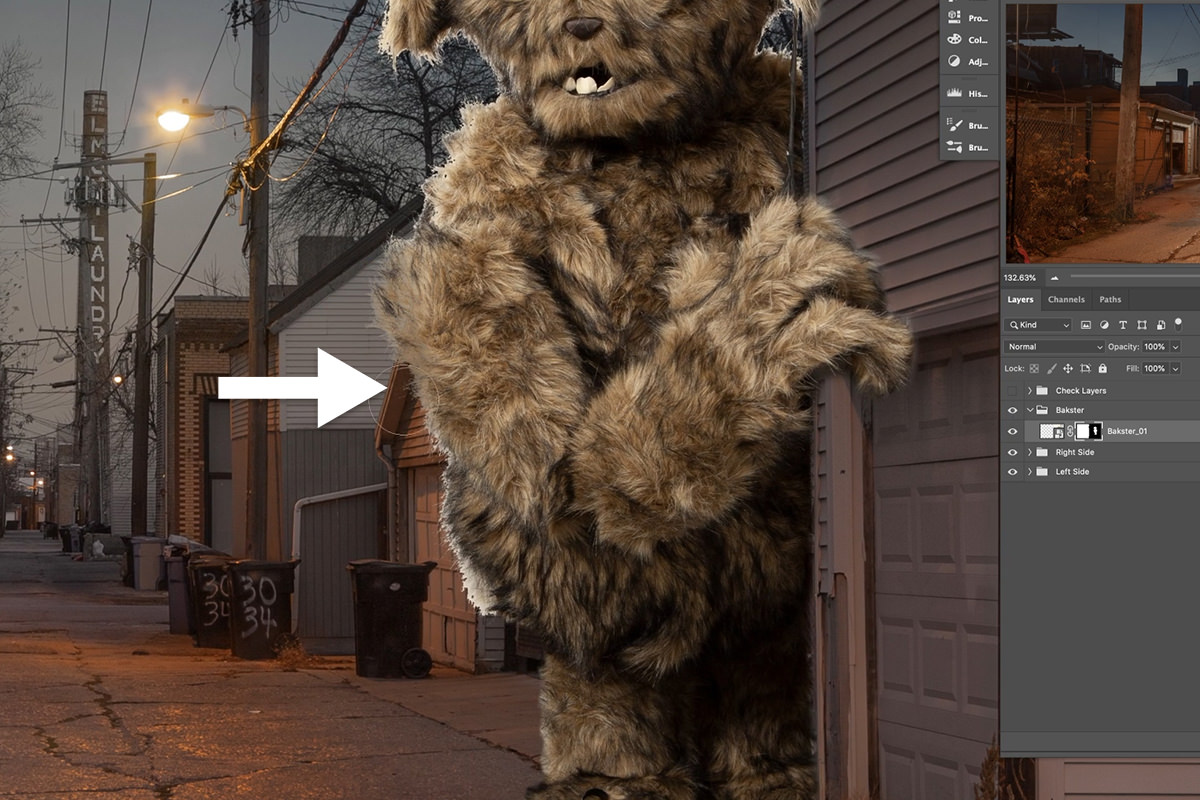
Painting in hair sounds like a strange approach, but we find that it offers unparalleled control compared to even the most advanced selection methods. Create a new Layer above Balster_01, sample a darker color from his fur, and start gently painting along the edges of his body.
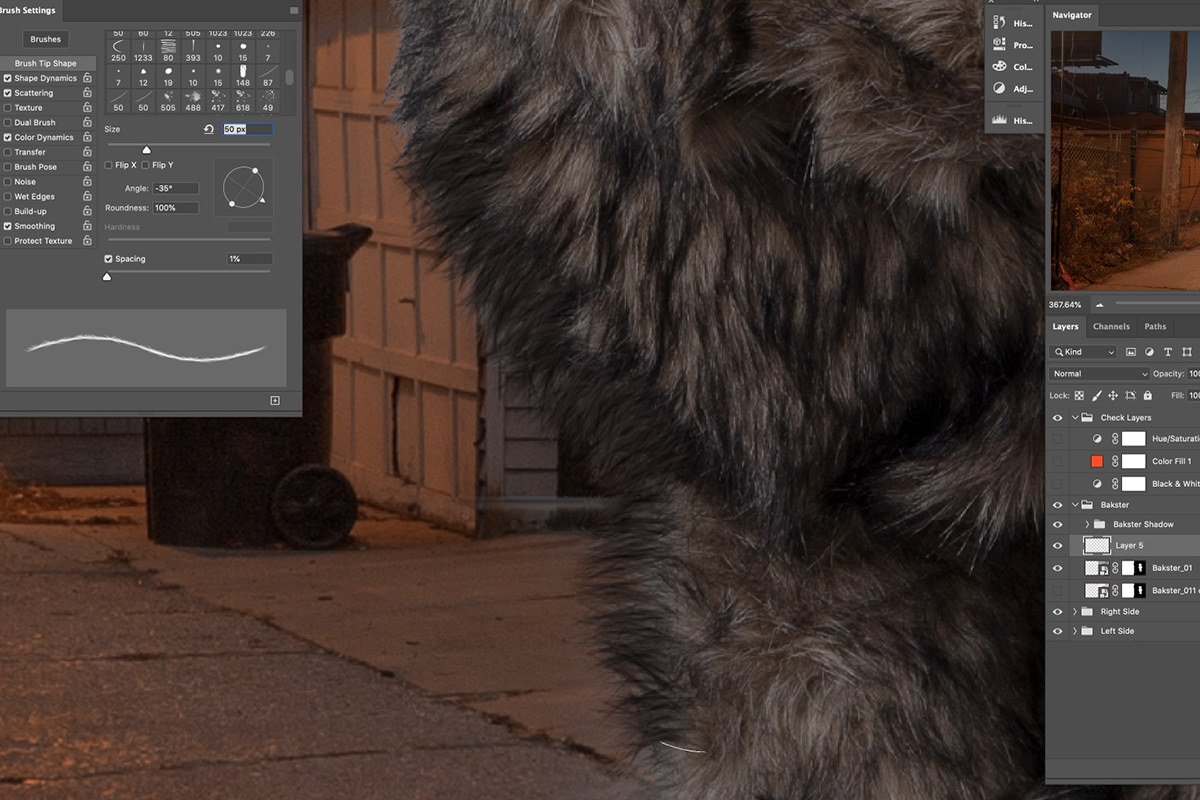
Continue to build up the effect by sampling lighter colors, adding some natural variation to the colors of the fur. This process will take some time, but take it slow and don’t be afraid to get creative with it.
The results can be miraculous! Once you’re done, Group the Layers created to make the shadow and name the Group Bakster Shadow.
Back to Color Matching
We did the bulk of the color matching earlier, but now it’s time to go back in and refine it. The color is pretty close, but we need to add in some additional environmental color effects. Every element in a scene will reflect colors onto the people and objects in that scene. For example, if we want the final composite to be as realistic as possible, the ground should be reflecting some of its light and color onto Bakster’s legs.
Create a new Layer above the Bakster Group and Clip it to the Group. Then, grab the Brush Tool and Sample a color from the ground just beneath Bakster. On the new Layer, paint with that color over Bakster legs and body. Since the color is being reflected from the ground, the reflection should be more prominent on Bakster’s legs and less prominent on his body–make sure to paint a nice gradient to reflect that!
Next, change the Blending Mode of the new Layer to Soft Light. It will integrate the color in the Layers below, but it’s a bit too dark. To fix that, hit CTRL or CMD + U to make a Hue/Saturation Adjustment on that Layer. Then adjust the lightness and saturation until you think it looks good.
Now let’s reflect some of the colors from the garage onto our furry friend. We can use Solid Color Fill Layers for this process instead of the Brush Tool. Create a Solid Color Fill Layer and change it to a color sampled from the side of the Garage. Change the Blending Mode to Soft Light, Invert the Layer Mask, and then paint white on the Layer Mask to blend the color in to the Bakster group. Keep in mind where the color is coming from, and where it should be reflected on Bakster!
Adding More Shadows
Next we’ll create a subtle shadow underneath Bakster. When creating shadows manually, it’s best to sample shadow colors from other areas in the image. Create a new Layer underneath Bakster. Use the Brush Tool to a Sample a shadow from the ground elsewhere in the image, and paint a shadow under Bakster. Set the Blending Mode to Multiply to blend it in with the environment. Shadows need to have a bit a of graduation to look realistic, and should be darker the closer they are to the object casting it. So sample darker shadows and paint those in closer to Bakster.
Once you’re done, create a Levels Adjustment Layer and Clip it to the Bakster Group, Invert the Layer Mask. Bring the lights down a bit, and then use the Layer Mask to paint the Levels Adjustment in over Bakster’s feet. This will darken his legs and feet and act as a continuation of the shadow effect.
Backlight Effect
Looking at the boy in the center of the image, we can see that he’s backlit, and has highlights around the edges of his hair and body. We want to recreate that effect on Bakster.
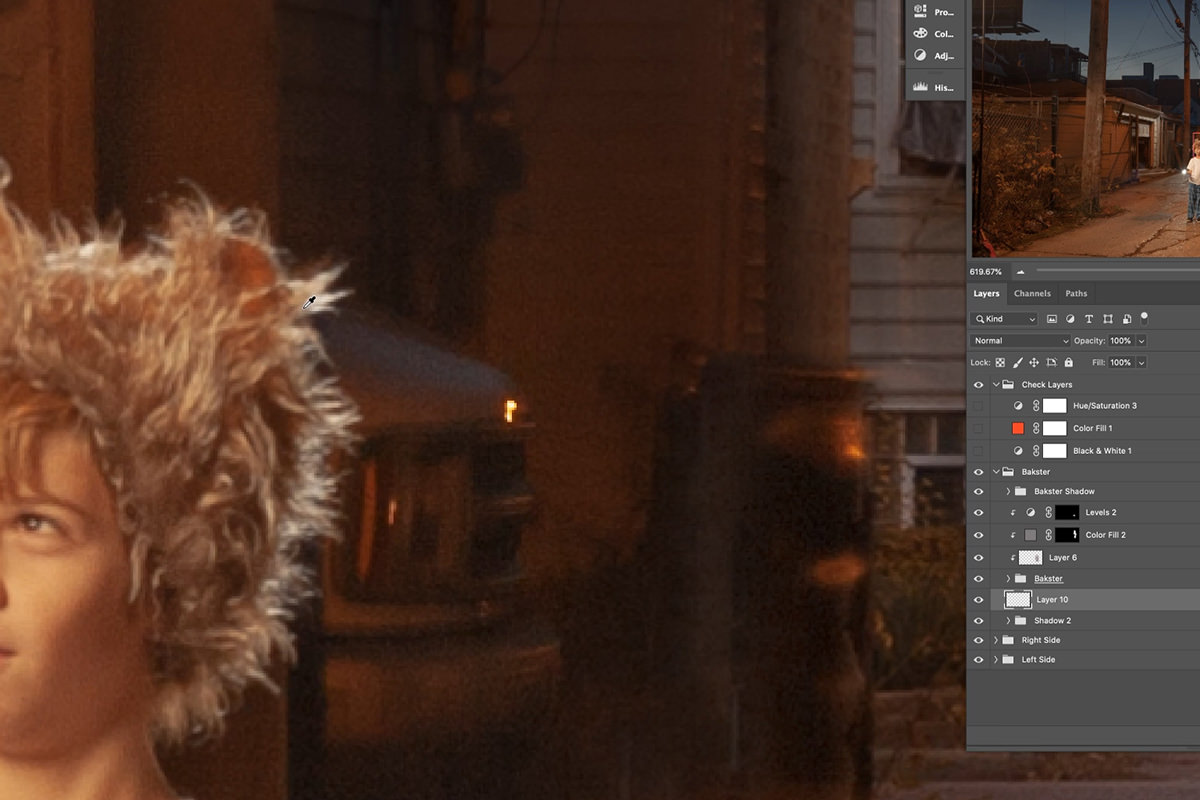
We can do this using the Bakster Brush, using the same method we used to paint in Bakster fur. Create a Layer underneath Bakster and, using the Brush Tool, sample some of the highlight color from around the boy’s head. Then use the Bakster fur Brush to paint highlights in along the edge of Bakster’s head and body.
This is tricky! Not only do you need to create realistic fur, but you also need to be able to analyze the light in the scene and predict where it will fall. Use your best judgement and a trial and error process to get it right! Remember, everything we do is non-destructive so you can always modify or remove this Layer if you don’t get it right the first time.
Finishing Touches
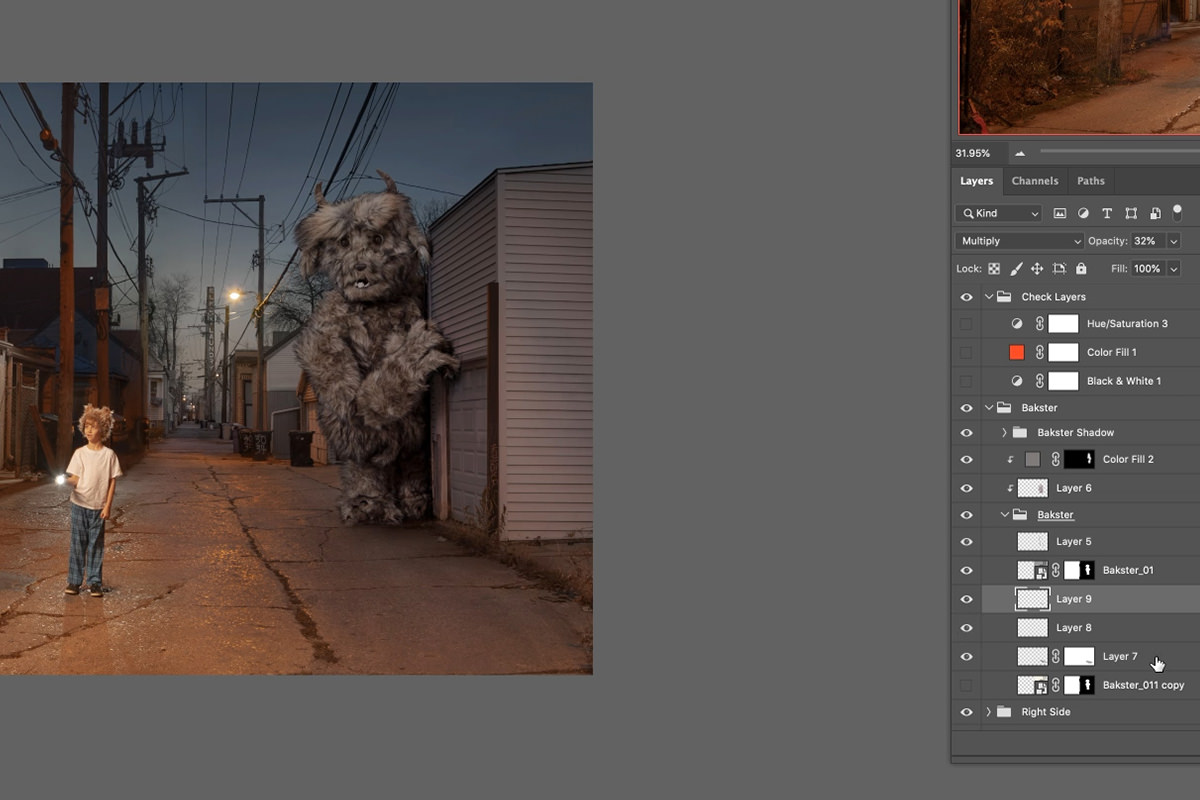
Now is a great time to zoom out of the image and get a good look at how well everything fits into the scene. Feel free to make any additional adjustments to the light and color as needed. You can always add new Levels Adjustment Layers and Hue/Saturation Adjustment Layers to make subtle changes.
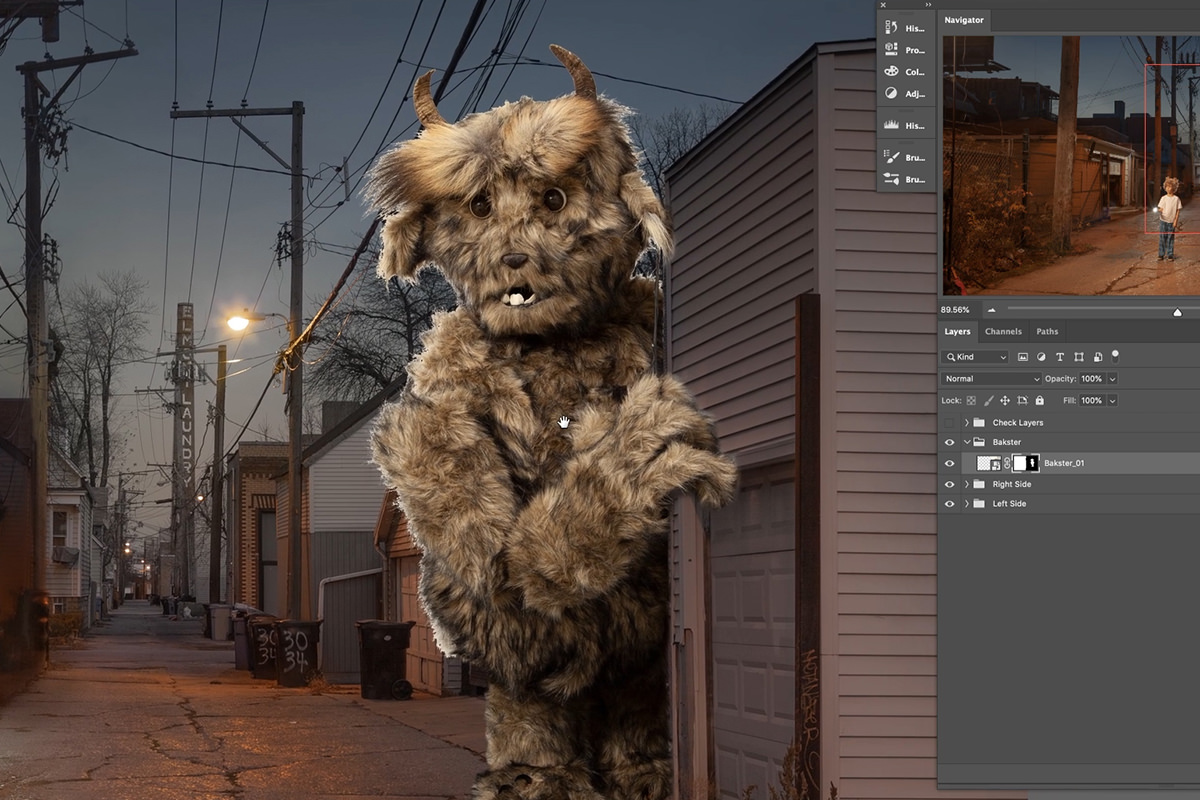
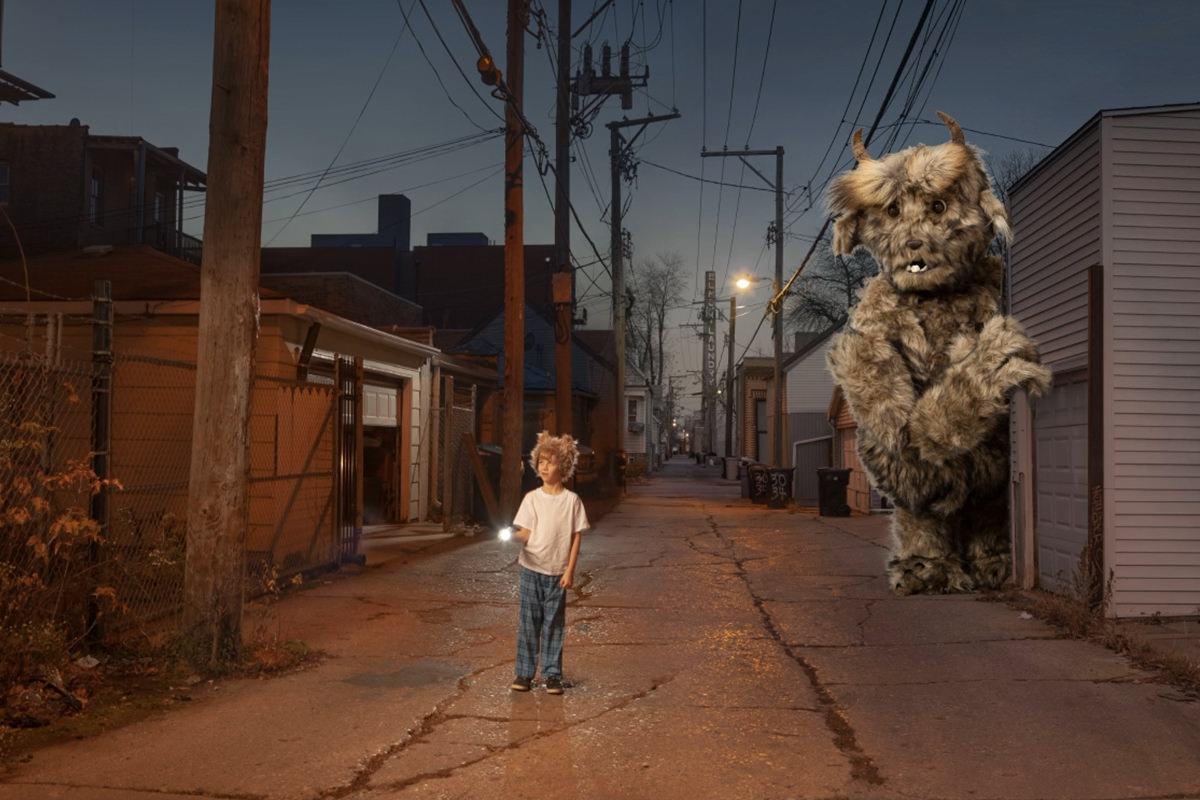
Your finished product should look something like this:
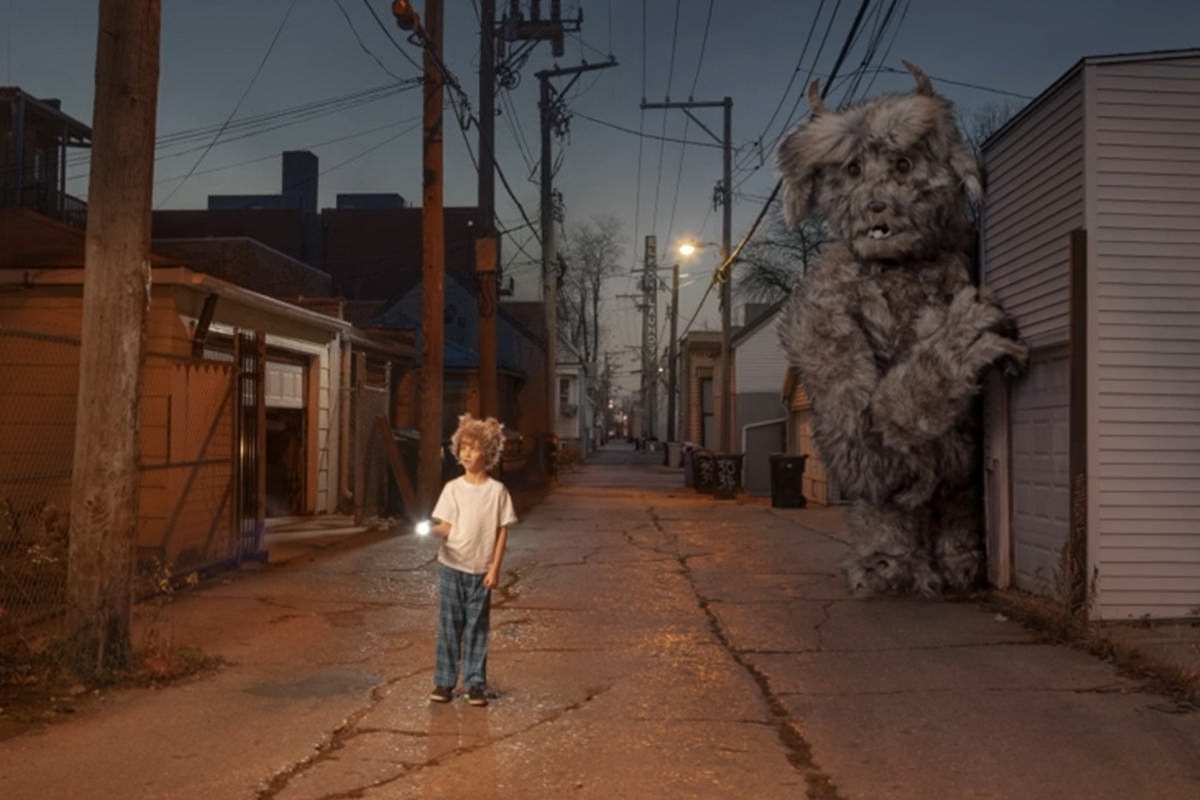
And we’re done with Part 2! We’ve come a long way, but there’s still one more episode to go. In the final tutorial of the series, we’ll be adding the finishing touches to light and color, creating light effects, and creating a subtle fog effect using another custom Brush!