Download Sample Images
Click the link below to download the sample images and follow along with this tutorial.
DownloadTutorial Description
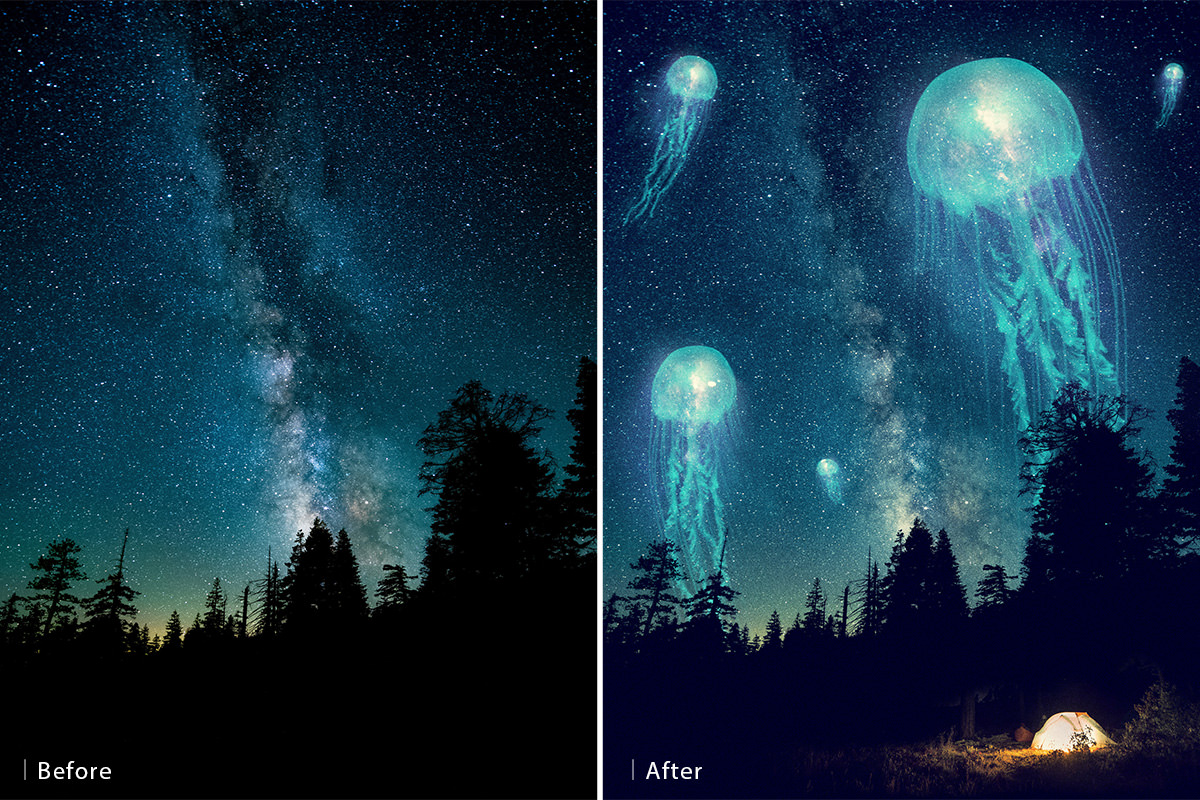
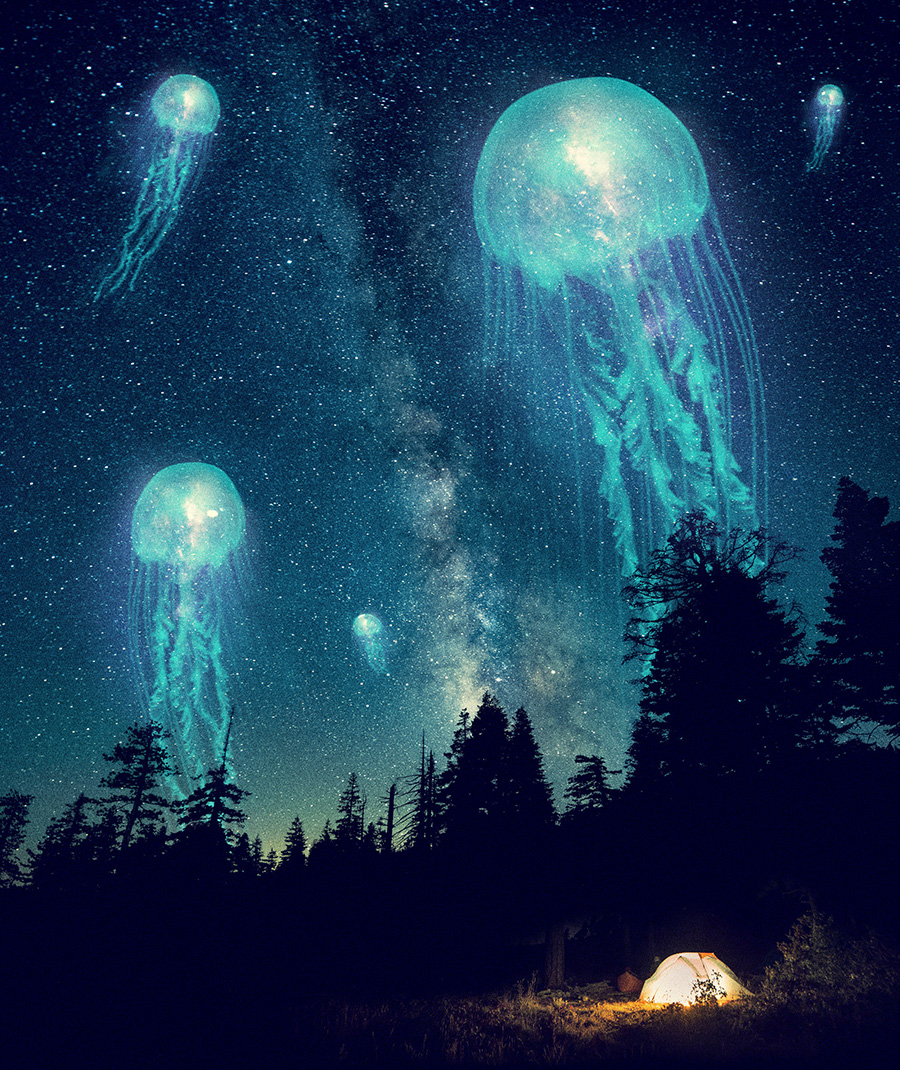
Learn to create an ethereal fantasy composite of jellyfish floating in a night sky! Combine multiple images with Blending Modes and Layer Masks, and then bring the composite together with creative color toning and grain!
Cutting Out the Jellyfish
Start off by opening the Simple Composite Background and Simple Composite Jellyfish images in a new document.
Before we can place this jellyfish into a sky, we need a way to remove its original, dark background. So how do we remove only the darkest parts of a photo? Blending Modes are a quick and effective way to merge Layers together for composites. Using the Screen Blending Mode, you can make the dark areas of a Layer invisible and keep the light areas visible with just a click.
To change Blending Modes, go to your Layers panel. In it, you’ll see a drop down menu that is set to Normal by default. Click on the menu, find the Screen Blending Mode, and select it. The dark areas of your photo will disappear!
In our example, the jellyfish’s tentacles are cut off at the edge of the frame. We can use a Layer Mask and the Brush Tool to create a more natural transition from visible to invisible. Simply click on the Layer Mask icon to create a layer mask on the jellyfish Layer, then choose your Brush Tool and paint with black around the border of the image (we recommend using a large, soft edge brush). This will make unwanted hard edges and background details go away completely.
Placing the Jellyfish in the Sky
With your newly cut out subject selected, hold CTRL or CMD + T to bring up your transform controls. Now, Right-Click on the subject and you’ll see options to Warp and Flip Horizontal/Vertical. Use these tools to play around with the placement of your subject. In our example, we Flip the jellyfish so that the curve of its body follows the Milky way of our background photo.
Once the first jellyfish is in place, you can duplicate it by holding CTRL or CMD + J. This will create another jellyfish that you can then Transform into another place in your image. Be sure to Warp this new copy of your subject to make it look different from the first. Hold CTRL or CMD + T, then Right-Click and go to Warp. You will see a grid of intersecting lines that you may click and drag in order to stretch and manipulate the image. Repeat this process and create different sized jellyfish to add depth to the composite.
You should now have a few Layers with jellyfish of different shapes and sizes. From here, hold SHIFT and Click on all of these Layers. Right-Click and go to Convert to Smart Object. This will place all of the jellyfish into a Smart Object that you can double-click to open and edit whenever you need to. You’ll notice the backgrounds of the jellyfish show up again when you do this. Simply change the Blending Mode of the Smart Object back to Screen to make the dark backgrounds disappear.
We can now go about placing the jellies behind the trees.
Selecting the Tree-line
To make part of an image look like it’s in the foreground, you need to Select it from its background first. To do this, click on your background Layer, then go to Select and down to Color Range. The cursor will change to an eyedropper tool that you can use to click on an area of your image and Select all areas of the same color range.
Use this to click on the trees, and lower the Fuzziness slider until you see the trees turn white, and the sky turn mostly black. The white areas are what will be Selected. Click OK, and Photoshop will turn what you see into a Selection.
You can now use this Selection to make the jellyfish Smart Object invisible where the trees are, so they seem like they’re behind the trees. Click on the Smart Object, and then the Layer Mask icon. This will do the opposite of what we want (the jellyfish will only be visible over the trees) so click on the Layer Mask and hold CTRL or CMD + I to Invert it. This will make the jellyfish invisible exactly where the trees are!
If you don’t want the jellyfish to be invisible in parts of the sky, you can make the sky area white on the Layer Mask. First, hold ALT or OPTION and click on the Layer Mask of the jellyfish to see what the Mask looks like. You can then use the Lasso tool to Select the sky area, then go to Edit and down to Fill. Under Contents, choose White and click OK to make the Selected area white on the Layer Mask. Deselect with CTRL or CMD + D. To further refine any gray areas around the trees, use the Brush Tool set to an Overlay Blending Mode and paint white. This will lighten those gray areas and not affect the black trees. Hold ALT or OPTN and click on the Layer Mask to get back to your image.
The jellyfish are now completely invisible where the trees are! To move the jellyfish around without also moving the mask of the trees, click the chain link in between the jellyfish Layer and the Layer Mask. Now we’re ready to throw some effects on those fish!
Making the Jellyfish “Realistic”
In this example, the stars in the sky have some motion blur caused by long exposure used to capture them. You can mimic this on the jellyfish to make them fit in with the stars even better. With the Smart Object selected, go to Filter, then Blur and over to Motion Blur and move the slider until the jellyfish match the stars (we stopped at 10 pixels).
Continue to make the subject blend into the image by warping the stars behind them. You can do this with the Liquify Tool. Duplicate the background layer, then go to Filter and Liquify. Under View Options, check Show Backdrop, set Use to All Layers, and set Mode to In Front to see the jellyfish while you work. Now, with the Bloat Tool, click on the stars directly behind the jellyfish. It helps to change the brush to the same size as the jellyfish you’re working on (with [ or ] ). Click OK, and we’re on to the final step with the jellyfish (woo!)
Bring in the Simple Composite Stars image, and remove the background of the stars the way you did with the jellyfish, leaving only the Milky way. It may not be enough to set the Blending Mode to Screen, so hold CTRL or CMD + L and use Levels to darken the darkest parts of the new Milky way image. The darker an area is, the more Screen will make it disappear. Transform the Milky way so that it seems like a glow coming from one of the jellyfish. Rinse and repeat by duplicating, transforming, and warping the Milky way over each of the jellyfish. Now we’re ready to bring in a new subject!
Adding The Camp
Putting giant jellyfish in the sky is cool. Let’s make it cooler by adding a sense of scale and a pop of complementary color! Bring in the Simple Composite Camp image, and remove the background with Blending Modes and Layer Masks like we did before. This method has worked so far because our subjects have all been very bright while on very dark backgrounds. Transform and scale the bright little camp until you like how it looks among the trees.
Almost finished: next, you can change the hue of the camp if you prefer. Select the camp Layer and click on the Adjustment Layer icon on the bottom of the Layers panel. Go over to Hue/Saturation, and Clip it so it only affects the camp by hitting the icon of a square with a down-pointed arrow. Now move the Hue slider left and right until you find the color you like. In this example, we go to orange for a cinematic, teal-and-orange look.
Finishing Touches
After grouping, renaming and organizing the layers we’ve created thus far, we’re in a great place to put on the finishing touches. We start with creative color toning using Gradient Maps and Levels.
Click the Adjustment Layer icon and go to Gradient Maps, then click on the bar at the top to go to the Gradient Editor. Here you’ll find presets for gradients already loaded into Photoshop, but for this example, we create our own. At the bottom, you’ll see a gradient that on the left, affects the darks of an image, and on the right affects the lights. Simply click to choose a color along the gradient, which will change everything in the image at that light value into that color. In this case, we go from black, to blue, teal, yellow, and finally white. The effect is strong, so feel free to lower the opacity of the layer and mask it away from areas you don’t want it to affect. We do so for the camp to keep its orange hue.
Now, Aaron is huge fan of blues in the shadows so we finish the coloring process with a Levels Adjustment Layer. Levels are often used to adjust light levels, but if you change the drop down option from RGB to Blue, Red, or Green, you can control color levels in cool ways. Go to the Blue channel and bring the Output Levels up to around 20 and 230, which brings blue into the shadows and yellow into the highlights.
Finally, you can make all of the different elements we’ve put together seem like they were shot with the same camera by adding grain, or noise, to the entire image. Create a new layer on top of everything, and click Edit, go down to Fill, and choose 50% Gray as the color. This will act as a base for some noise. Next, click Filter, go down to Noise, and over to Add Noise, then crank it up until you can clearly see it (in this example, around 120%). Now, how can we blend this layer with the image below it? By choosing our trusty Blending Modes. For noise, the Soft Light Blending Mode works well to keep the effect subtle but still impactful. And with that, our “simple” composite is done!
We hope these techniques help you bring your next fantastical, Instagrammable image to life.