How to Create a Camouflage Effect in Photoshop
-
Add to
favorites
-
DifficultyMedium
-
Length1.5 hours
-
Videos7
-
Software
DESCRIPTION
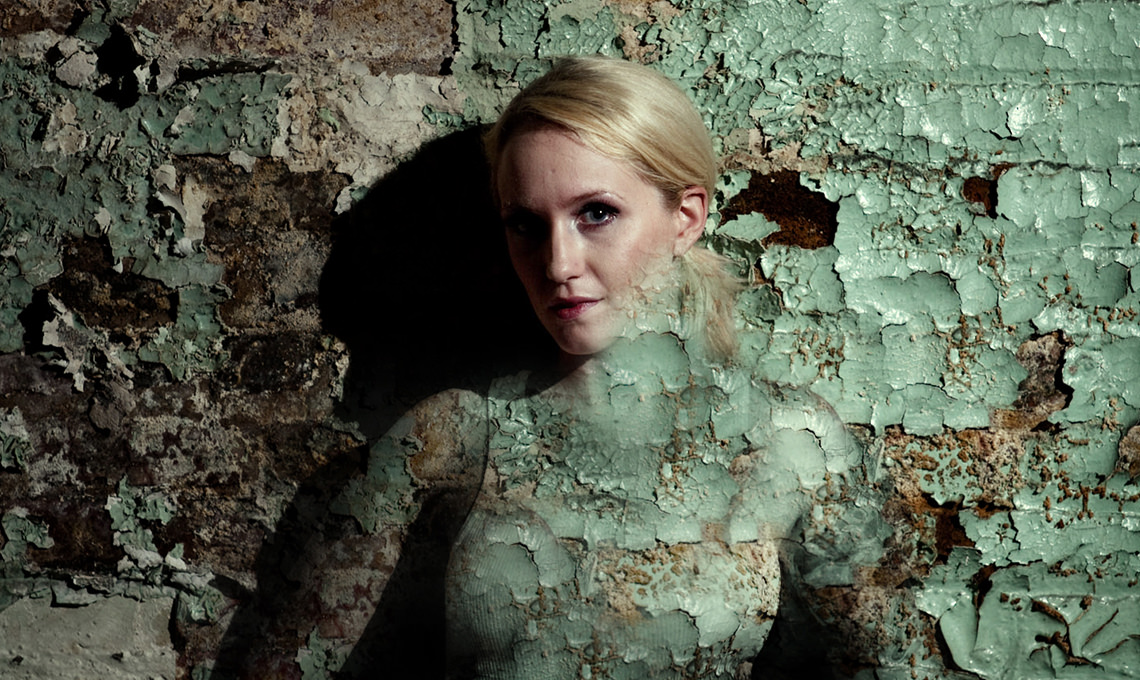
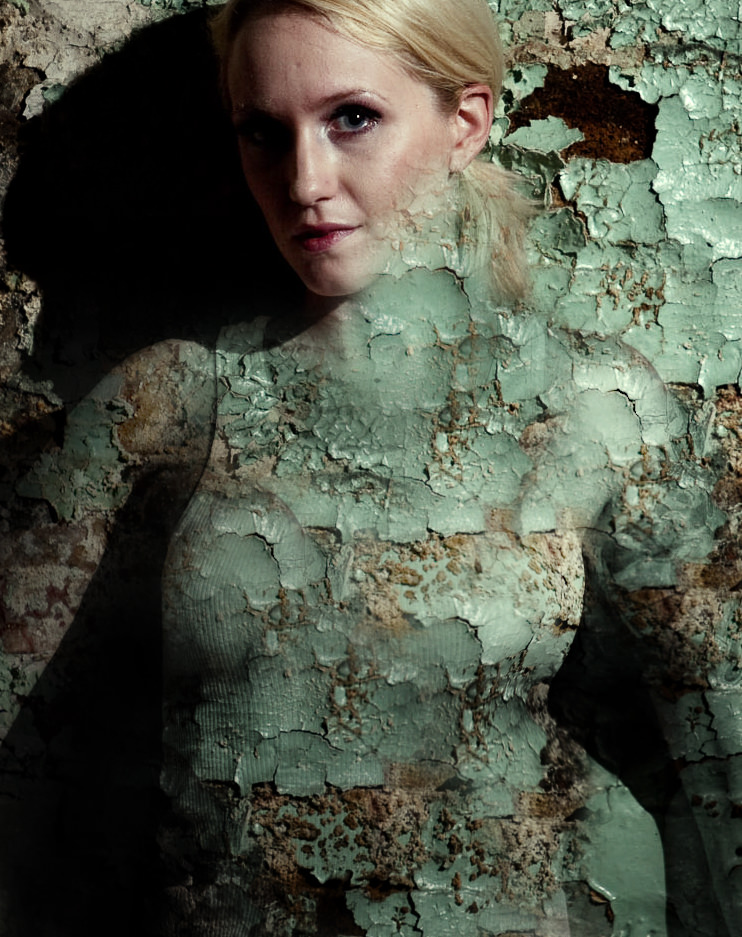
In this Phlearn PRO Tutorial, you will learn how to take the texture from any background and blend it directly onto your subject. Discover techniques for blending, colorizing, advanced cloning, creating highlights + shadows, making selections and more.
THIS COURSE INCLUDES
- 1 Sample Image
Share
Table of Contents
-
01 - Planning the Edit & Applying Texture to Skin10:46m
-
02 - Shadow Detail with Channels11:32m
-
03 - Highlight Detail17:35m
-
04 - Shaping the Body with Liquify10:38m
-
05 - Adding Texture12:29m
-
06 - Adding Texture (Part 2)5:58m
-
07 - Coloring6:41m
Course Downloads
Learn Photoshop Compositing.
Plan Your Vision
Every Photoshop project should start by creating a plan of action. This is extra important for composites. See how to identify what to keep, what to get rid off, what to combine and what to enhance.
Blending Modes
Use multiple layers to blend different textures. Learn how to stack layers and adjust powerful blending modes to achieve an effect that blends texture into skin.
Use the Clone Stamp
Copy parts of you image directly onto other areas. Learn how to overcome the challenge of making the image look like it’s just a bunch of the same texture. In this tutorial, we show you how to blend different clone stamps together to create a seamless effect.
Discover Blend If
Learn about one of Photoshop’s most powerful and underutilized tools—Blend If. This tool will allow you to restrict a layer to effect just the highlights or shadows. It sounds simple but the results will amaze you.
Blending In
In this tutorial we blend our subject in to the background using a
Select Highlights and Shadows
Create realistic effects by separately selecting the highlights and shadows before adding effects. Learn how to make these advanced selections using channels and keep the rest your subject intact while only editing the specific area you need to.
Advanced Blending
The key to blending texture into an image is to treat highlights and shadows differently. Learn how to restrict the visibility of textures to either highlights or shadows.
Add Texture to Skin
Build incredible texture onto the skin of your subject without making it look fake. Skin is always a sensitive area, but this tutorial will educate you on the best practices so keep both your subject and your effects looking great.
Add Details
Copy elements from one area of the image to another and transform them to feel completely original. Learn to identify areas that are too light, too dark or lacking in detail. Then, easily fix each of the problem areas.
Reviews
New & Popular Tutorials
Training Site in
the World
Tutorials!
Ratings
and Counting
Subscribers


Thanks for the info. I was finally able to implement my tree girl idea.
Awesome! Glad to know this helped with another project!
Great stuff. This was such a great way to use a simple technique, but really create a stunning result. Also, I’ve seen people use channels in other tutorials and always stayed away from them. This is the first time they actually made sense to me! So thanks Aaron!
This is a fantastic tutorial, and one that I highly recommend. I have, so far, just used blending modes to try and blend in. What I like in Aaron’s tutorial, is how he uses Channels, Cloning and a few other tools to achieve a really outstanding effect. This is something that I will try, but with a tweak of my own. Once again, he teaches the virtue of patience to achieve the desired effect. This is one tutorial where you don’t see Aaron, but the systematic approach is all there. This is an absolute must see for anyone who wants to learn artistic ways of creating images
I really liked this tutorial. The reason i bought it is different from the reason i bought the other Phlearn PROs. With the other Phlearn PROs i was searching for techniques which i could universally use on many of my photomanipulation ideas, like learn it once and use it in many places. With this one, i was searching specifically for this effect where you blend one person into a texture, but no doubt i will be using these techniques on other photomanipulations as well. I was sure you would use the liquify filter first and then bring the shadows and highlights of the original photo. I was quite pleasantly surprised to see you can get such a realistic effect without using the liquify filter much. It’s not that i don’t like the liquify filter, but it is hard to separate the affected area from the unaffected areas. Overall, a really great tutorial. My all time favorite Phlearn PRO remains The Outlaws, but then again, i also bought that for different reasons :))
What i also want to say is thank you for making great tutorials at affordable prices, it means a lot to me, and i am sure for others as well!
Thank you Aaron, thank you Phlearn.
I first learned of Aaron’s Phlearn tutorials after watching a few of his You Tube videos. I was impressed with what Aaron presented on You Tube, so I was super excited to try a couple of his paid tutorials. This particular Blending tutorial is quite informative, and it is clear that Aaron is a Jedi Master with photoshop. BUT… I found it difficult to follow many of the topics Aaron discussed in this tutorial primarily because he talks way too fast! Aaron – you need to slow your delivery down. I honestly found it difficult at times to understand what Aaron was saying. I was surprised by this because his You Tube videos are much clearer and he delivers the information much more slowly (IMHO). It seemed to me that this tutorial was rushed. I’d like to purchase more of Aaron’s tutorials because I am really impressed with his knowledge, but I just can’t see myself investing much more without some evidence that Aaron can slow it down a bit. Overall, the content of the tutorial is fantastic, but delivery needs work.
Hi John!
Thank you for your feed back, we really appreciate and will to try slow it down. In the future, feel free to contact us at info@phlearn.com if you have anymore questions or concerns 🙂
Would of never thought of how to create this look without buying this special Tutorial. Alot of great tricks Thanks for the great time i learned a lot.