Download Assets
description
Learn how to turn any color into a gradient in Photoshop! This tutorial guides you through selecting objects, applying custom gradients, and adjusting blend modes for vibrant results.
Go PRO:
Explore more about color with our PRO tutorial Advanced Color Grading in Lightroom & Adobe Camera RAW . You’ll learn how to perfect your hues, highlight your subjects, and craft unique visual styles.
Image Source
- Tochukwu Ekeh
Images sourced from Pexels.
Share

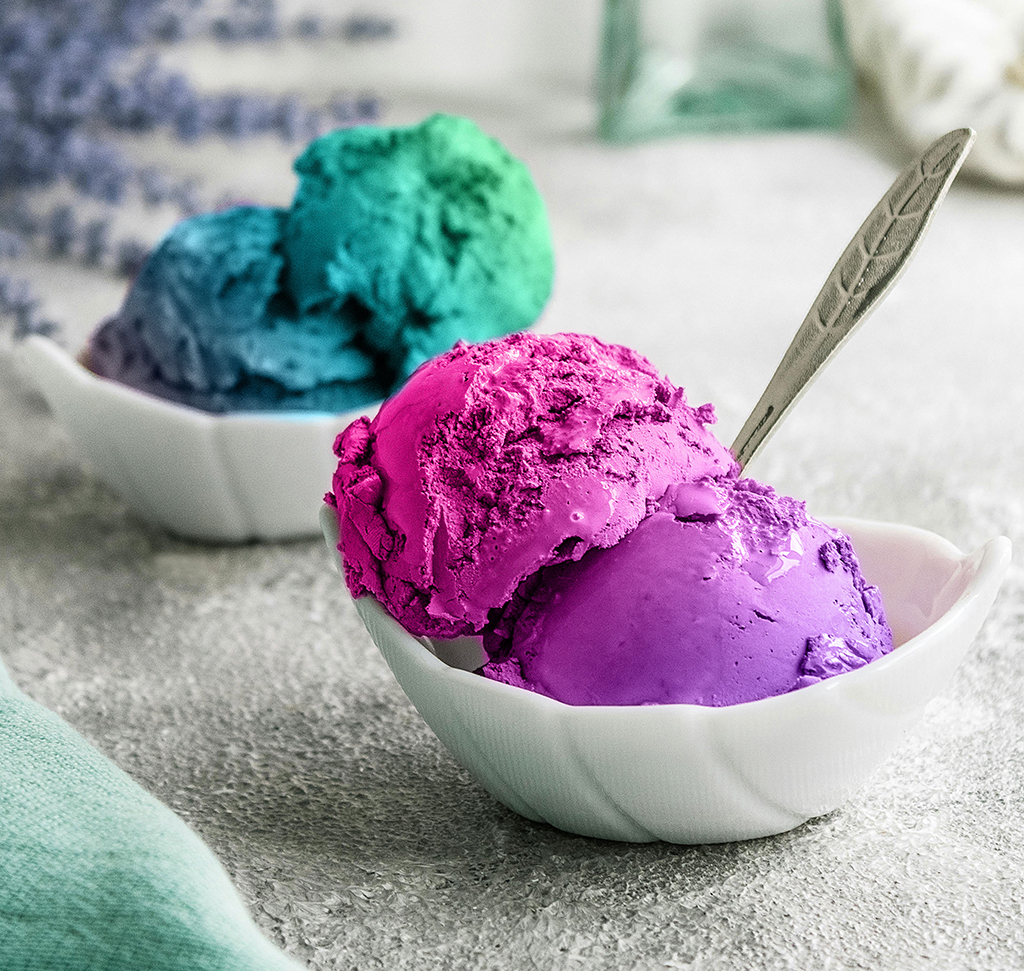
AFTER
BEFORE
Your Vision, Gradient Perfect.
This guide will show you how to transform any color into a beautiful, customizable gradient in Photoshop. Learning this technique opens up a world of creative possibilities, allowing you to add depth and visual interest to your images, whether you’re enhancing an object or creating striking backgrounds. It’s a fun and easy way to add a professional touch to your Photoshop projects.
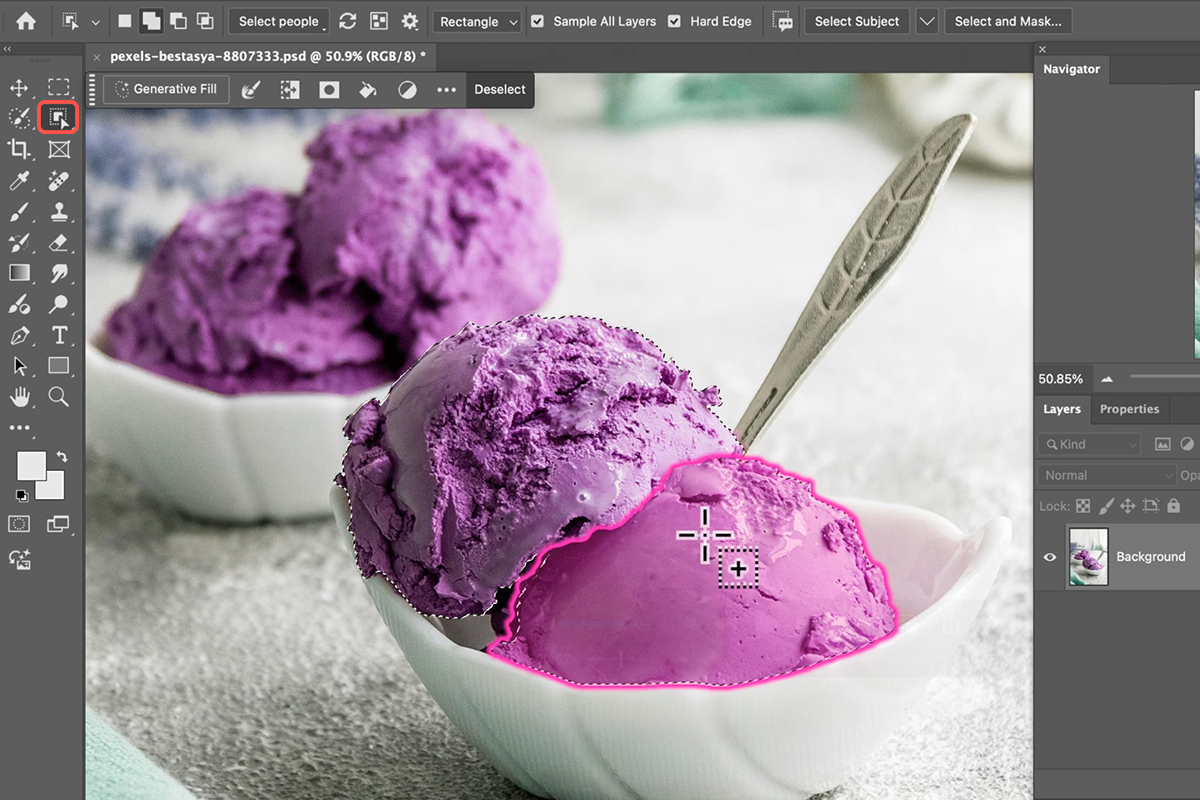
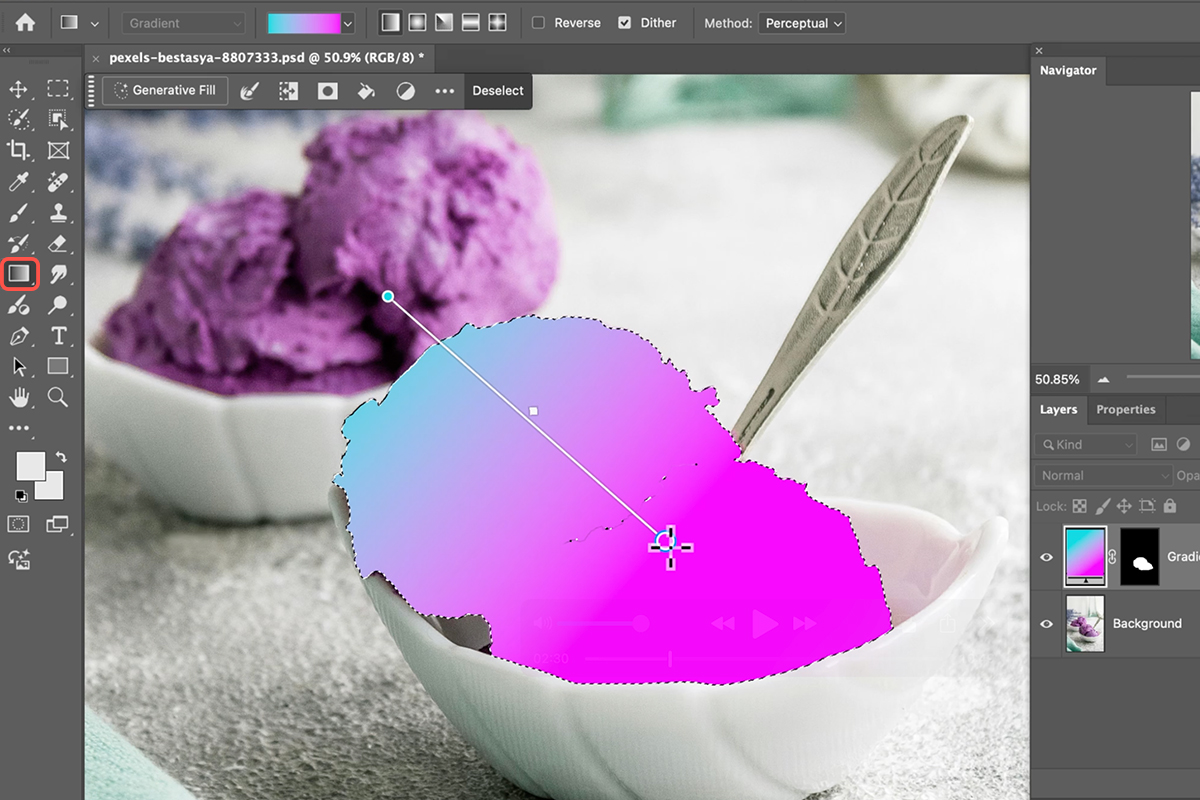
Object Selection First
1. Begin by selecting the object you wish to gradientize. Use the Object Selection tool (Keyboard Shortcut “W”). Simply hover over the object and click to create an initial selection. If the selection isn’t perfect, hold Shift and click on additional areas to add to the selection.
2. For more precise adjustments, switch to the Selection Brush tool (Keyboard Shortcut “L” and then select the Selection Brush from the toolbar) to paint in any missed areas. Ensure your entire desired object is perfectly selected before moving on.
Apply The Gradient
3. With your object selected, it’s time to apply the gradient. Access the Gradient tool (Keyboard Shortcut “G”). In the top bar, select “New Gradient” for more control over your colors.
4. Click on the color dropdown to explore various pre-set gradient options, such as purples or sun-like effects. You can also choose different gradient shapes like linear or radial.
5. Once you’ve chosen your gradient, click and drag across your selected object in the direction you want the gradient to appear.
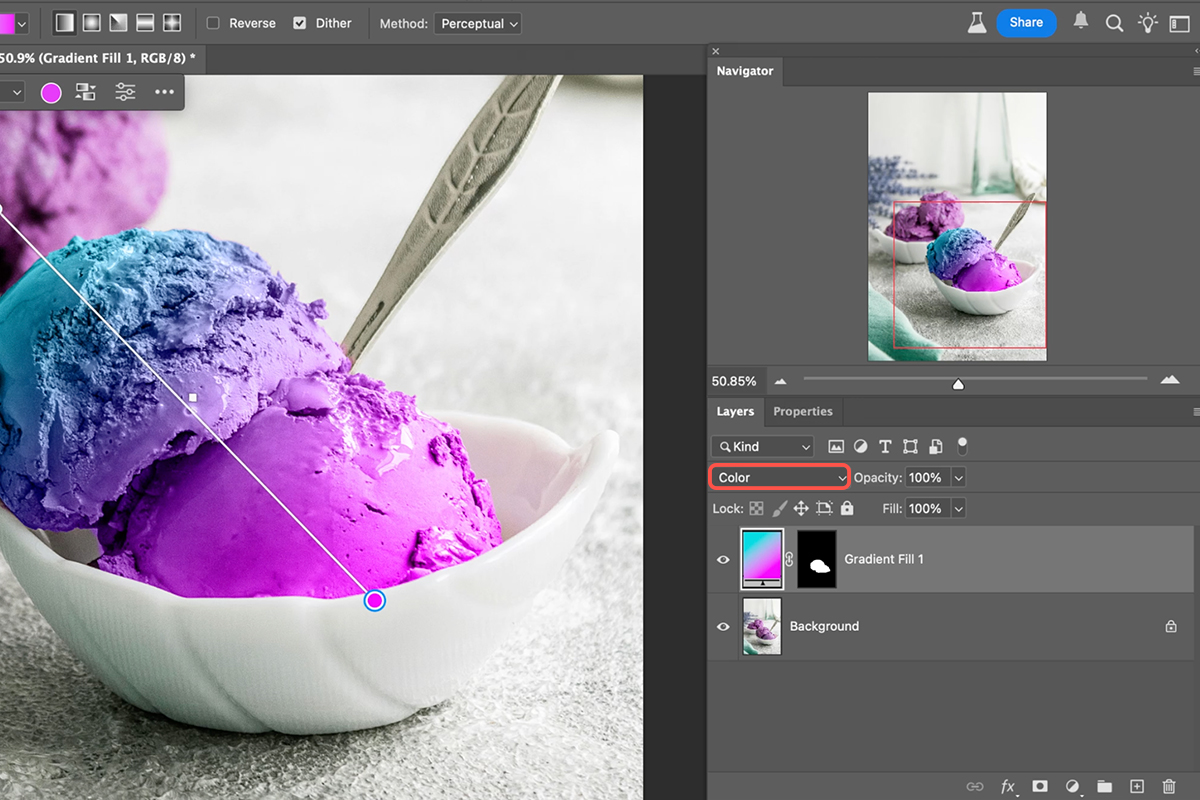
Adjust Blend Mode
The next crucial step is to adjust the blend mode of your new gradient layer.
6. Locate the layer blend mode in the Layers panel, which is typically set to “Normal” by default. Click on this setting and change it to “Color”. This blend mode will apply the gradient’s colors while preserving the underlying details of your original object. For a slightly less vibrant effect, you can also experiment with the “Hue” blend mode.
Fine-Tune Your Gradient
Once the blend mode is set, the fun truly begins! You can easily move the gradient on your layer to change its positioning. Even better, you can customize the gradient’s colors by clicking on the individual color stops on the gradient bar. This will bring up your contextual taskbar where you can select new colors from the color picker or choose from different gradient presets. Experiment with different colors and positions to achieve your desired aesthetic, creating unique and eye-catching effects.