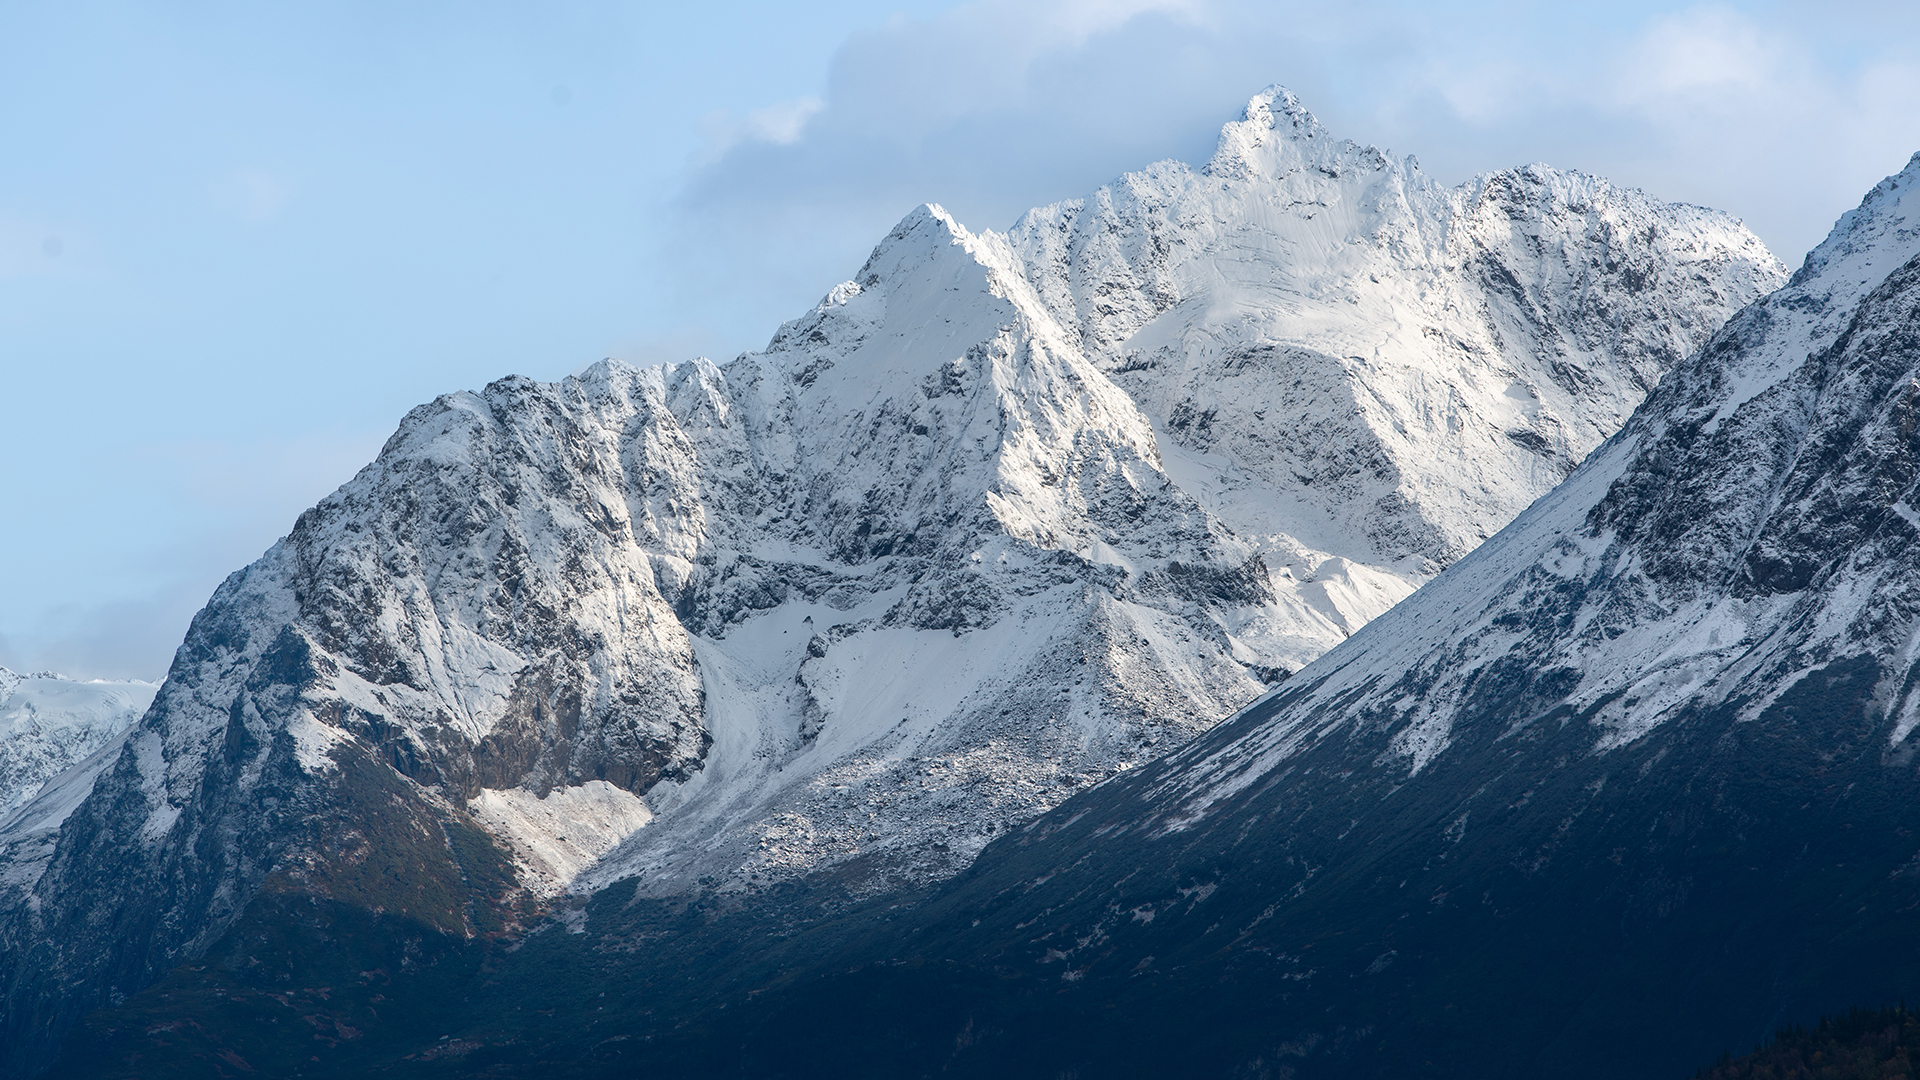

description
Adobe’s AI landscape tool now detects snow. Generate separate snow, sky and vegetation masks in one click, then edit each independently in Lightroom or Camera Raw.
Enjoying This Free Tutorial?
We publish a new free tutorial every week, each one with sample images and PSDs you can download and follow along with. Sign up and they land straight in your inbox, along with early word on sales, events and subscriber-only offers.
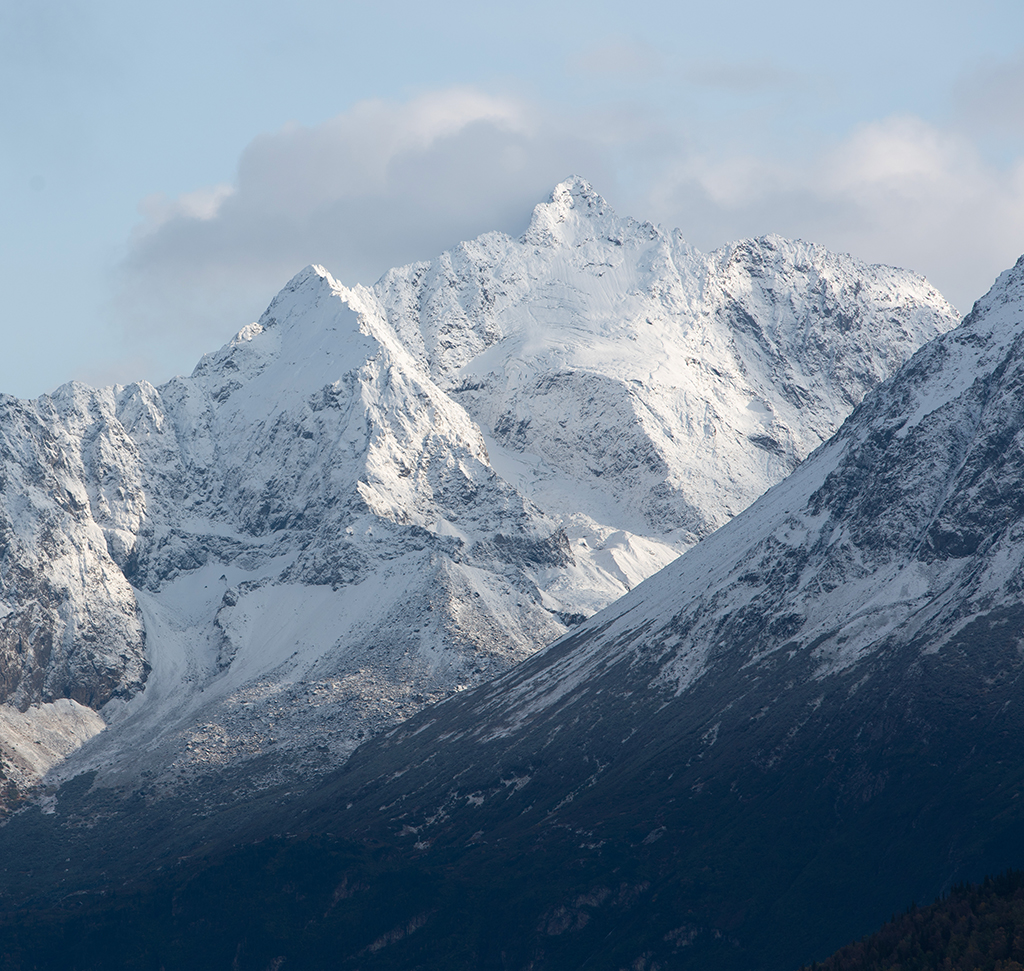
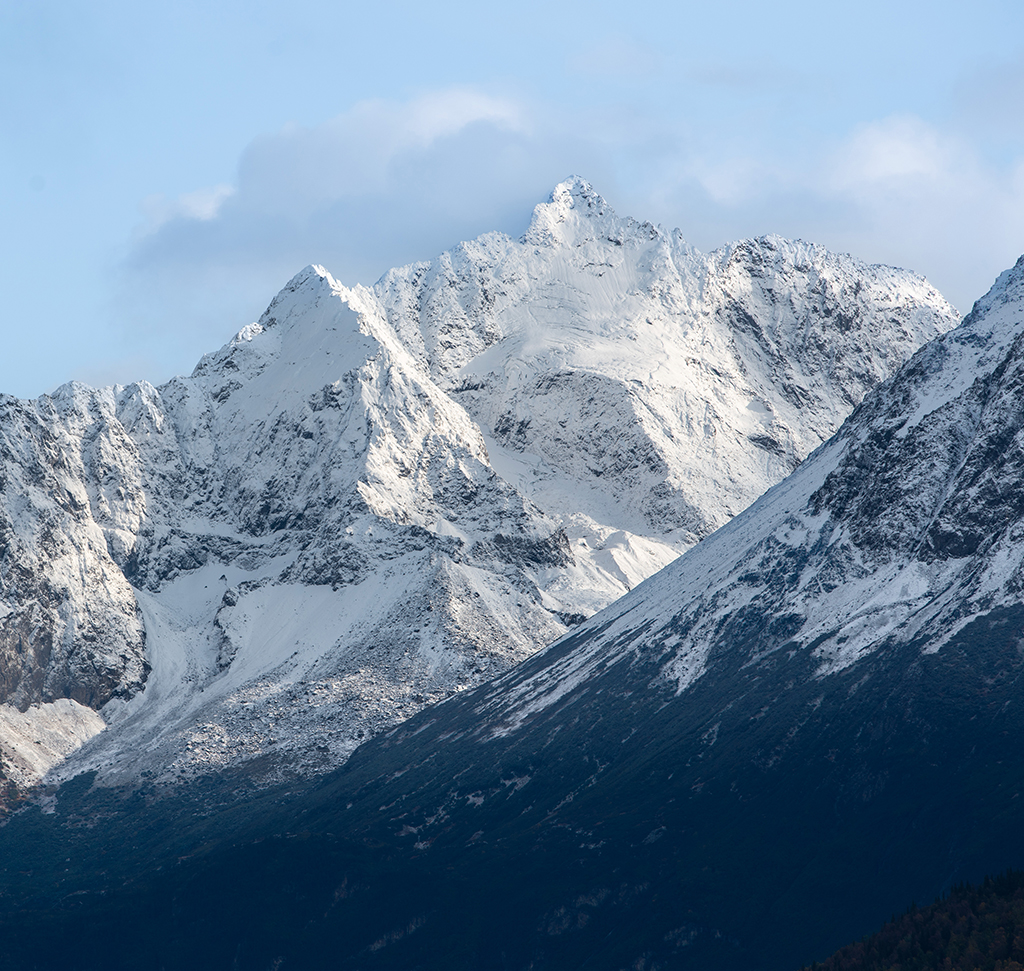
AFTER
BEFORE
The AI Landscape Tool Now Finds Snow, and It Changes the Whole Edit
Snow is one of the hardest things to select by hand. It’s the brightest thing in the frame, it has almost no colour to grab onto, and it wraps around branches and rocks in a thousand small edges that no luminosity mask handles cleanly. Which is why most winter shots get edited globally — you pull the highlights down across the whole picture and accept that the trees go flat with them.
Adobe’s AI landscape tool has added snow detection, and that’s the constraint gone. One click gives you snow, sky and vegetation as separate masks, and each one takes its own adjustments. The same feature is in both Lightroom and Adobe Camera Raw, so the workflow below covers each.
Why Separate Masks Change the Result
Snow Needs the Opposite Treatment to Everything Else
To recover detail in snow you pull highlights down and push clarity up. Do that globally and the trees turn muddy and the sky goes harsh. Do it on a snow-only mask and nothing else in the frame notices.
The AI Is Doing the Part You’d Do Badly
A hand-drawn snow selection along a treeline is an afternoon of work and still won’t be accurate. This is the class of task where automation isn’t a shortcut so much as the only practical route.
You Still Make Every Adjustment Decision
The tool selects. It doesn’t decide how bright your snow should be, how cold your sky is, or how saturated the pines get. All of that stays yours — you just get to apply it precisely.
Generate the Masks in Lightroom
-
Open the Photo and Go to the Masking Panel
In the Develop module — keyboard shortcut D — open Masking with M. A RAW file gives the AI more tonal information to work with than a JPEG, and more room to recover the highlights afterwards.
-
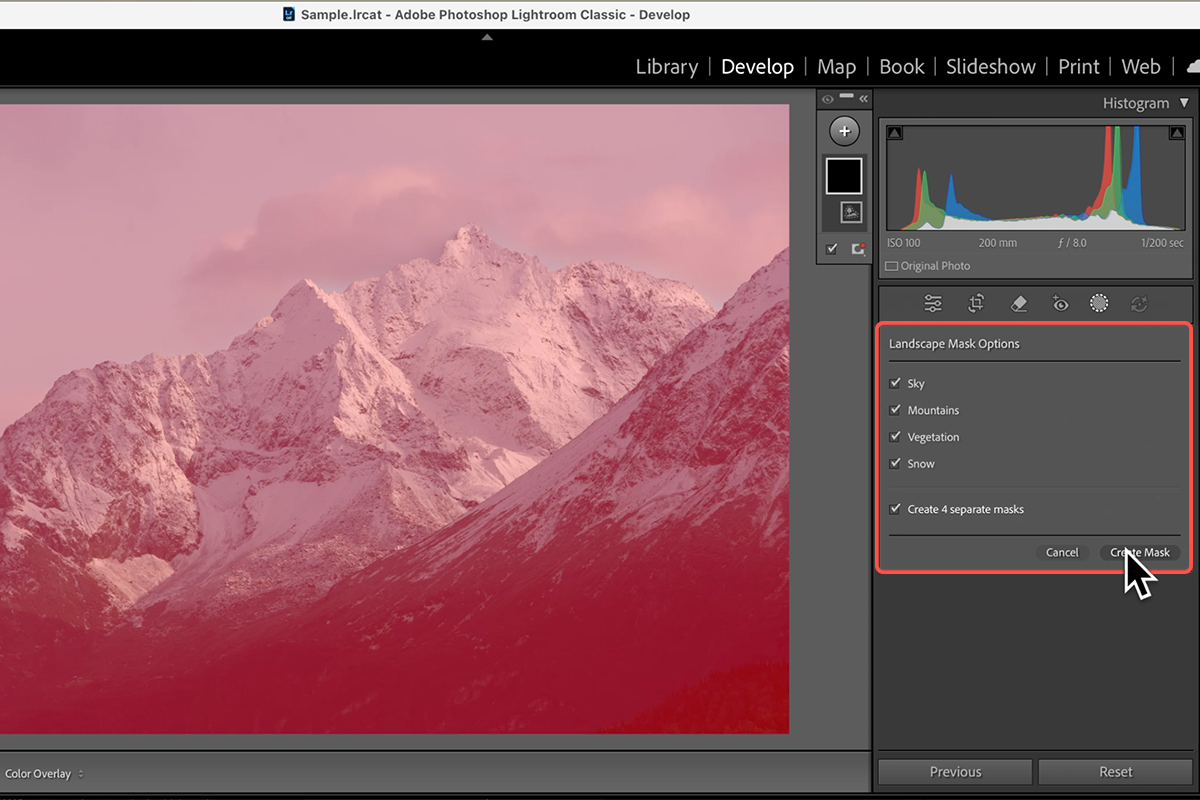
Click Landscape and Let It Scan
Adobe analyses the scene and reports back what it found. On a winter shot that’s typically snow, sky and vegetation, sometimes with mountains or water separated out too.
-
Click Create Masks
Each detected element becomes its own mask in the list. Press O at any point to toggle the red overlay and see exactly what the AI selected — worth doing before you adjust anything, because it tells you whether the edge along the treeline is as good as it needs to be.
Edit the Snow Itself
-
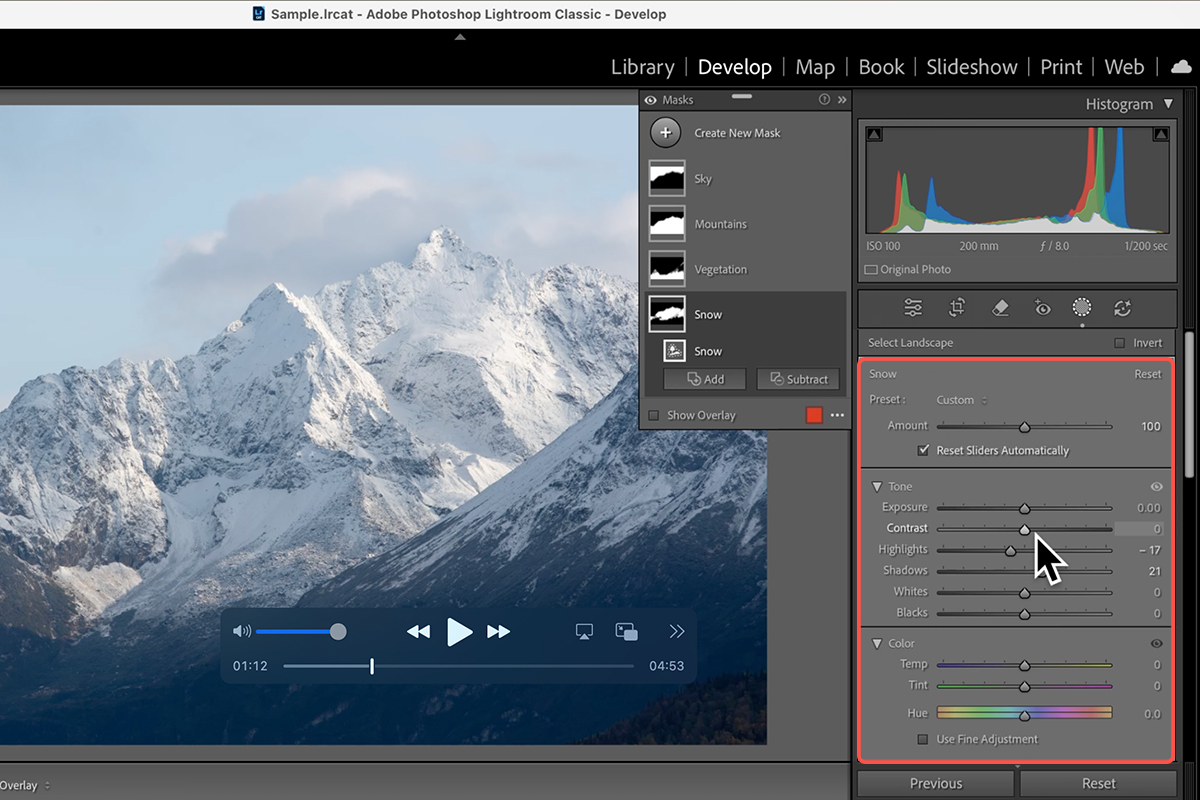
Select the Snow Mask
Every slider you now move affects only the snow. This is the whole payoff of the previous three steps.
-
Lower the Highlights, Lift the Shadows
Blown snow is the default failure of every winter photograph. Pulling Highlights down recovers the tone that’s already sitting in the RAW file, and raising Shadows opens up the dips and footprints that give a snowfield its shape.
-
Add Clarity From the Effects Tab
This is the step that makes the difference. Clarity on a snow mask brings out crust, drift lines and texture in what was previously a flat white shape — and because it’s masked, the trees and sky keep the softness you want them to have.
The Same Tool in Adobe Camera Raw
-
Drag the RAW File Into Photoshop
It opens in Adobe Camera Raw automatically. Shift + Cmd/Ctrl + A gets you there from an already-open file.
-
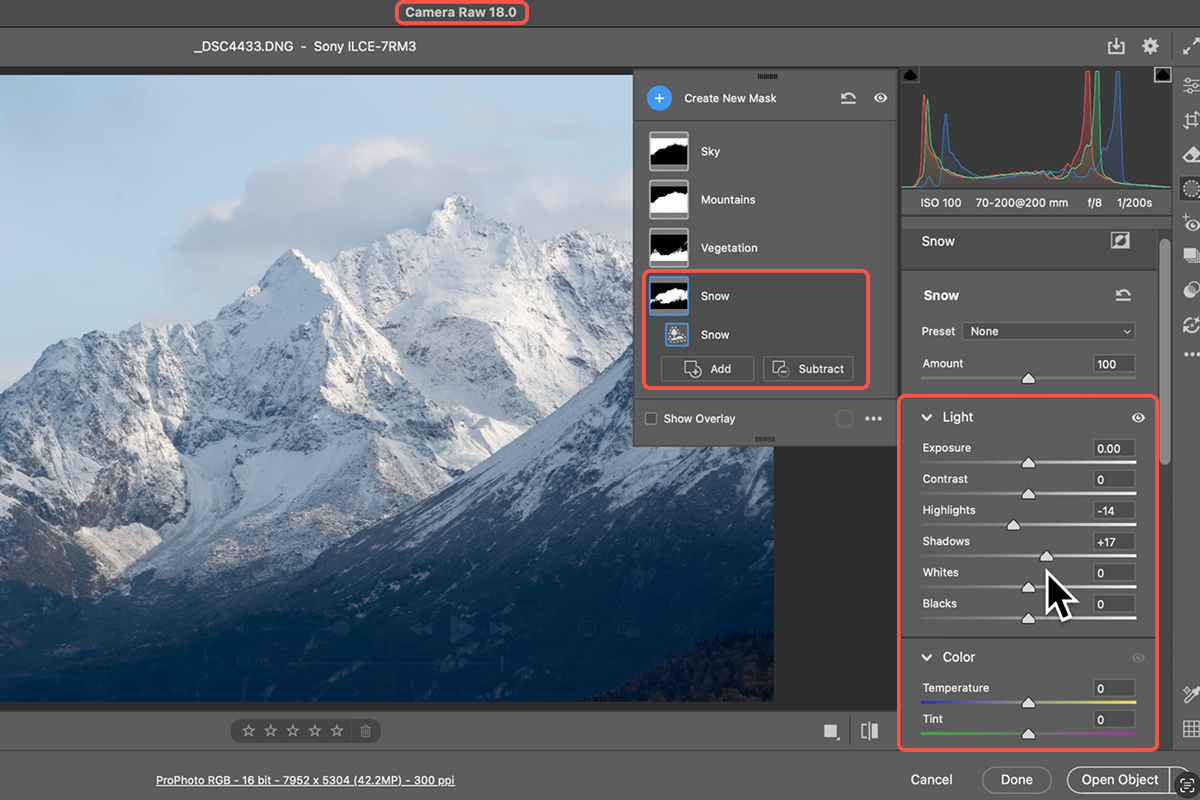
Run Landscape Masking From the Same Panel
Identical feature, identical results. Camera Raw generates the snow and vegetation masks exactly as Lightroom does, so nothing about the technique changes with the application.
-
Hold Shift and Click Open Object
The button normally reads Open Image; holding Shift turns it into Open Object. This is the step people skip, and it’s the one that matters — the file arrives in Photoshop as a Smart Object with the Camera Raw edits still live.
Finish the Rest of the Frame
-
Cool the Sky Mask
Drop the Temperature on the sky mask alone and the blues deepen without pushing the snow toward a colour cast. Snow reads as white because of what surrounds it, so a colder sky often makes the snow look cleaner than editing the snow would.
-
Bring the Vegetation Forward
Raise Saturation on the vegetation mask to separate dark pines from a white background. A small amount goes a long way — winter scenes turn cartoonish quickly.
-
Reopen and Adjust Whenever You Want
Double-click the Smart Object thumbnail in Photoshop and you’re back in Camera Raw with every mask and slider where you left it. Nothing here is baked in.
Where People Go Wrong With This
Not Checking the Mask Before Editing
Press O. The AI is good, not infallible, and a mask that has quietly included a patch of sky will show up as a halo the moment you add clarity.
Over-Darkening the Snow
Recovering highlights feels productive, so it’s easy to keep going. Snow that reads grey looks worse than snow that’s slightly too bright — you’re after detail in the brightest areas, not a uniformly mid-toned field.
Too Much Clarity
Clarity on snow is remarkably effective, which is exactly why it gets overdone. Push it until the texture appears, then back off a third.
Opening as an Image Instead of an Object
Miss the Shift key and every Camera Raw adjustment is flattened into the pixels. You won’t notice until you want to change something.
More Free Masking and Editing Tutorials
If masking and landscape work are where you spend your time, these free tutorials go further:
- How to Use AI Depth Masking in Photoshop
- How to Use Contrast and Clarity in Photoshop
- How to Use Reference Image in Photoshop 2026
- Create a Glow Motion Blur Effect in Photoshop
When Selection Stops Being the Bottleneck
For most of the history of digital editing, what you could do to a photograph was limited by what you could select in it. Snow was the clearest example: everybody knew what the edit should be, and almost nobody could isolate the snow well enough to make it.
With that constraint lifted, the interesting question moves. It’s no longer “can I select the snow” but “how bright should this snow be, and what does that say about the picture” — which is a better question to be spending your afternoon on.
Open a Winter Shot and Try It
Open Masking, click Landscape, click Create Masks, take the snow mask and pull the highlights down while pushing clarity up, then cool the sky and lift the vegetation. Download the free sample RAW file and follow the exact edit — then run it on a winter shot of your own that you gave up on, which is where the difference will be most obvious. For masking and colour work in depth, our PRO Power of Masking and Coloring in Lightroom goes considerably further, and the Photoshop Learning Path runs to 11 courses.







Enjoying This Free Tutorial? Go Further with PRO.
Unlock Full Sample Files, PSDs, and Hundreds of Masterclasses!

Download full project assets, original PSDs, and RAW images for every lesson
Unlimited access to our complete library of PRO Photoshop & Lightroom courses
Instant 4K Ultra HD streaming on all devices, anytime, anywhere
Full access to our entire library of Photoshop Actions, Presets, and LUTs
Flexible monthly and annual membership plans
Cancel anytime with zero hassle or commitments