
Download Assets
description
Learn how to revive dull trees in your photos using Photoshop’s Camera Raw filter. This tutorial will show you how to easily select and adjust hues, saturation, and luminance to transform lifeless foliage into vibrant, natural-looking greenery.
Go PRO:
Want to take things to the next level? Explore our PRO tutorial Advanced Landscape Editing in Photoshop & Adobe Camera RAW . Learn precise adjustments, advanced sky replacement, color grading, and more!.
Image Source
- Matt Richmond
Images sourced from Pexels.
Share
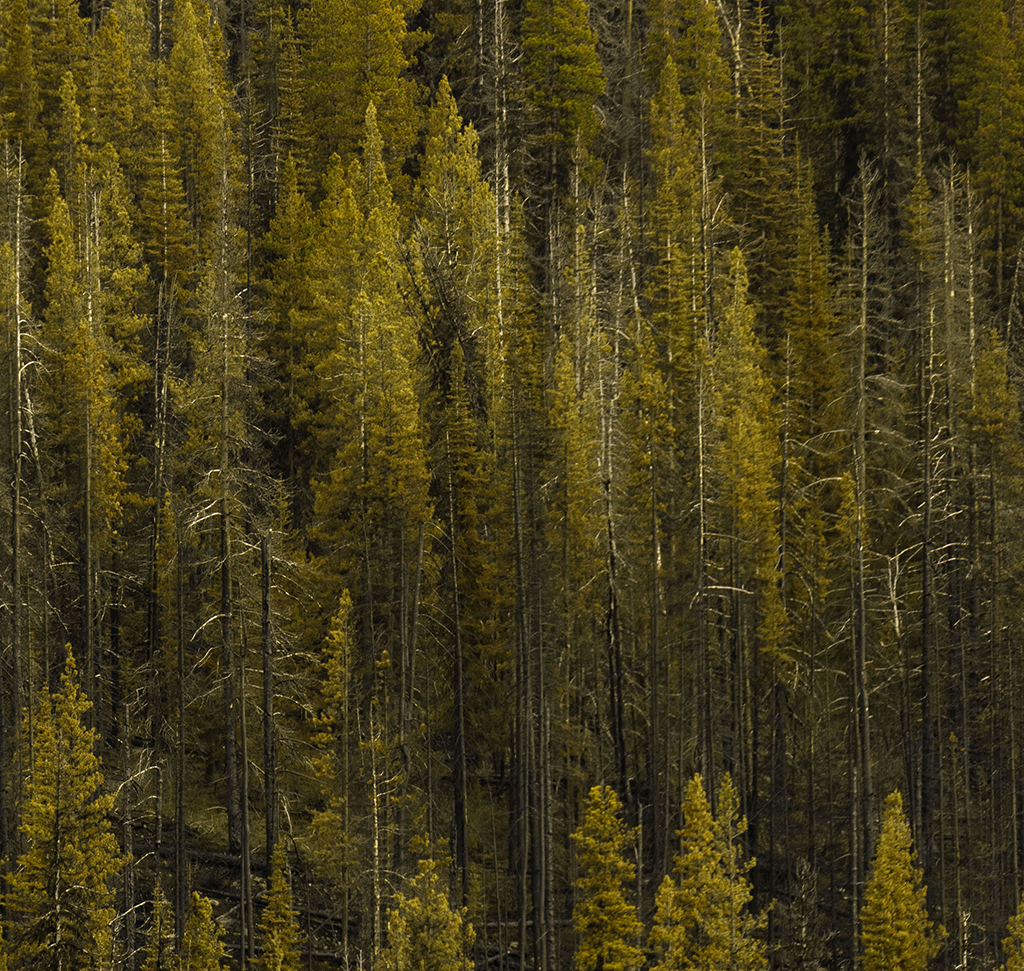
AFTER
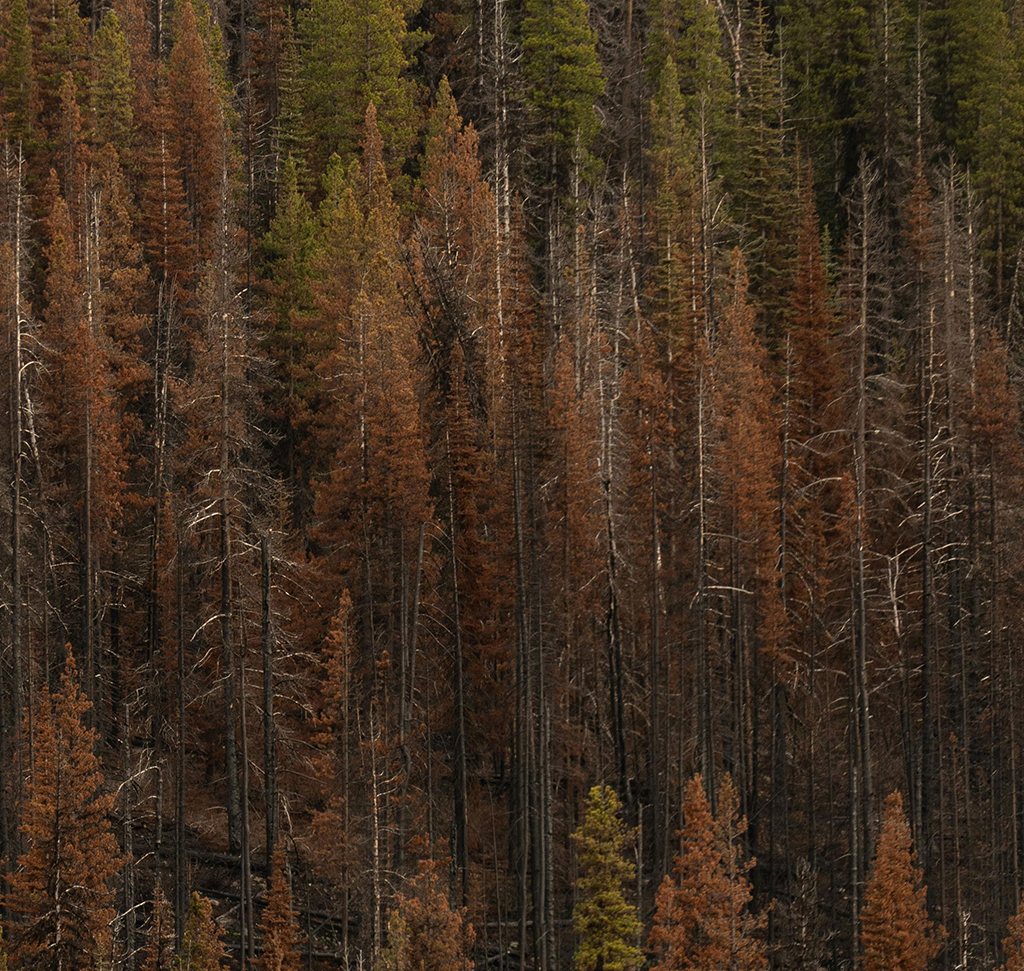
BEFORE
Revive Dull Foliage
Often, natural elements in our images can appear washed out or nearing the end of their season, even if the rest of the photo is perfect. Learning to selectively enhance these greens can dramatically improve the overall vibrancy and realism of your nature shots, and even photos with people where trees are in the background, making your images truly pop. This easy technique is the perfect solution. Let’s jump into Photoshop!
Getting Started
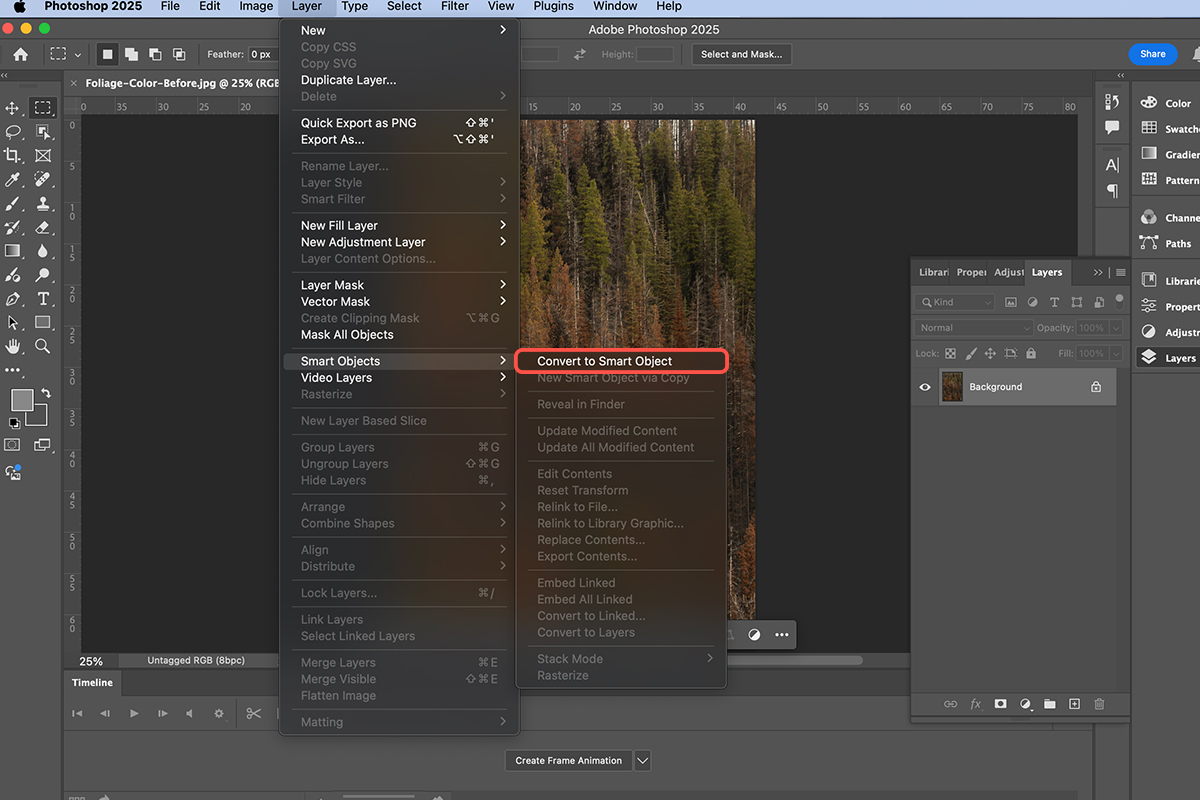
1. Open your image in Photoshop.
2. To ensure you can always go back and make changes without damaging your original image, convert your background layer to a Smart Object. To do this, go to Layer > Smart Objects > Convert to Smart Object (you can also right click on the layer and select “Convert to Smart Object”). This allows you to apply “Smart Filters” which are non-destructive and fully editable.
3. Next, you’ll apply the Camera Raw Filter, a fantastic tool for color adjustments. Go to Filter > Camera Raw Filter.
Making Adjustments
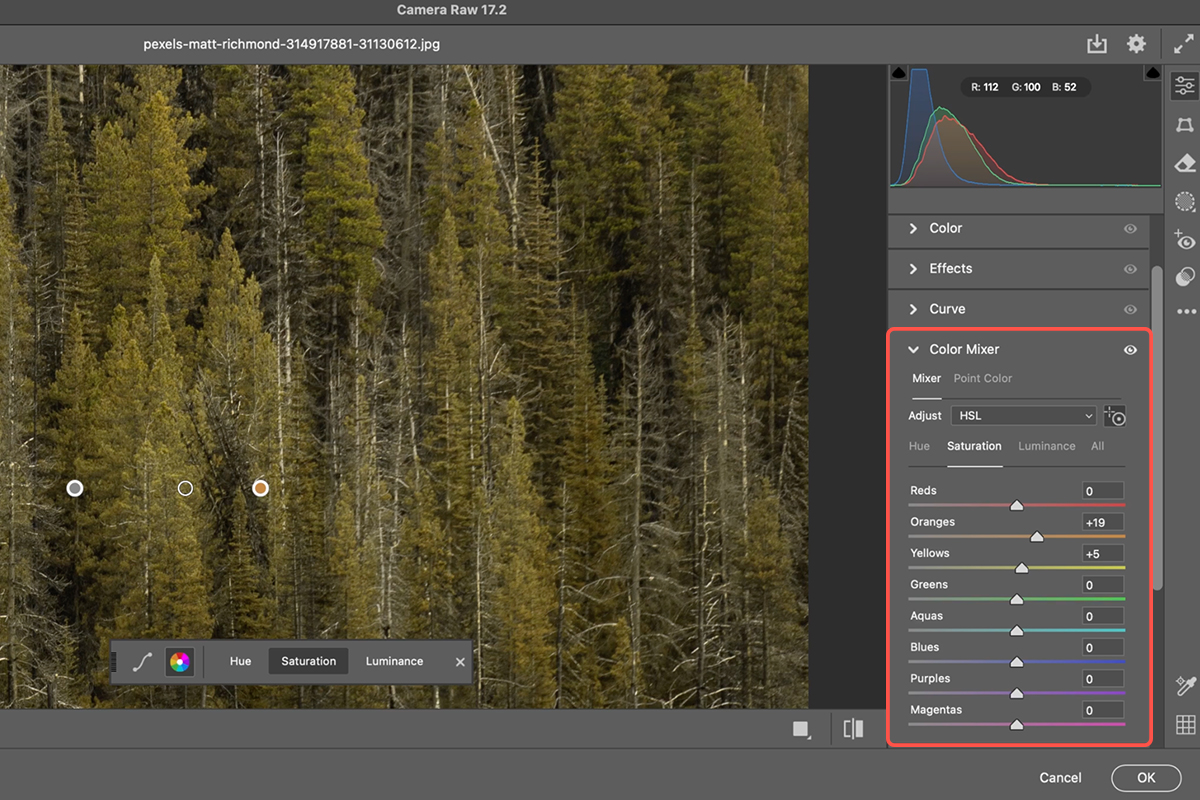
4. Once in the Camera Raw dialog box, navigate to the Color Mixer panel on the right-hand side.
5. Within the Color Mixer, select the eyedropper icon. This tool allows you to directly click on the colors you want to adjust in your image. You’ll have three options: Hue, Saturation, and Luminance.
Hue: Click on the dull green areas of your trees and drag to the right to shift the yellow tones towards green, bringing out a more vibrant, healthy color.
Saturation: With the eyedropper still active, click on the trees again and drag to the right to intensify the color, making the greens look more alive.
Luminance: Finally, click on the trees and drag to the right to brighten the green tones, adding more light and making them appear fresher.
Refine and Finalize
6. After making your adjustments in the Camera Raw Filter, click OK.
Because you converted your layer to a Smart Object, the Camera Raw Filter will appear as a “Smart Filter” in your Layers panel. You can toggle this filter on and off by clicking the eye icon next to it, allowing you to see your before and after.
If you wish to make further tweaks, simply double-click on “Camera Raw Filter” in the Layers panel to re-enter the dialog box and refine your settings. This non-destructive workflow ensures flexibility and control over your edits.


