
Download Assets
description
Learn how to create a double exposure in Photoshop 2026! In this tutorial, we’ll show you how to blend two high-contrast images using the Screen blending mode for an instant artistic effect. Plus, learn to use Generative Expand to perfectly fit your layers.
Go PRO:
Dive deeper into the world of Photoshop with our in-depth PRO Photoshop Learning Path . Across 11 courses and 53 hours of engaging content, you’ll learn Photoshop’s ins and outs, master pro-level tools, and tackle fun and challenging projects..
Image Source
- Max Ovcharenko
- Mavi Atlas
- Dawid Zawia
Images sourced from Unsplash.
Share

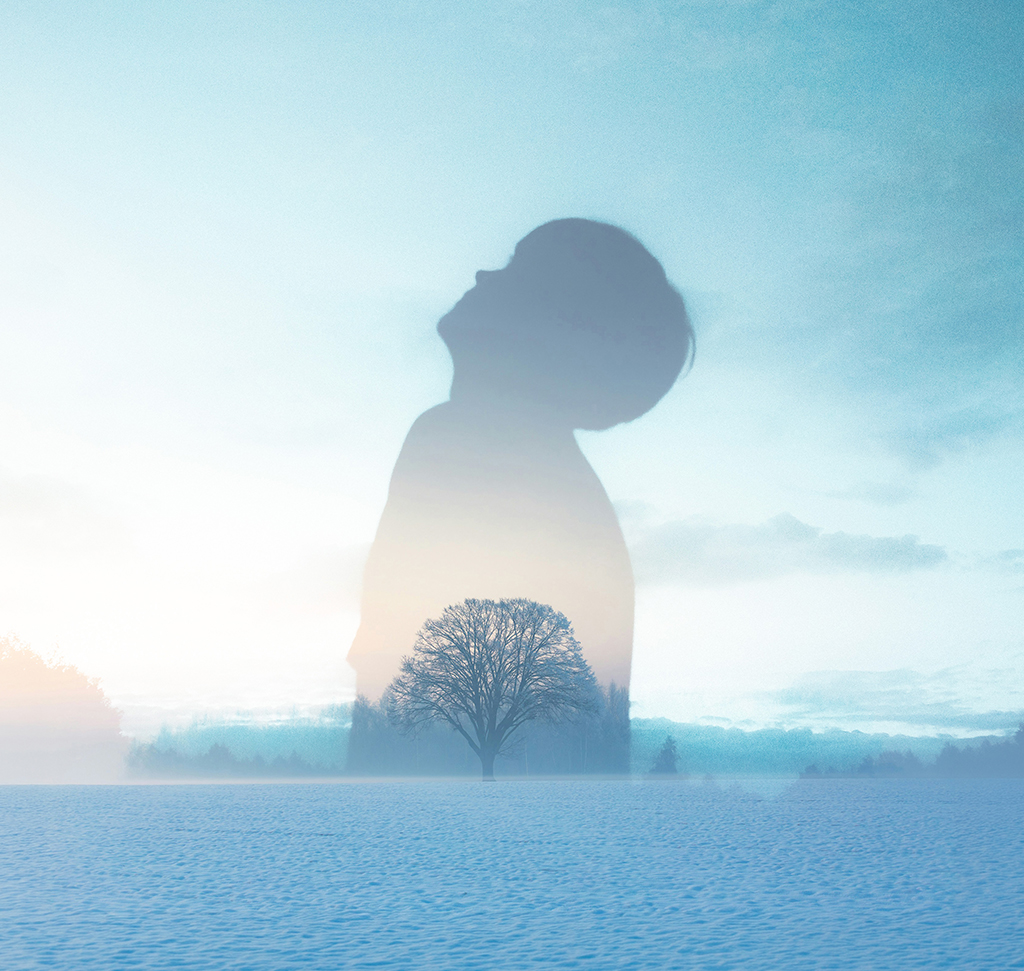
AFTER
BEFORE
Double Exposure Explained
The double exposure effect is a timeless technique that blends two or more images to create a surreal, layered narrative. It’s an essential skill for any creative because it teaches you how to see light and shadow through the lens of blending modes, turning basic photos into high-end digital art.
Getting Started
1. Start with a background image that features a clear distinction between light and dark, such as a silhouette. In this tutorial, we use a subject in shadow against a bright background. This contrast is what will allow your second image to show up only where you want it.
2. Select your top layer (the tree or palm image) and change the Blending Mode from Normal to Screen. This instantly drops out the dark areas of the top layer, allowing it to appear only within the dark silhouette of your subject.
3. To get the placement just right, use the Transform Tool (Keyboard Shortcut Ctrl/Cmd + T) to resize or rotate the image until the composition feels balanced and the “inner” photo fills the frame.
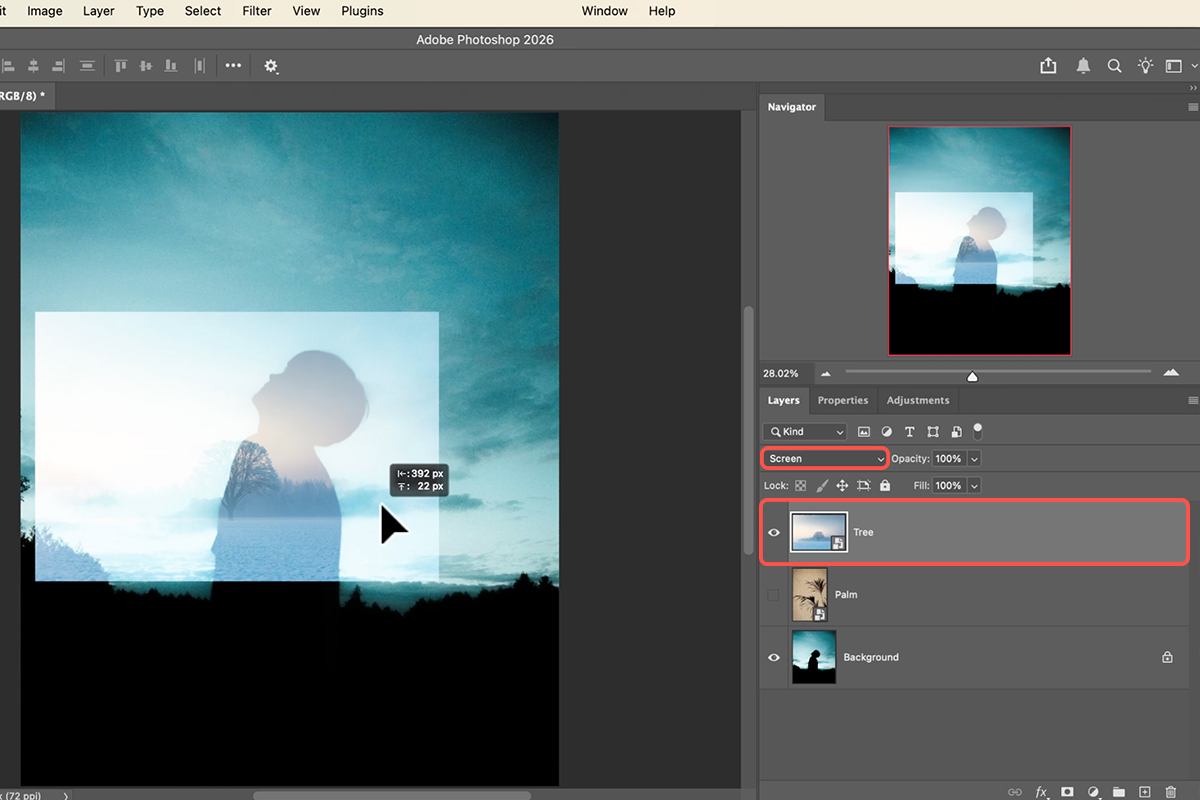
Expand Your Canvas
If your secondary image doesn’t quite fit, use Generative Expand.
4. Double-click the Smart Object to open it in a new window, then select the Crop Tool (Keyboard Shortcut “C”).
5. Set the fill setting to Generative Expand and pull the boundaries out to match your main document’s aspect ratio. Once you hit Generate, pick your favorite AI variation and merge the layers (Keyboard Shortcut Ctrl/Cmd + E).
6. Save (Keyboard Shortcut Ctrl/Cmd + S) and close the window; your main project will update automatically!

Refine Your Blend
With your newly expanded image, you have total freedom to move the texture around within the silhouette. Remember, the best double exposures rely on that interplay between light and dark. If the effect feels muddy, look for images with cleaner lines and stronger highlights. Once you’re happy with the alignment, hit Enter to commit your changes. You’ve just turned two separate photos into a professional, cohesive piece of art!


