Download Assets
description
Elevate your photo editing skills with Levels and Curves. Learn how to use these powerful Adjustment Layers to make precise exposure and color adjustments in any image.
Go PRO:
Interested in learning more about Photoshop? Explore our exclusive Photoshop Learning Path. From the fundamentals to advanced techniques, this comprehensive guide will help you make the most of this powerful software and bring your creative vision to life.
Share
AFTER
BEFORE
Shape Your Image
In this guide, we’ll show you how to use two powerful tools in Photoshop: Curves and Levels. These tools help us adjust the brightness and color of our images, and while they may seem similar, they have different ways of working.
Understanding Curves & Levels
Both Curves and Levels adjustments allow you to modify the tonal range of your image. However, Curves offers more granular control.
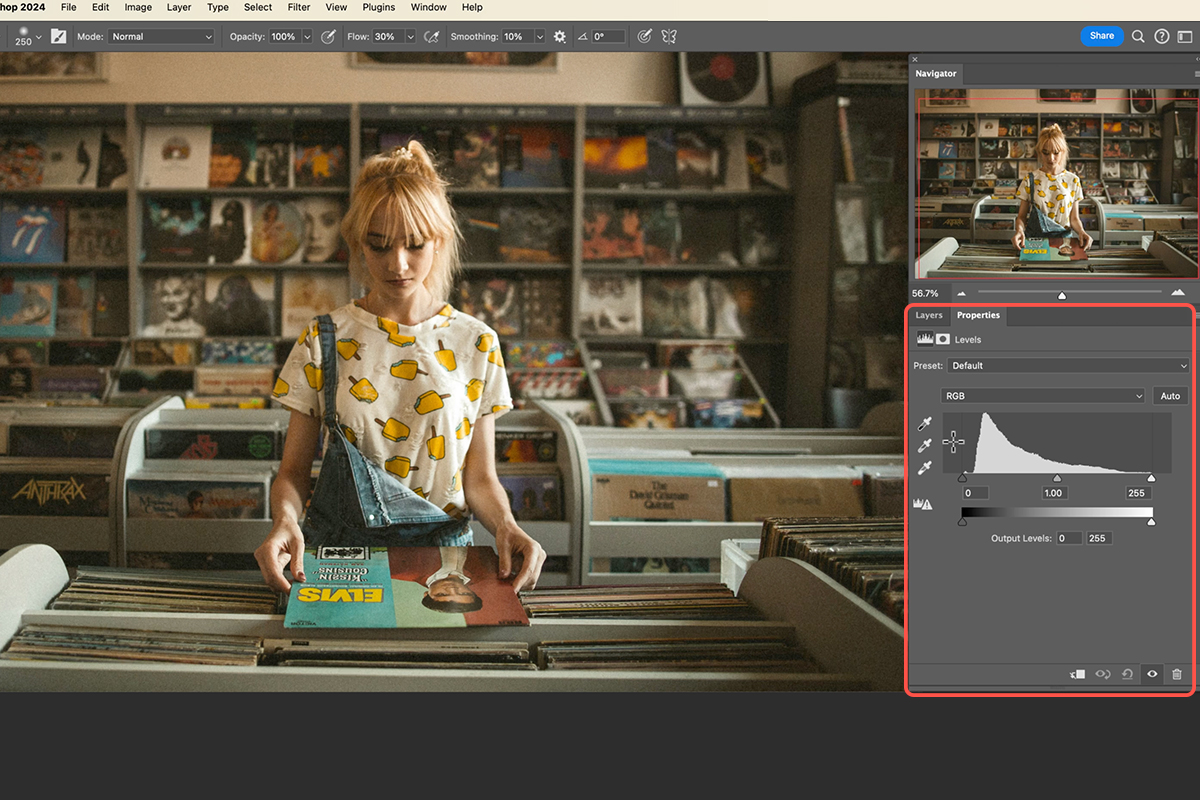
The Levels adjustment panel provides three primary sliders: Shadows, Midtones, and Highlights. By moving these sliders, you can adjust the overall brightness and contrast of your image.
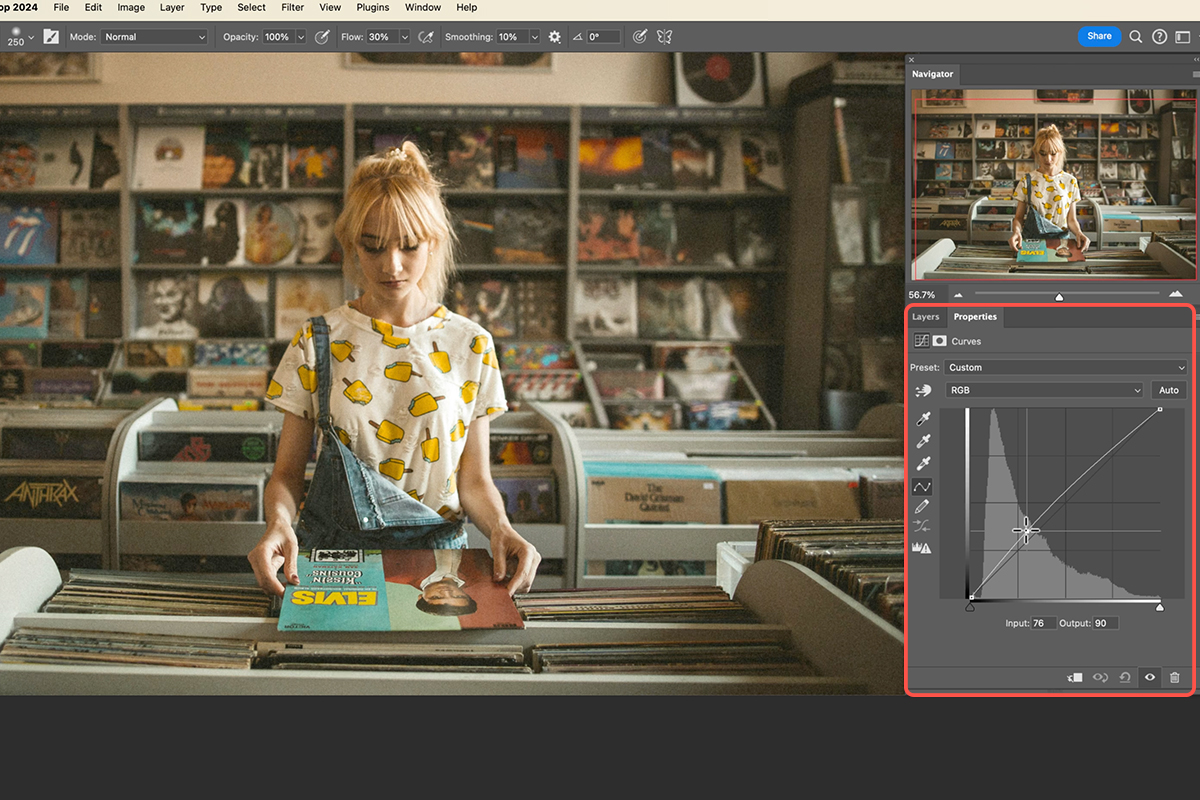
The Curves adjustment panel offers a more flexible approach. You can create a curve by clicking and dragging on the graph. Each point on the curve represents a specific tonal range. By manipulating these points, you can fine-tune the contrast, brightness, and color balance of your image.
Creating Adjustment Layers
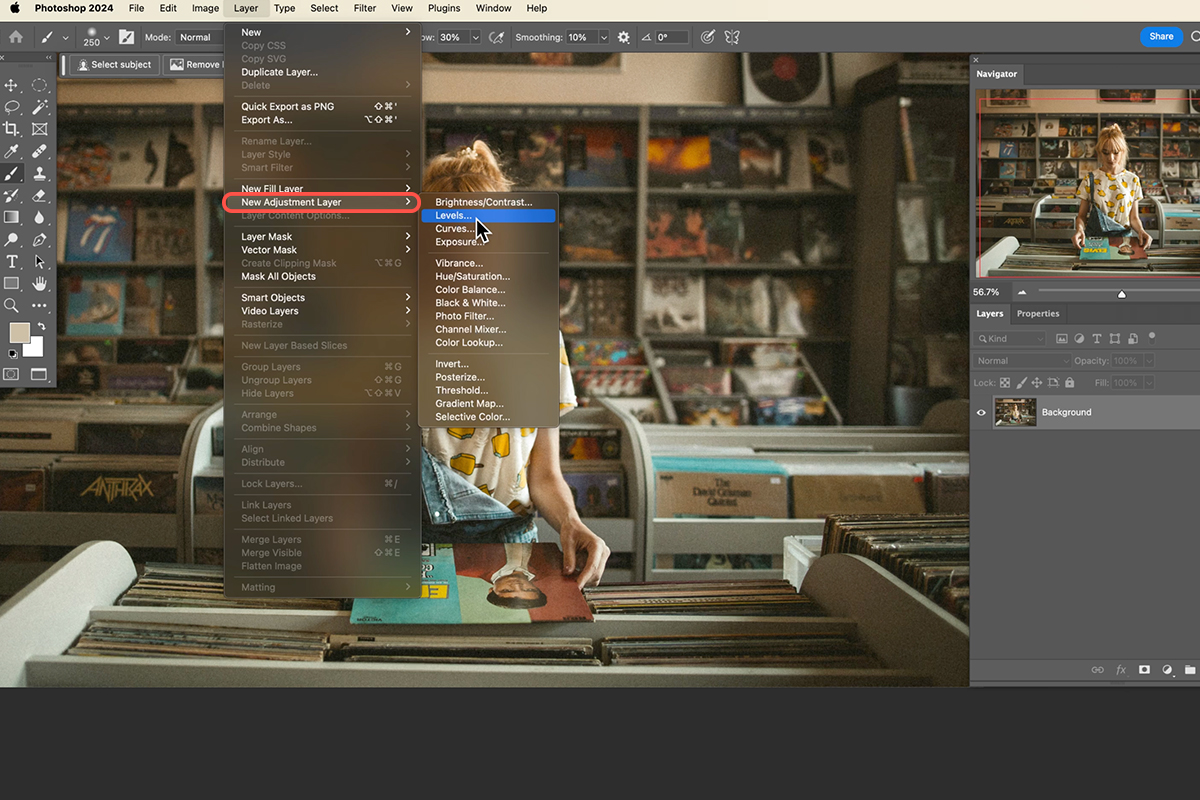
Creating Adjustment Layers is preferred over directly applying the adjustment to a layer, as it allows for non-destructive editing and masking.
1. Go to Layer > New Adjustment Layer.
2. Choose Curves or Levels.
Adjusting Brightness & Contrast
Both Curves and Levels can be used to adjust the overall brightness and contrast of your image.
Levels: Use the sliders for Shadows, Midtones, and Highlights to adjust the overall brightness and contrast.
Curves: Click and drag on the curve to adjust the tonal range. Pulling the curve up makes the image brighter, while pulling it down darkens it.
Correcting Colors
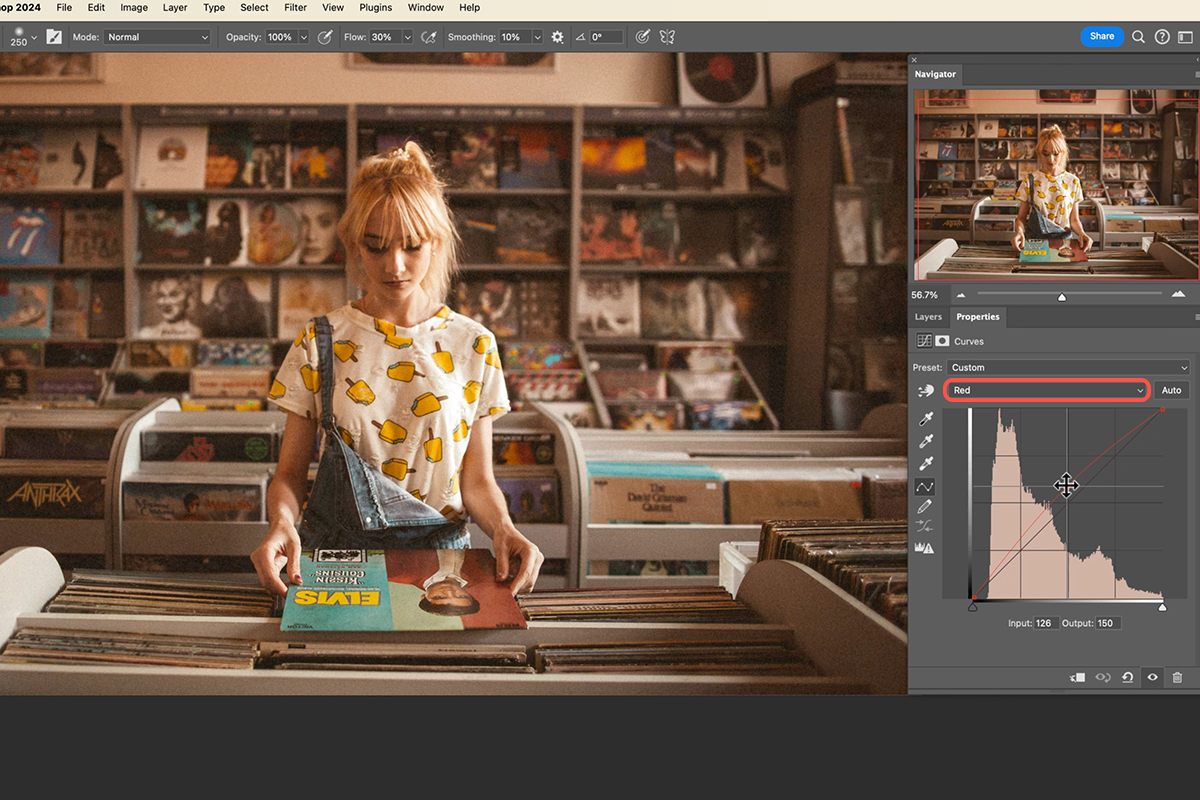
To adjust specific colors in your image, use the Curves tool to target individual color channels.
1. Click on the channel you want to adjust (Red, Green, or Blue).
2. Click and drag on the curve to adjust the color’s tonal range.
For example, pulling the red curve up will make the reds in your image more intense.
Creating Special Effects
To create different effects, experiment with different curve shapes. An S-curve increases contrast, making your image more dramatic. A reverse S-curve decreases contrast, creating a softer, more muted look. You can also use point curves to target specific tonal ranges, such as the shadows or highlights.


