Download Sample Images
DOWNLOAD THE PSD
Download the complete PSD file here (162 MB).
description
Follow along as we show you how to create realistic glow and lighting effects in Photoshop! Learn how to create a glowing ring effect, integrate it into a photograph, add particle effects with the included Photoshop Brush, and more!
submit your work
We want to see what you create with the techniques discussed in this tutorial! Send us your own custom glow effect for a chance to be featured on this page and on social media.
Please use the image included in the tutorial download, a free stock image from Pexels.com or Unsplash.com, or an image that you own the rights to (Make sure that it’s family-friendly!)
Ready? Submit it here!
Share
CREATE OUT-OF-THIS-WORLD EFFECTS
Create Custom Glow Effects
Getting Started with Glow Effects
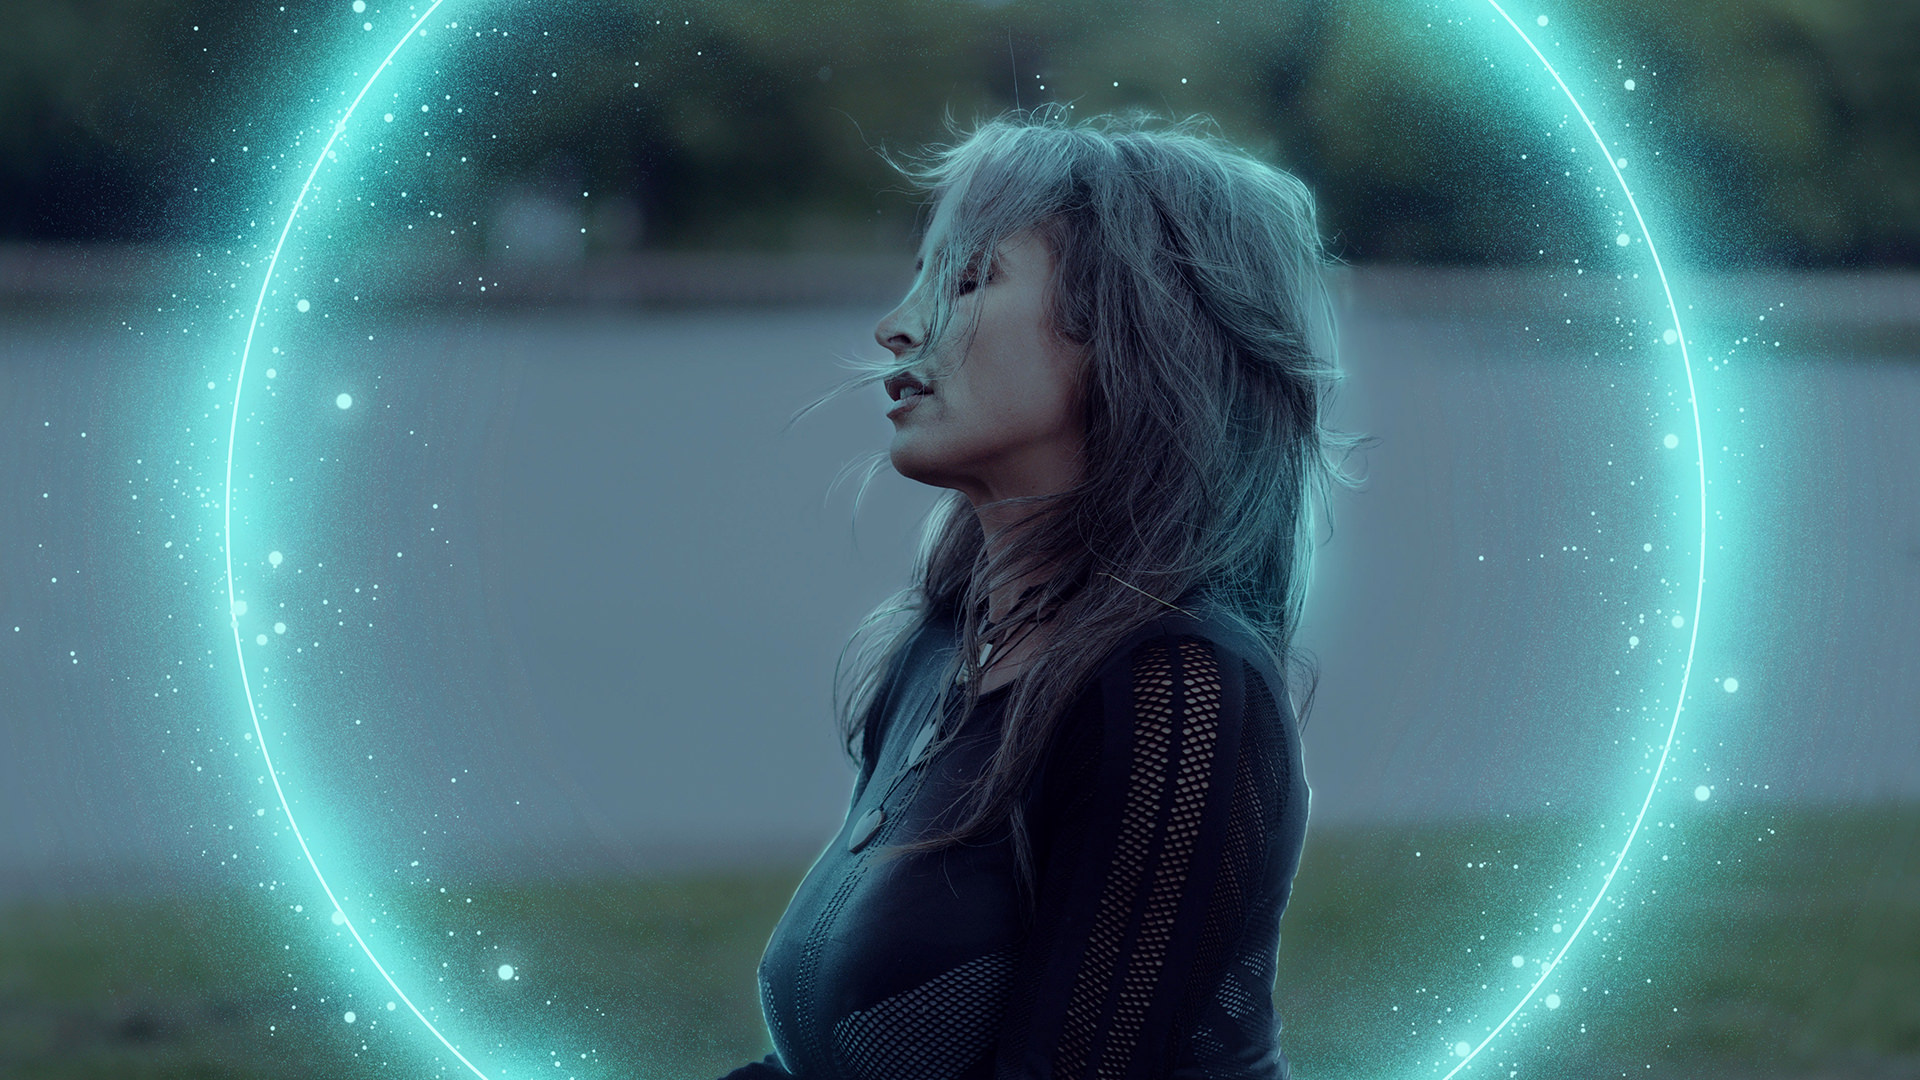
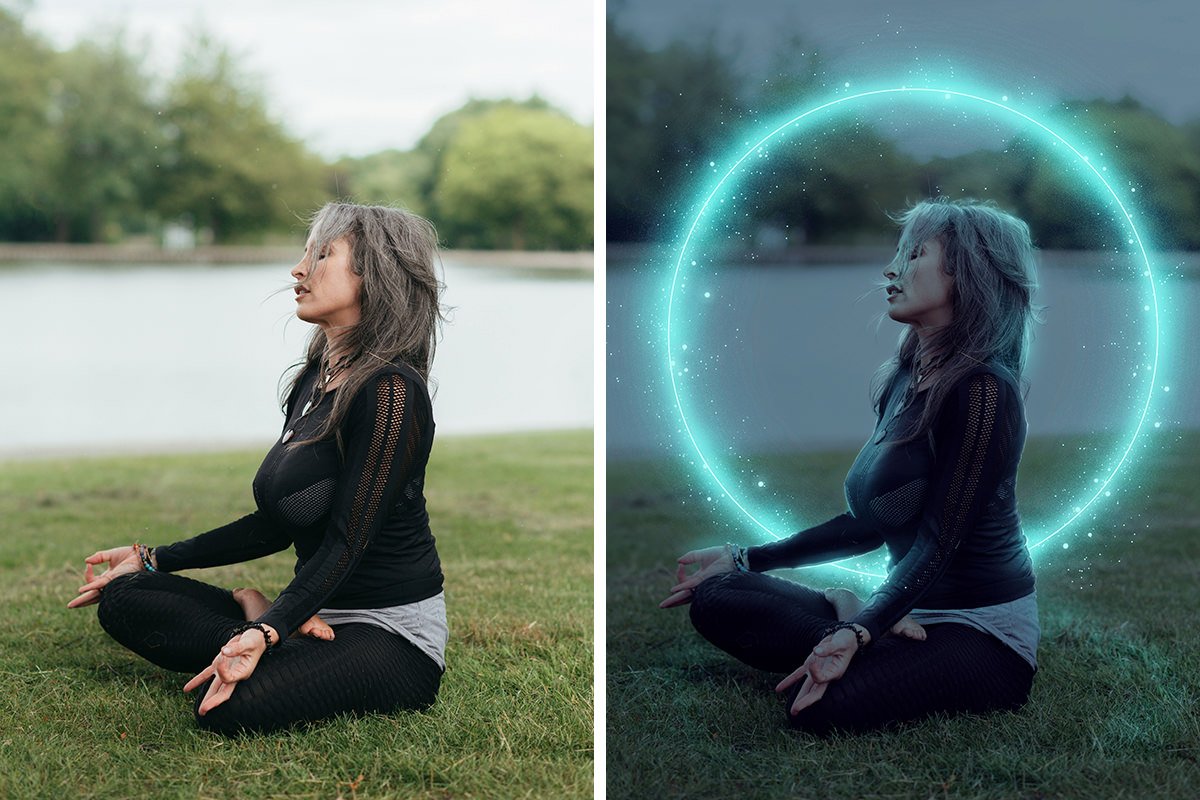
Creating special effects in Photoshop is a lot of fun, and it can also lead to some pretty amazing images. The best part about glow effects, like the one we’re creating in this tutorial, is that they can be added to almost any photo.
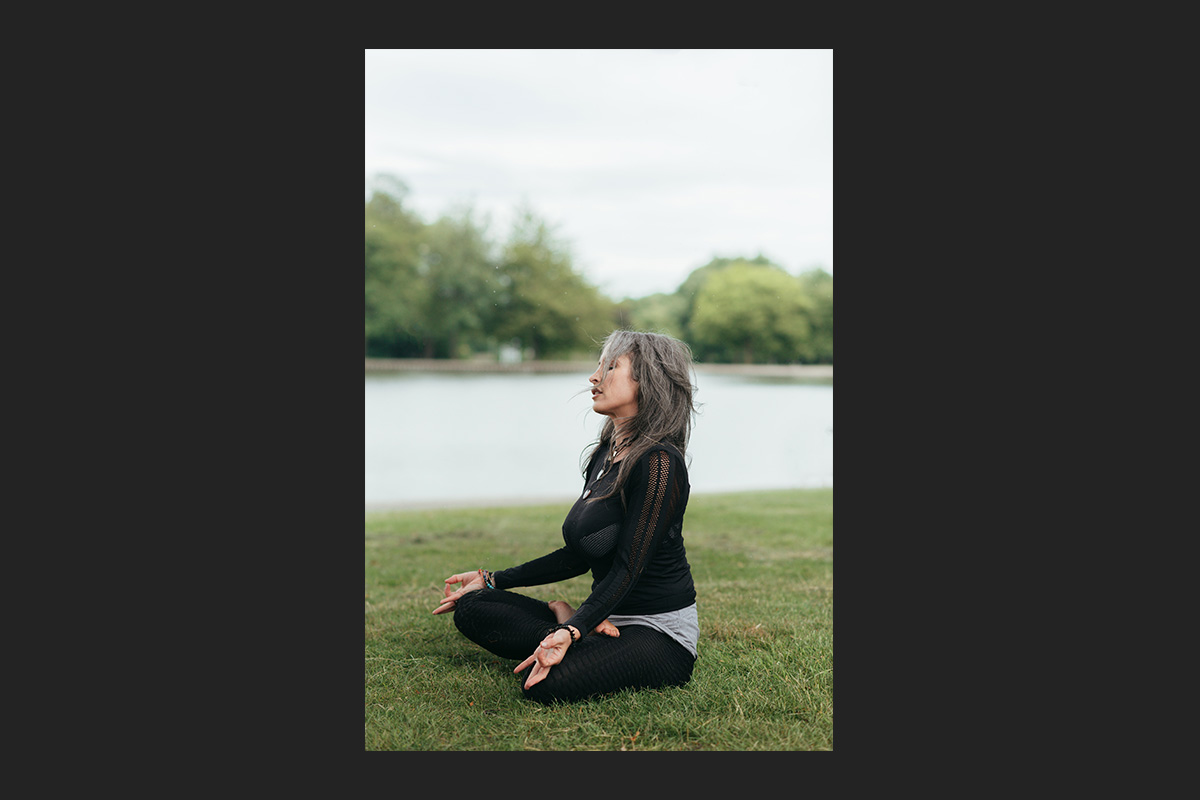
Take a look at the image we’re using for our example. It’s a simple, well-composed portrait of a woman practicing yoga and meditation. There’s no way we could use a glow effect to spice things up a little bit, right?
Wrong! Let’s take a look at just how versatile effects like this can be.
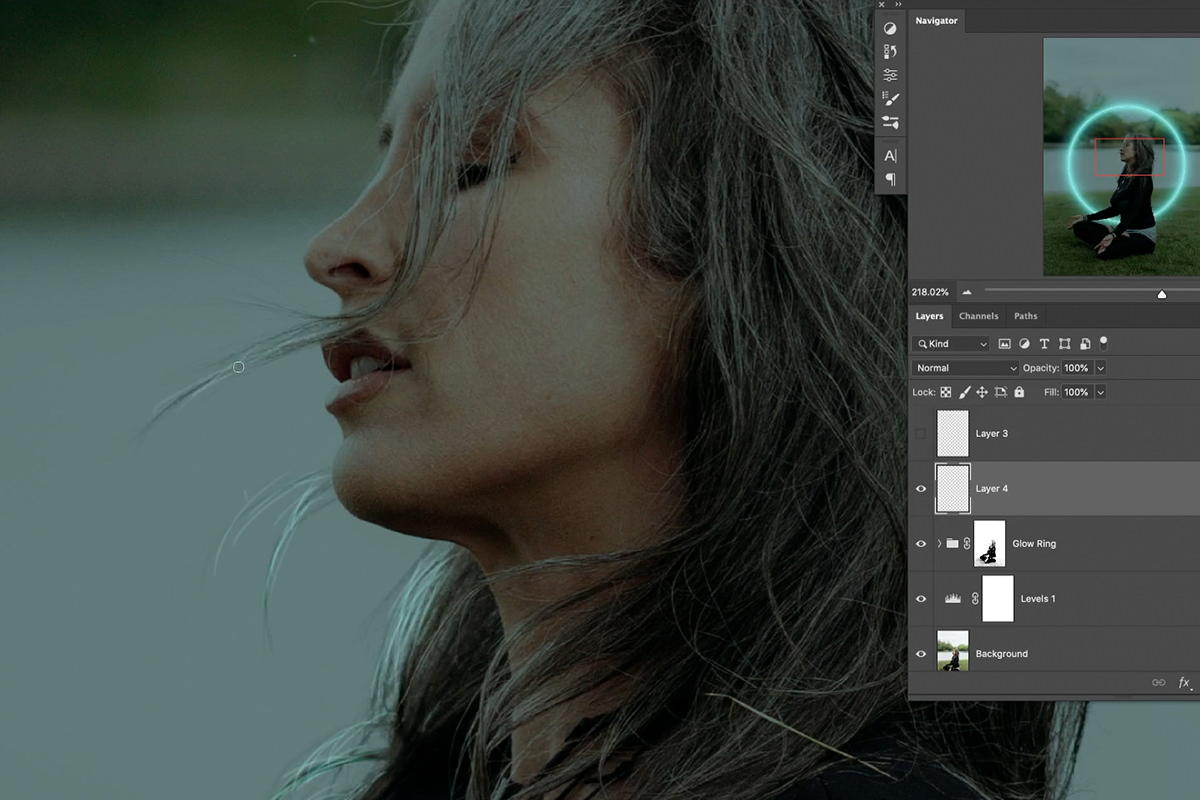
Darken the Image with Levels
Since we want a glow effect, we know that we’re going to be adding a light source into the image. If you want a new light source stand out, it often helps to darken the rest of the photograph.
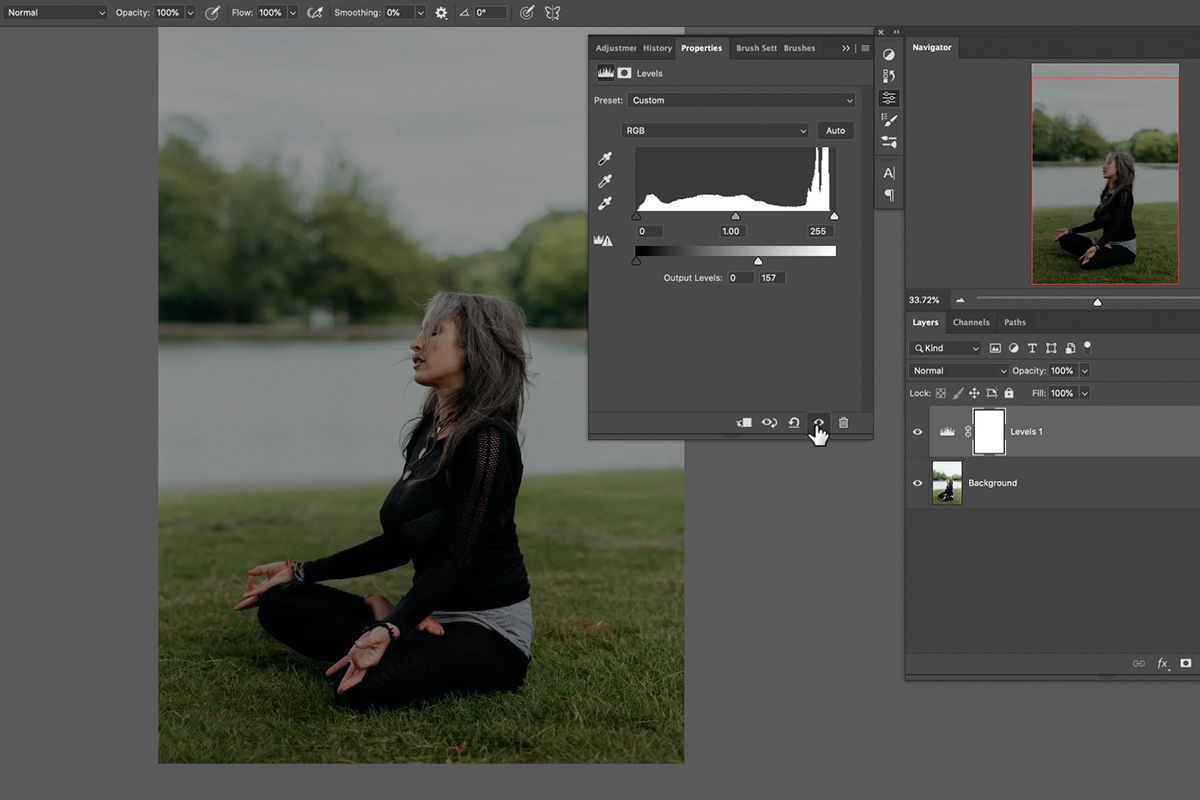
Create a Levels Adjustment Layer, place it over the background image in the Layer stack, and drag the highlight slider for the Output Levels to the left.
This will bring the overall brightness of the image down, which will ultimately help the glow effect stand out. It will also give us an opportunity add more environmental lighting around the subject to enhance the overall effect.
Create a Glowing Ring
Our goal for this image is to create a glowing ring of energy around the subject in the photo. So we’ll need a ring to get started.
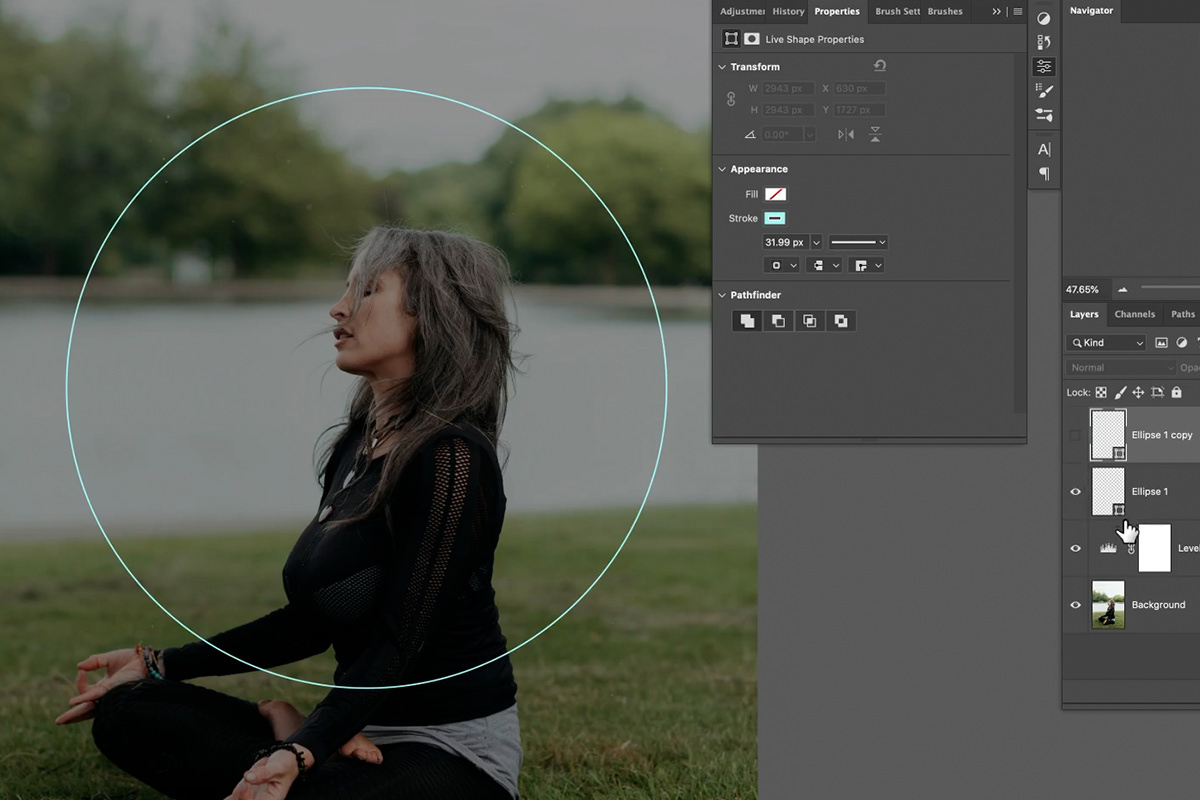
To create the ring shape, grab the Ellipse Tool and click and drag around the subject while holding SHIFT to maintain a perfect circle. Make sure the Fill is set to none and the Stroke is set to the color that you want for the glow effect (you can always change this later).
Once you’ve created the circle, you can use the Move Tool to adjust its position or the Transform options to resize it as needed.
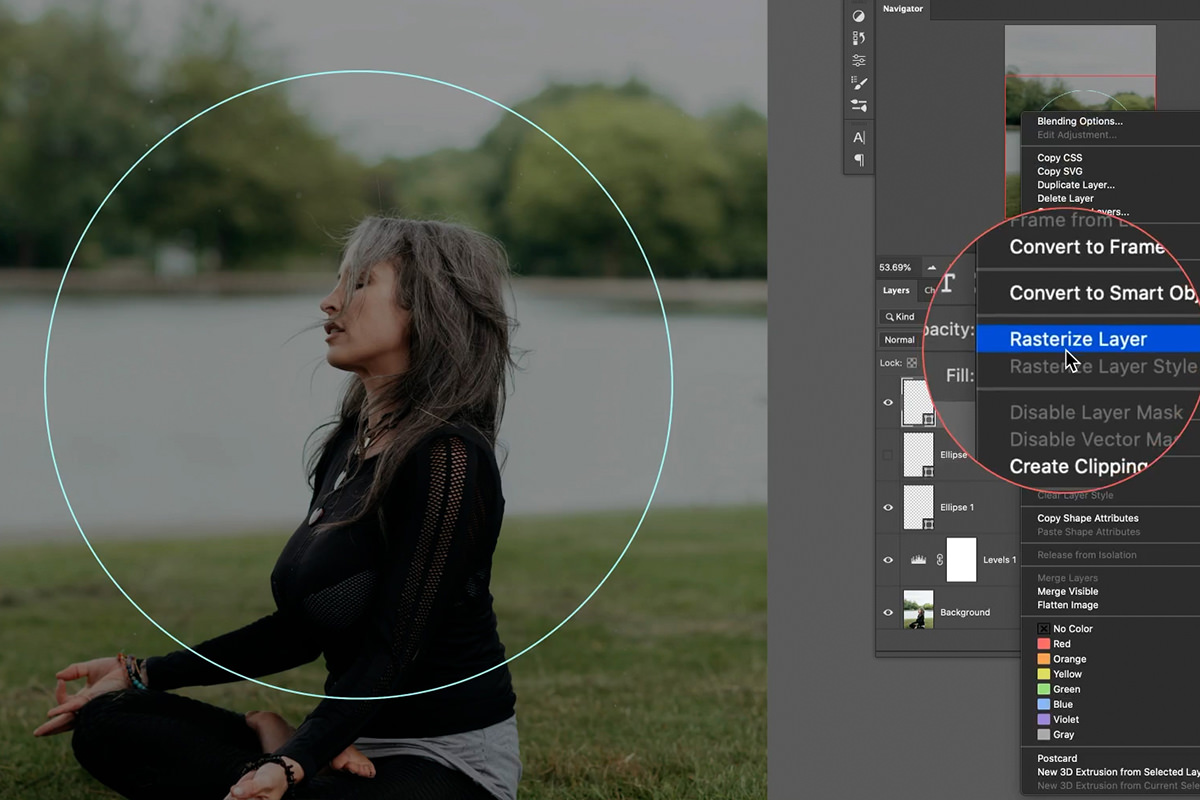
It’s always good practice to leave a reference of any original assets you’ve made. After you’re happy with the color and placement of the circle, Duplicate it. Right-click on the duplicate and select Rasterize Layer. This will be the Layer that we start building the effect on top of.
Go ahead and hide the original shape Layer, we’ll keep it in case we want to reference it later.
Create the Glow Effect
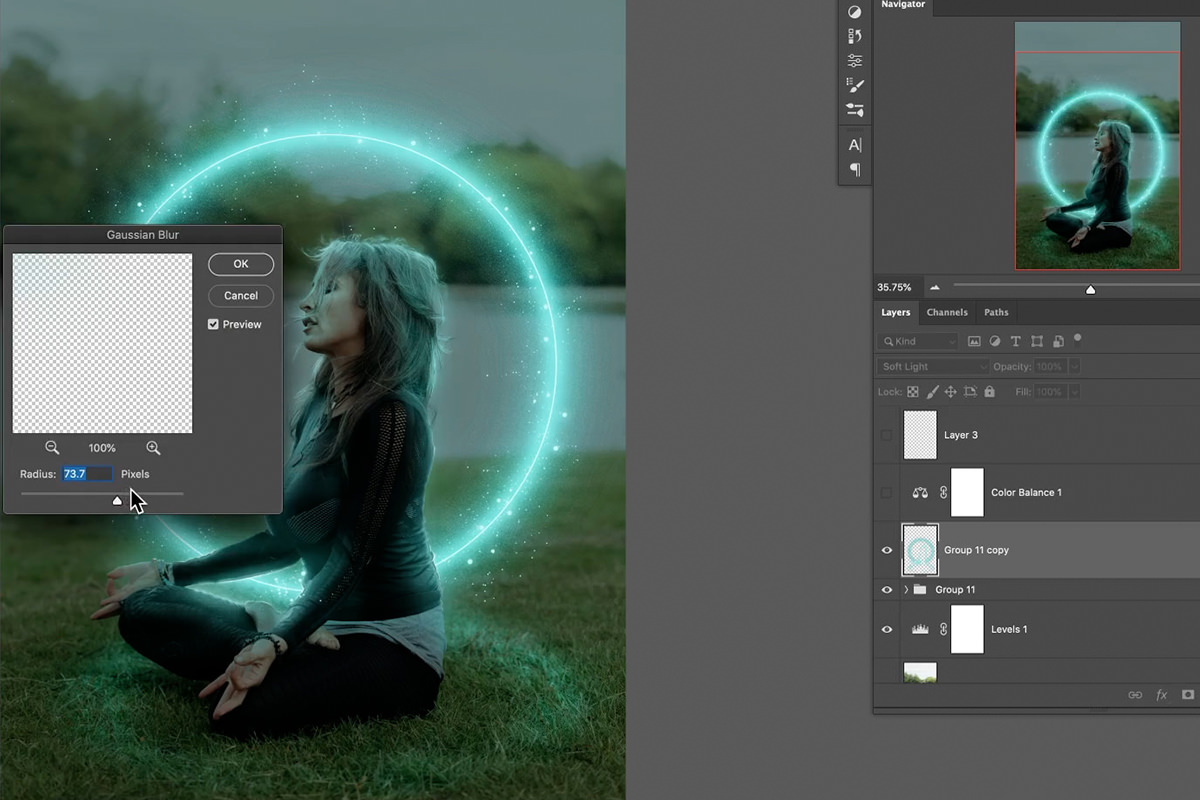
Now that we have the foundation of our glowing ring, we’re going to be Duplicating this Layer a bunch while adding a combination of Blurs and Blending Modes to build the effect.
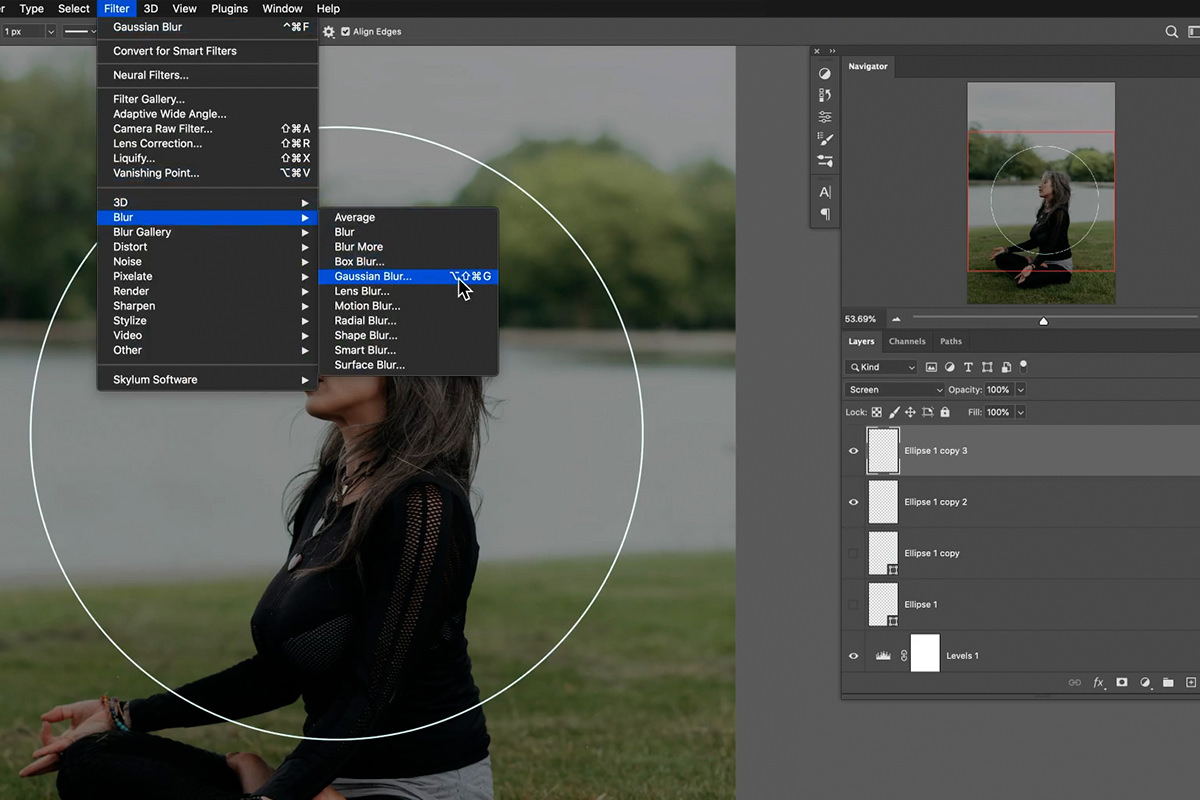
Begin by Duplicating the ring Layer, and adding a slight Gaussian Blur.
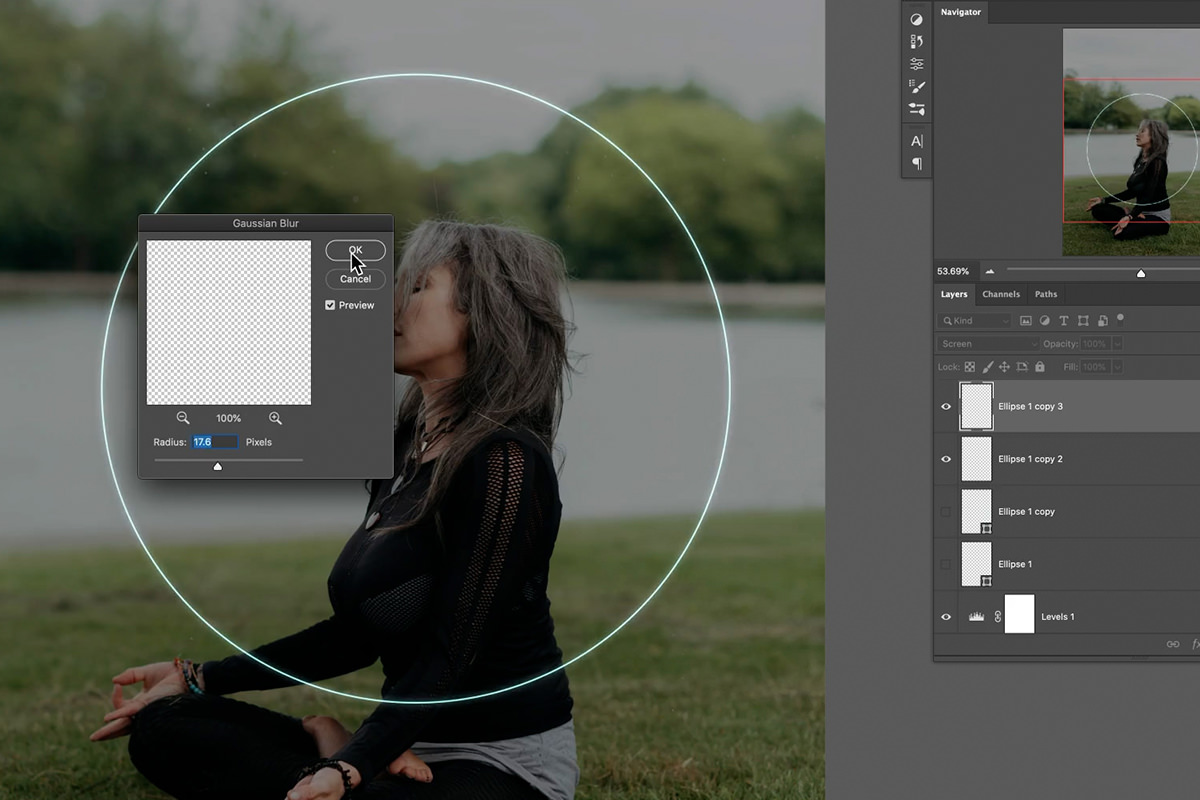
Don’t worry about making it too strong to begin with. We’re going to be repeating this process over and over while increasing the intensity of the blur at each step.
To add some natural variation to the glow effect, create a Layer Mask on each ring Layer, and paint with black over random spots using a large, soft brush set to a low Flow. It’s very subtle, but it will make the overall effect look much more natural.
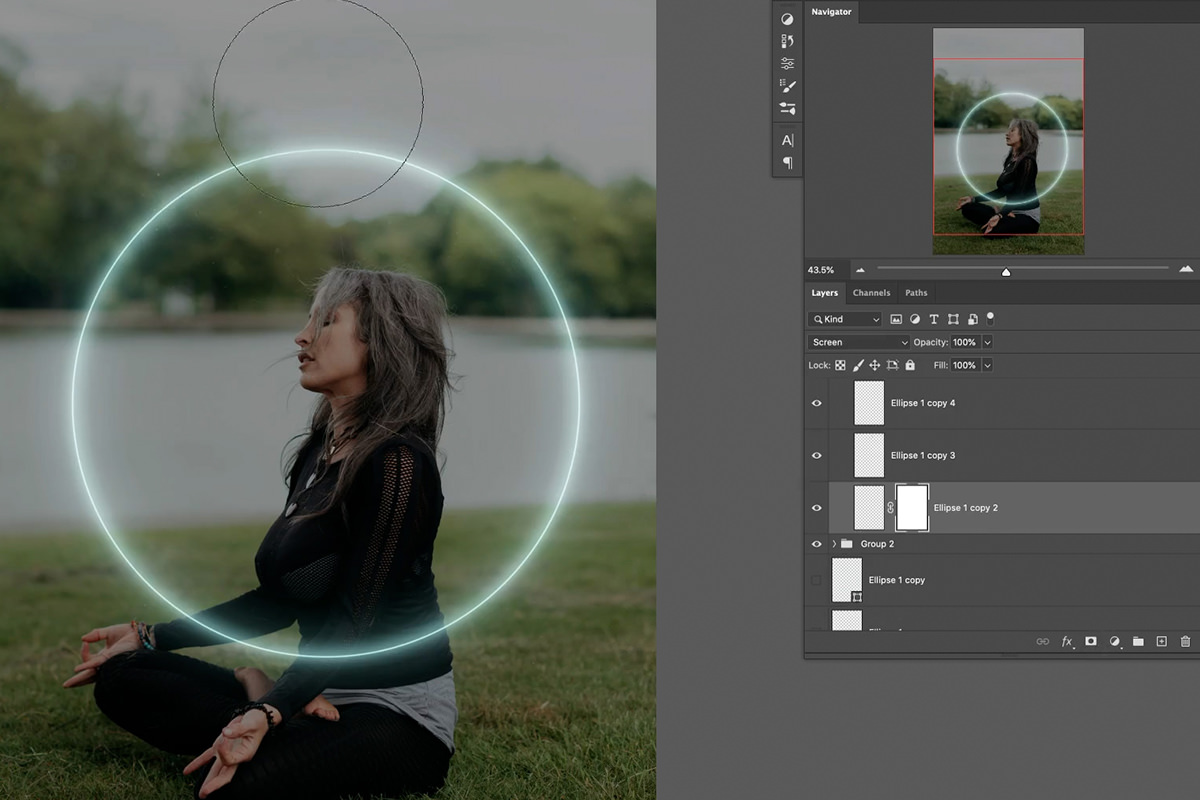
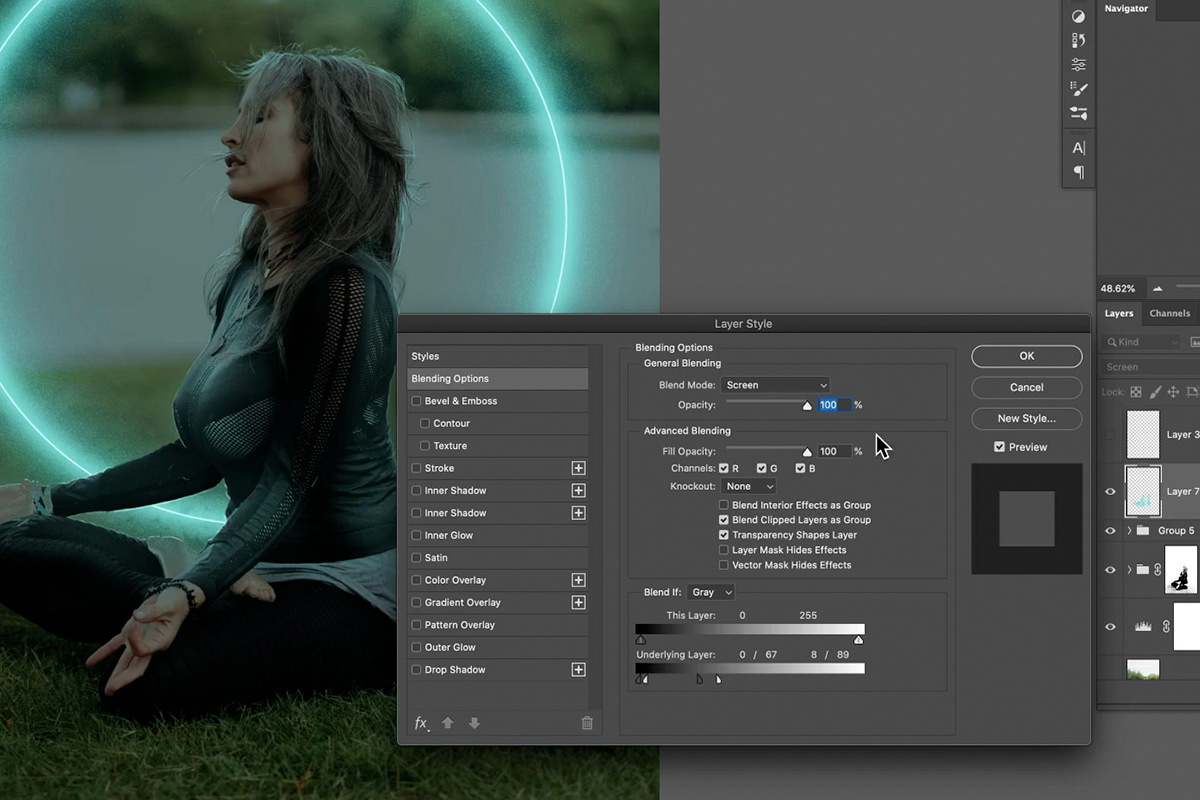
Work with Blending Modes
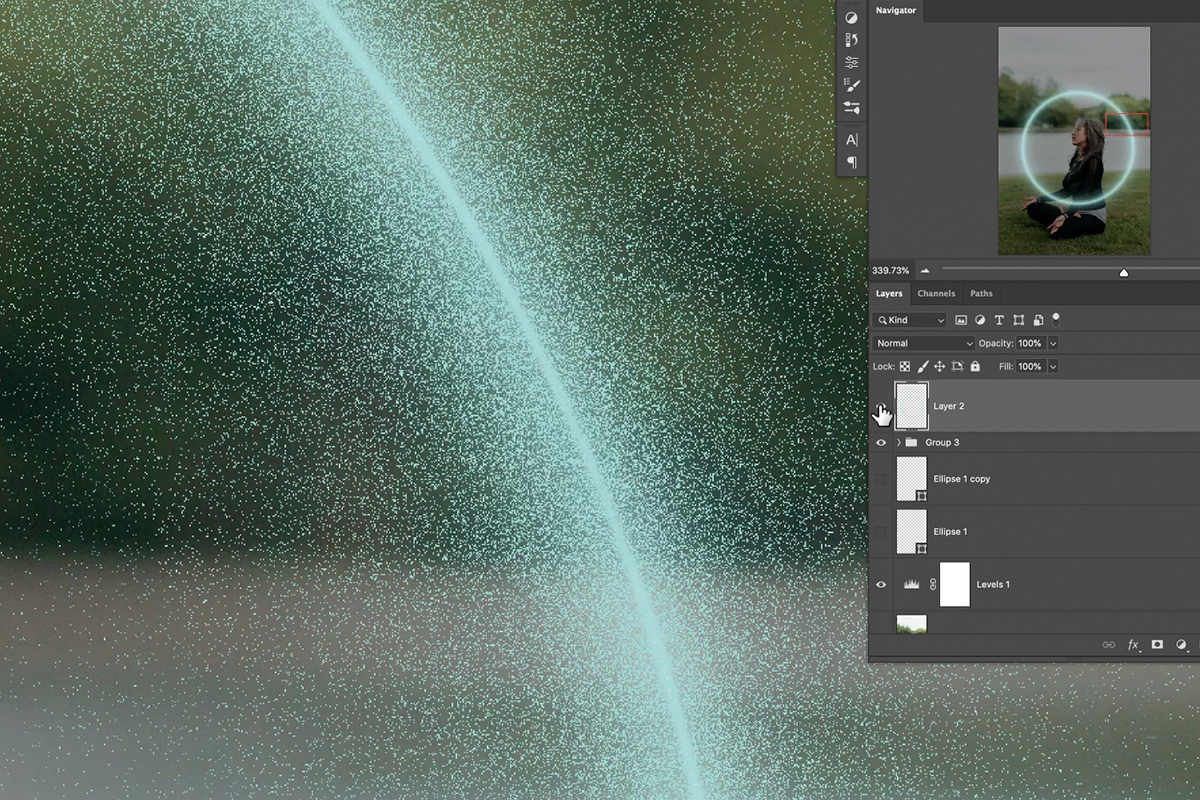
As you continue to add new ring Layers with varying levels of Blur, try changing the Blending Modes of each as well. We find that Screen tends to create a nice, soft lighting effect, so that should be your go-to.
However, you can experiment with others to see what happens. We found that setting one Layer to the Dissolve Blending Mode created a cool particle effect that we can add to later.
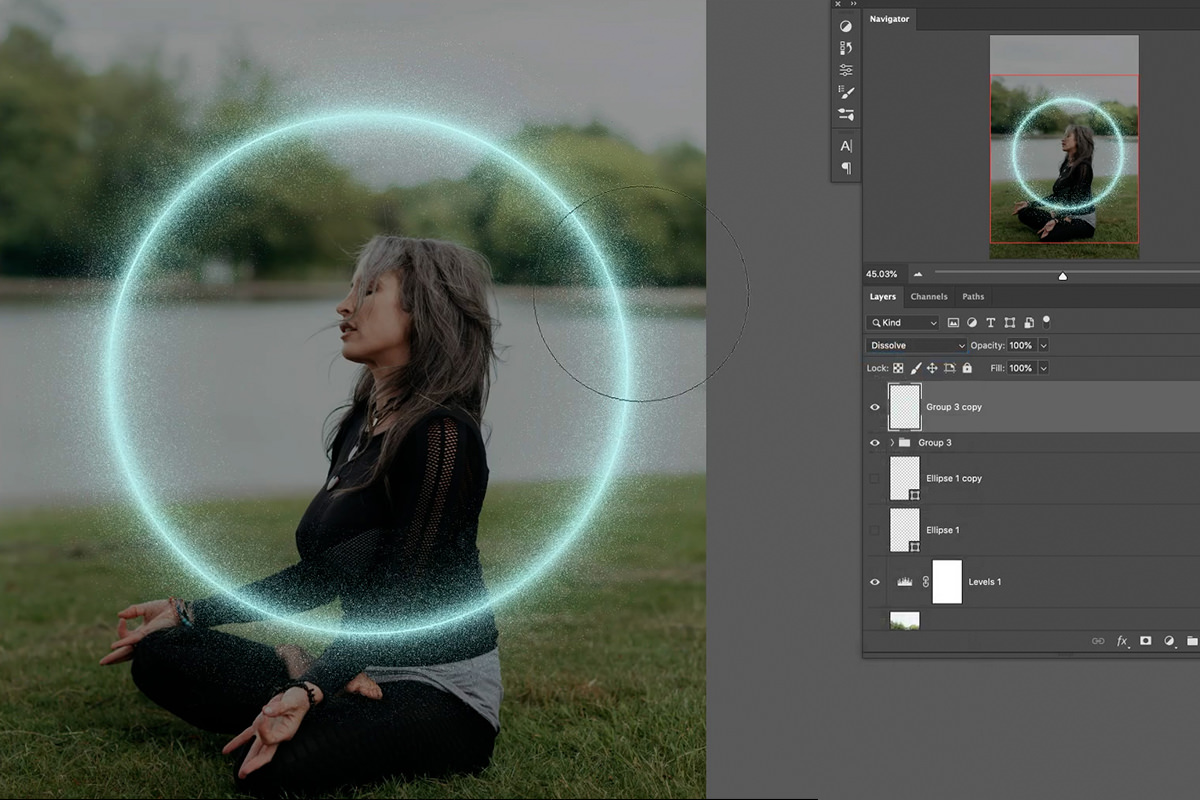
When using atypical Blending Modes like Dissolve, it often helps to convert the effect to a new Layer that we can have set to a Normal Blending Mode.
To copy the effect of a the Dissolve Blending Mode, we just need a way to select all of the particles that it’s created. Place a black Solid Color Fill Layer behind the Dissolve Layer.
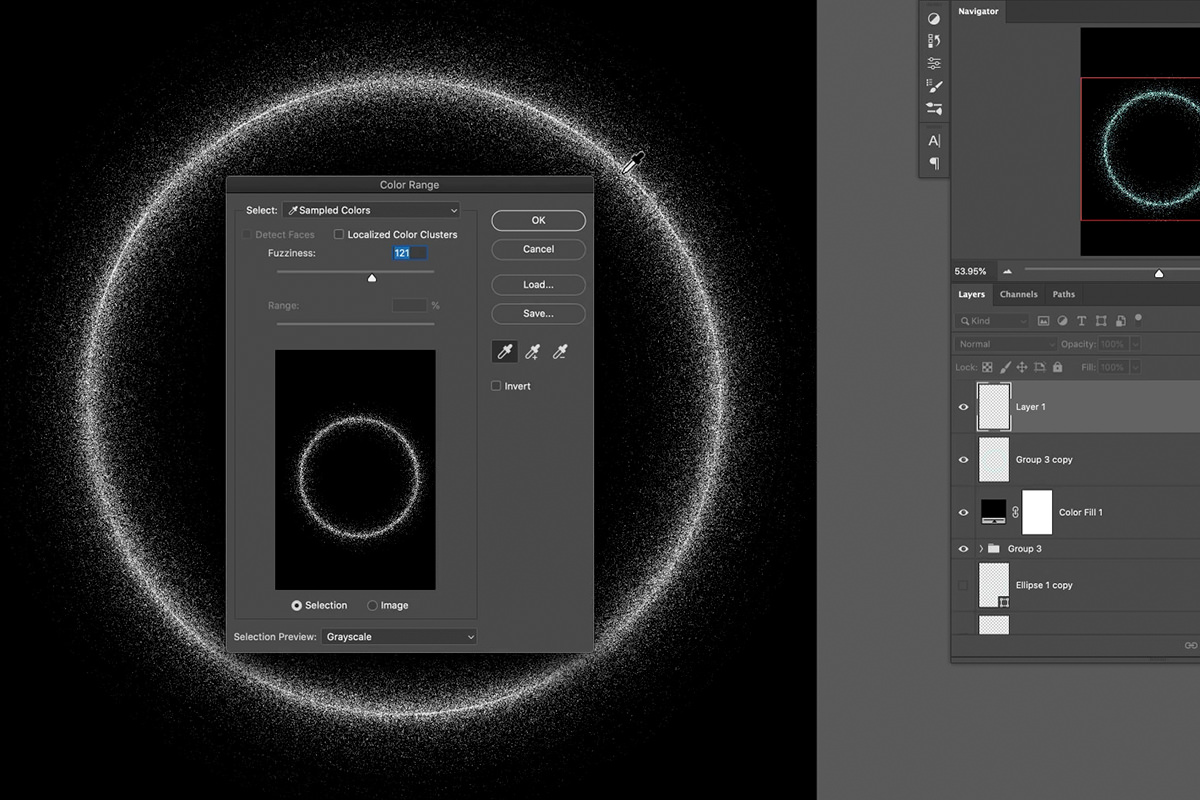
Then use Select Color Range to select the color of the glow effect. With the Selection active, create a new Layer, and Fill that selection with the same color that you’ve been using to create the glowing rings.
You’ll end up with a new Layer with a copy of the Dissolve Blending Mode effect. Go ahead and delete the original Layer that we set to the Dissolve Blending Mode–it won’t be needed.
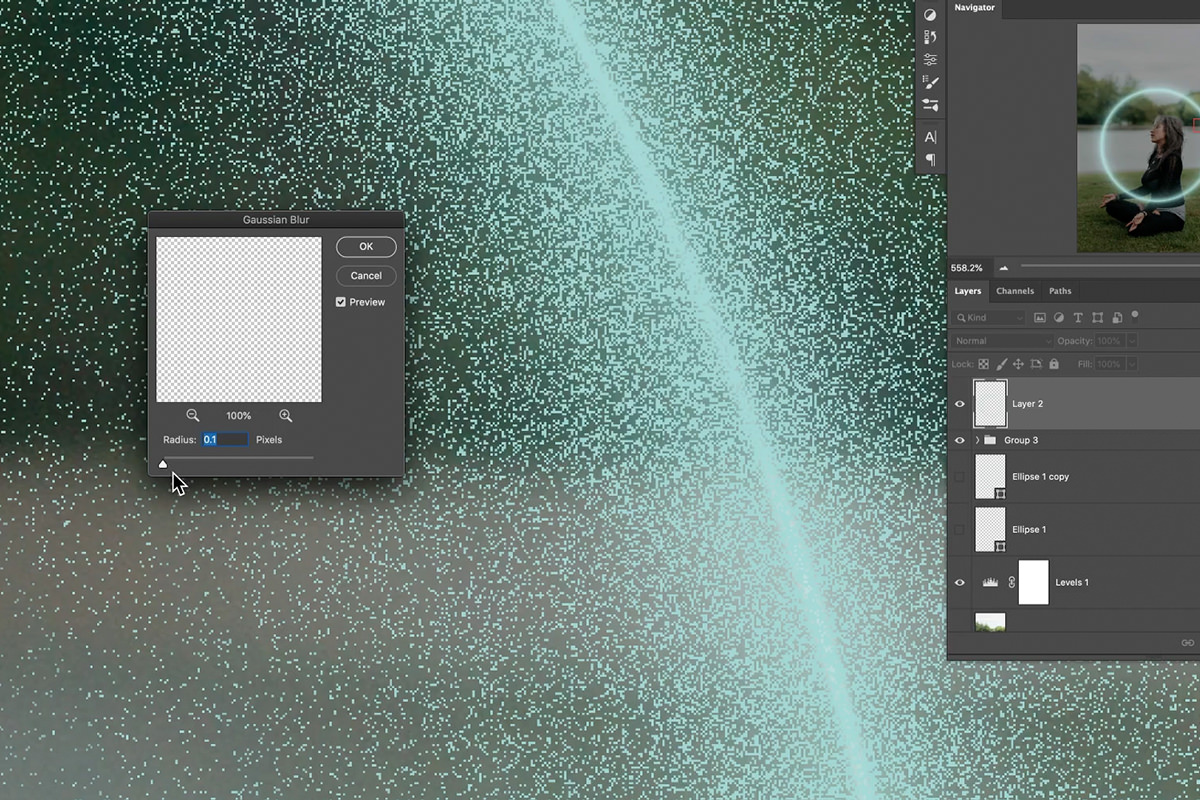
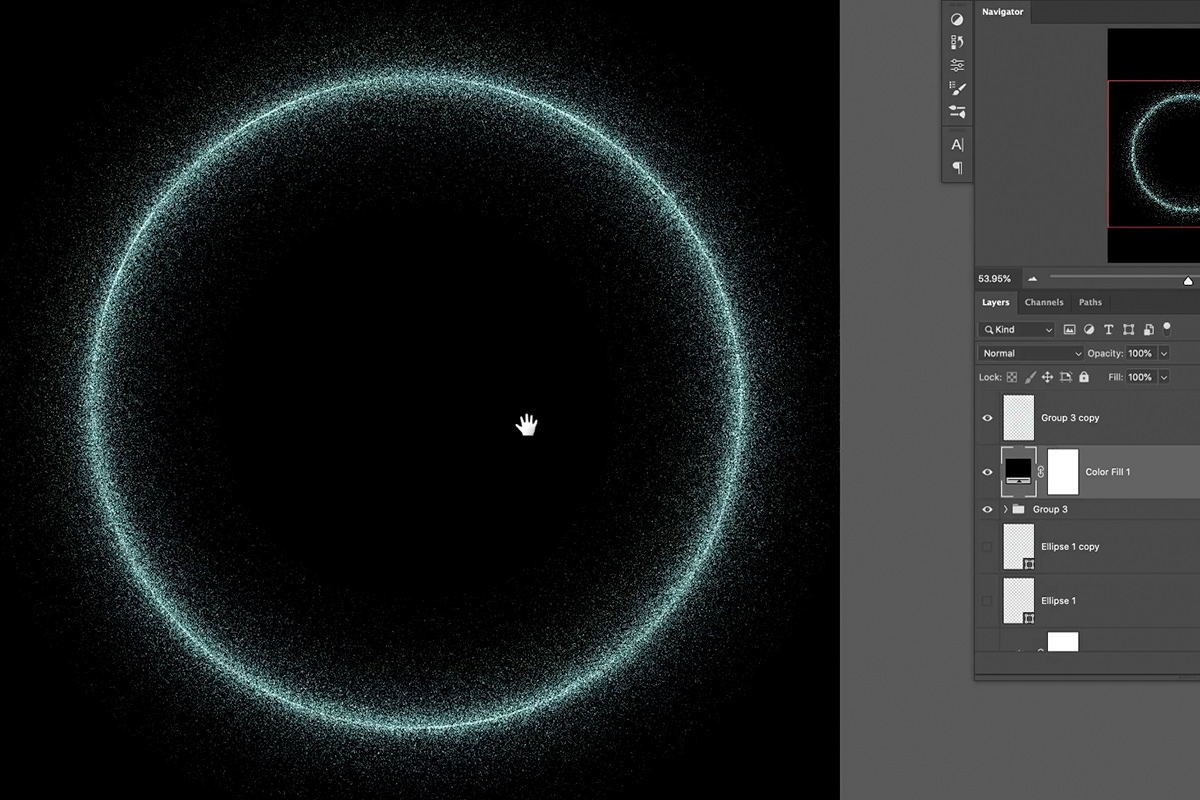
Like we did with the other glowing ring Layers, go ahead and add a Gaussian Blur to the Dissolve effect to help it blend in more naturally with the image.
Continue Duplicating Layers (or entire Groups) and playing around with Blurs and Blending Modes to dial in a glow effect you like.
Integrate Lighting into the Subject & Environment
Now that our glowing ring is about finished, let’s integrate it into the photo so that it looks like it’s behind the subject.
We need the ring to be invisible wherever it passes over the top of the subject. To do that, we can create and use a selection of the subject to Mask out the ring from those areas.
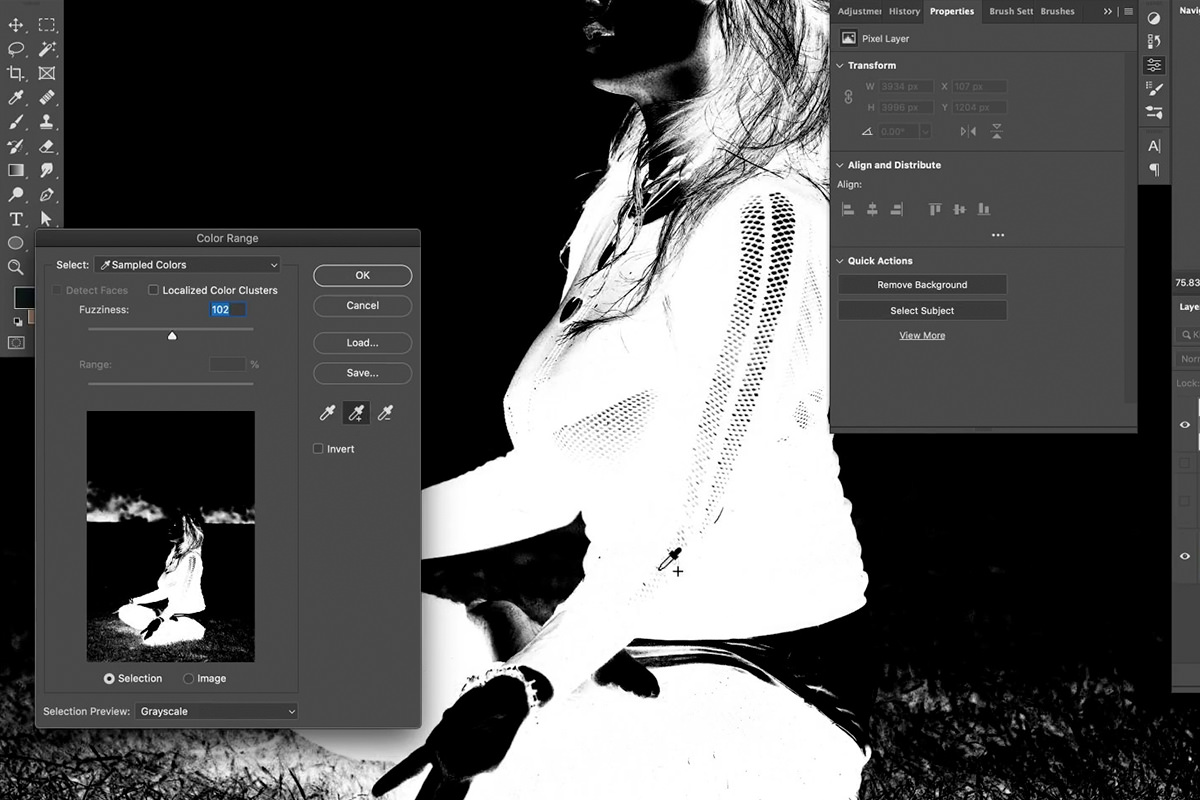
Group all of the glowing ring Layers together and then hide the Group. Zoom in to the subject a bit, and then go to Select, and Select Color Range. Choose the black from the subject’s outfit and dial it in until you have a fairly clean selection of the subject.
Now make the glowing ring Group visible and load the active selection of the subject into the Layer Mask of the Group. You should see something like this:
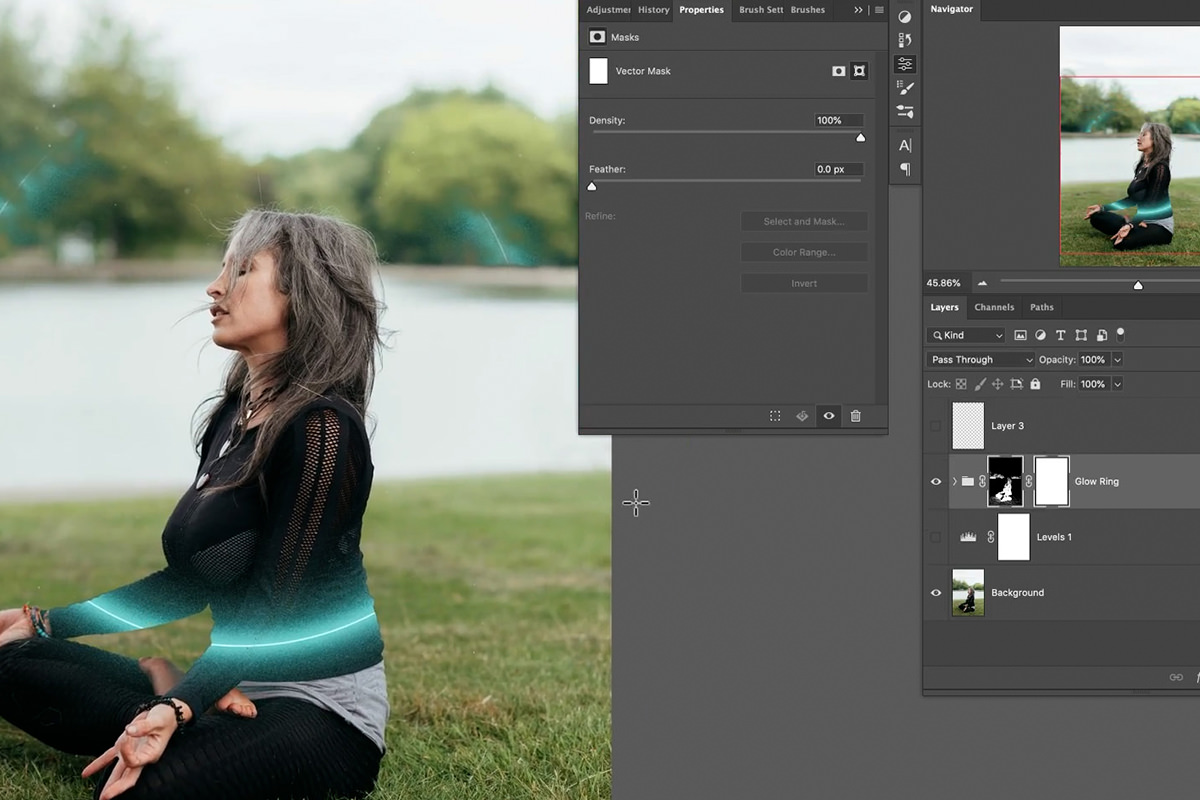
The selection looks good, but this is the opposite of what we want. Invert the Layer Mask you just created by hitting CTRL or CMD + I.
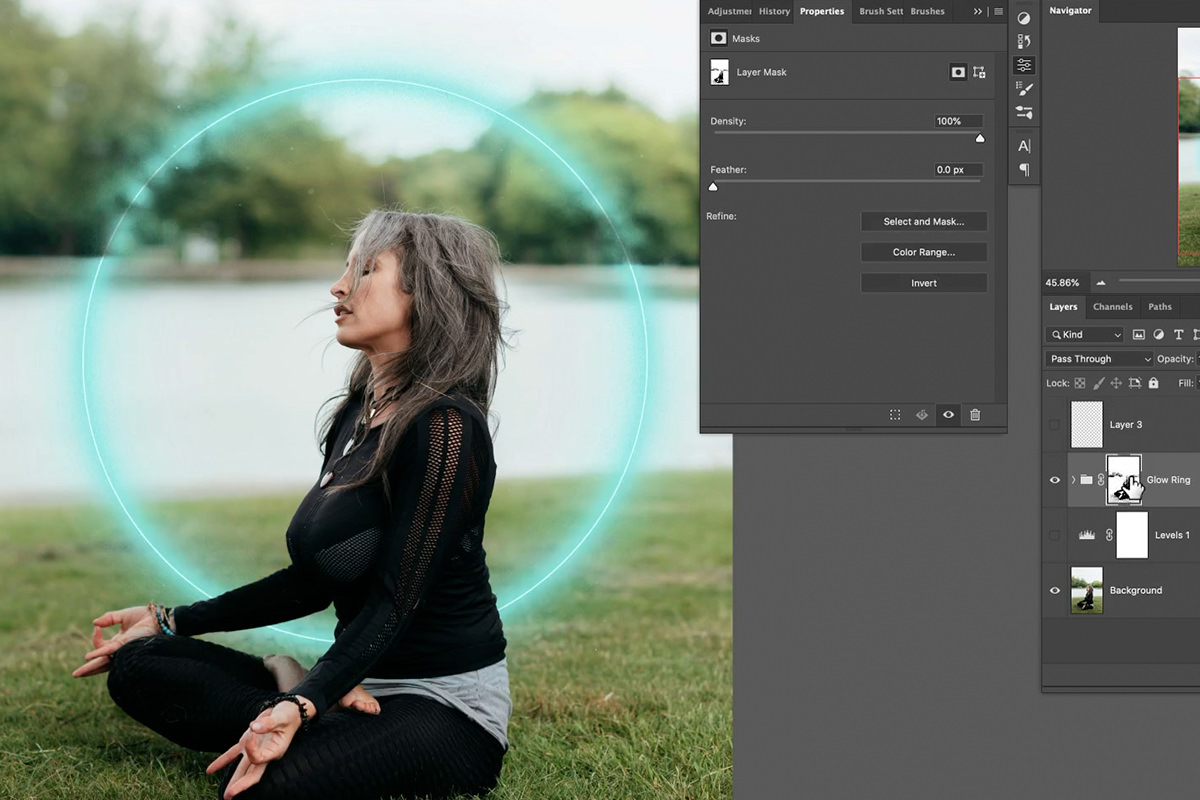
Bingo!
Integrate Lighting into the Scene
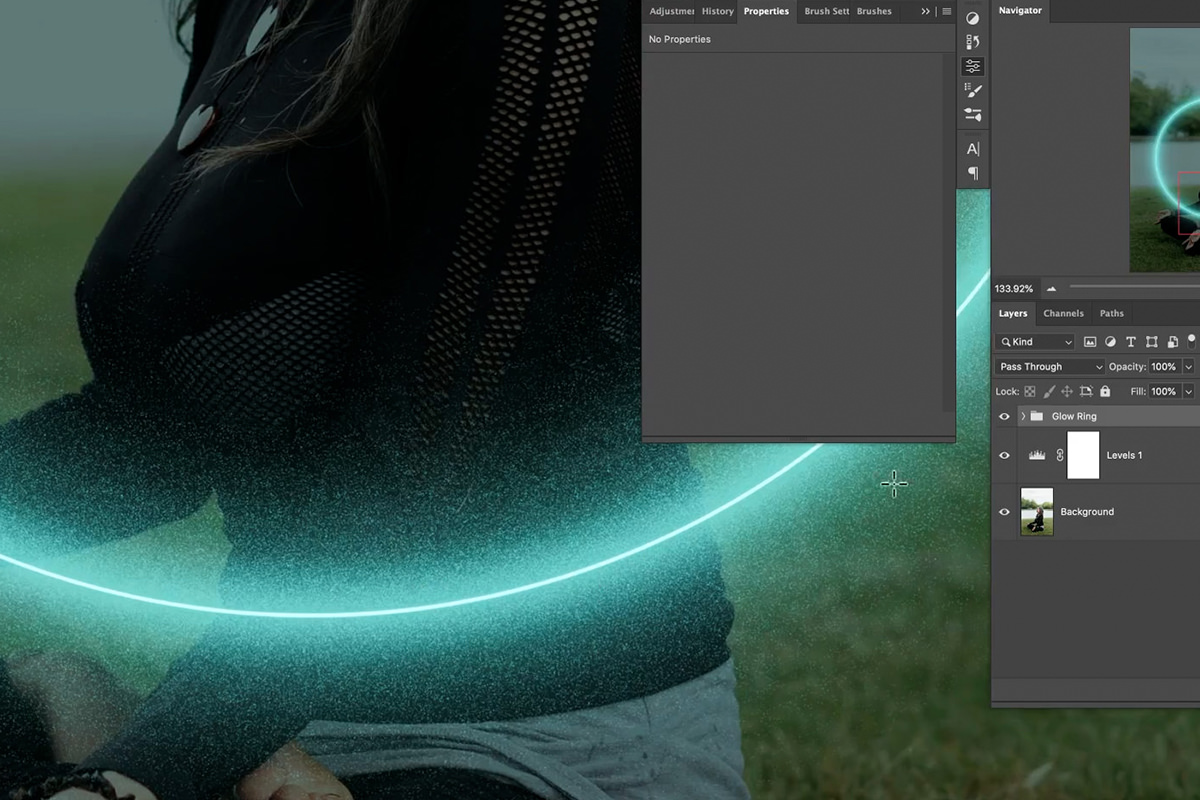
We’ve got a pretty cool glowing ring that looks like it’s floating behind the subject. However, we need to integrate the glow from the ring into the lighting of the photograph if we want it to look realistic.
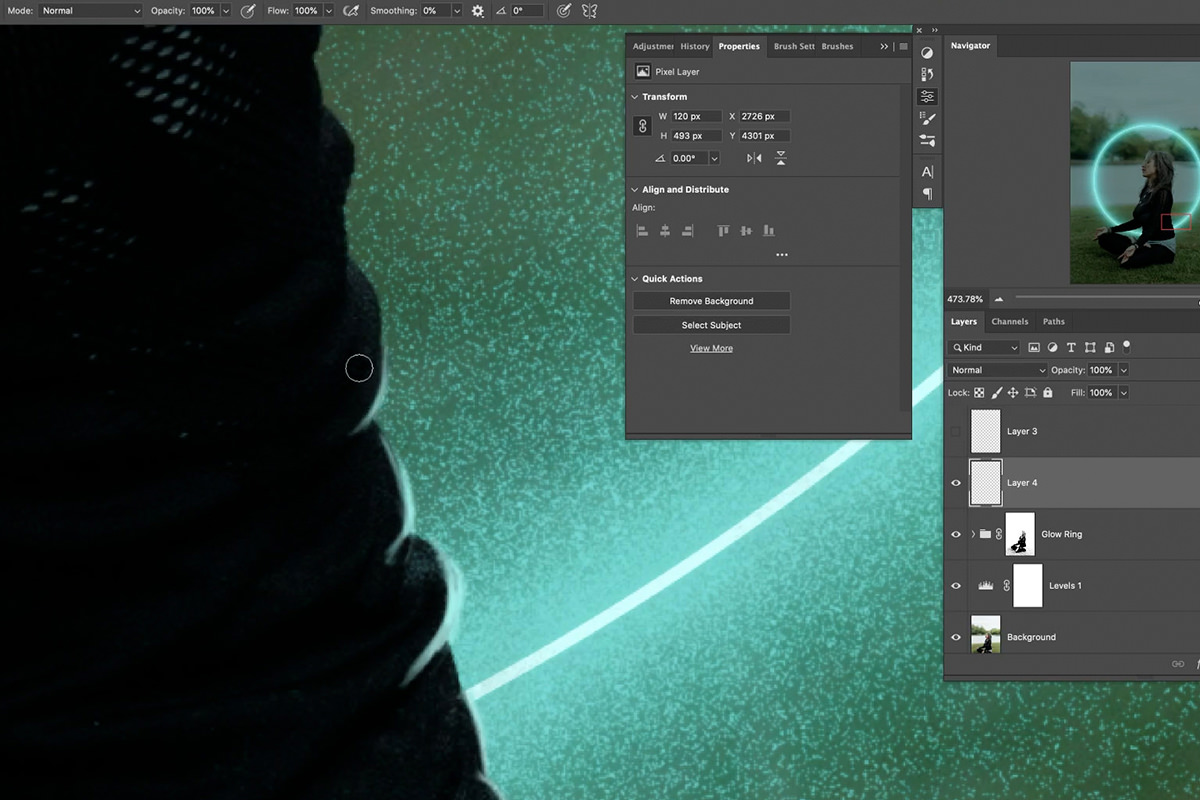
This requires a bit of manual work with Brush Tool, but the payoff is worth it! Zoom in to the image and begin lightly tracing around the edges of the subject with a bright color sampled from the glowing ring. The goal is to create some colored highlights around that look like the light from the ring is wrapping around the subject.
Spend some extra time when working with detailed areas like the hair. The finer, more natural-looking highlights you can add, the better the overall effect will look.
Take as much or as little time as you want with this part, but the more care you put in, the more realistic everything will look.
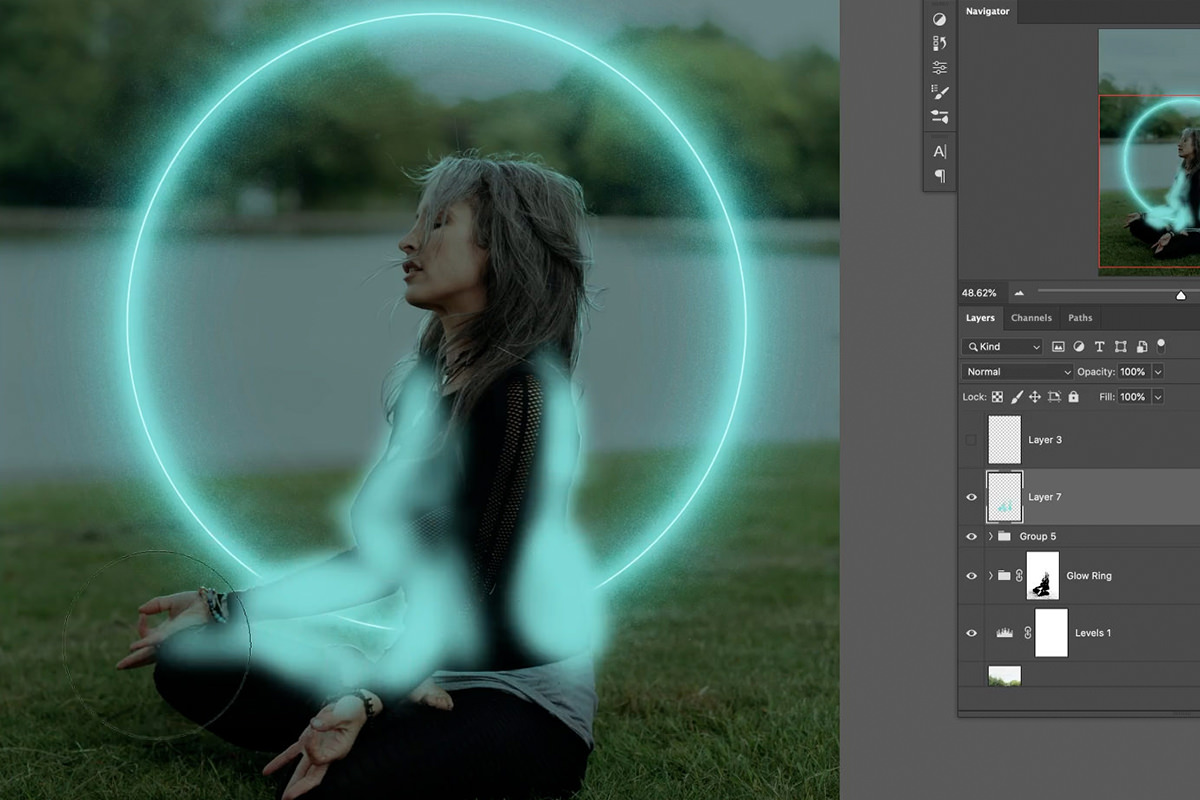
Once you’ve finished with the smaller edge details, we can add some larger, softer glow effects around the subject. Again, use large, soft brush and a low Flow to paint larger spots along the edges of the subject.
Then, use Blend If to make sure those highlights only appear where there are natural highlights in the image.
More Environmental Effects
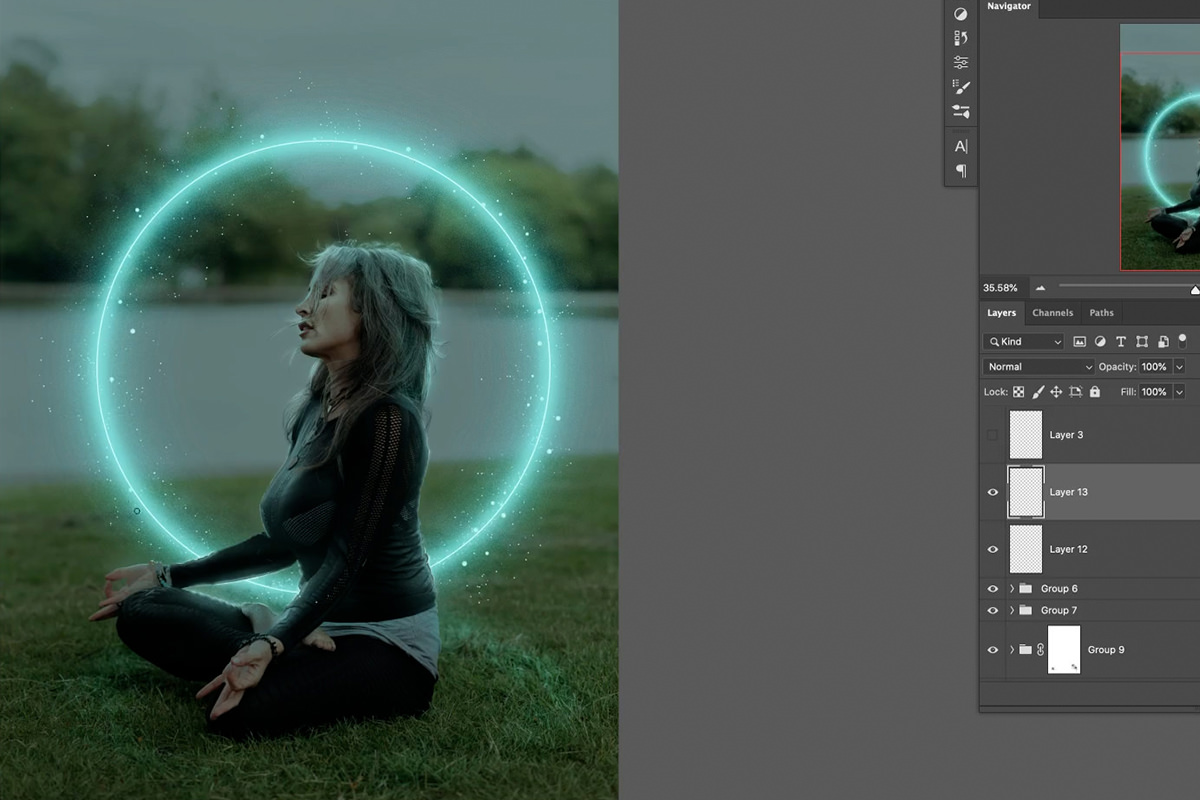
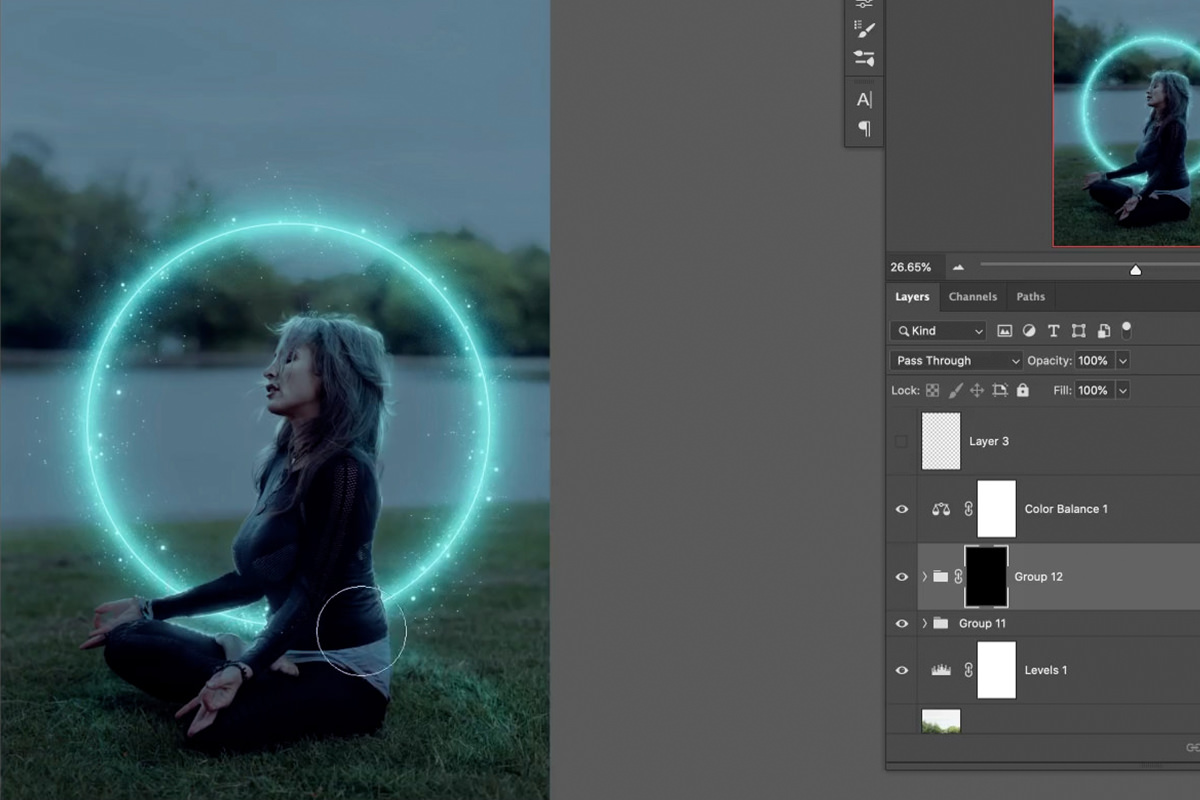
We’re just about done. We’ve done a great job integrating the effect and lighting around the subject, but we need to focus more on the rest of the environment and background. It would make sense that the glowing ring creates a bit of reflection and light on the ground around the subject.
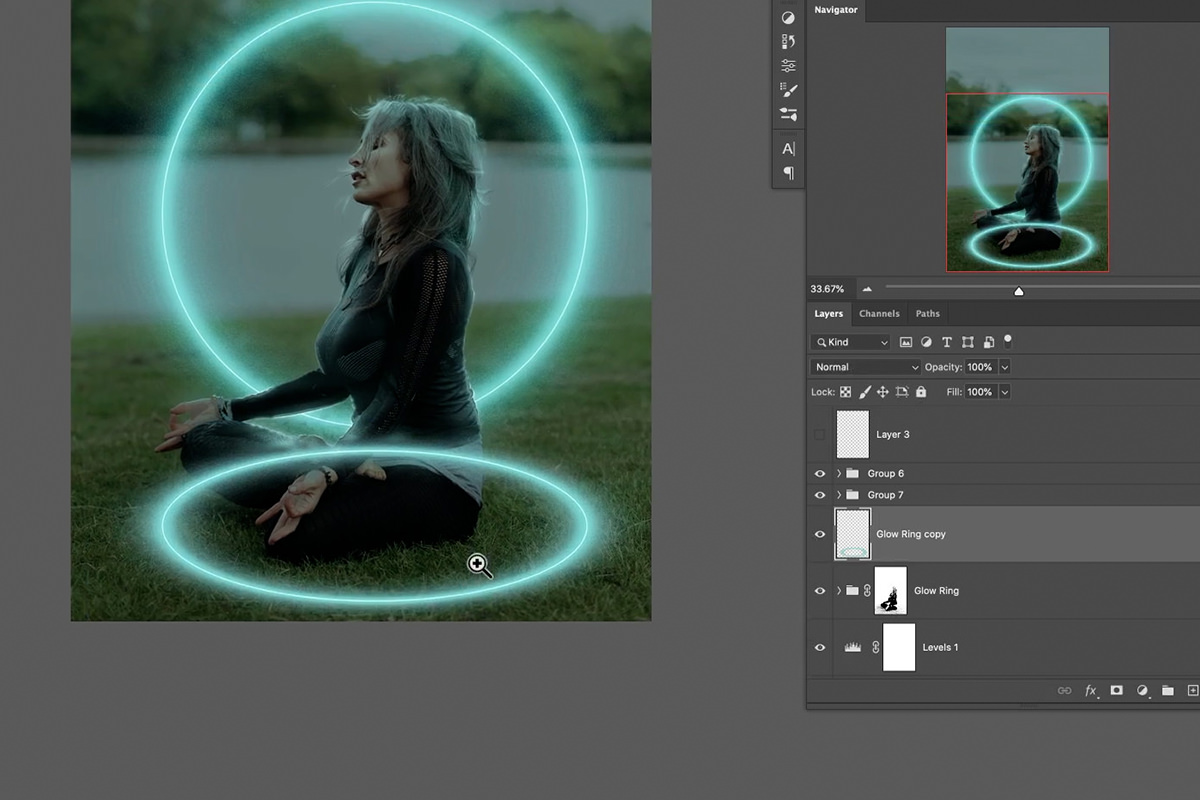
To do this, simply Duplicate the entire glowing ring Group, and then Transform and reposition it until it fits into a natural looking area along the ground.
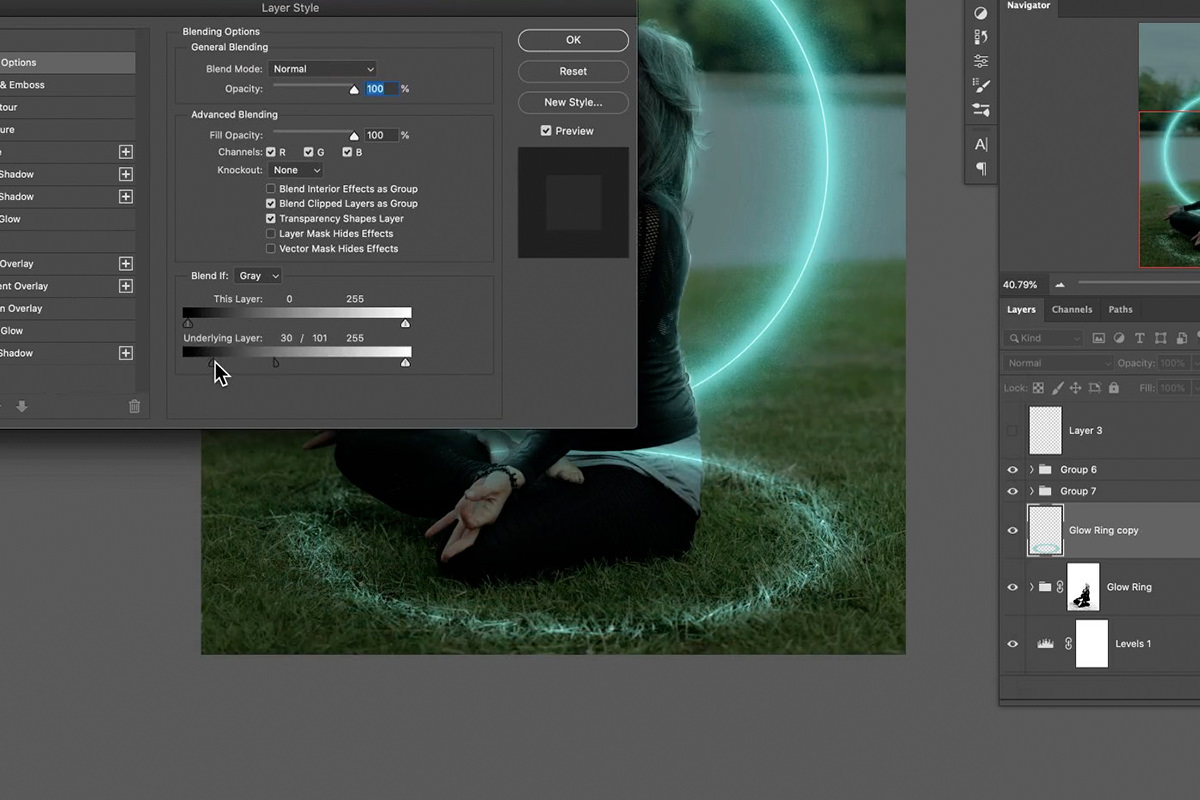
Use Blend If to blend it into the highlights and shadows of the ground more naturally.
And then use the Brush Tool to paint with black on the Layer Mask to make the effect much more subtle.
Particle Effects with a Custom Brush
Custom Photoshop Brushes are a great way to enhance special effects. In particular, custom brushes are the best way to create particle effects and atmospheric effects, since we can build in randomness and natural variation into the brushes themselves.
You can follow along in the video to learn how we created the custom brush but, if you want to skip that process, the brush is available for free in the tutorial download.
Simply use it to paint in particle along the ring to create an effect that you like.
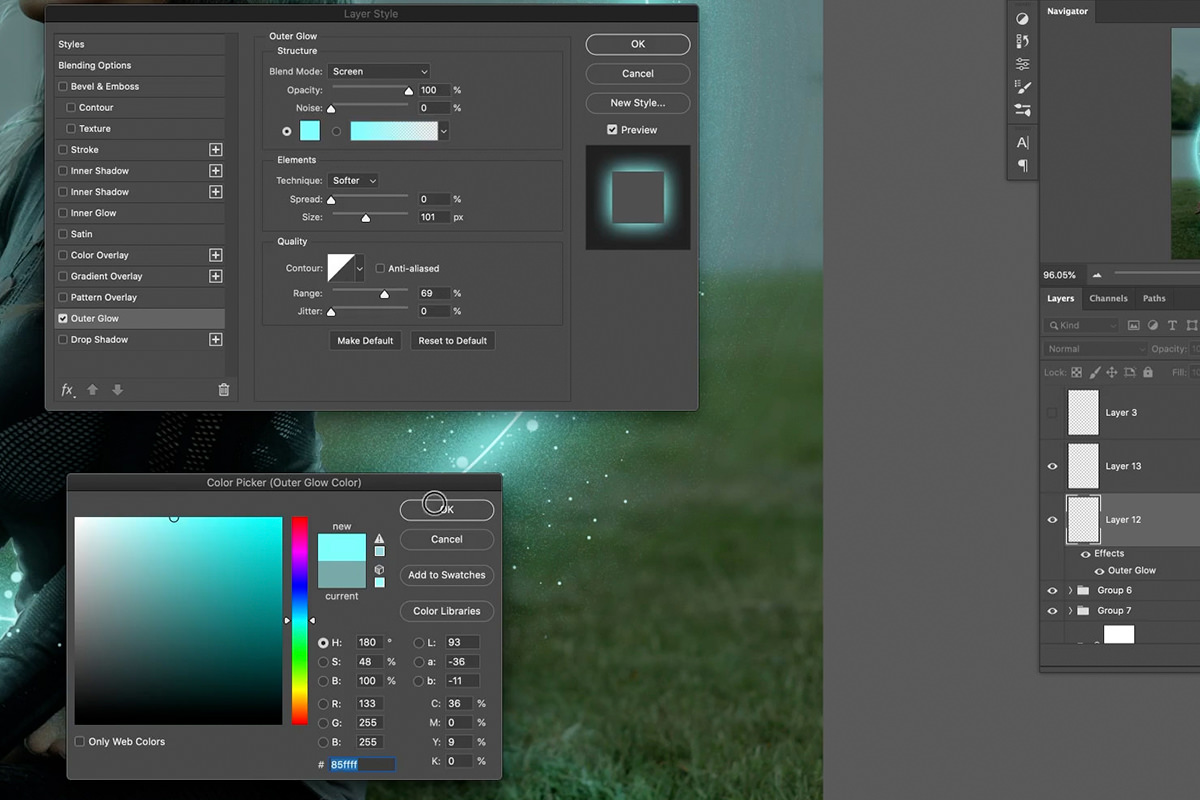
You can use Layer Style effect like Outer Glow to give the particles a little more pop.
Enhance the Overall Effect
Now that we’ve completed the the majority of the effect, we can zoom out and take a look at the image as a whole. Here we can decide if we want the glow effect to be more or less intense and adjust it accordingly.
If you want to enhance the entire effect, Duplicate the entire glowing ring Group.
You can add a Gaussian Blur to the new Duplicated Layer, change the Blending Mode, and use Layer Masks to add some variation to the intensity in different spots of the image.
Once you’re done, you should have a natural-looking glow effect that took the original photo to surprising new places!
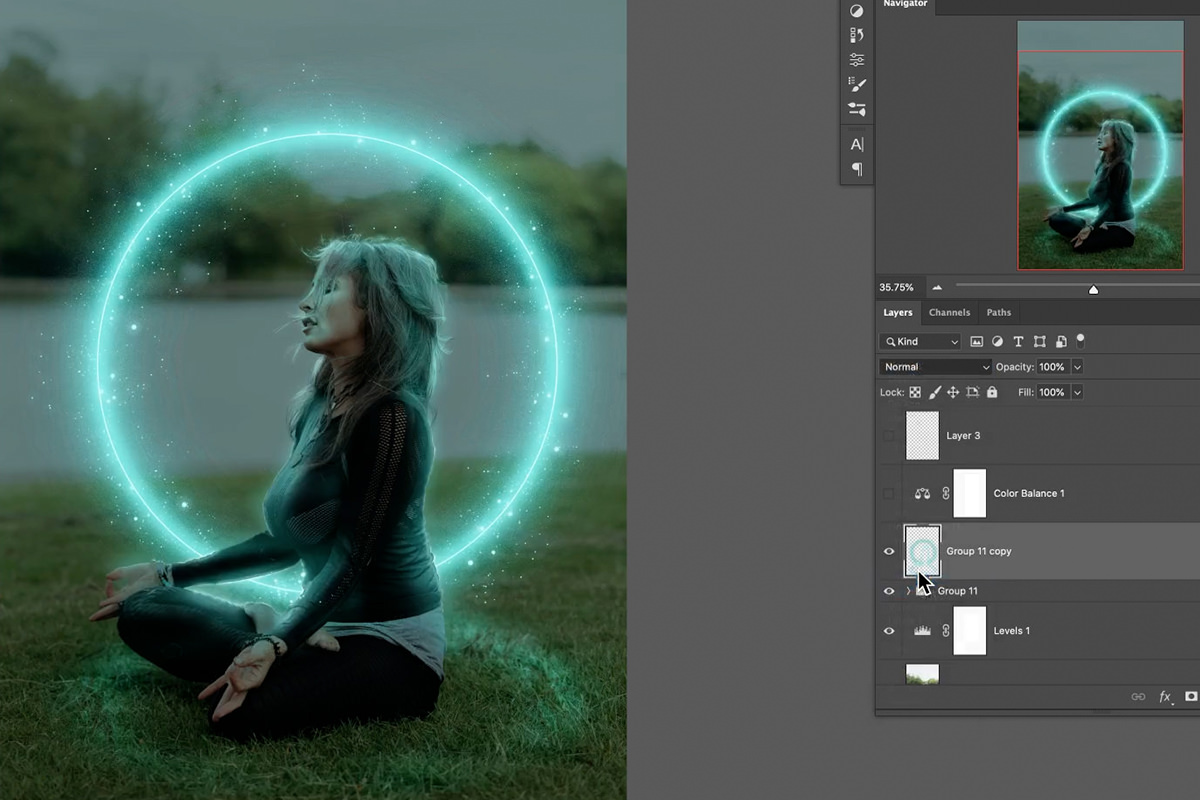
Quick & Easy Color Grading
But it doesn’t stop there! Whether you’re creating special effects or compositing multiple images together, adding some color grading over top of everything can really help tie it all together.
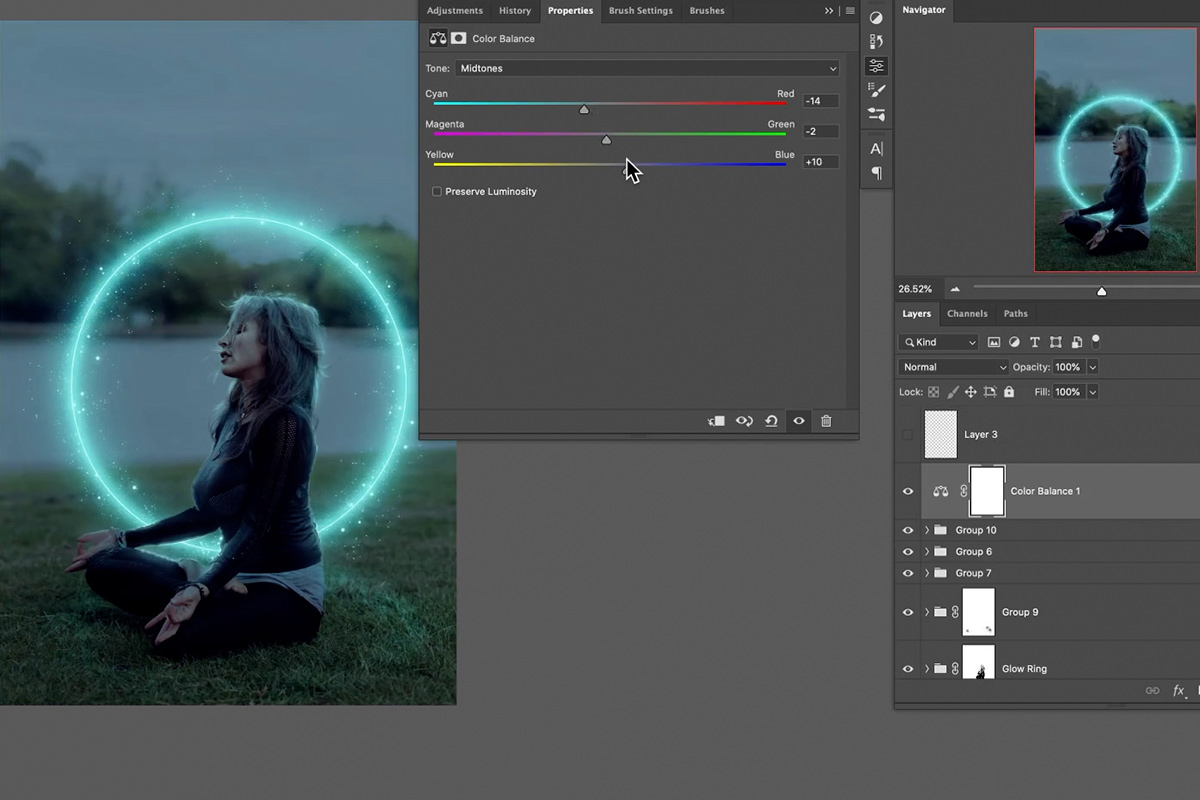
To add some quick and effective color grading, try using a Color Balance Adjustment Layer to push and pull the colors of the image until you get a look that you love.