

Download Assets
This tutorial includes 1 sample image and 1 PDF guide. Downloads are free with a PHLEARN account.
- Download the sample images and PSDs from every free tutorial on PHLEARN
- New free tutorials published every week
- One free account — sign up once, then download anything
Free PDF Guide · 6 Pages
This Tutorial as a Step-by-Step PDF
The 6-page guide walks through the cactus project, from the Spot Healing Brush and Pen tool cutouts to drop shadows and a two-frame animation, then saving it as PSD, PSB and TIFF with the TIFF Options, and exporting JPEG at Quality 70, an animated GIF and a transparent PNG-24 from Save for Web. Keep it next to your keyboard.
description
The right file format depends entirely on what happens to the image next: reopening it to keep editing, posting a still online, sharing an animation, or dropping a logo onto a colored background. Using a small animated cactus project as the example, this tutorial walks through PSD, PSB and TIFF for layered working files, then JPEG, GIF and PNG for export, and when each one is the right call.
Enjoying This Free Tutorial?
We publish a new free tutorial every week, each one with sample images and PSDs you can download and follow along with. Sign up and they land straight in your inbox, along with early word on sales, events and subscriber-only offers.
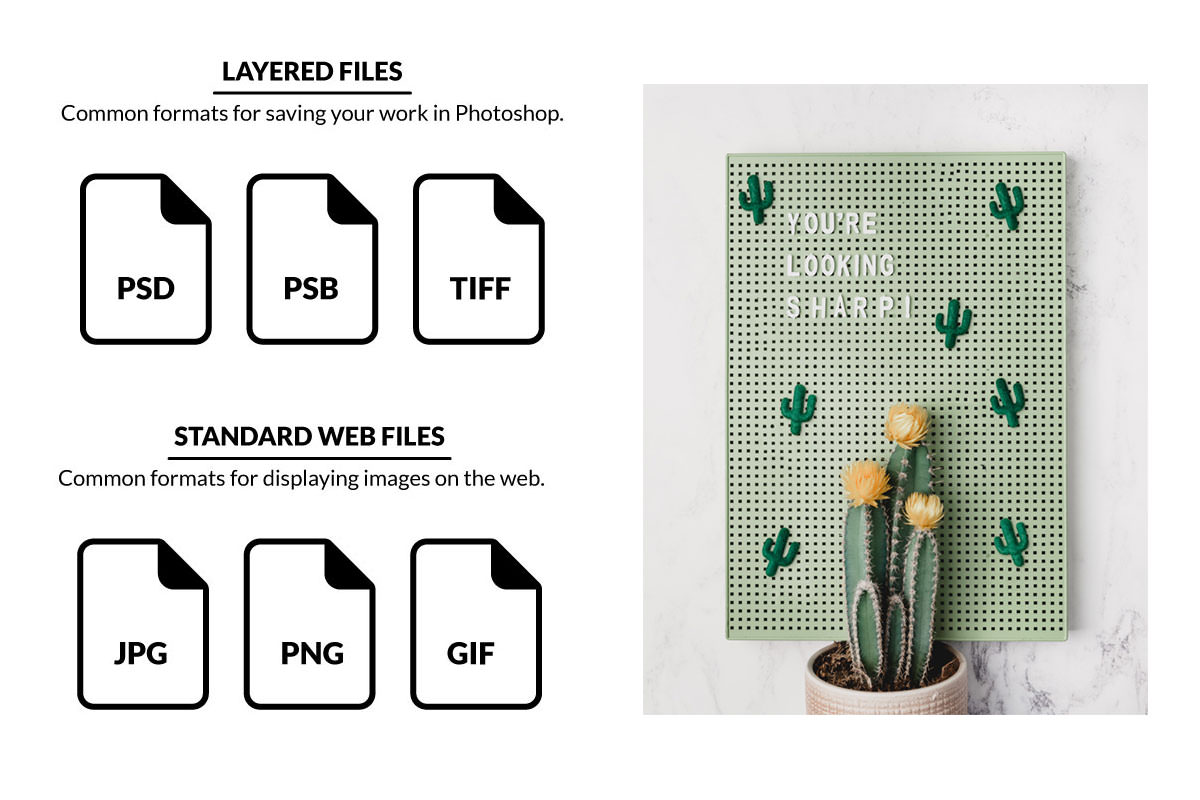
Image File Formats in Photoshop Explained
Choosing the right file format in Photoshop depends entirely on what happens to the image next: coming back to edit it later, posting a still image online, sharing an animation, or dropping a logo onto a colored background. This tutorial builds a small, playful animated project, cutting cactuses out of a pegboard photo and making them shift positions, as a way to walk through every commonly used Photoshop file format and explain exactly when each one makes sense.
Build a Fun Animation Project to Explore Every Format
The starting image is a JPEG of a pegboard with several cactuses hanging on it. On a new layer set to Sample All Layers, the Spot Healing Brush tool paints directly over each cactus; its content-aware fill analyzes the surrounding pegboard pattern and removes the cactuses cleanly, all on a layer that can be toggled off and on at any time without touching the original background.
Cut Out Objects with the Pen Tool
With the healed layer temporarily hidden, the Pen tool traces a path around one of the original cactuses on the background layer. Right-clicking that path and choosing Make Selection, with a 1-pixel feather for a slightly soft edge, turns the outline into a usable selection. Command/Ctrl+J duplicates whatever’s inside that selection onto its own new layer with a transparent background, and that cutout cactus layer moves to the top of the stack, right back over the spot where the healed layer erased the original. Repeating this process a few more times produces three separate cactus cutouts, ready to be arranged and animated independently of the original photo.
Add Realistic Drop Shadows
A cutout floating over a background reads as fake without a shadow underneath it, so double-clicking each cactus layer opens the Layer Style dialog to add a Drop Shadow, angled to match the same light direction already established elsewhere in the design, with opacity raised and size and distance brought down for a tight, believable shadow. Clicking the plus icon adds a second drop shadow with a larger size, greater distance, and lower opacity, stacking two shadows together for more visual depth than a single shadow can provide on its own. Holding Alt/Option and dragging that FX effect from one layer onto another copies the exact same two-layer drop shadow setup onto the remaining cactus layers instantly, so all three end up with matching, consistent shadows.
Duplicate, Rotate and Arrange Your Cutouts
Command/Ctrl+J duplicates each cutout cactus a few more times to build out a fuller arrangement, and each duplicate gets a slight rotation with Free Transform so it doesn’t look like an exact clone of the original. Command/Ctrl-clicking a cactus layer directly on the canvas and dragging it around makes it easy to build a custom arrangement of cactuses across the board, moving pieces freely until the composition looks intentional and photographic, even though every piece is really a cutout repositioned from elsewhere in the same image.
Animate with Frame Animation in the Timeline Panel
Window > Timeline brings up two options: Video Timeline, meant for editing actual video, and Create Frame Animation, the right choice for a simple back-and-forth animation like this one. Creating a second frame and making a different set of layers visible on each frame produces the most basic version of the effect: shift-clicking both frames sets a shared delay of a couple of seconds, and hitting play previews the layers appearing and disappearing on that timer.
For a smoother rotating effect instead of a plain on/off flicker, all the cutout cactus layers get grouped together with Command/Ctrl+G, then that whole group gets duplicated with Command/Ctrl+J to create a second, slightly rotated version of the same arrangement (each individual cactus inside the duplicate group gets its own small Free Transform rotation). Building one animation frame where the first group is visible and a second frame where the duplicate rotated group is visible instead, both frames set to a delay of 2 seconds and then shortened to 1 second, produces a subtle, continuous-looking rotation every time the frames swap, a simple, playful effect well suited to something like a newsletter graphic.
Save Layered Files as PSD, PSB or TIFF
Before exporting anything for the web, saving a layered version of the file matters, since going back to make future changes without one means redoing all the cutting, shadow, and animation work from scratch. File > Save As offers three formats that preserve every layer, group, and animation frame intact.
When PSD Is the Right Choice
A Photoshop Document (PSD) is the most common layered format, keeping every layer and all image information intact, with the Layers box checked and the sRGB color profile embedded for web-friendly color. The one real limitation is that a PSD can only be opened in Photoshop itself, and PSD has a hard 2-gigabyte file size ceiling.
When to Switch to PSB Instead
For files that exceed that 2-gigabyte limit, which happens more often than it sounds given today’s high-megapixel cameras and the size that smart objects can add, Large Document Format saves a PSB, or “Photoshop Big,” file instead, using the same Layers and color-profile settings as a PSD. A PSB is even more limited than a PSD in terms of compatibility though: it only opens in Photoshop, and other Adobe programs like Lightroom won’t read it at all.
Why TIFF Is the Industry Standard
A TIFF file also preserves layers fully, with the Layers box checked, the color profile embedded, Image Compression set to None, Pixel Order Interleaved, Byte Order Macintosh and Layer Compression RLE, but unlike a PSD or PSB, a TIFF opens natively on both Windows and Mac without needing Photoshop at all, which makes it the safest choice for sharing a layered file with a client who may not have Photoshop themselves.
Export Still Images as JPEG for the Web
Layered formats like PSD, PSB, and TIFF are for coming back to edit a file later, not for uploading anywhere; a still image destined for the web, print, or a client review needs a compressed format instead, and JPEG is by far the most common and versatile choice, readable everywhere from a personal website to Instagram, though it doesn’t support animation or transparency.
Balancing Quality and File Size
File > Export > Save for Web opens the dialog where JPEG quality gets dialed in on a slider. A quality of 100 produces a noticeably larger file, in this example around 3 megabytes, while dropping to a quality of 0 shrinks that same image down to roughly 270 kilobytes, about a tenth the size, with surprisingly little visible difference at a glance, though very low quality settings start to introduce visible compression artifacts. A quality setting around 70 is a solid middle ground, usually cutting file size roughly in half while preserving most of the image’s visual quality. Convert to sRGB should stay checked, since browsers render color using the sRGB color space and skipping this step is a common reason uploaded images come out looking off. The dialog also allows resizing the image directly, and the Preview button opens the exact export in a web browser at its real size so there’s no guessing how it’ll actually look once it’s live.
Export Animations as GIF
To share the finished cactus animation rather than just a single still frame, the same File > Export > Save for Web dialog offers a GIF format option, which includes built-in animation settings, looping options, a play button to preview the motion directly in the dialog, and a browser preview to see exactly how it will look once uploaded.
Controlling GIF File Size with Dimensions and Colors
The most effective way to shrink a GIF’s file size is reducing its physical dimensions: dropping the width from 800 pixels down to 400 pixels cuts the file size from around 427 kilobytes down to about 131 kilobytes in this example. Beyond resizing, the Color Reduction Algorithm set to Perceptual and the Dither Algorithm set to Diffusion generally give the best-looking results, and reducing the total number of colors below the default 256 can shrink file size further, though pushing that number too low starts to visibly degrade image quality. Keeping Transparency enabled also helps reduce file size, and Convert to sRGB should stay checked here too, for the same color-accuracy reasons as JPEG.
Export Transparent Backgrounds as PNG
For a logo, icon, or avatar that needs to sit cleanly on any color background, a PNG is the right format, since neither JPEG nor GIF can preserve a genuinely transparent background. Duplicating a single cactus cutout layer into a brand-new document (right-click the layer, Duplicate Layer, choose New Document) isolates it cleanly, and dragging away any layer effects that aren’t needed, straightening it with Free Transform, and cropping in with the Crop tool prepares it as a standalone graphic. Back in the Save for Web dialog, PNG-8 limits the image to 256 colors and works well for simple graphics with a smaller file size, while PNG-24 preserves full, unlimited color detail for anything more complex. Either way, Transparency needs to stay checked, since that’s the entire reason to choose PNG over JPEG in the first place, and Convert to sRGB stays on as usual for accurate web color.
Matching the Format to the Job
Every format covered here solves a different, specific problem rather than competing to be the single best option: PSD, PSB, and TIFF all preserve editable layers for future changes, with TIFF winning on compatibility outside of Photoshop and PSB existing purely for files too large for a standard PSD. JPEG, GIF, and PNG each compress a finished image for actual use out in the world, JPEG for ordinary still photos, GIF for simple looping animation, and PNG whenever a genuinely transparent background is required. Picking correctly among these six formats comes down to one question: is this a working file to come back to later, or a finished file heading out to the web?
Final Thoughts
Cutting a handful of cactuses out of a pegboard photo and animating them turned into a complete tour of Photoshop’s file format options, from layered PSD, PSB, and TIFF files kept for future edits, to JPEG, GIF, and PNG exports built for the web. Keeping a layered master file around, in whichever of the three layered formats fits best, means any future change to a project like this one starts from where the work left off rather than from scratch.
Quick Reference: Keys, Menus and Settings
- Cut out a cactusPen tool (P), right-click > Make Selection, Feather Radius 1 pixel, then Cmd/Ctrl + J
- AnimateWindow > Timeline > Create Frame Animation; Cmd/Ctrl + G to group; Shift-click frames to set one delay
- Save the layered fileFile > Save As: Photoshop (PSD), Large Document Format (PSB) or TIFF; Layers and Embed Color Profile checked
- TIFF OptionsImage Compression None, Pixel Order Interleaved, Byte Order Macintosh, Layer Compression RLE
- JPEG for stillsFile > Export > Save for Web, JPEG, Quality about 70, Convert to sRGB checked
- GIF for animationSave for Web, GIF: smaller dimensions, Perceptual, Diffusion, 256 colors, Transparency on
- PNG for transparencySave for Web, PNG-24 with Transparency and Convert to sRGB checked
Free Downloads
Follow Along on the Same Photo
Get the pegboard photo of felt cactuses from the video and the 6-page PDF guide to all six formats, so you can build the same project. Free with a PHLEARN account.
Photoshop File Formats: Common Questions
Which file format should I save in?
Ask one question: is this a file to keep working on, or one heading out to the web? Keep a layered PSD, PSB or TIFF, then export a JPEG for stills, a GIF for animation or a PNG for a transparent background.
What is the difference between a PSD and a TIFF?
Both keep every layer, group and animation frame. A PSD only opens in Photoshop. Windows and macOS read a TIFF natively, which makes it the industry standard and a great option when you work with clients.
When do I need a PSB file?
A PSD cannot be saved over 2 gigabytes. Past that, choose Large Document Format in File > Save As to save a PSB, or Photoshop Big. Only Photoshop opens a PSB; Lightroom will not even read it.
Which TIFF Options should I choose?
In the video: Image Compression None, Pixel Order Interleaved (the first option), Byte Order Macintosh and Layer Compression RLE. Keep Layers checked and the color profile embedded when you save.
What JPEG quality should I export at?
About 70. On this image Quality 100 is 3.05 megabytes and Quality 0 is 270 kilobytes. Around 70 normally cuts the file size about in half and keeps most of the quality; at 0 you may see artifacts.
Why do my colors look wrong after I upload an image?
Chances are it was not in the sRGB color space, which web browsers use to render color. File > Export > Save for Web converts to sRGB as long as Convert to sRGB stays checked.
How do I make an animated GIF smaller?
Make the dimensions smaller. Here the GIF is 427 kilobytes at 800 pixels wide and 131 kilobytes at 400 pixels wide. Use Perceptual color reduction, Diffusion dither, 256 colors, and keep Transparency on.
How do I save an image with a transparent background?
Use a PNG; a JPEG will not keep a transparent background. In Save for Web choose PNG-24, which keeps all of the color detail, and make sure Transparency and Convert to sRGB are checked. PNG-8 limits you to 256 colors.
How do I make a simple animation in Photoshop?
Go to Window > Timeline and choose Create Frame Animation. Show one group of layers on the first frame and a rotated copy on the second, Shift-click both frames and set the delay. Aaron tries 2 seconds, then changes it to 1 second.
Is the sample file free?
Yes, with a free PHLEARN account. You get 1 sample image and 1 PDF guide: the pegboard photo with the felt cactuses and a 6-page guide to all six formats.
Master Photoshop, Lightroom and Photography
Join PHLEARN PRO for $12.99 a month or $99.99 a year. Cancel anytime, with a 100% money-back guarantee.





