

description
A great panorama starts well before Photoshop, with a handful of shooting habits that make the individual frames far easier to stitch together cleanly. This tutorial covers those field tips, then walks through Photoshop Photo Merge, correcting the bowing left behind with Lens Correction, cropping to a proper 3:1 panorama ratio, filling the empty corners with Content-Aware Fill and the Clone Stamp, and finishing with Selective Color and sharpening.
Enjoying This Free Tutorial?
We publish a new free tutorial every week, each one with sample images and PSDs you can download and follow along with. Sign up and they land straight in your inbox, along with early word on sales, events and subscriber-only offers.
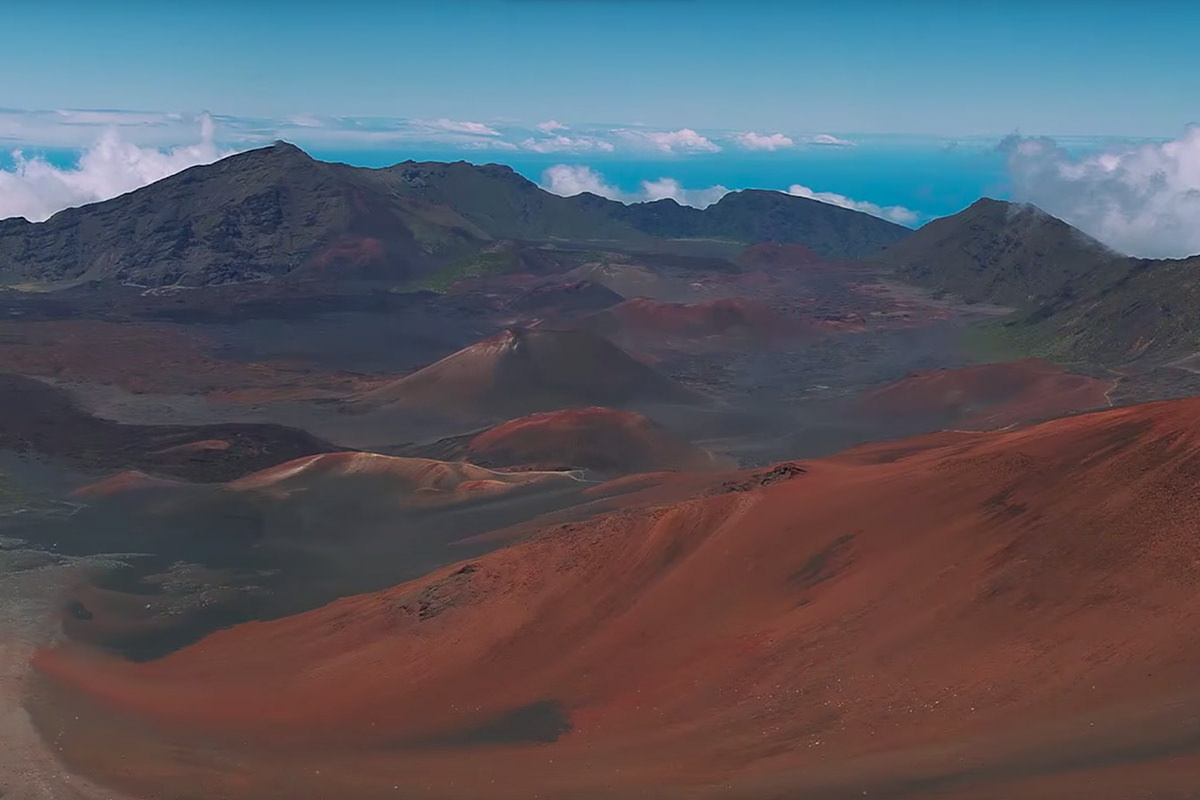
How to Make a Panorama in Photoshop
A great panorama starts well before Photoshop, with a handful of shooting habits that make the images much easier to stitch together cleanly. This tutorial covers those field tips, then walks through Photoshop’s Photo Merge feature, correcting lens distortion, cropping to a proper panorama ratio, filling in the gaps left around the edges, and finishing with color and sharpening.
Getting Better Source Images in the Field
A few adjustments to gear and camera settings before shooting make a panorama’s individual frames far easier to stitch together seamlessly afterward. For a closer look at recommended gear for shooting panoramas, check out this gear article.
-
Shoot on a Sturdy, Level Tripod
Use a sturdy tripod and keep the camera level while panning, since even small up-and-down drift will show in the stitched result.
-
Overshoot the Scene
Capture a few more frames than seem necessary, and shoot a bit wider than needed, to make sure there’s enough information to work with back on the computer.
-
Choose a Lens Around 50mm or Longer
Avoid super wide-angle lenses in favor of something around 50mm or higher to reduce distortion and make stitching easier.
-
Shoot Between f/8 and f/11
Set the aperture between f8 and f11 rather than a wide aperture like f2.0 or f2.8, to keep every frame as sharp as possible.
-
Switch to Manual Focus
Change the lens to manual focus so the camera holds the same focal point across every frame of the panorama.
-
Use a Slow Shutter Speed or Neutral Density Filter
Use a slow shutter speed or a neutral density filter so anything moving through the frame blurs out rather than creating a hard mismatch between frames.
Stitching the Panorama With Photo Merge
Photoshop’s Photo Merge feature automatically aligns and blends a set of source images into a single wide panorama.
-
Open Photo Merge
Go to File > Automate > Photomerge.
-
Set the Layout to Auto
In the Photomerge dialog, choose Auto for the layout option, since it tends to produce the best results in most cases.
-
Browse for the Source Images
Click Browse, select the set of panorama frames to combine, and click Open.
-
Keep Blend Images Together Checked
Leave Blend Images Together checked, and leave Vignette Removal and Geometric Distortion Correction unchecked for now.
-
Process the Merge
Click OK and let Photoshop stitch and mask the individual frames together automatically into layers.
Why Auto Works Best for Most Panoramas
Photo Merge offers several layout options beyond Auto, but testing across many different panoramas has shown Auto consistently produces the strongest result in the majority of cases. Sticking with Auto by default, and only exploring the other layout options when a specific panorama needs it, saves time without sacrificing quality.
Merging the Stitched Layers Together
Combining every stitched layer into one flattens the panorama so it’s ready for distortion correction, cropping, and cleanup.
-
Select All the Stitched Layers
Select every layer that Photo Merge created in the Layers panel.
-
Merge the Layers
Press Cmd/Ctrl+E to merge all the selected layers into a single layer.
Removing Distortion With Lens Correction
The Lens Correction filter’s Custom tab flattens the natural bowing that a wide panorama stitch tends to introduce.
-
Open Lens Correction
Go to Filter > Lens Correction, then click the Custom tab.
-
Adjust the Distortion Slider
Move the Distortion slider to flatten out the bowed shape along the top and bottom of the panorama.
-
Adjust Vertical and Horizontal Perspective if Needed
Adjust the Vertical Perspective and Horizontal Perspective sliders if the panorama needs additional straightening in either direction.
-
Confirm the Correction
Click OK to apply the lens correction adjustments.
Cropping to a Panorama Ratio
A 3:1 ratio crop trims away the uneven top and bottom edges that a stitched panorama typically leaves behind.
-
Select the Crop Tool
Press C for the Crop tool.
-
Set a 3:1 Ratio
Type 3 and 1 into the ratio fields to load a standard panorama crop ratio.
-
Adjust and Confirm the Crop
Reposition the crop as needed and press Enter, or click the checkmark, to apply it.
Removing Sensor Dust With the Spot Healing Brush
Small dust spots that show up across a large, detailed panorama disappear quickly with the Spot Healing Brush.
-
Select the Spot Healing Brush Tool
Choose the Spot Healing Brush tool from the toolbar.
-
Paint Over Dust Spots
Paint directly over any small dust spots visible in the image, letting the tool automatically fill them in with similar nearby texture.
Filling Edge Gaps With Content-Aware Fill and the Clone Stamp Tool
The corners of a stitched panorama often lack information, and Content-Aware Fill or the Clone Stamp tool can fill those gaps in believably.
-
Select the Gap With the Polygonal Lasso Tool
Use the Polygonal Lasso tool to select an empty area along an edge or corner that’s missing information.
-
Apply Content-Aware Fill
Go to Edit > Fill, choose Content-Aware from the Contents menu, and click OK to let Photoshop generate matching detail for the selection.
-
Undo and Retry if the Result Looks Off
Press Cmd/Ctrl+Z to undo if the filled result doesn’t look convincing, then try selecting a slightly different area and running Content-Aware Fill again.
-
Clone Stamp Any Remaining Gaps Manually
Create a new layer, press S for the Clone Stamp tool, and sample from several different nearby areas to fill in any gap Content-Aware Fill couldn’t handle well.
Why Content-Aware Fill Doesn’t Always Work
Content-Aware Fill analyzes the rest of the image to generate matching detail, but it can occasionally produce a result that looks obviously wrong or repetitive, especially in an area with unusual or inconsistent texture. Keeping the Clone Stamp tool as a manual backup, sampling from several different spots to avoid an obviously repeating pattern, ensures every gap gets filled convincingly even when the automated option comes up short.
Enhancing Color With Selective Color
A Selective Color adjustment layer lets each individual color in a landscape, like reds, yellows, and blues, be enhanced on its own without shifting the whole image unnaturally.
-
Add a Selective Color Adjustment Layer
Add a Selective Color adjustment layer above the merged panorama.
-
Adjust the Reds
Select Reds from the Colors menu and adjust the Cyan, Yellow, Magenta, and Black sliders to enhance any red tones in the image.
-
Adjust the Yellows
Select Yellows and adjust its Cyan and Yellow sliders to bring out warm tones such as foliage or sand.
-
Adjust the Cyans and Blues
Select Cyans or Blues and lower the Yellow slider to deepen and cool the sky.
-
Adjust the Whites
Select Whites and adjust the Yellow and Magenta sliders to give clouds a warmer or cooler tone as desired.
Why Selective Color Keeps Landscape Tones Natural
Selective Color adjusts each color channel independently rather than shifting the entire image’s tone at once, which is what allows the sky to deepen while the foliage and other tones stay unaffected. This targeted approach enhances colors that already exist in the landscape rather than introducing an unnatural, uniform color cast across the whole panorama.
Sharpening the Finished Panorama
A dedicated sharpening action adds a final pass of clarity once the color and cleanup work is complete.
-
Open the Actions Panel
Go to Window > Actions.
-
Run a Sharpening Action
Select a sharpening action, such as Sharpen Plus 3, and click Play, repeating it if additional sharpening is needed.
-
Group the Finished Layers
Select all the finished adjustment layers and group them together to keep the panorama organized.
Why This Approach Works
Good field technique, a level tripod, overshooting the scene, and a longer lens, prevents many stitching problems before they ever reach Photoshop. Removing distortion and cropping to a proper ratio before worrying about gaps or color keeps each step building cleanly on the last, rather than fixing details on a panorama that still needs major structural correction. Enhancing color with Selective Color rather than a blanket adjustment keeps a landscape’s natural tones intact while still making the sky, foliage, and clouds each look their best.
Final Thoughts
A panorama’s real advantage is resolution and detail that a single frame simply can’t match, and the workflow here, from Photo Merge through distortion correction, cropping, gap-filling, color, and sharpening, is what turns a set of individual frames into one seamless, high-detail image. The same process works for any set of overlapping frames, whether it’s a skyline, a landscape, or any other wide scene worth capturing in full.
Quick Reference: Keys, Menus and Settings
- Shoot the framesSturdy, level tripod; 50mm or longer; f/8 to f/11; manual focus
- StitchFile > Automate > Photomerge, Layout: Auto, Blend Images Together on
- Merge the layersSelect them all, Cmd/Ctrl + E
- Flatten the bowFilter > Lens Correction > Custom: Distortion to the right
- CropC, ratio 3 by 1, Enter
- Fill the cornersPolygonal Lasso, Edit > Fill > Content-Aware; Cmd/Ctrl + Z to retry; S Clone Stamp on a new layer
- ColorSelective Color layer: Reds, Yellows, Blues (less Yellow), Whites
No AI, no generative credits.
Panoramas in Photoshop: Common Questions
What lens should I use for a panorama?
Something around 50mm or longer. Super wide-angle lenses add distortion and make the frames harder to stitch together in Photoshop.
What camera settings work best for panoramas?
Shoot between f/8 and f/11 so every frame is sharp, and switch the lens to manual focus so the focal point stays the same across the whole sweep. A slow shutter speed or a neutral density filter blurs away anything moving through the frame.
Do I need a tripod?
A sturdy tripod helps a lot. Keep the camera level as you turn it, since drifting up and down shows in the stitched result. Take a few more frames than you need and shoot a little wider, too.
Where is Photomerge in Photoshop?
Go to File > Automate > Photomerge. Choose Auto, click Browse to pick your frames, keep Blend Images Together checked and leave Vignette Removal and Geometric Distortion Correction off.
Which Photomerge layout should I pick?
Auto. After a lot of testing it gives the best result most of the time, so only try the other layouts when a panorama needs it.
How do I fix a panorama that looks bowed?
Select the stitched layers and merge them with Cmd/Ctrl + E. Then go to Filter > Lens Correction, click the Custom tab and move the Distortion slider to the right until the image flattens out. Vertical Perspective can straighten it further.
What crop ratio should a panorama be?
Most panoramas look good at 3 by 1. Press C for the Crop tool, type 3 and 1 in the ratio fields, then click the checkmark or press Enter.
How do I fill the empty corners after stitching?
Select the gap with the Polygonal Lasso tool, go to Edit > Fill and choose Content-Aware. If you don’t like the result, undo with Cmd/Ctrl + Z and try a different selection, or clone the area in on a new layer with the Clone Stamp tool (S), sampling from several different spots.
How do I bring out the colors in a landscape panorama?
Add a Selective Color adjustment layer and work through Reds, Yellows, Blues and Whites one at a time. Lowering Yellow in the Blues cools the sky while the other colors stay natural.
Master Photoshop, Lightroom and Photography
Join PHLEARN PRO for $12.99 a month or $99.99 a year. Cancel anytime, with a 100% money-back guarantee.





