Download Sample Images
SAMPLE PSD
Download the complete sample PSD (646 MB) for this tutorial!
description
Learn how to convert photos into textures using Blending Modes in Photoshop! Then, apply those textures to another image, using Hue/Saturation, Curves, Levels, and LUTs to dial in the perfect textured look.
Share
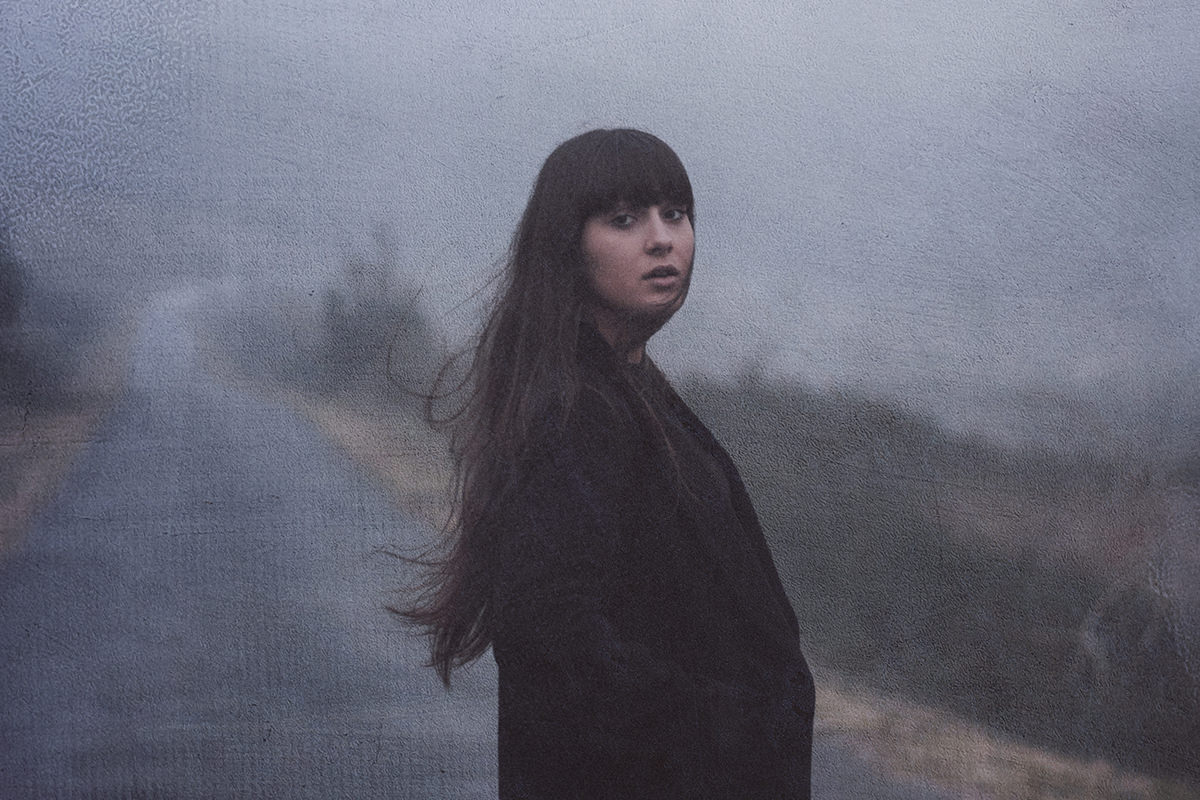
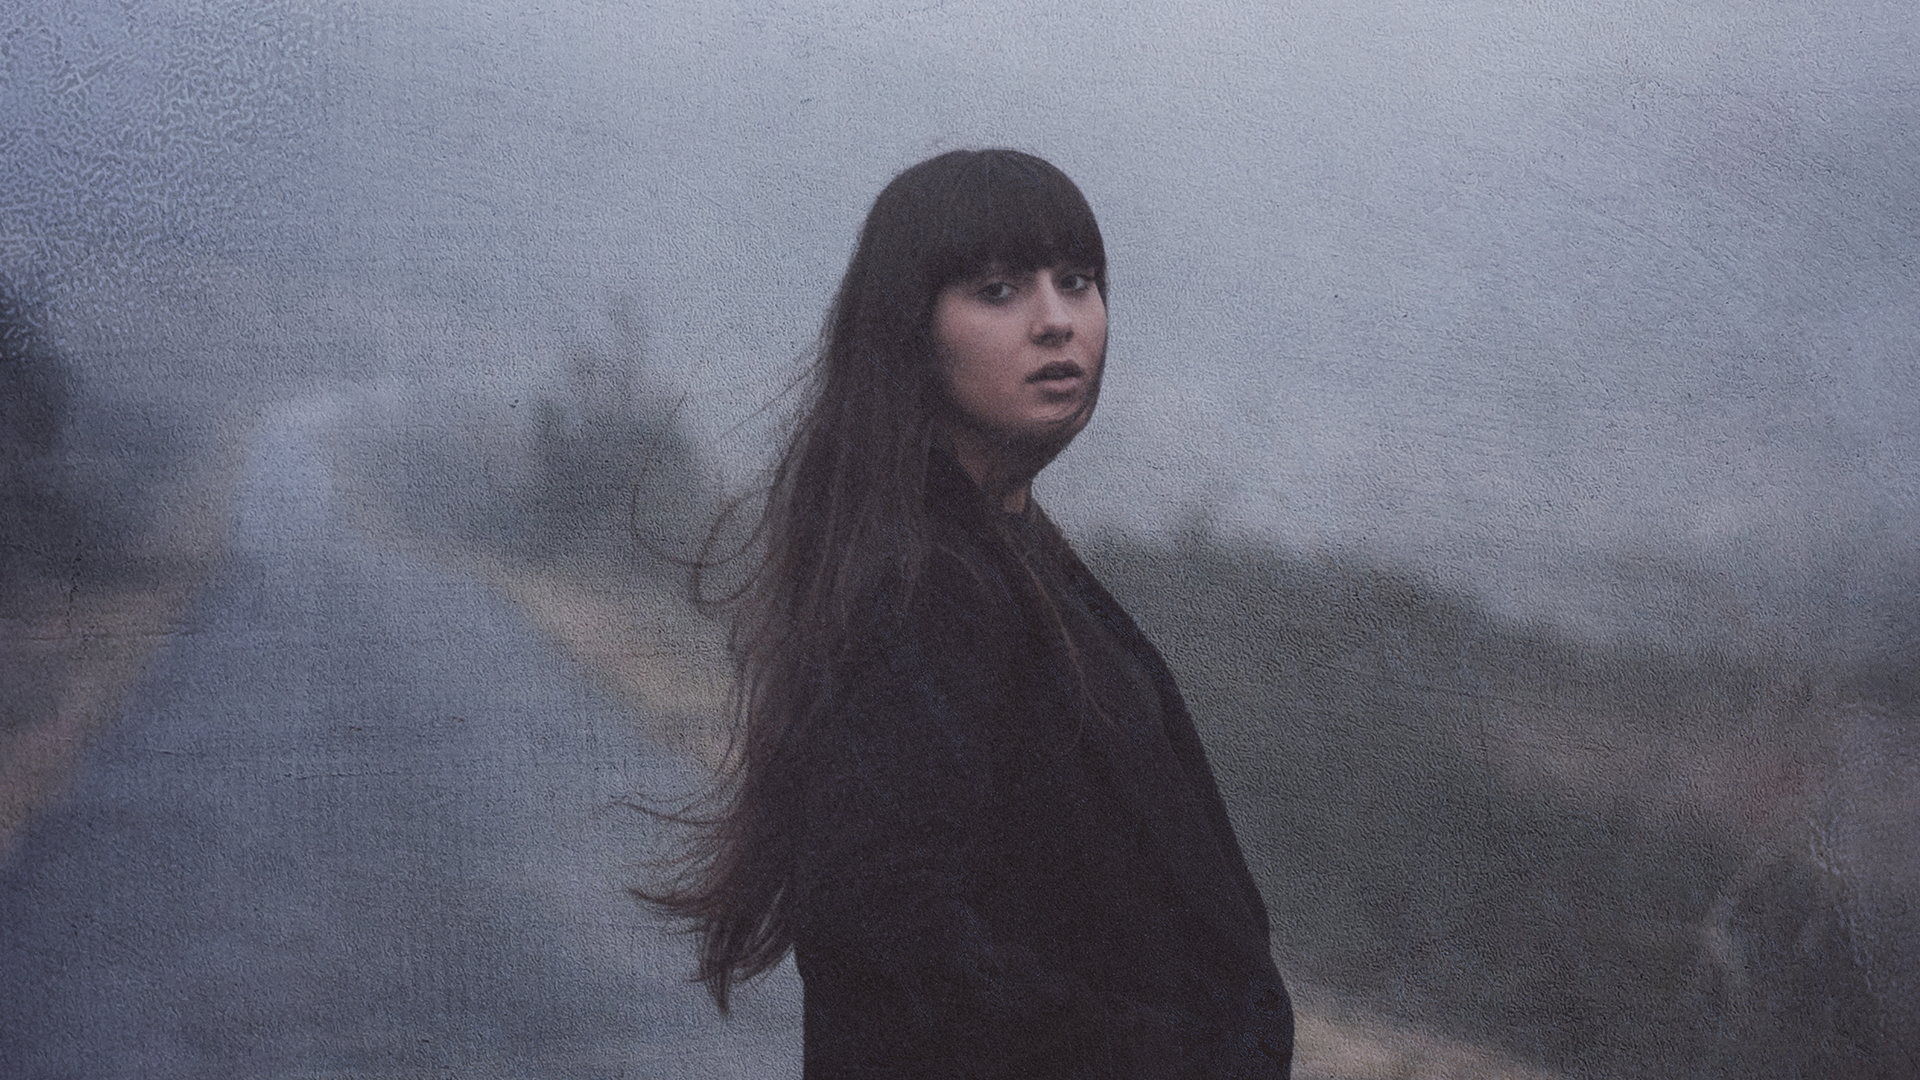
AFTER TEXTURES & COLOR GRADE
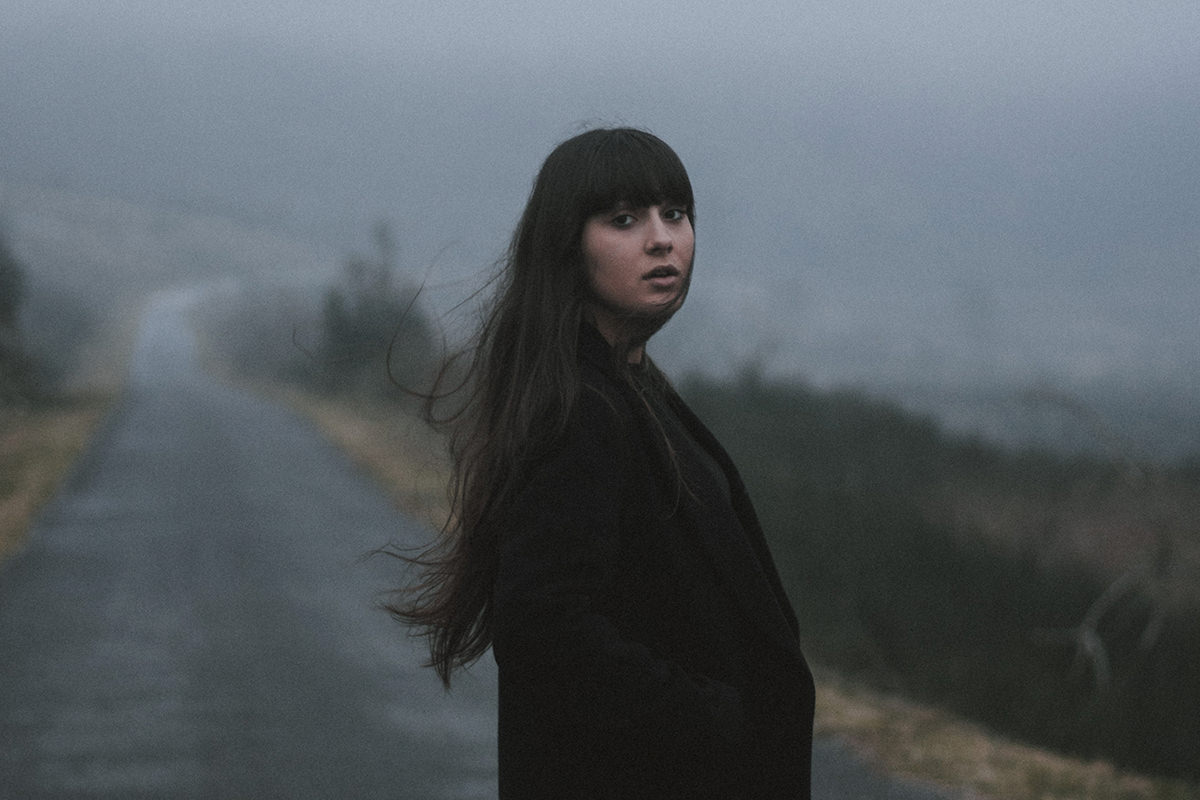
BEFORE
Create Textures from Photos
Finding & Adding Textures to Photos
Textures are a great way to add style and drama to a photograph. Better yet, they’re relatively easy to apply once you have the right ingredients.
First, you’ll need a photograph that would benefit from adding textures. Generally, a moody, dramatic, or stylish image tends to work best. (For our example, we chose a dark and moody image.)
Next, you’ll need some images that will function as textures. The most obvious type are close-up shots of various surfaces and materials (weathered paper, metal, fabric, etc). You can also get creative with these as well with images of clouds, or even birds-eye landscape photos.
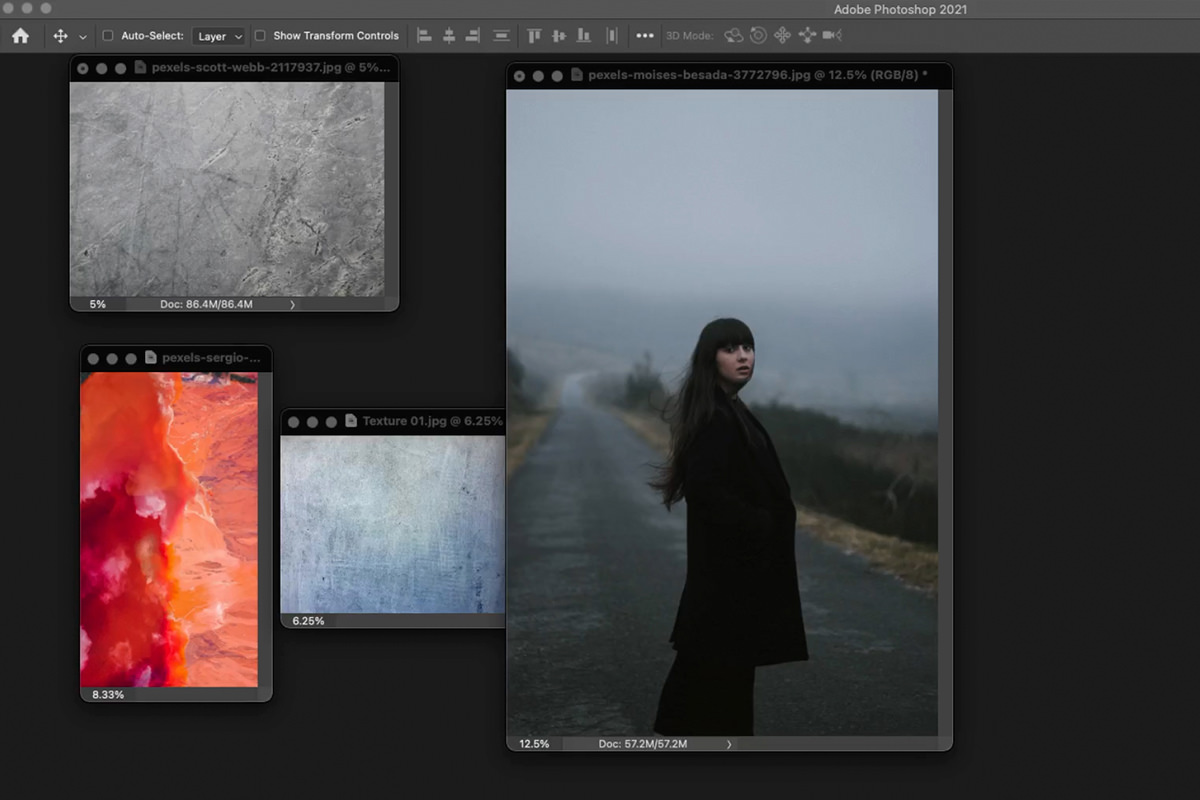
We’re going to show you how to apply three different textures using a variety of tools and techniques to dial in the right look.
To get started, simply drag and drop the image you want to use as a texture over top of the photograph.
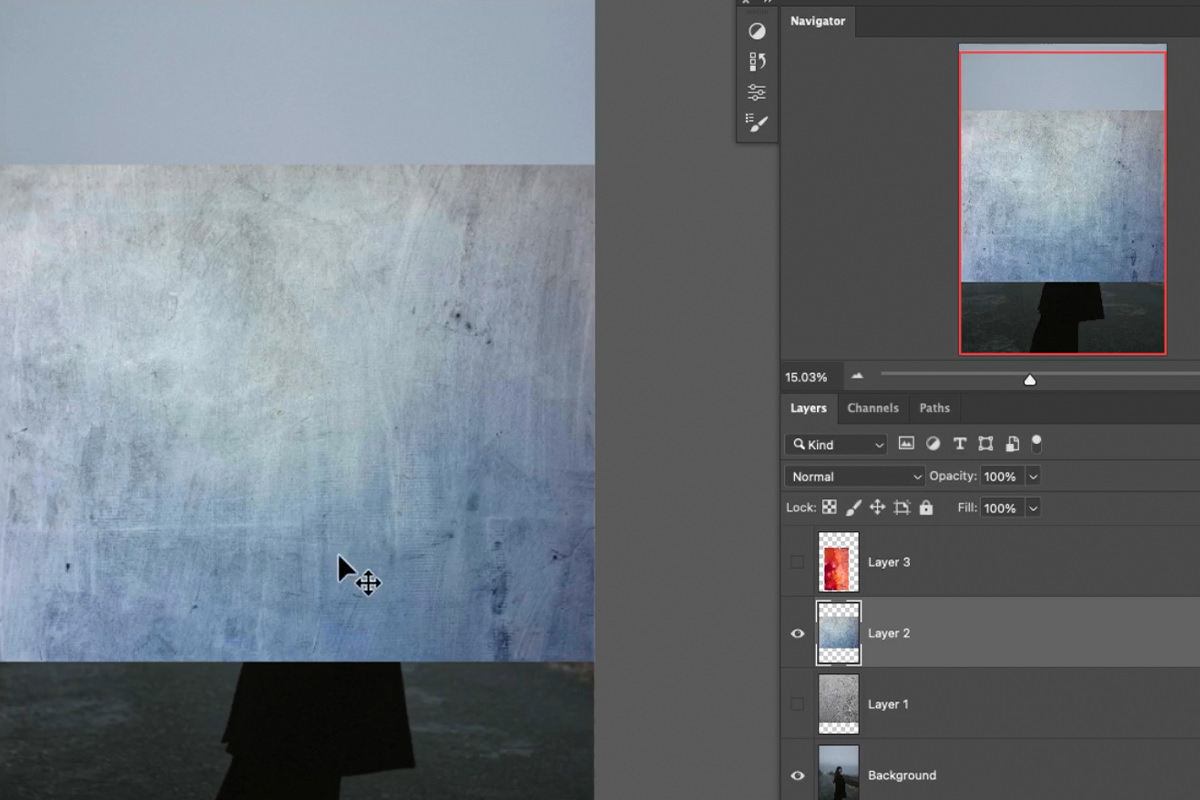
Once the texture is on top of the main image, it’s relatively easy to start blending it into the photograph below. The main tools that we’ll be using are Blending Modes. Blending Modes allow us to tell Photoshop how we want a Layer in the Layer Stack to interact with all of the Layers underneath it.
That may sound complicated (and if it does, we have an entire PRO course that goes over everything you could ever want to learn about Blending Modes), but you don’t need to know exactly how Blending Modes do what they do.
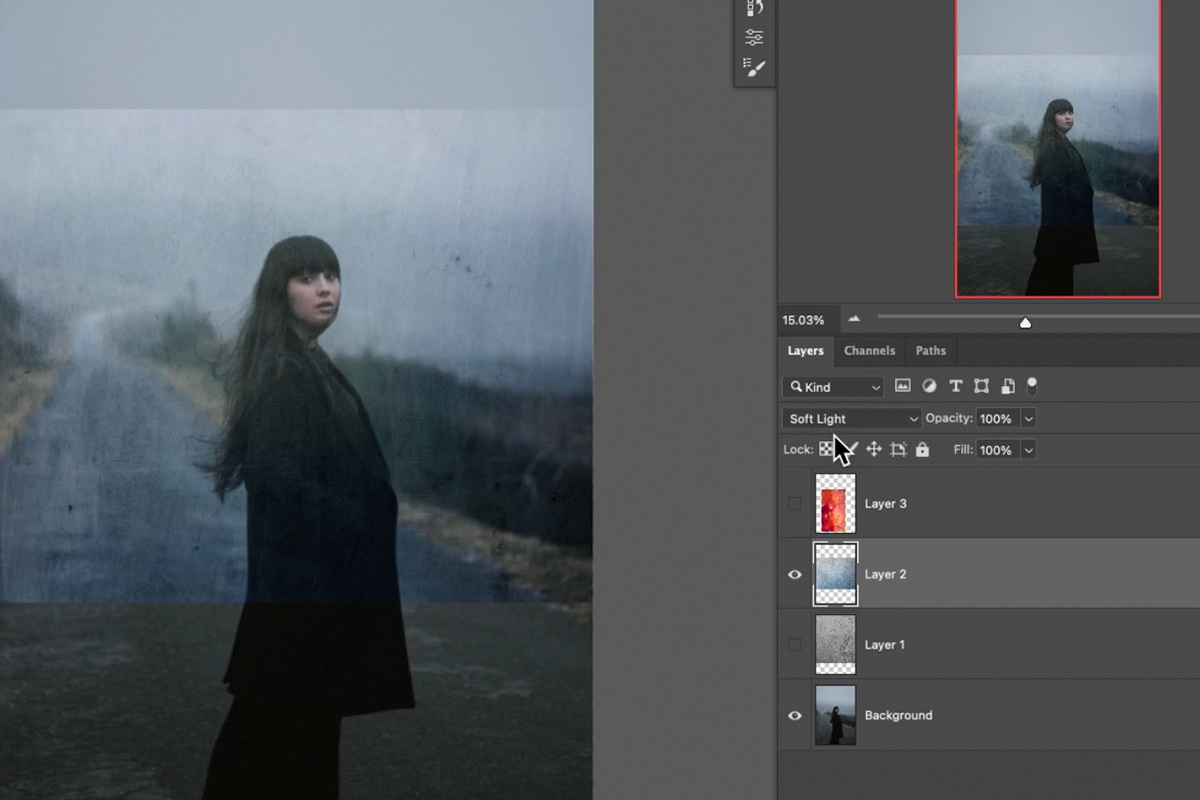
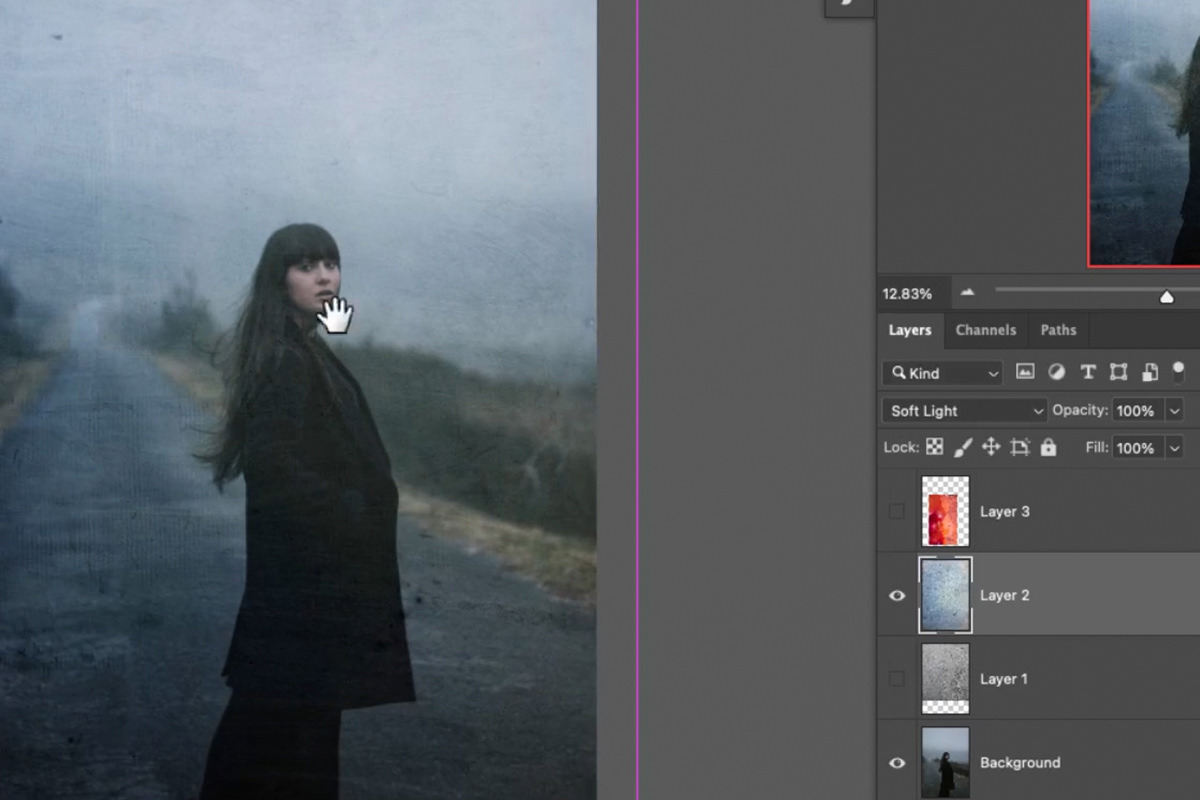
It’s easy enough to experiment with them to see what effects that create. In the image above, we’ve set the texture layer to the Soft Light Blending Mode. Doing so made a lot of the layer invisible, leaving behind only subtle traces of the texture we want.
Blending Modes can be changed or set back to Normal at any time, so cycle through each of them to see what you like. And, when in doubt, Soft Light and Overlay tend to be very reliable when applying most textures to another image.
Once you’ve found a Blending Mode that works, you can rotate and transform the texture layer so that it covers the background photo!
This is the basic way to extract a texture from an image and apply it to another photo.
Reduce Textures Over a Subject
Textures can add style, but we don’t want them to interfere too much with the subject. Texture effects on people can either be distracting or create an unflattering result.
It’s easy enough to reduce the effect the texture has on the subject. Make any texture layers invisible and select the background image with the subject. Then go to the Select Menu and choose the Subject option. This will create a rough selection of the subject in the photo.
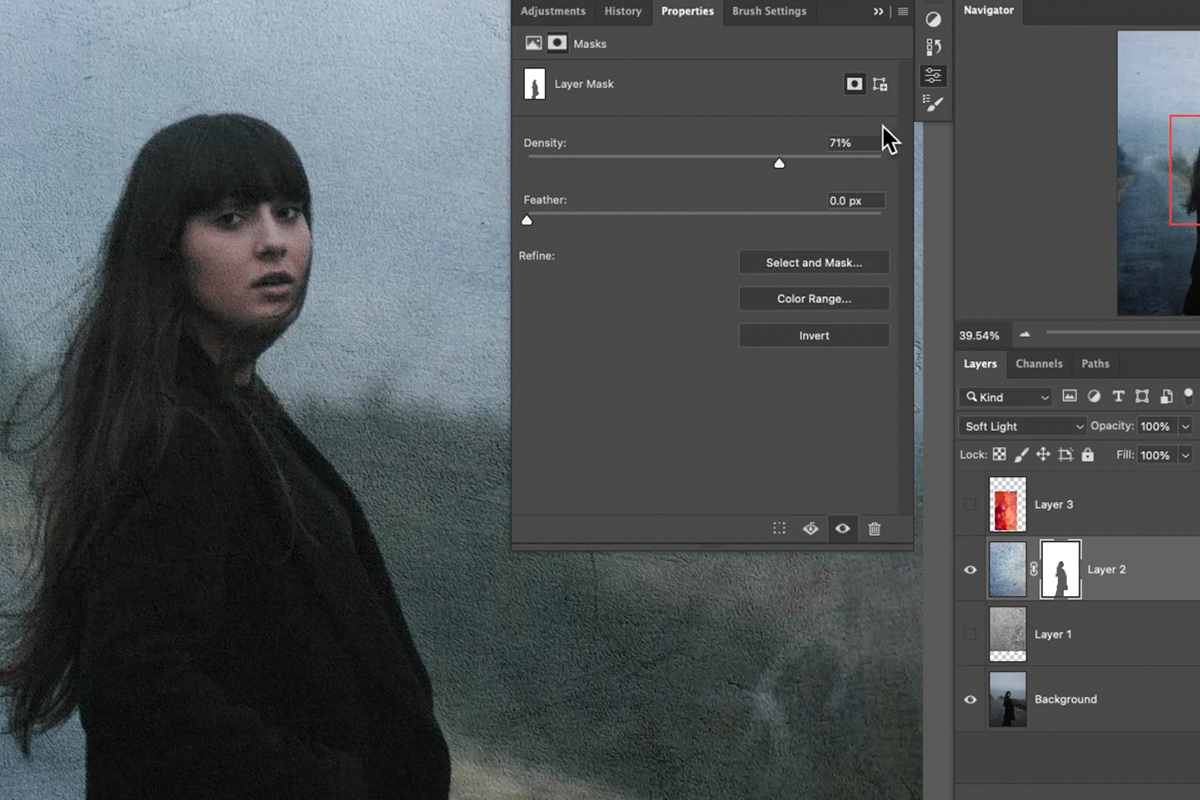
Make the texture layer visible, and then, with the subject selection still active, add a Layer Mask to the texture layer. Select the Layer Mask icon and hit CTRL or CMD + I to invert it. This will make it so the texture does not appear at all over top of the subject.
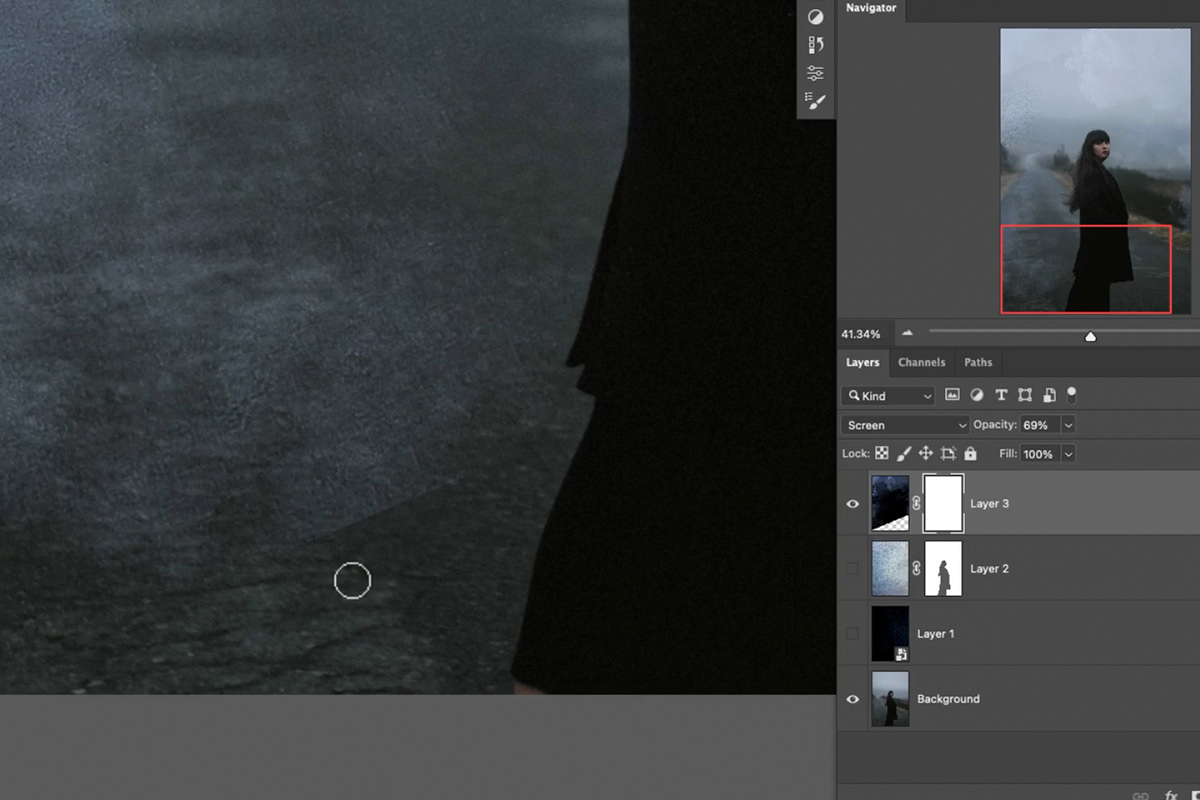
We just want to reduce the texture over the subject, not remove it completely. You can change the Density of the Layer Mask by selecting the Mask and then raising the Density Slider within the Properties Menu. This will allow the texture layer to once again be visible over top of the subject, but with a much more subtle effect.
Clean Up Textures with Healing Tools
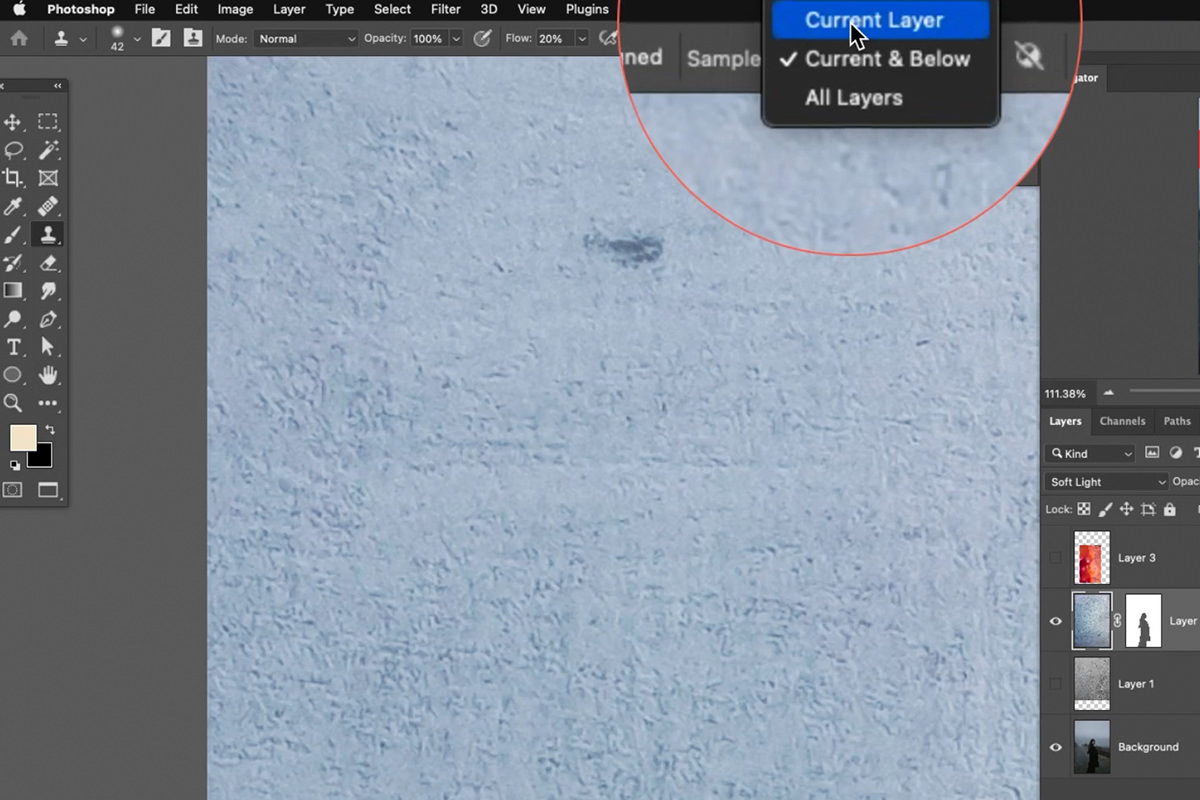
You can also remove any spots from the texture that are too obvious or distracting. Select the Clone Stamp Tool and set the Sample option in the top toolbar to Current Layer.
Hit ALT or OPTN and click on an area where the texture looks good. This will take a sample of that area that you can use to cover up spots you don’t want.
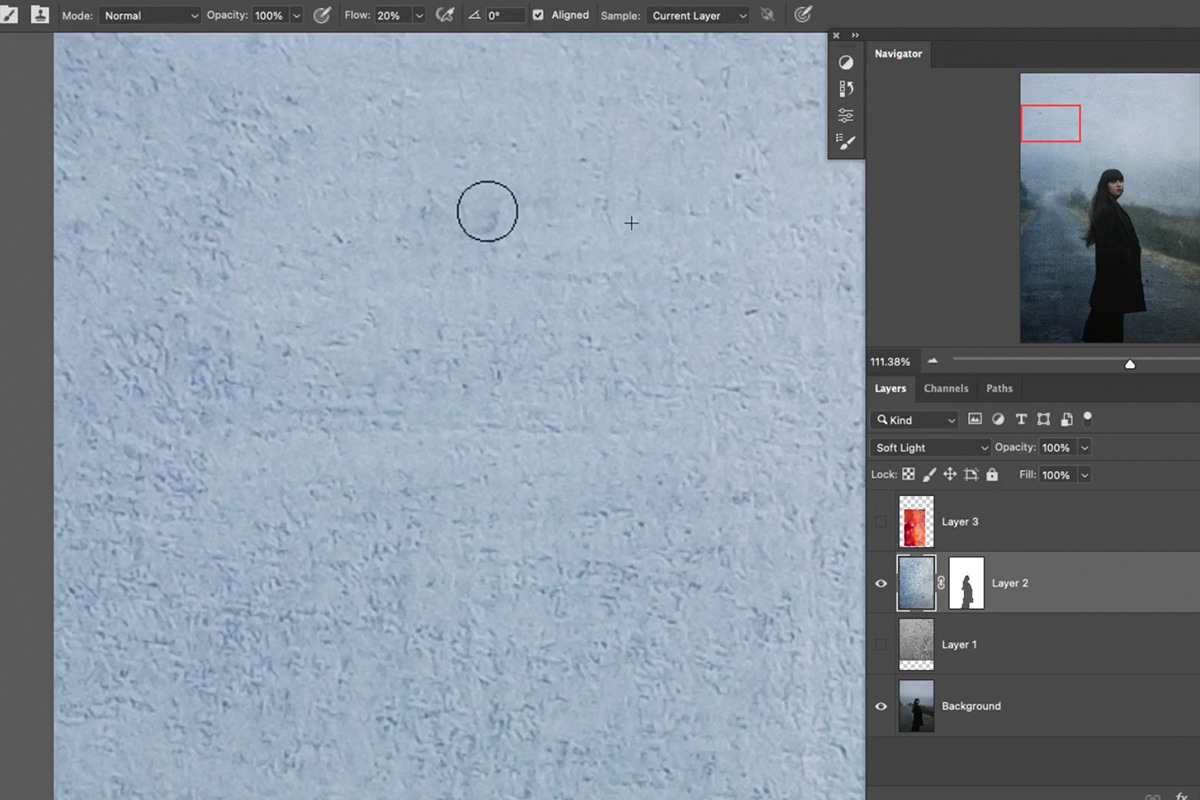
Then, simply paint over any spots or areas you want to cover up.
Texture Effects & Adjustment Layers
There are a variety of tools we can use alongside Blending Modes to affect how the texture layer appears in the image below.
Before trying any of these, be sure to right-click on the texture layer and select Convert to Smart Object. This will ensure that any adjustments we add can be changed or removed later.
Adjust Visibility with Levels
Some textures might need additional adjustments to help them blend more naturally into a photo.

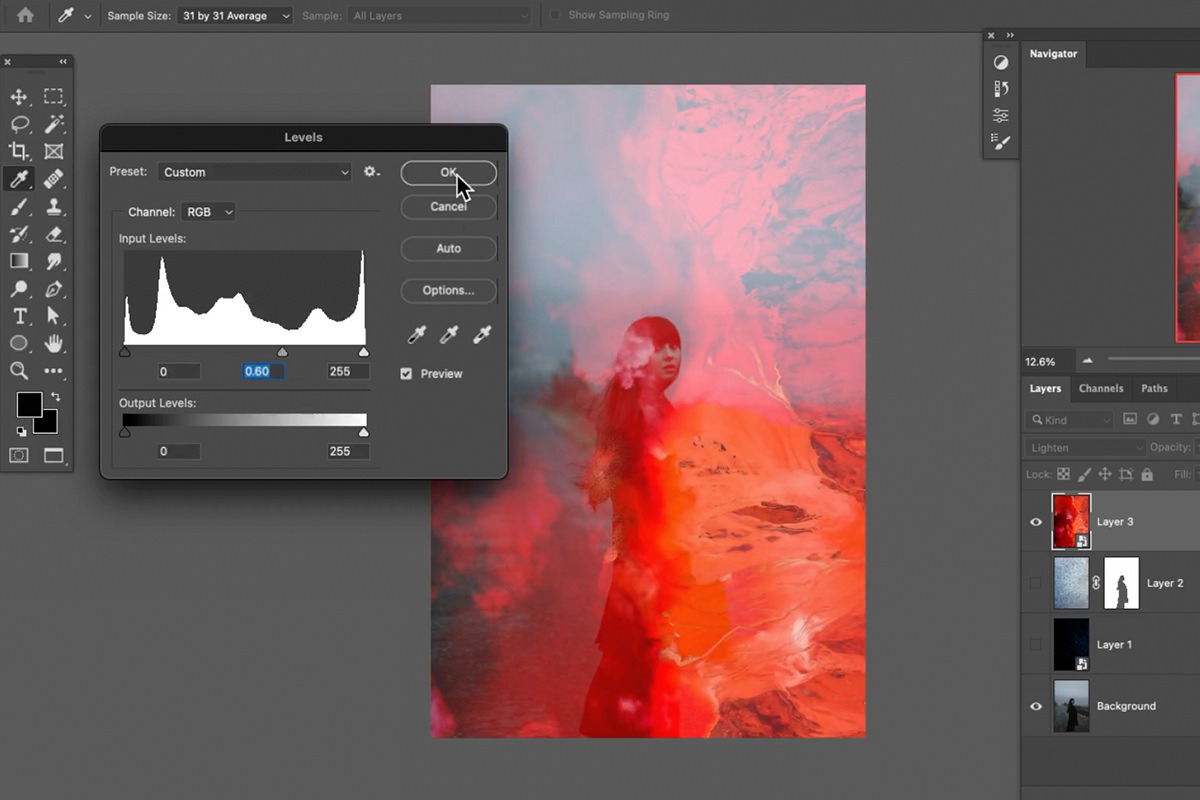
This texture has a lot of dark, heavy lines that might just be too distracting for a simple Blending Mode change. We can adjust how the Blending Mode treats the texture by using a Levels Adjustment to dial-in a more subtle look.
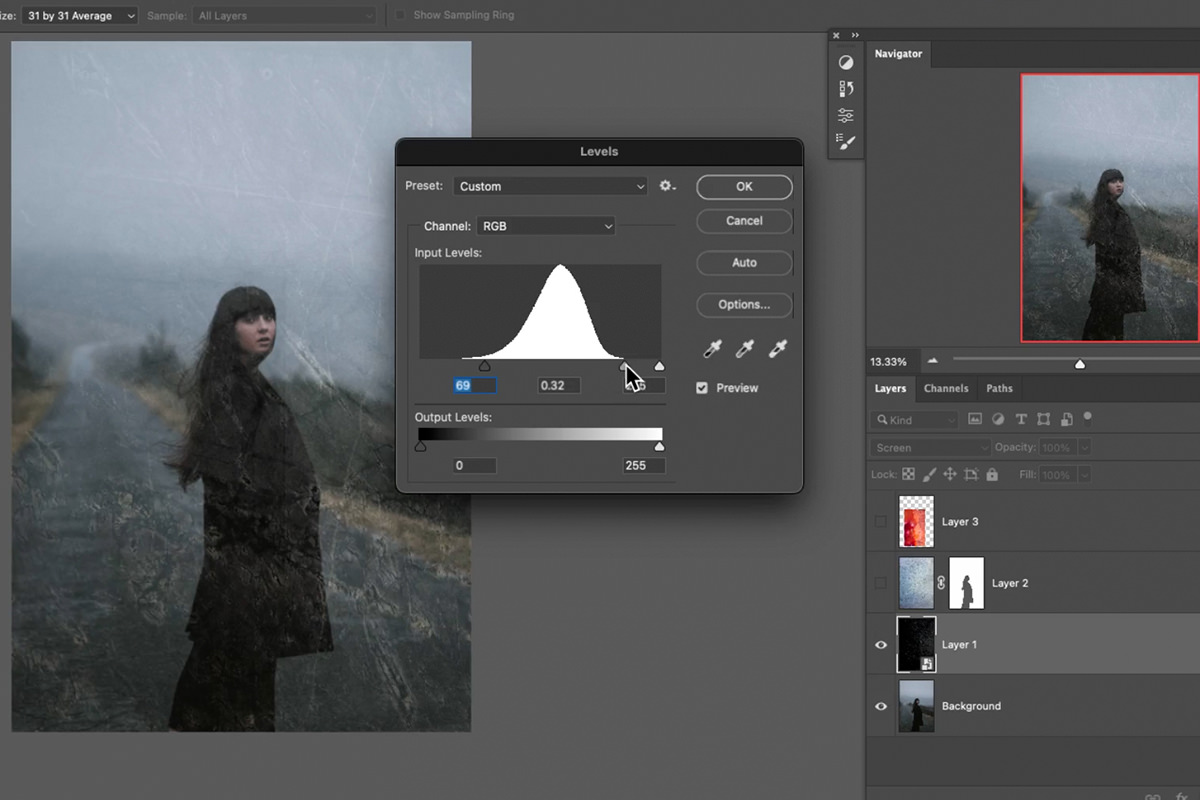
With the texture layer selected, hit CTRL or CMD + L to open the Levels dialog. We made the darks darker by moving the black slider to the right. We then made the midtones darker by moving the middle gray slider to the right as well.
This should make the overall appearance of the texture less pronounced, but we’re not quite done yet!
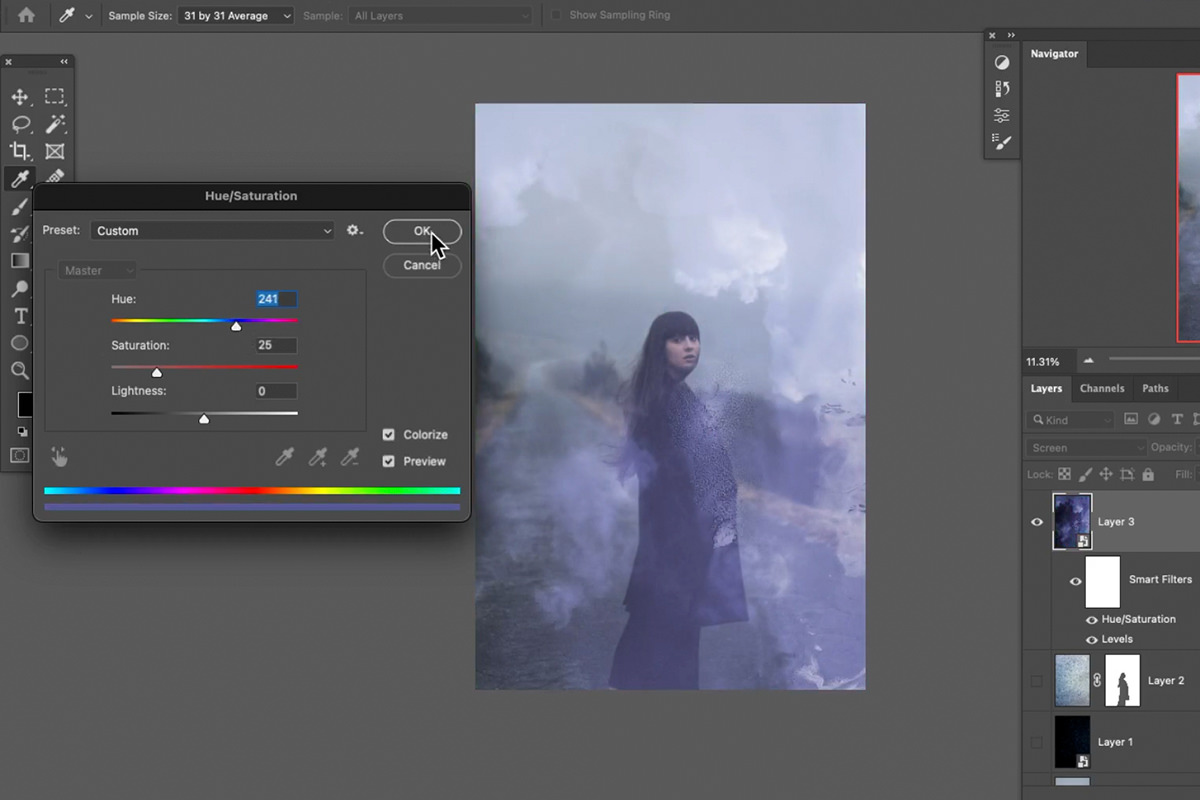
Adjust Color with Hue/Saturation
In addition to making the texture more subtle, adjusting the color to match the rest of the photo can help it blend in more seamlessly.
You can do this by selecting the texture layer and hitting CTRL or CMD + U to open the Hue/Saturation dialog.
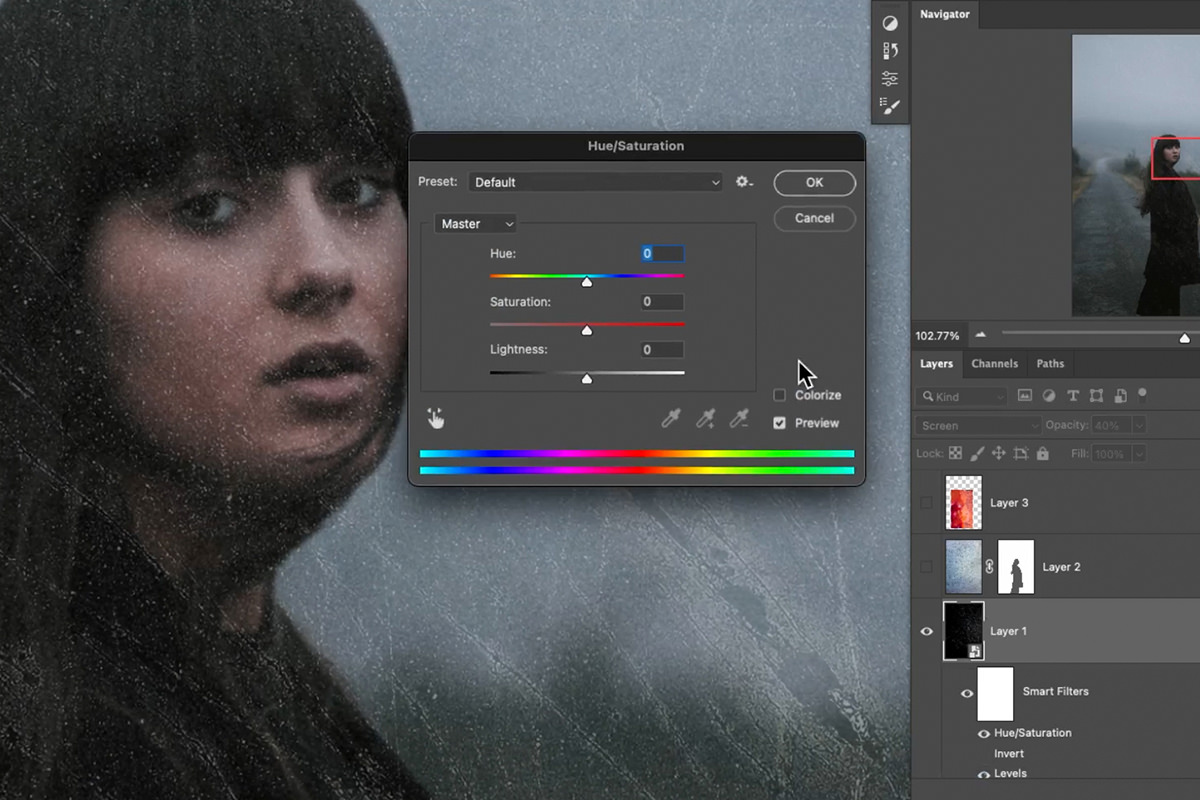
We checked the box for Colorize and then adjusted the sliders until the color of the texture started to match the color of the background.
Adjusting the color is an often-overlooked step of adding textures to photos and it can make a huge impact on the final result.
Adding Additional Effects
We’ve used some pretty standard textures up until now, but don’t forget that you can get creative with your texture choices.
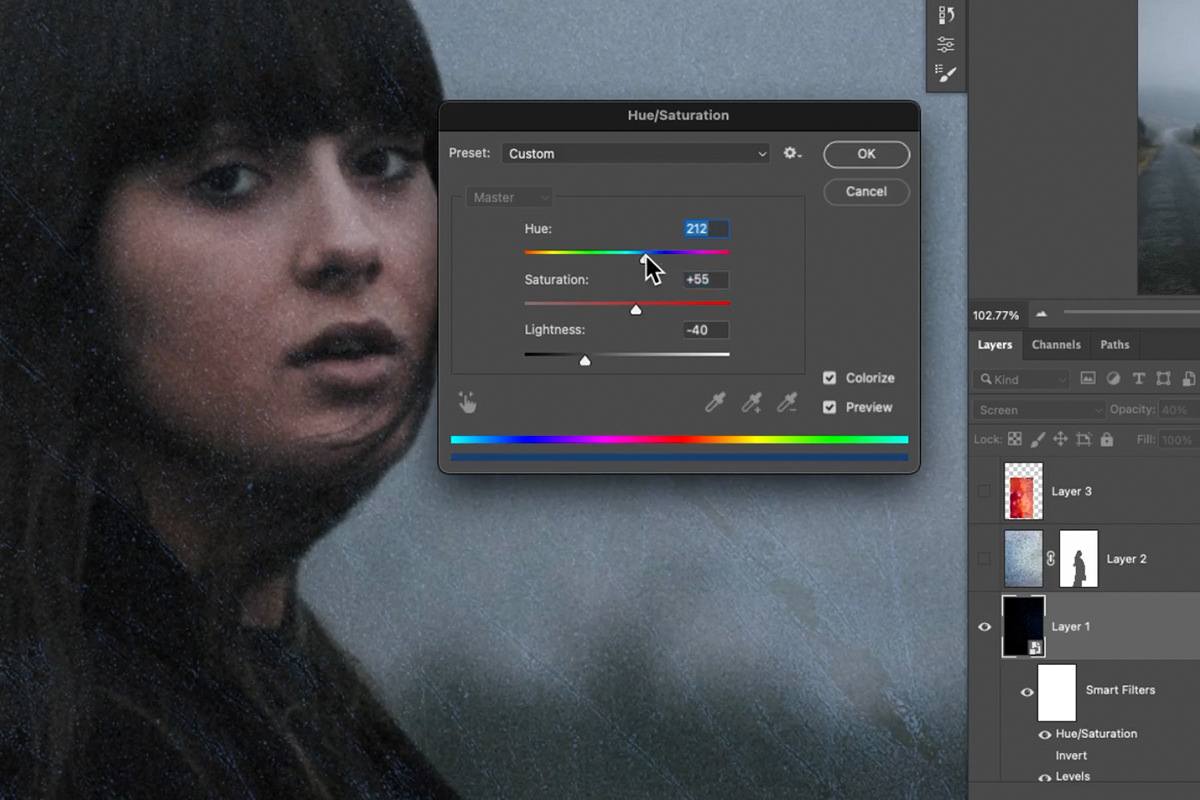
This is an aerial shot of landscape that, at first glance, might not seem like it would work at all as a texture for our example photo.
But, if we set the Blending Mode to Lighten and use Levels to tone down the effect, we start to see a smoky texture that we might be able to use.
We can also change the red color that doesn’t match our image to cooler tones that do. Again, using the Hue/Saturation adjustment we demonstrated earlier.
In just a few short steps, we took something that didn’t look like it could work at all as a texture and transformed it into something that almost fits with our background image.
We’re getting close, but there’s a few more techniques that can help us get the perfect look.
Moving & Transforming Textures
Once you’ve locked in any Levels and Hue/Saturation Adjustments, it might help to rasterize the texture layer so that you can move it and transform it more freely.
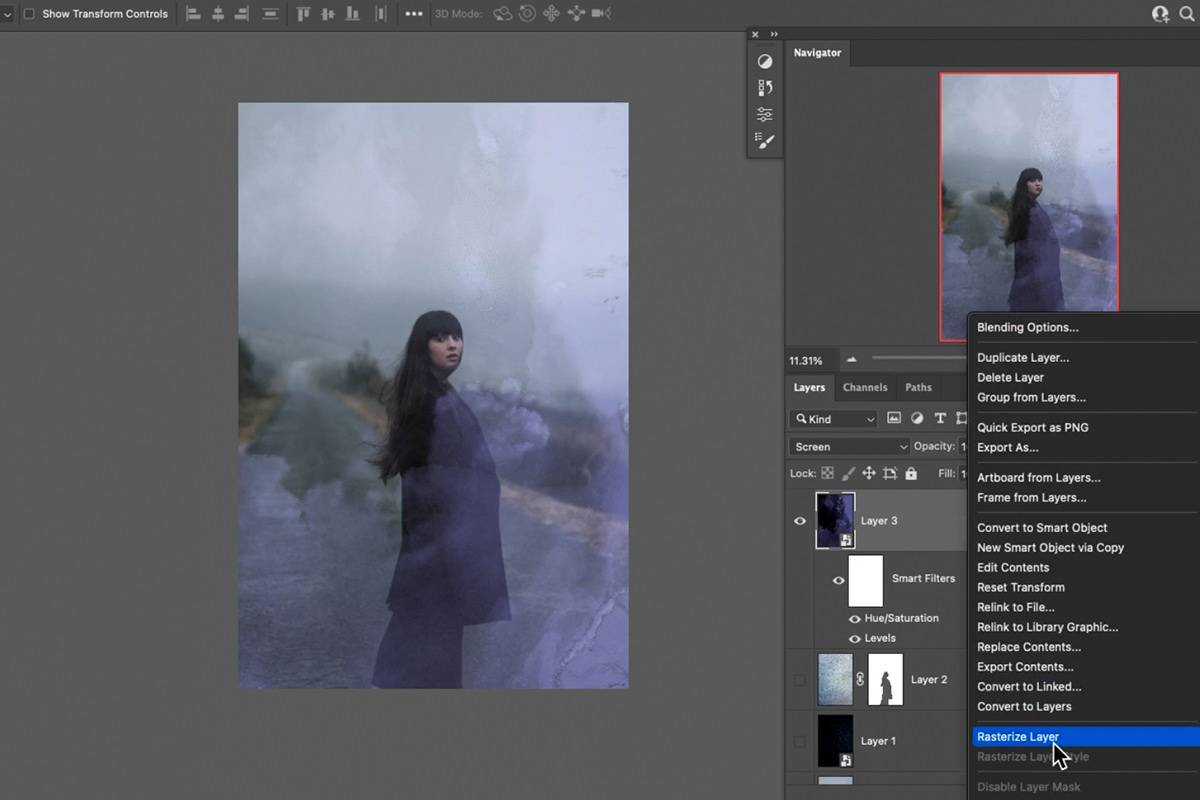
To rasterize a Smart Object, right-click on the layer and select Rasterize Layer.
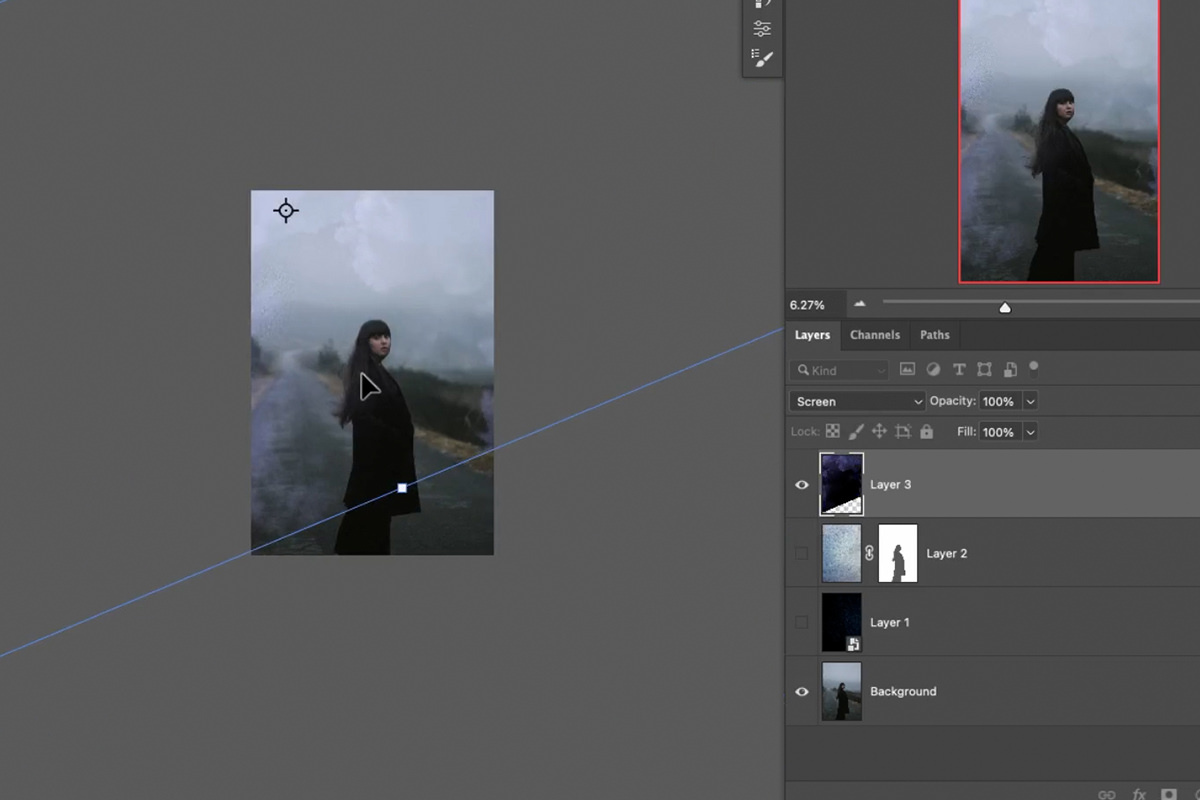
Now we can scale, rotate, and transform the texture and all of the adjustments we made will remain visible.
Positioning a texture is just as important as any blending or effects you apply to it. Take your time and experiment with a variety of sizes and positions until you find a spot that fits into the overall composition.
Depending on how you place the texture, you might end up with visible lines from the edge of the texture layer. Use a soft brush set to a low flow to paint black on the Layer Mask of the texture layer to remove any edges and to help the effect fade out naturally.
Guide the Eye with a Vignette
We said textures can be great, but they can be pretty distracting. Using textures effectively usually means finding the right balance between style and making sure the subject of the image stands out.
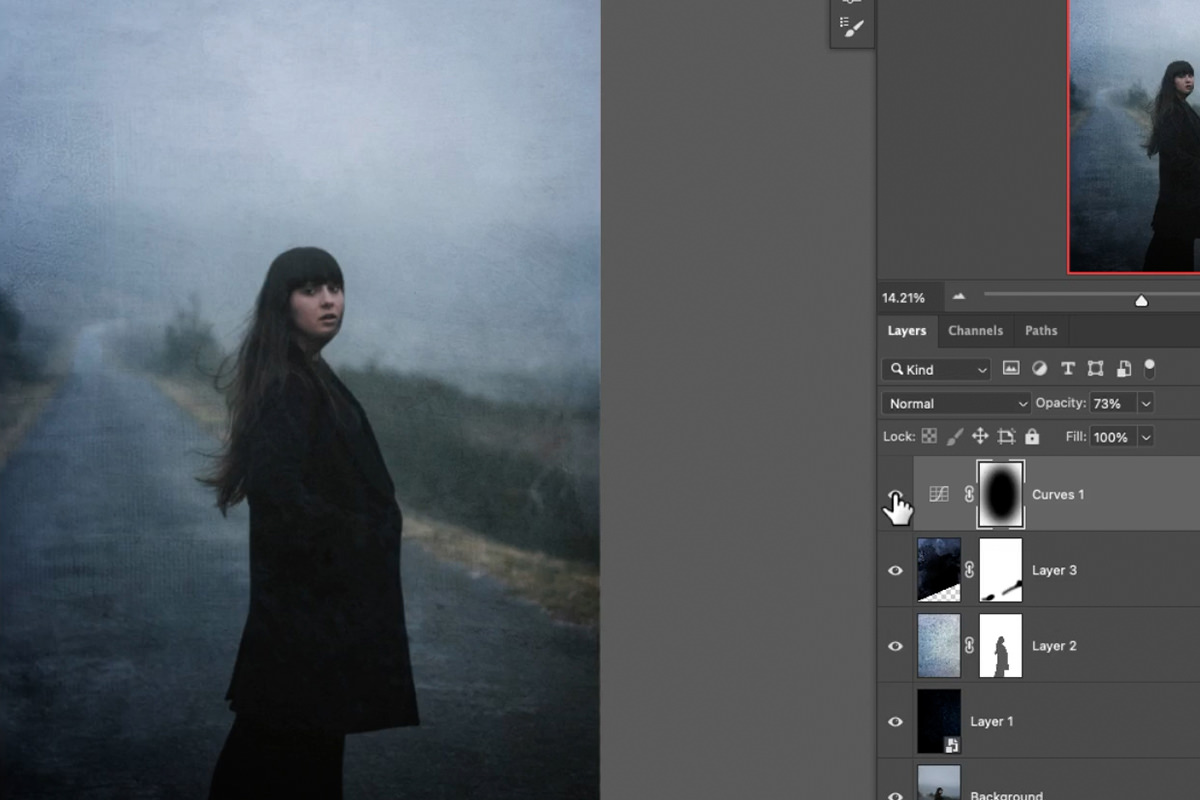
Vignettes are a great tool that can help draw more attention to the subject. To add a vignette, create a Curves Adjustment Layer and drag the middle of the curve down to darken the image.
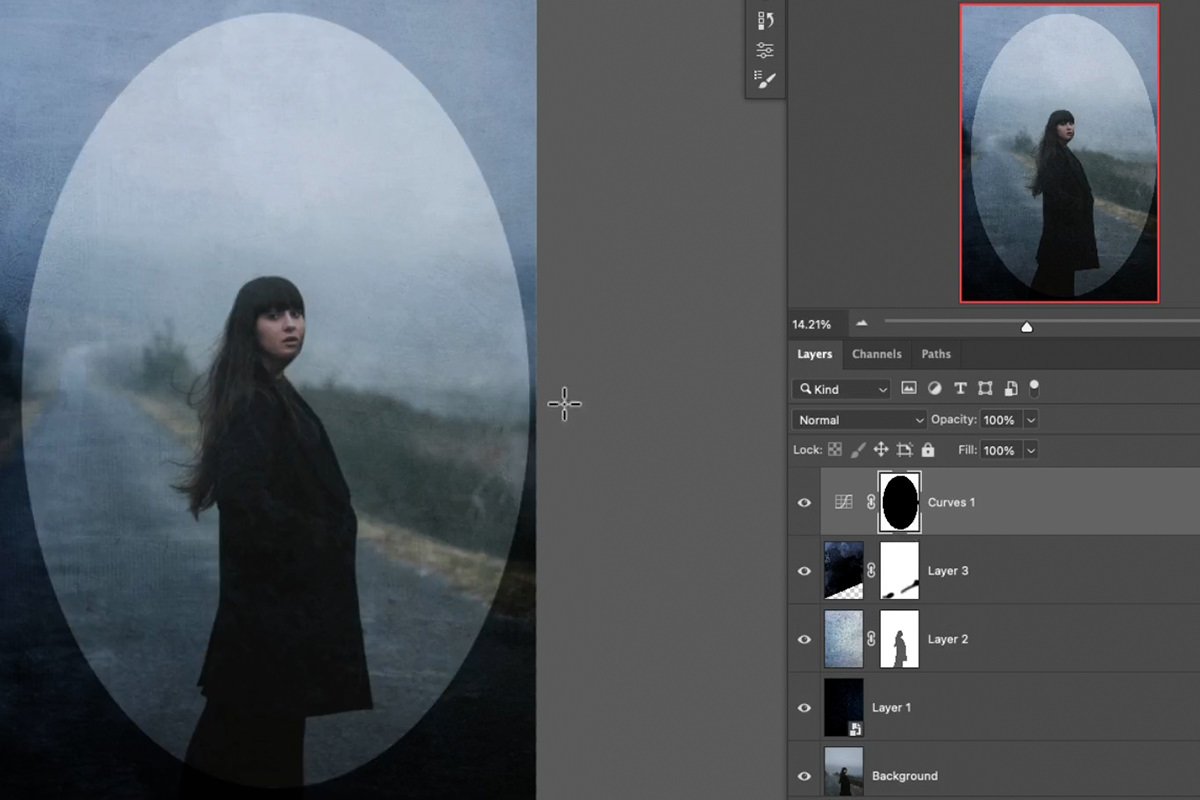
Next, use the Elliptical Marquee Tool to create a large elliptical selection, select the Layer Mask of the Curves Adjustment Layer, and fill the selection with black.
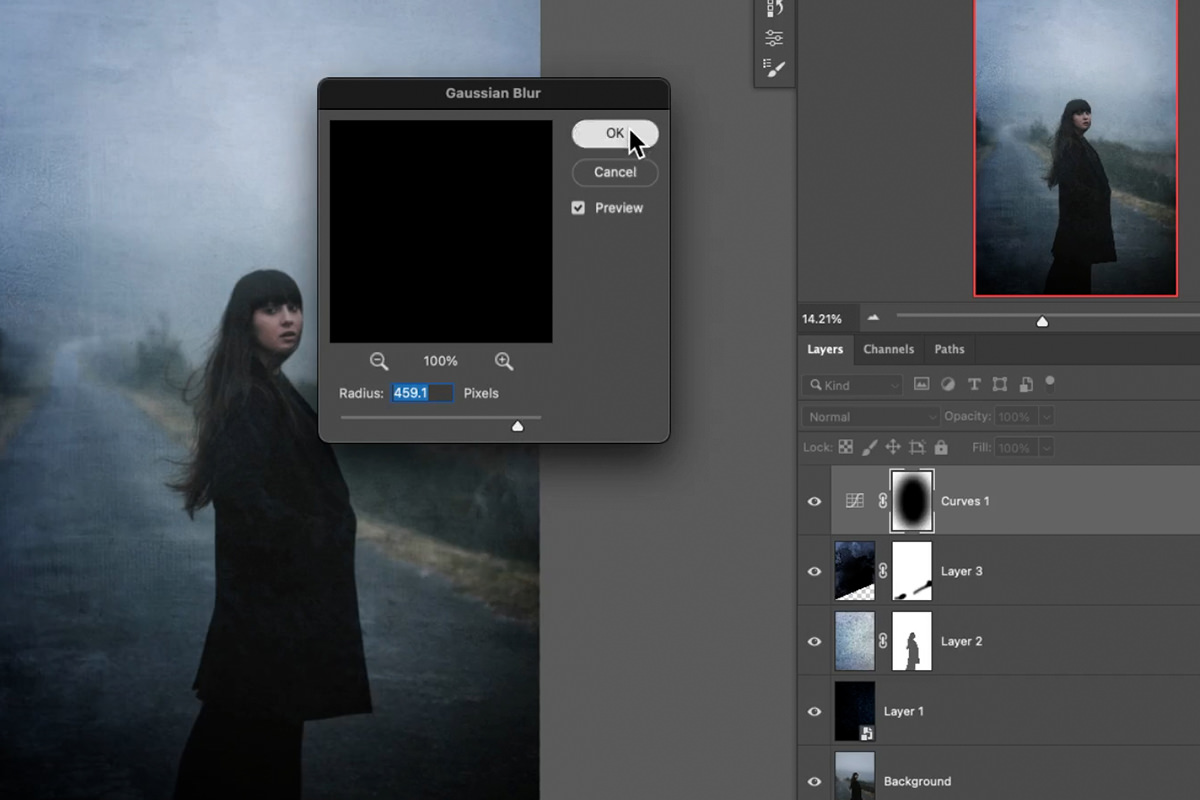
Select the Curves Adjustment Layer and add a Gaussian Blur to create a soft and subtle vignette effect.
Tie Everything Together with LUTs
The best way to finish off a texture effect is with some additional color grading for the entire image. This will adjust the color of both the image and any added textures, creating a more photorealistic effect.
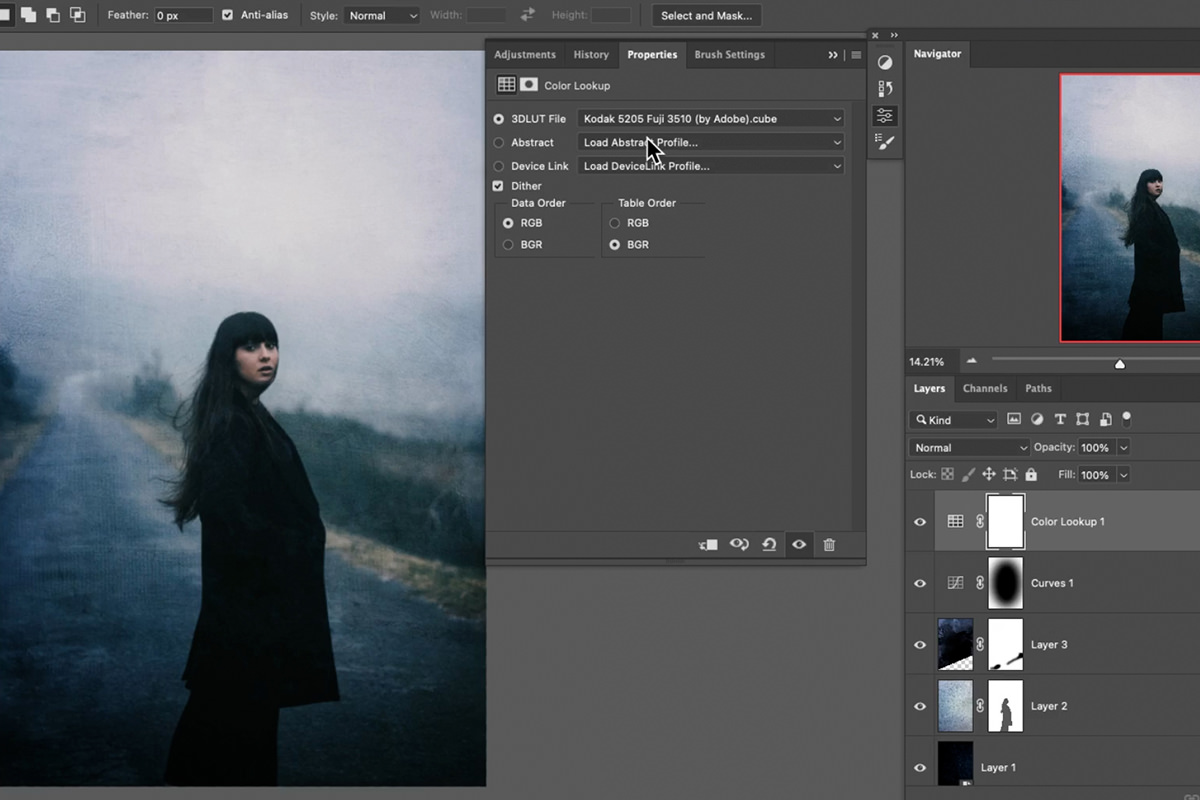
Create a Color Lookup Adjustment Layer on top of the layer stack. If you haven’t heard the term color lookup before, you might be more familiar with the common abbreviation: LUTs.
Photoshop comes with a variety of preloaded LUTs that can help make color-grading a breeze. If you want even more options, we have a large (and growing) library of LUTs that’s included with PHLEARN PRO!
Simply select a look that you like and that works for the image you’re working on. Remember that the main image, the textures you use, and the final coloring should all work and fit together.
Use these tools and techniques to add style and drama to your own photos!