
Download Assets
description
Fix color and exposure in Photoshop using the Camera Raw Filter! In this tutorial we’ll be using masking techniques to make targeted, non-destructive adjustments to our image. We’ll even apply a radial gradient for localized warmth, and use linear gradients for subtle vignetting.
Go PRO:
Want to learn more about Photoshop, but you’re unsure where to start? Explore our PRO tutorial Photoshop Fundamentals: Aaron’s Top 10 Essential Tools & Techniques. Discover Aaron’s Top 10 tips, including Camera Raw, blend modes, selections, smart objects, and more!.
Share
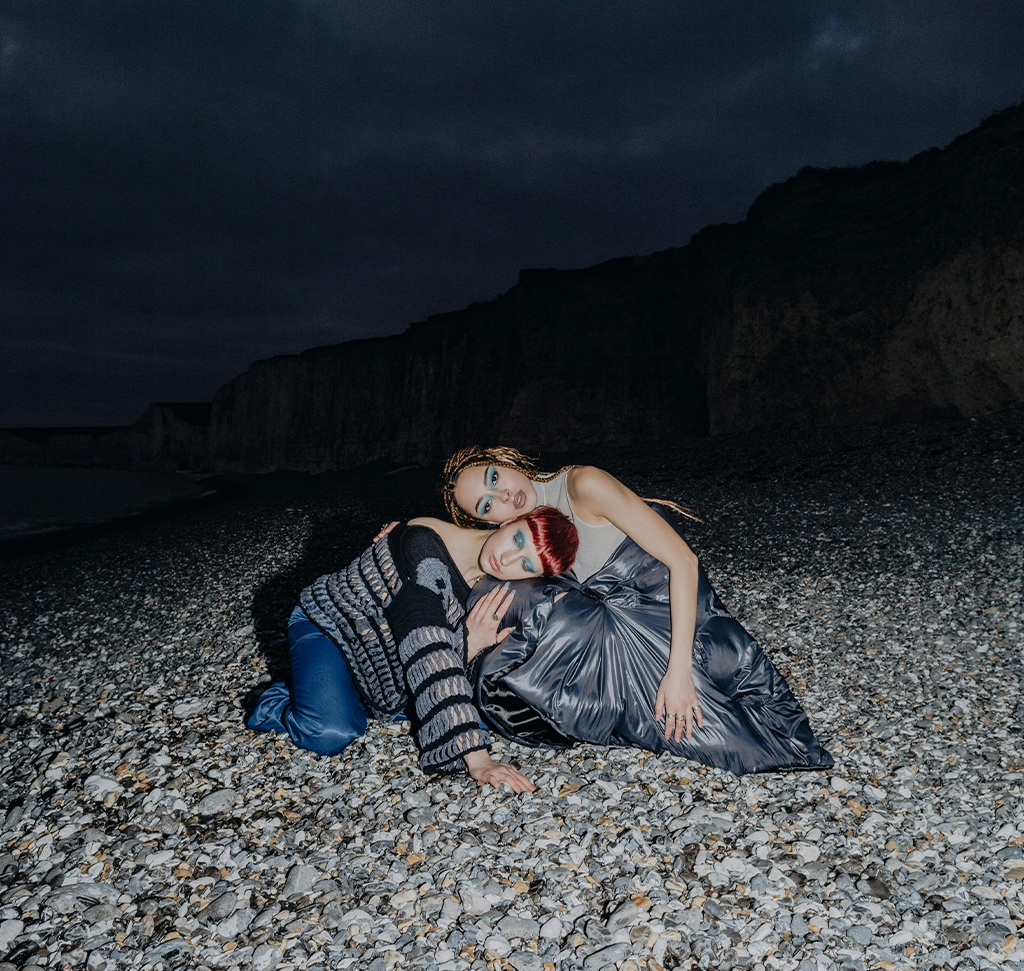
AFTER
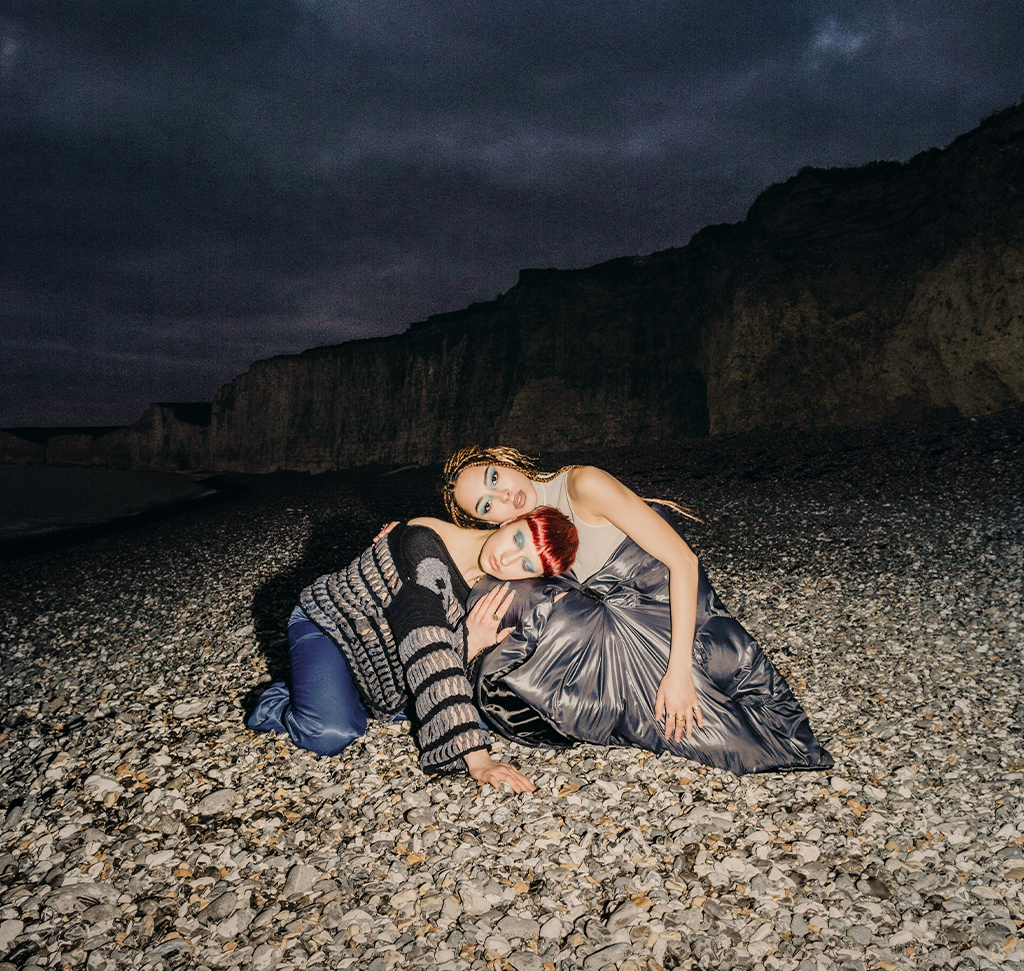
BEFORE
Quickly Perfect Any Photo
Many users overlook the Adobe Camera Raw in Photoshop, often seeing it just as a tool for raw files. However, this powerful feature is available for JPEGs and other formats through the Filter menu, making it an essential, non-destructive editing tool with immense potential for professional-grade color and exposure corrections using advanced masking features. In this guide we’ll show you how to correct the exposure and color in a few easy steps.
Getting Started
1. Before starting, convert your image layer into a Smart Object to allow for non-destructive, adjustable filtering. Go to Filter > Convert for Smart Filters. This ensures you can re-edit your ACR adjustments at any time.
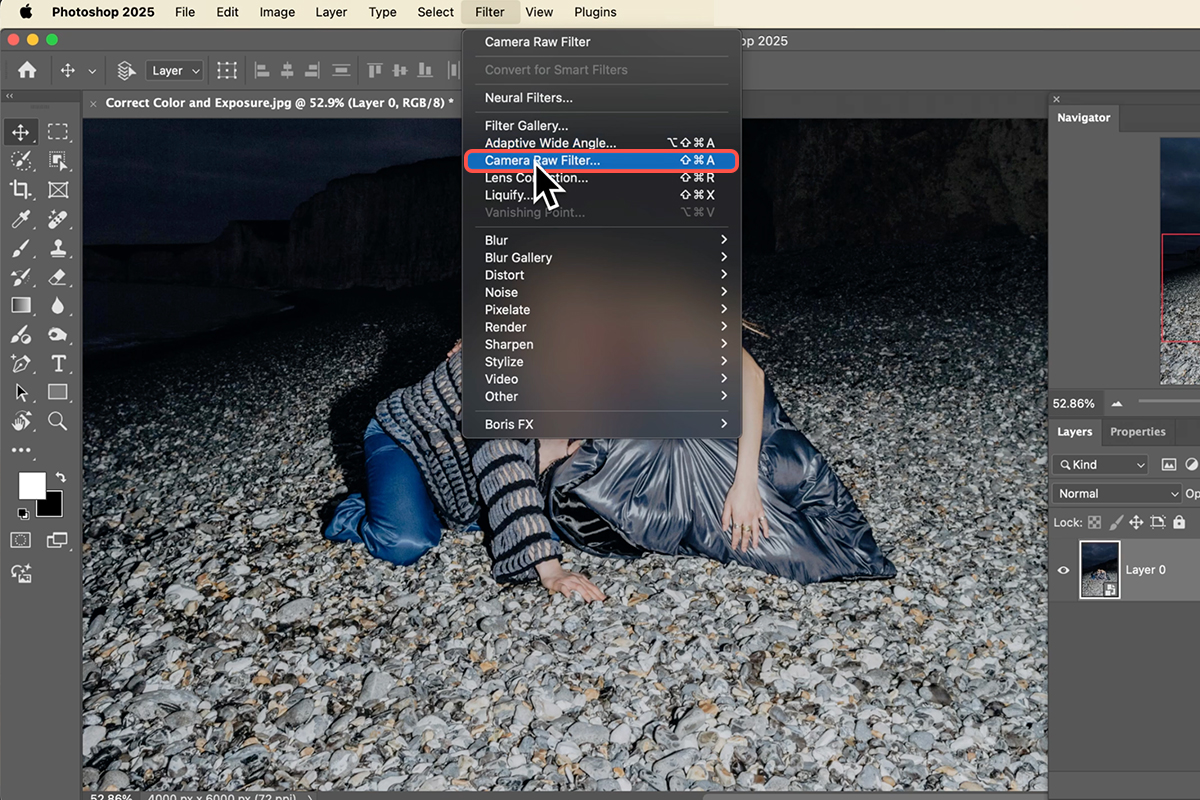
2. Next, open the main editing window by going to Filter > Camera Raw Filter. Zoom in and observe the image, noting areas that need correction, such as the overall cool color temperature or lack of detail in the background.
Detail with Masks
Use the new Masking feature in ACR to address specific areas.
3. First, select the Sky and Mountains using the automated subject detection, creating separate masks for each. For the sky, increase the Exposure, Contrast, and Clarity (found under Effects) to bring out detail.
4. For the mountains, slightly raise the Exposure and adjust the Color Temperature to a warmer tone.
5. Next, create a new Radial Gradient mask over your subjects. Adjust the Color Temperature and add a little Magenta to give them a warmer, more natural skin tone. Use the ‘V’ key to show/hide the pins and tools for adjusting the mask’s position and feathering.

Focus and Finish
6. To direct the viewer’s eye, create a subtle vignette effect using two Linear Gradient masks—one dragged from the bottom up and another from the top down. For both, slightly decrease the Exposure and Saturation to darken the periphery.
7. Finally, create one last Radial Gradient mask over your subjects and slightly increase the Exposure and Shadows to make them pop. Use the feathering slider to ensure all gradient effects blend naturally.
8. Hit OK to apply the non-destructive filter. You can double-click the “Camera Raw Filter” in the Layers panel at any time to re-enter and fine-tune your masks.
You can now see the significant impact the Camera Raw Filter and its masking tools have on your images! By working non-destructively with a Smart Object, you have complete control to refine your color and exposure adjustments anytime. This technique is invaluable for bringing professional quality and focus to any photograph.


