Catalog > Free Tutorials > How to Black Out Eyes in Photoshop

Black Out
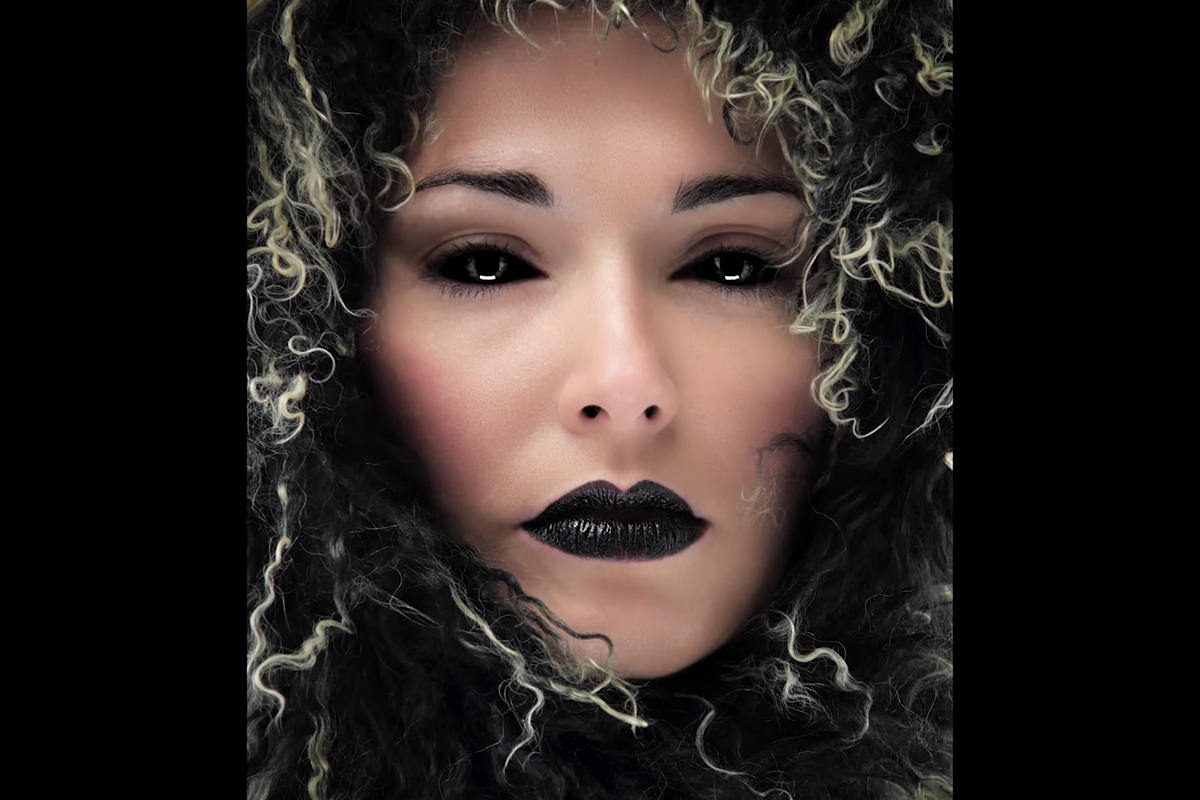
Making eyes all black is faster than you might think, and is definitely a terrifying effect to add to your images! Join us in the spirit of Halloween as we show you how to black out eyes in Photoshop! Looking for Black and White instead?
The Trick
First and foremost, take a look at the catch Lights in the eyes of your subject. Those highlights will need to shine through, which is the ultimate trick to making the effect look realistic.
The Steps
- Begin by painting the inside of the eye with a black Brush.
- Create a Curves Adjustment Layer and drag the Curve down to create a very dark Adjustment.
- Invert the layer, and then choose a white soft edge Brush. Now you can paint around the edges of the eye, and there will be a more believable Transition between the black and the eyelids. This Curves layer should help a little bit, but the eye will still look extremely fake. The Depth you need in the eye can be added back using the Channels tab.
- Find the channel that has the greatest Difference between the highlights in the eye and the other tones (this is usually the blue Channel).
- Duplicate that Channel, and then create a Levels Adjustment Layer and bring the Highlights up and the Shadows down. It should look very contrasty and scary, but don’t worry! Next, take only the highlights and turn them into a selection.
- Go back into the layers and create a New Layer on top of everything. Paint white with the Brush Tool to Draw in the Highlights in the eyes. This is what will truly gives life to your black eyes!
That’s all, folks! Enjoy this spoooooky black effect!