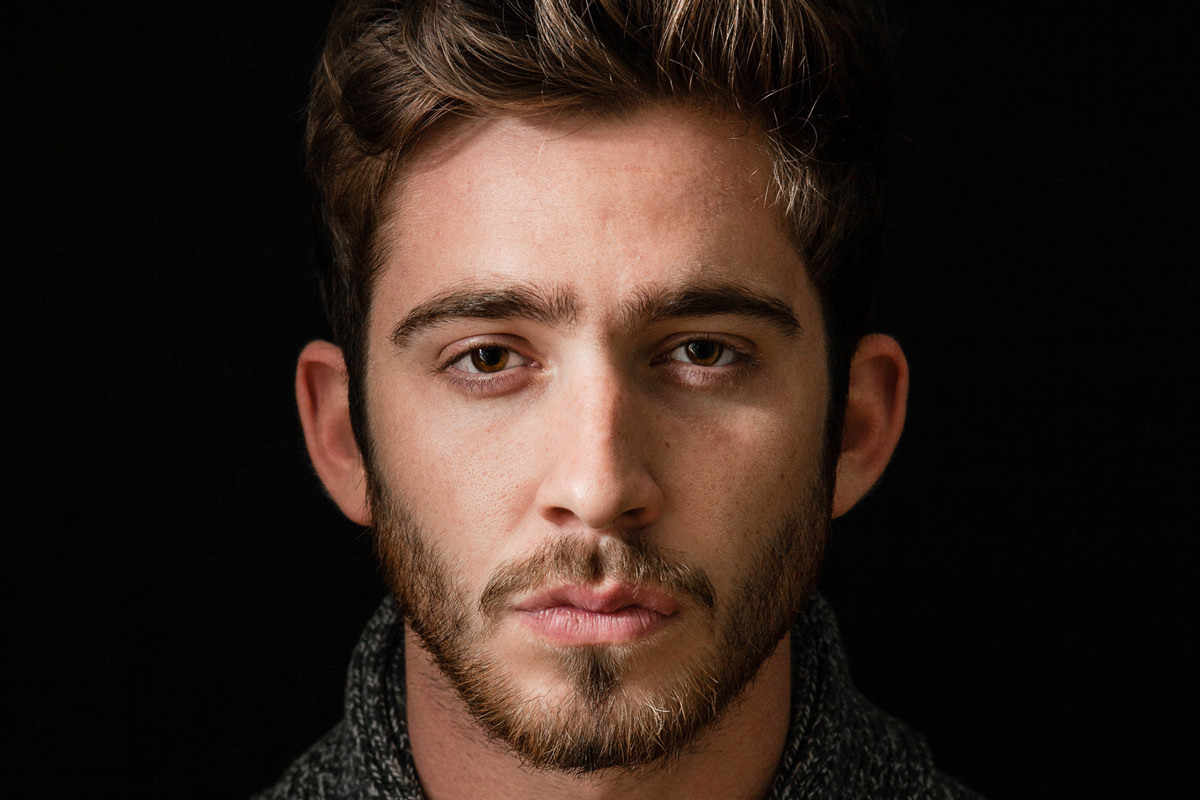

ORIGINAL
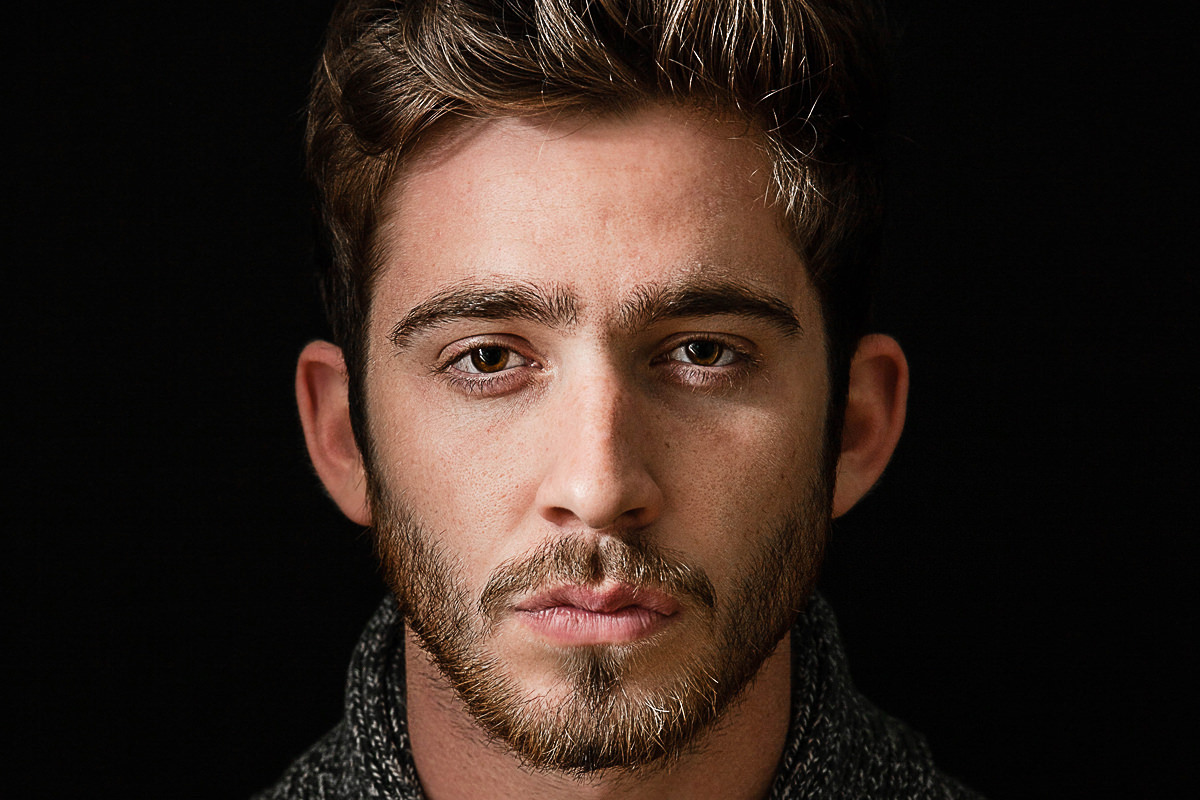
AFTER SHARPENING
Download Sample Images
Click the link below to download the sample images and follow along with this tutorial.
DownloadTutorial Description
After spending long hours on a photo edit, sharpening is the best way to enhance all of the details you worked so hard to preserve It’s also a great tool to help guide the viewer’s eye to the subject of the image. In this tutorial, we show you the best sharpening method out there to target and highlight the details that matter.
Sharpen with Precision
Before you start sharpening, there’s two important tips to keep in mind. First, sharpening should be the very last step in your post-processing workflow. Make sure to take care of all of the retouching and coloring first – that way you only end up sharpening details that you intended to be in the final image.
Second, sharpening should be done according to whatever you want the size of the final image to be. For example, you would sharpen a full-sized print differently than you would an 800-pixel wide version for the web. So if you’re exporting several different sizes, be sure to sharpen them all separately after you’ve cropped and resized. It takes more time but will make a significant difference in the quality and impact of the sharpening.
Step-by-Step Tutorial
Download the Sample Images
DownloadOpen the Samples Images in Photoshop
First, place the how_to_sharpen_a_portrait_in_photoshop.jpg into Photoshop by going to File and Open… or by dragging and dropping the files into the workspace.
Adding Apply Image To A Layer Mask
Create a New Layer by hitting Shift + Option + CMD + N or Shift + ALT + CTRL + N on the keyboard or locate the New Layer symbol at the bottom of the Layers Panel which is identifiable by a square with the folded corner.
The new blank layer will appear as Layer 1 in the Layers Panel.
Locate the top of the workspace and click on Image and go down to Apply Image….

Once selected, Apply Image window will appear.
The Layer should be set to Merged, Channel to RGB, Blending Mode to Normal, and Opacity to 100%.
Once these options are selected, hit OK.
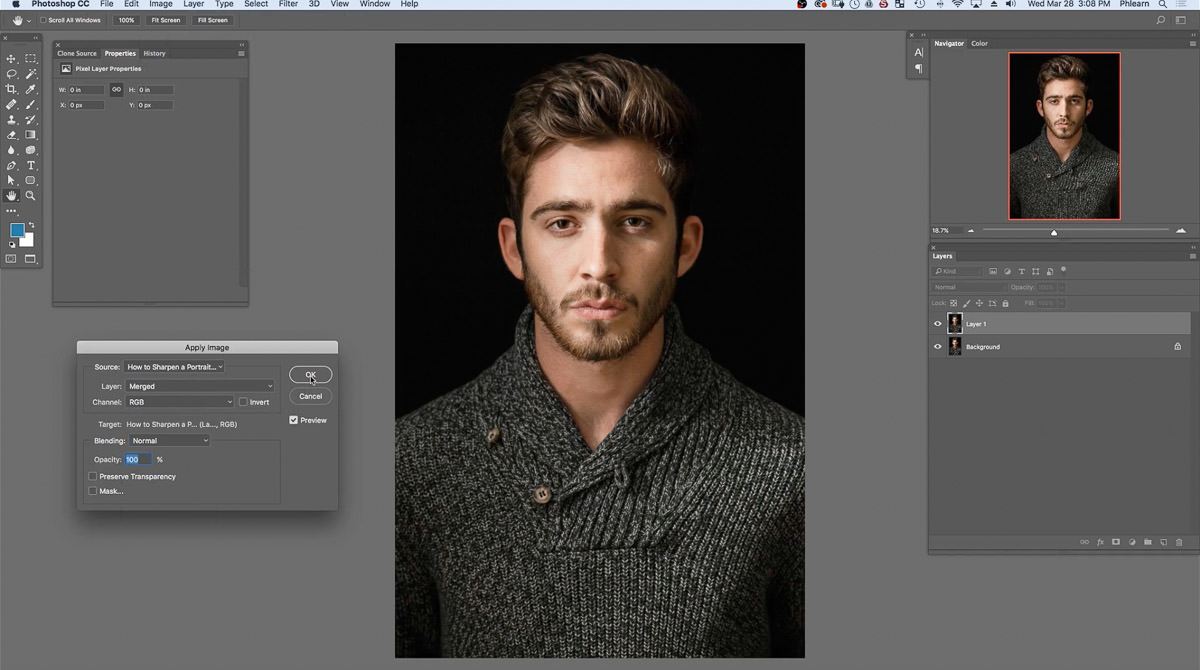
By selecting these options, Photoshop will take a copy of all the visible layers in the Layers Panel and merges them into one layer.
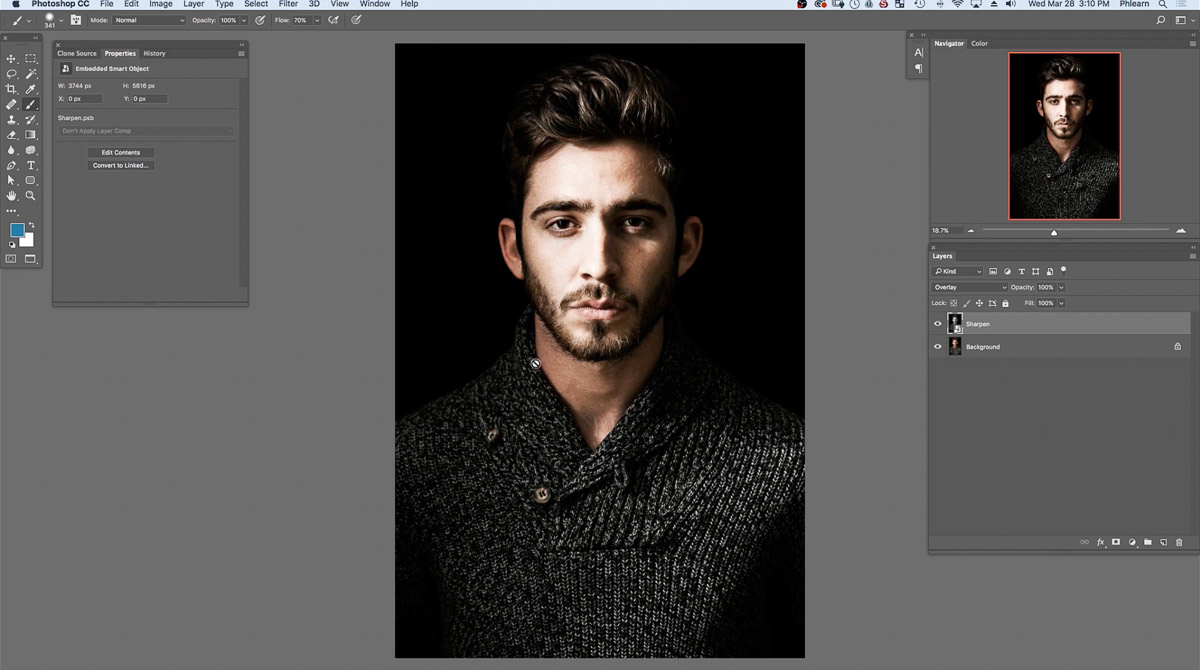
Layer 1 layer will serve as the sharpening layer, which will be the last step.
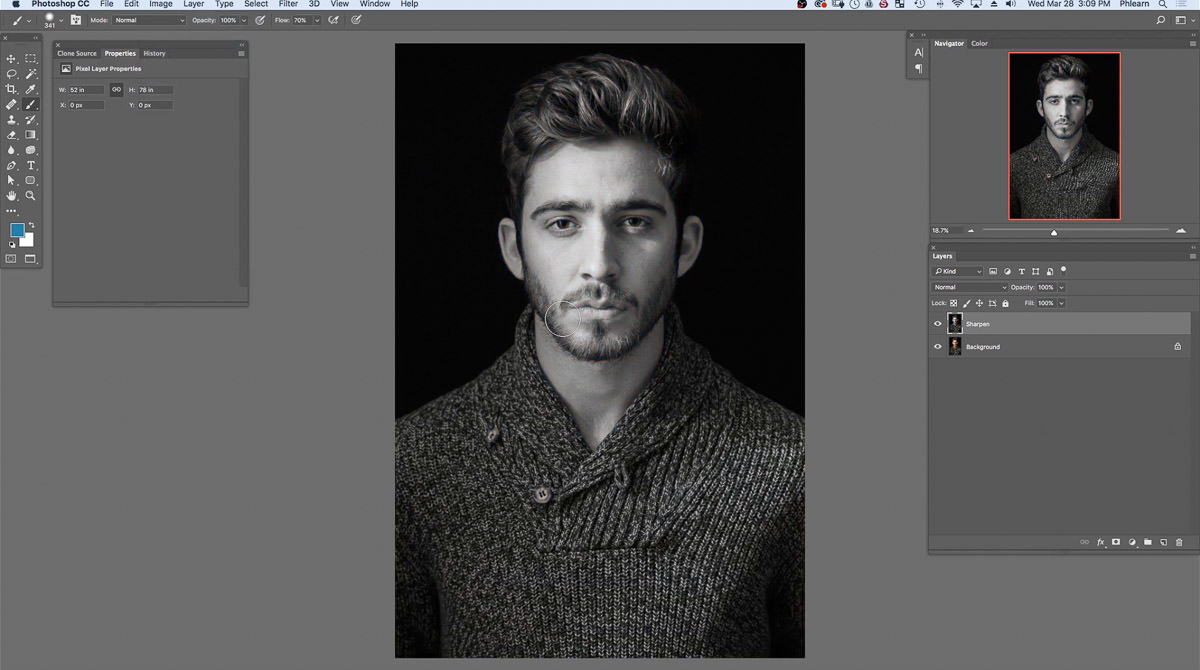
Desaturate The Image
First, desaturation is needed so the sharpening does not affect the color but only the detail.
Double-click on Layer 1 layer name to rename the layer.
Rename Layer 1 to Sharpen.
Locate the top of the workspace and click on Image, go down to Adjustments and then select Desaturation or hit Shift + CMD + U or Shift + CTRL + U on the keyboard.

Notice how the image is now black and white.
Apply A Smart Object To A Layer
Next, make the layer a Smart Object so the Smart Filters can be edited at any time.
To do this, select and right click on the Sharpen Layer in the Layers Panel.
When right clicking, a side tab will appear and select Convert to Smart Object.
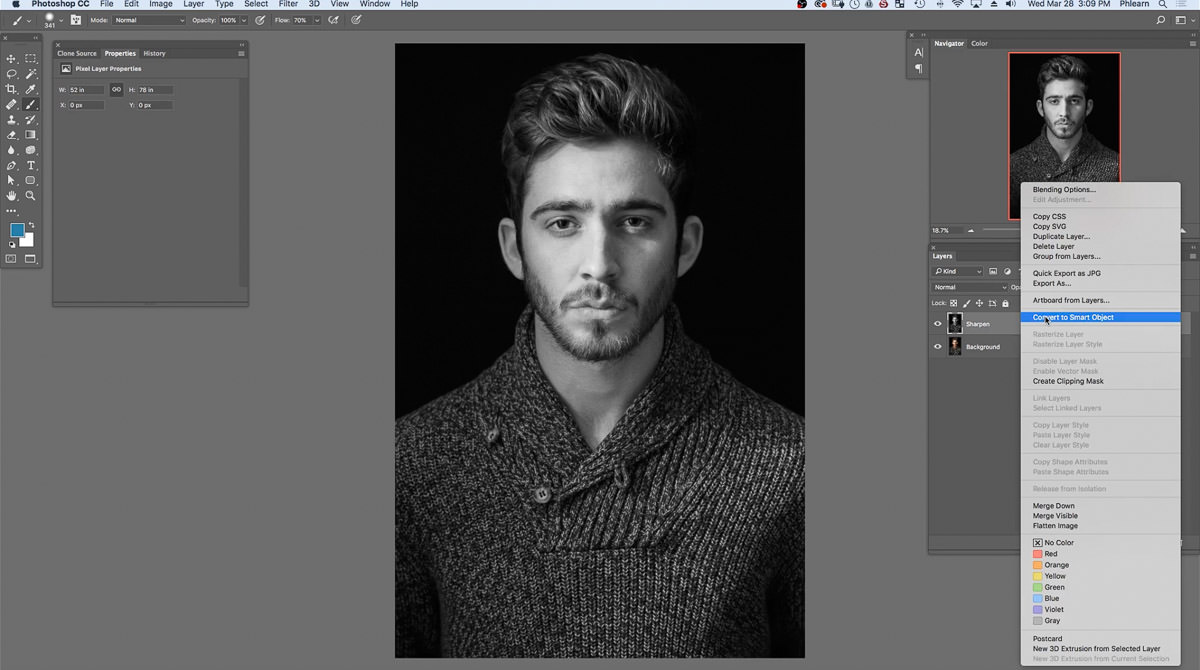
The Sharpen layer is now a Smart Object, which is identified by the small paper logo in the Sharpen layer thumbnail.
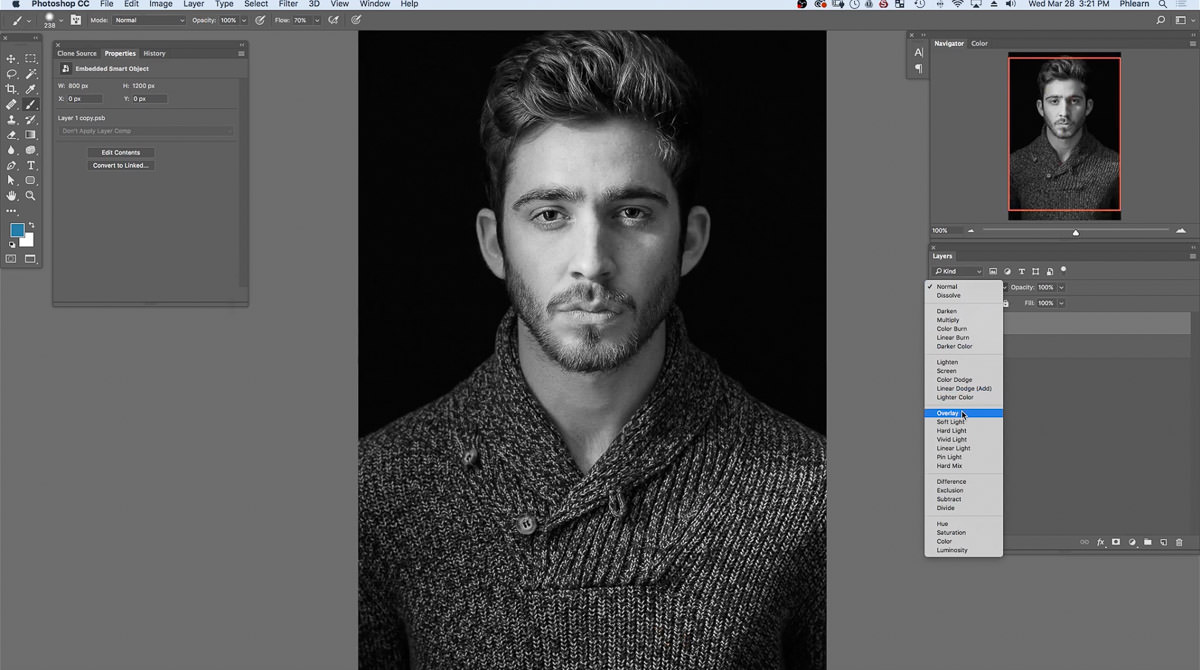
Change Blending Mode To Overlay
Now, locate the Layers Panel on the right side of the workspace.
In the Layers Panel, the Blending Mode for the Sharpen layer is currently set to Normal.
Change the Blending Mode from Normal to Overlay.
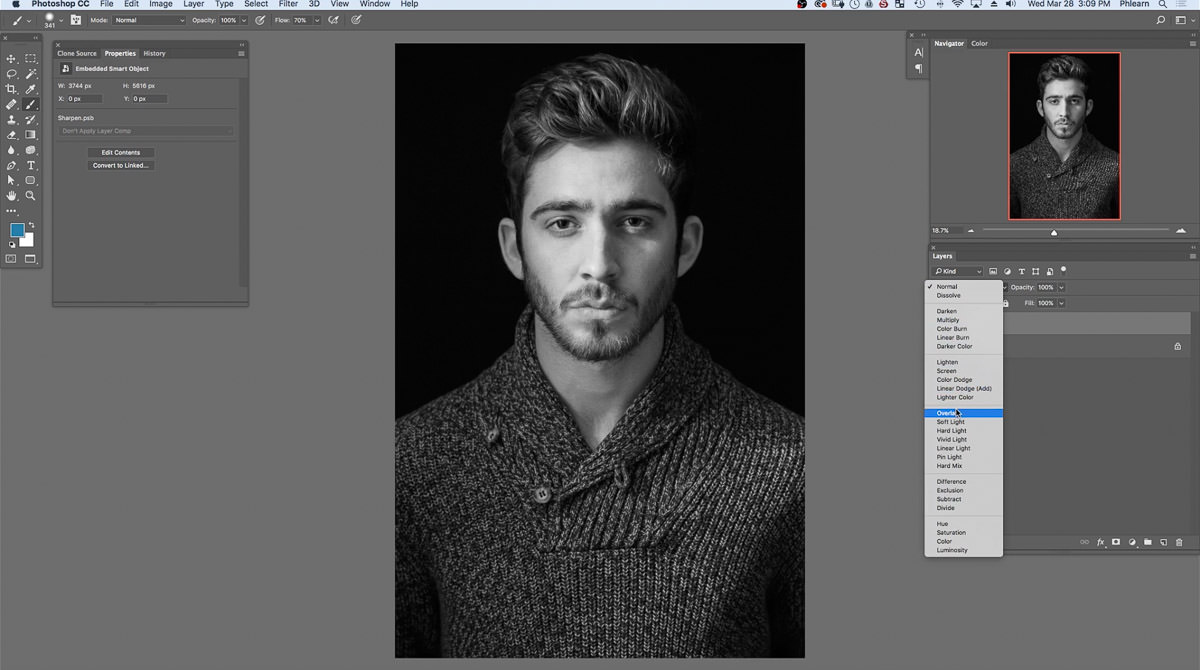
The image may not look correct but when using a High Pass filter, the light and dark details will be enhanced while leaving the tones in the middle alone.
By setting the Blend Mode to Overlay, the middle 50% gray appears invisible and the highlights and shadows visible. By doing this, this is how Smart Sharpening is applied.
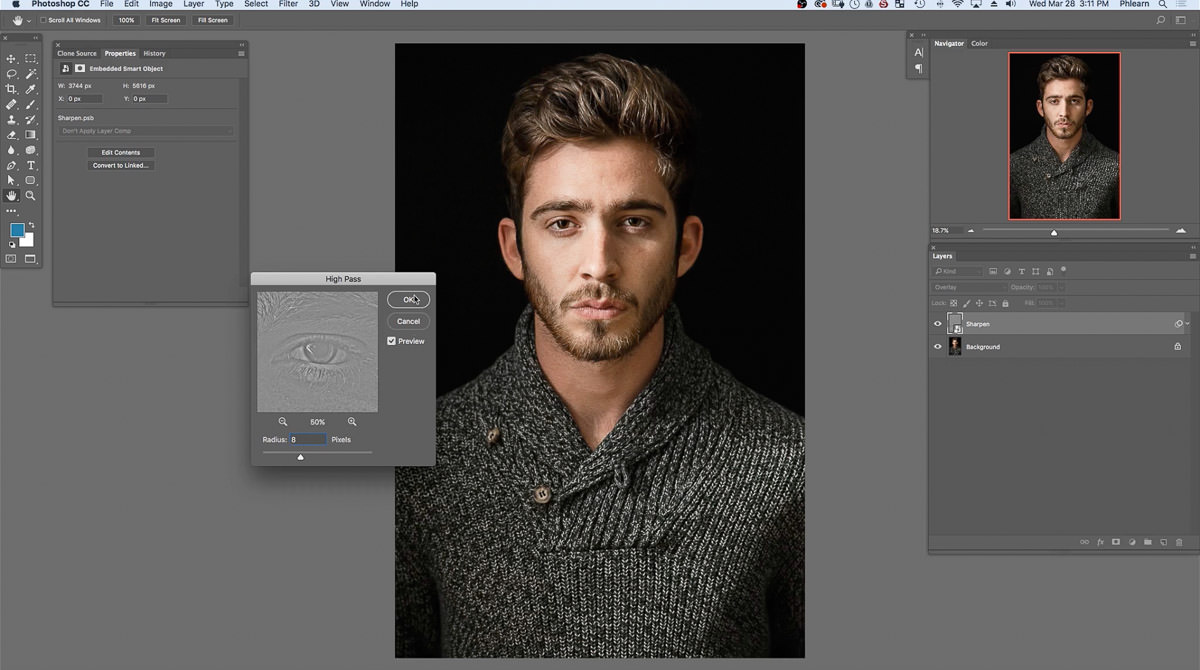
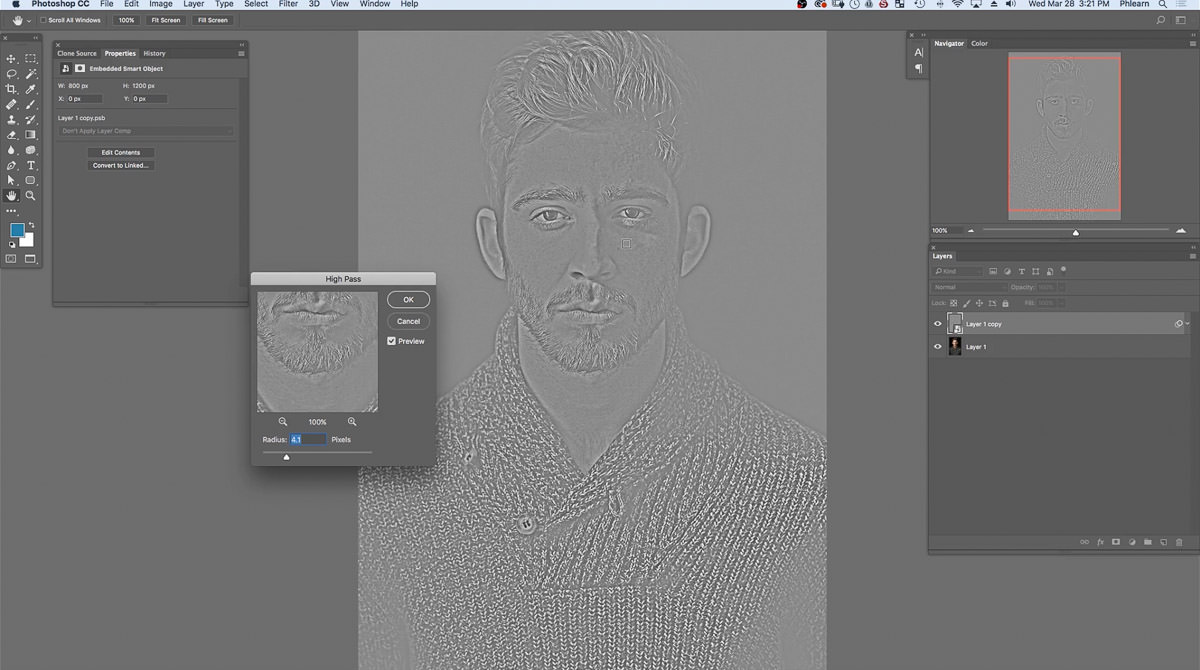
Apply High Pass
At the top of the workspace, select Filter, go down to Other, and select High Pass….

The High Pass window will appear.
High Pass allows the radius and detail to be selected.
Notice how a zoomed in preview of the image with the High Pass effect is presented. This preview allows the current settings within the window to be previewed before applying to the actual image.
Select the magnifying glass with the negative symbol above Radius.
As the negative magnify glass is selected, the image zooms out.
Now, click and drag the hand tool in the preview window until the subject’s eye is visible.
As the mouse selects the image, notice how the image turns from grey to black and white.
While looking at the subject’s eye, notice that the middle detail becomes 50% gray and the lighter or darker areas show.
Located the Radius and Pixels slider beneath the preview of the image.
By moving the Pixels slider to the left or right the High Pass effect increases and decreases in the preview window. Also notice as the High pass effect is changed, the intensity may look correct for the clothing but not for the skin.
Set the radius 8 px.
Once the options are selected hit OK.
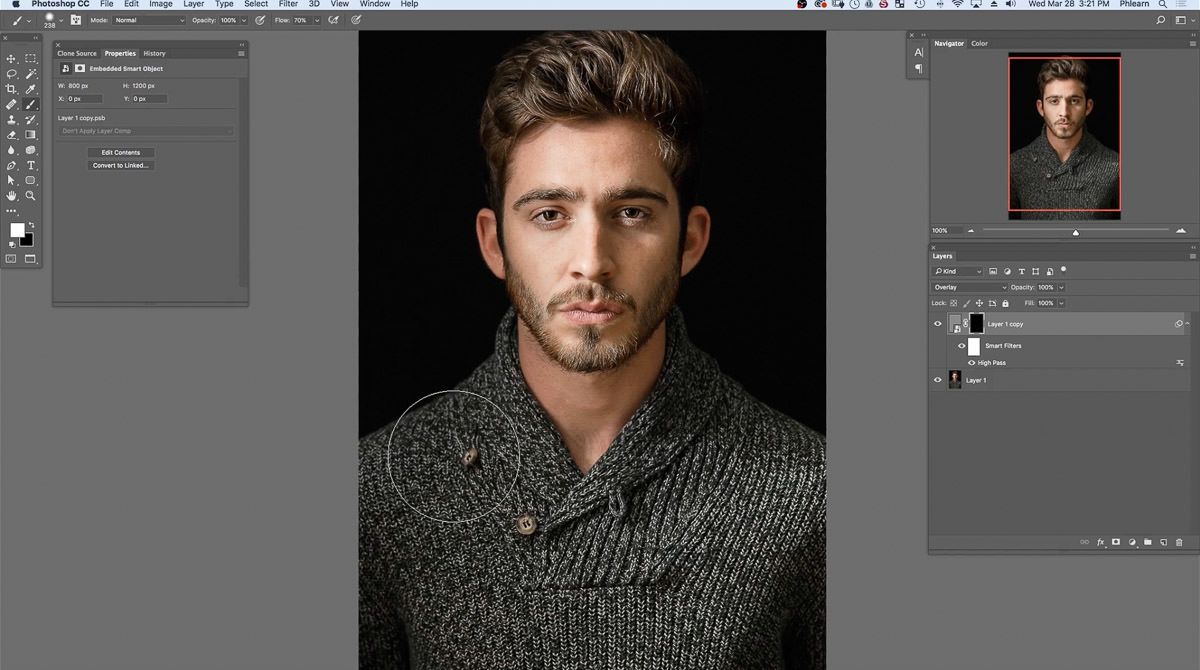
Notice how the Smart Filters have been added to the Sharpen layer in the Layers Panel.
Deselect and select the sharpen layer to notice how the Sharpened layer has affected the image.
Notice how the strength of sharpening may be good on the shirt but not on the face.
Different amounts of sharpening are required for different areas of the image.
Remove Sharpening Of The Face
To customize the sharpening of the face, select the Sharpen layer and add a new Layer Mask.
To create a new layer mask, locate the bottom of the Layers Panel.
Select the symbol with the rectangle with a circle in the middle located at the bottom of the Layers Panel. This symbol represents the Layer Mask.

A Layer Mask allows changes to be made to the selected layer without completely deleting the information.
Select the Brush Tool by hitting B on the keyboard or by selecting the brush symbol in the Tool Bar.
Locate the two colored boxes at the bottom of the Tool Bar.
The two colors represent the selected foreground and background color.
If the two colored boxes are not black and white, hit D on the keyboard to select the Default Foreground and Background Colors.
If white is the foreground color, hit X on the keyboard to change the foreground color to black.
Locate the top of the workspace where the Brush Tool can be customized.
Set the Mode to Normal, Quality to 100% and Flow to 70%.
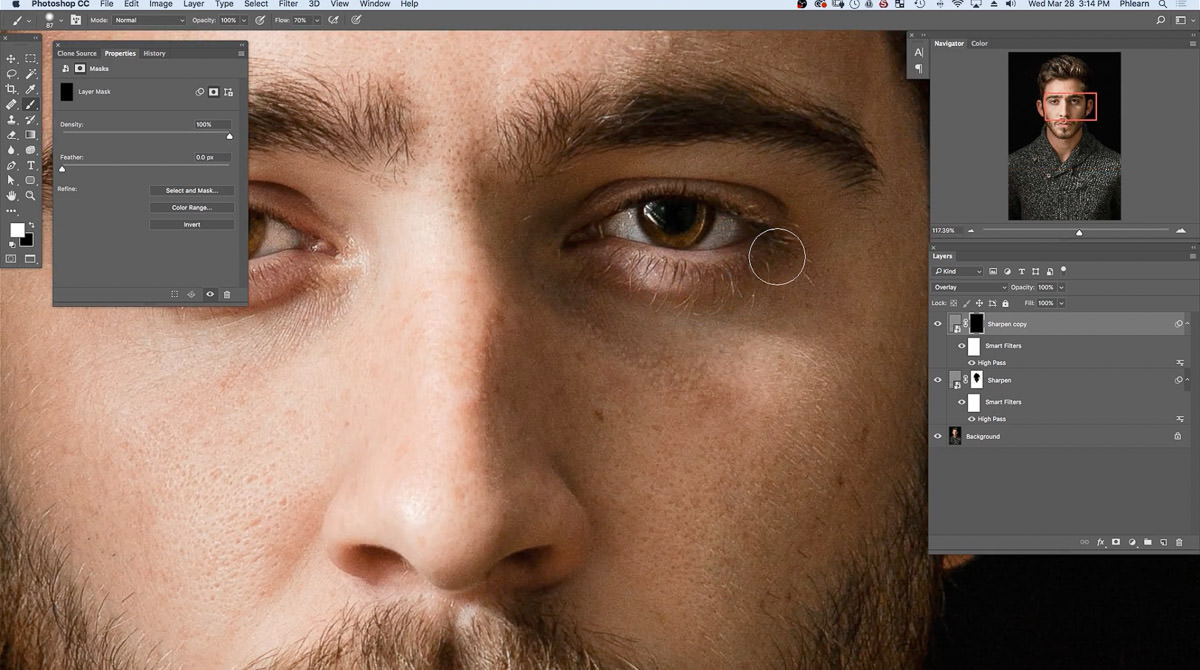
Now, paint with black over the subject’s face and neck.

To adjust the size of the brush hit [ or ] on the keyboard to make the brush bigger or smaller.
Notice as black is applied, the same painted path shows up in the Sharpen layer mask in the Layers Panel.
The light areas of the layer mask represent the visible areas of the layer and the dark areas are the invisible areas.
As the brush tool is applied to the image, the sharpening is removed from the subject’s face.
The purpose of sharpening the skin in a separate step is because clothing and skin require different levels of sharpening. Over sharpening the skin will enhance imperfections.
By painting black, the sharpening in the Sharpen Layer will now be removed from the subject’s face.
Once the subject’s face and neck have been painted, deselect and select the Sharpen layer.
Notice how the clothing and hair are affected by the High Pass filter but face and neck are not affected.
Create The Sharpening Layer
Now, the subject’s eyes, eyebrows, and lips will require a different amount of sharpening.
Duplicate the Sharpen layer by clicking and dragging the Sharpen layer to the New Layer symbol at the bottom of the Layers Panel.

The New Layer symbol is identified by a square with the folded corner, which is located right next to the trash bin.
The duplicate layer will appear as Sharpen copy in the Layers Panel.
This layer will serve as the sharpening layer for the subject’s eyes, eyebrows, lips and facial hair.
While the Sharpen copy layer mask is selected, hit Shift + Delete or Shift + Backspace on the keyboard to view the Fill Color window.
The Fill Color window will appear.
Within the window, change the Content to White, Blending Mode to Normal, and Opacity to 100%.
Once the options are selected, hit OK.
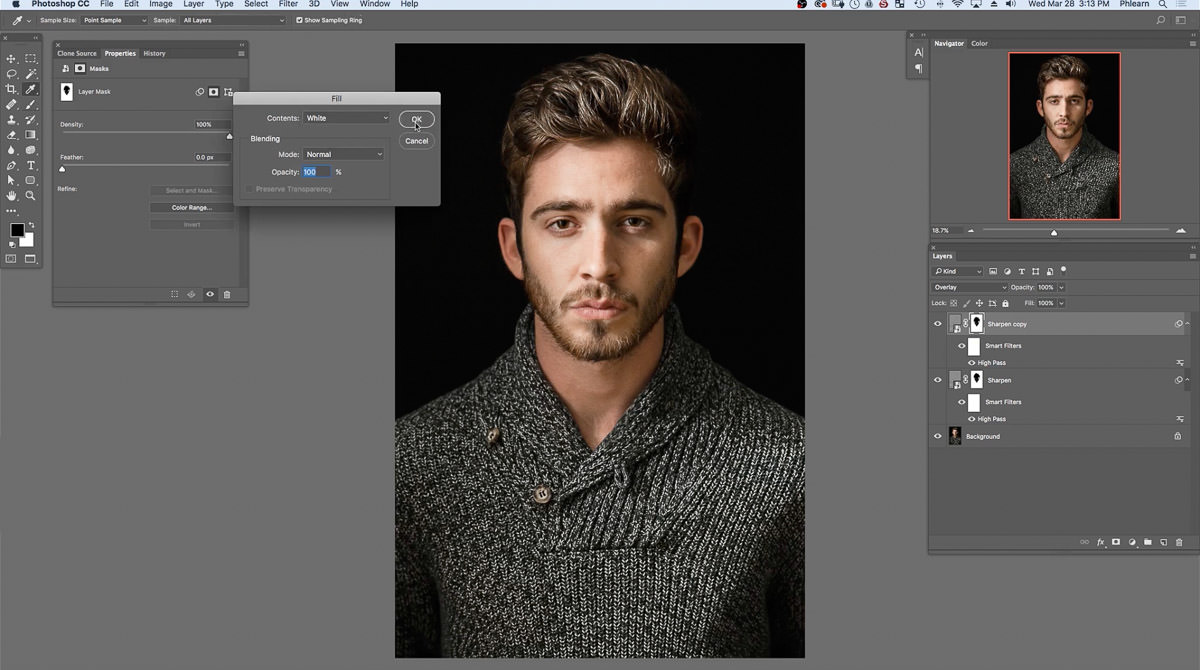
By selecting these options, this indicates that the layer selected will be filled with white and the previous edit to the layer mask will be deleted.
Zoom in closer to the image to view the subject’s face by hitting A on the keyboard to select the Zoom Tool.
Simply click to zoom in and ALT or OPTN and click to zoom out.
Now notice how the duplicate layer, Sharpen copy, is a Smart Object.
As a result of the layer being Smart Object, this allows a Smart Filter to be added to the Sharpen copy, which can be changed at any time.
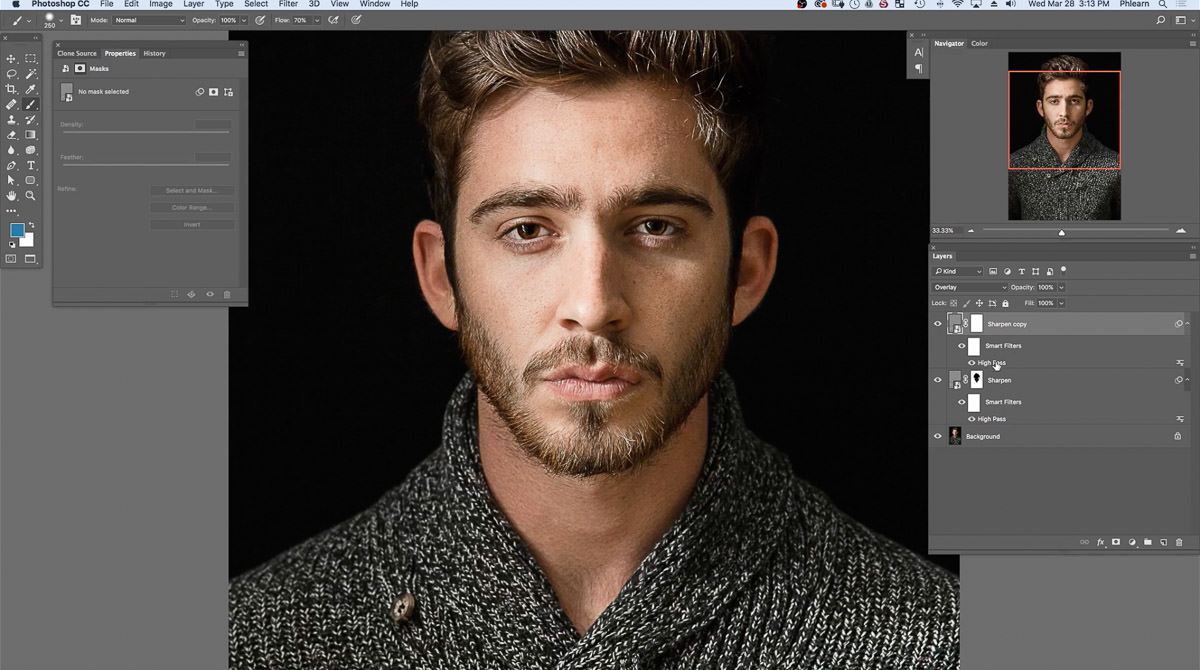
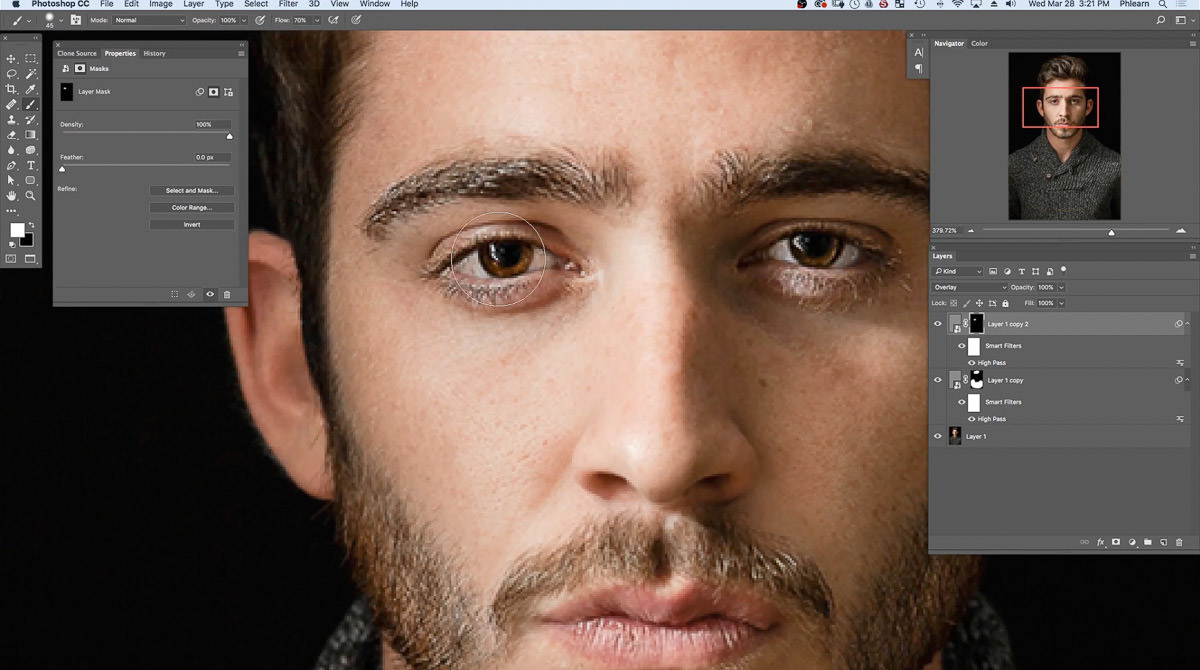
Sharpening Subject’s Face
Now, the subject’s eyes need to be sharpened.
Double-click on the High Pass filter in the Sharpen copy layer in the Layers Panel.
Set the Radius to 5 px and click OK.
While the Sharpen copy layer mask is selected, hit Shift + Delete or Shift + Backspace on the keyboard to select Fill Color.
The Fill Color window will appear.
Change the Content color to Black and hit OK.
By filling the layer mask black, the Sharpen copy layer will not be visible.
Zoom in closer to the subject’s eye by hitting Z on the keyboard to select the Zoom Tool.
Select the Brush Tool by hitting B on the keyboard or by selecting the brush symbol in the Tool Bar.
If black is the foreground color, hit X on the keyboard to change the foreground to white.
Paint with white over the subject’s eyes, eyelashes, eyebrows, lips, and facial hair.
To adjust the size of the brush hit [ or ] on the keyboard to make the brush bigger or smaller.
By painting white, the High Pass filter applied to the Sharpen copy is now visible overtop the subject’s eyes, eyelashes, eyebrows, lips and facial hair.
Essentially, anywhere where more detail is desired is where the brush tool should be applied.
Hit ALT or OPTN and click to zoom out.
Deselect and select the Sharpen copy layer to notice the applied sharpening on the subject’s face.
Now, zoom in towards the subject’s eye by hitting Z on the keyboard to notice the difference.
Another way to view the difference is by holding Shift and click the Sharpen copy layer mask to disable the layer mask.
While selecting and unselecting the layer mask, a red X will appear.

When disabling the layer mask, notice how the effect sharpens the entire face and enhances skin imperfections. This is an example of why sharpening specific sections of a portrait is recommended.
Adding More Sharpening To The Entire Image
Now that the facial features have been enhanced, the entire image requires more sharpening enhancements.
Close the preview tabs for the Sharpen layers by selecting the arrow symbol on the right side of the Layers Panel.
Duplicate the Sharpen copy layer by clicking and dragging the layer to the New Layer symbol at the bottom of the Layers Panel.
The duplicate layer will appear as Sharpen copy 2 in the Layers Panel.
Now notice how the image has been sharpened more.
Duplicate the Sharpen copy 2 layer by clicking and dragging the layer to the New Layer symbol at the bottom of the Layers Panel.
The duplicate layer will appear as Sharpen copy 3 in the Layers Panel.

By duplicating the Sharpen copy layers, this allows small amounts of Radius to be applied to the image every time the image is duplicated instead of selecting one of the Sharpen layers and increasing the Radius of the High Pass filter.
Hold ALT or OPTN and click to zoom out to view the entire image.
Notice how there are different layers of sharpening. The Sharpen copy, Sharpen copy 2 and Sharpen copy 3 are used for sharpening the face and the Sharpen layer is used for sharpening the hair and clothing.
Any of the layers can be adjusted or turned off at any time because the Sharpen layers are Smart Objects.
Expand the preview for the Sharpen layers by hitting the arrow on the right side of the layer in the Layers Panel.
Select the Sharpen copy 3 layer and double click on the High Pass.
Adjust the Radius to 2.9.
Select the Sharpen copy 2 layer and double click on the High Pass.
Adjust the Radius to 3.7.
Select the Sharpen layer and double click on the High Pass.
Adjust the Radius to 4.1.
Group All Sharpen Layers
Now, select all of the Sharpen layers in the Layer Panel by clicking the Sharpen layer while holding Shift and click on Sharpen copy 3.
All of the layers except Background should be selected.
Now, to Group all of the Sharpen layers together, hit CMD or CTRL + G on the keyboard.
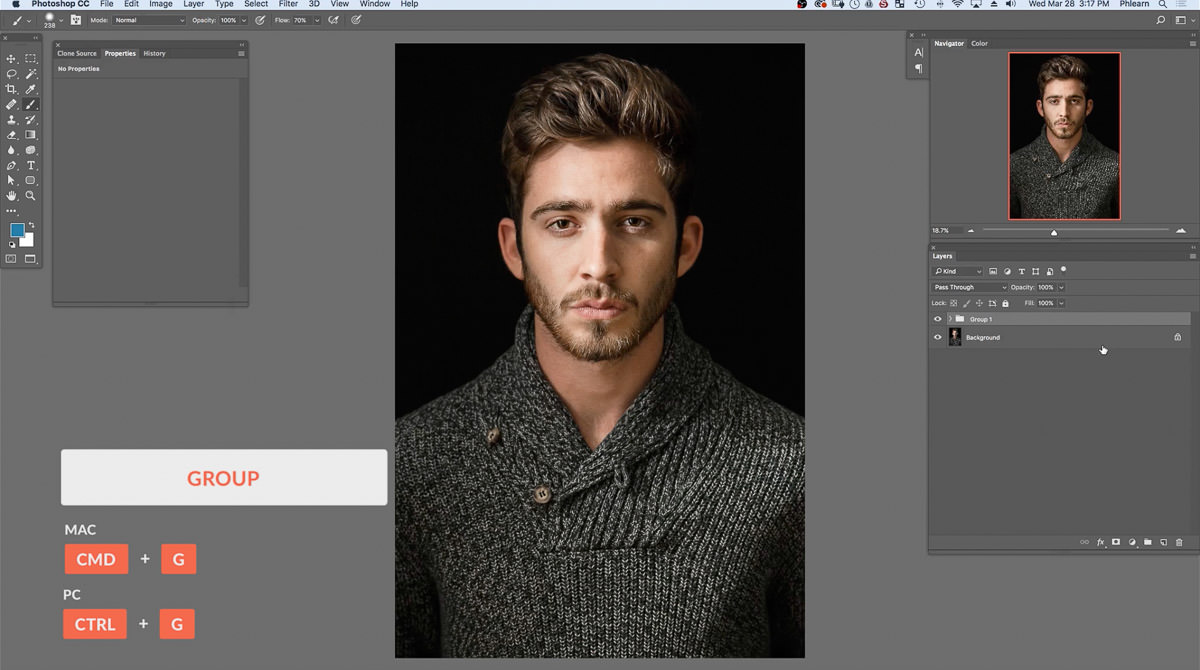
The Sharpen layers will now be relocated to the Group 1 folder in the Layers Panel.
Hit F on the keyboard for Full screen.
Zoom in closer to the image to view the end result by clicking to zoom in and ALT or OPTN and click to zoom out.
Resizing Image For Publishing
The last step is to sharpen the image to the actual size that the image will be used for publishing.
The sharpening applied to the image is set for a full-size print but if the image will be published on the web, which is smaller, the sharpening applied will not be very visible. Always sharpen an image that is sized for the final output because if the image is sharpened before resizing then more sharpening will be needed.
Minimize the sharpened portrait in the workspace.
Create a New Layer by hitting Shift + Option + CMD + N or Shift + ALT + CTRL + N on the keyboard or locate the New Layer symbol at the bottom of the Layers Panel which is identifiable by a square with the folded corner.
The new blank layer will appear as Layer 1 at the top of the Layers Panel.
Locate the top of the workspace and click on Image and go down to Apply Image….
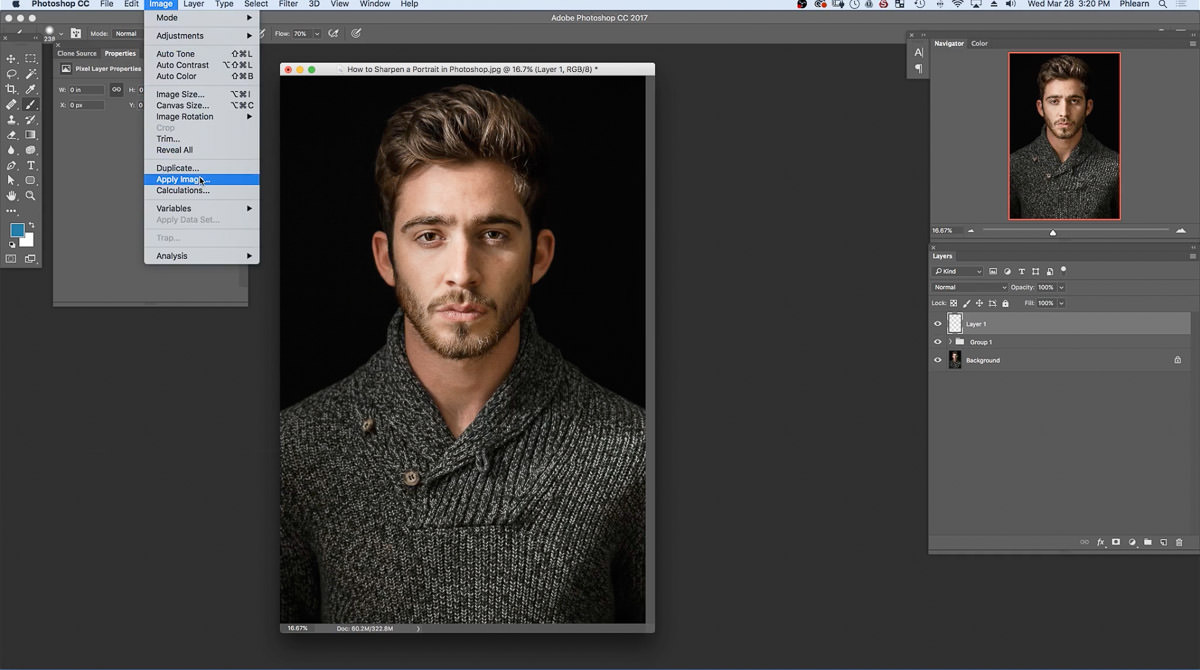
Once selected, Apply Image window will appear.
The Layer should be set to Merged, Channel set to RGB, Blending Mode to Normal, and Opacity to 100%.
Once these options are selected, hit OK.
Right click on Layer 1 and select Duplicate Layer….

The Duplicate Layer window will appear.
Locate Document and select New.
Once the options are selected, hit OK.
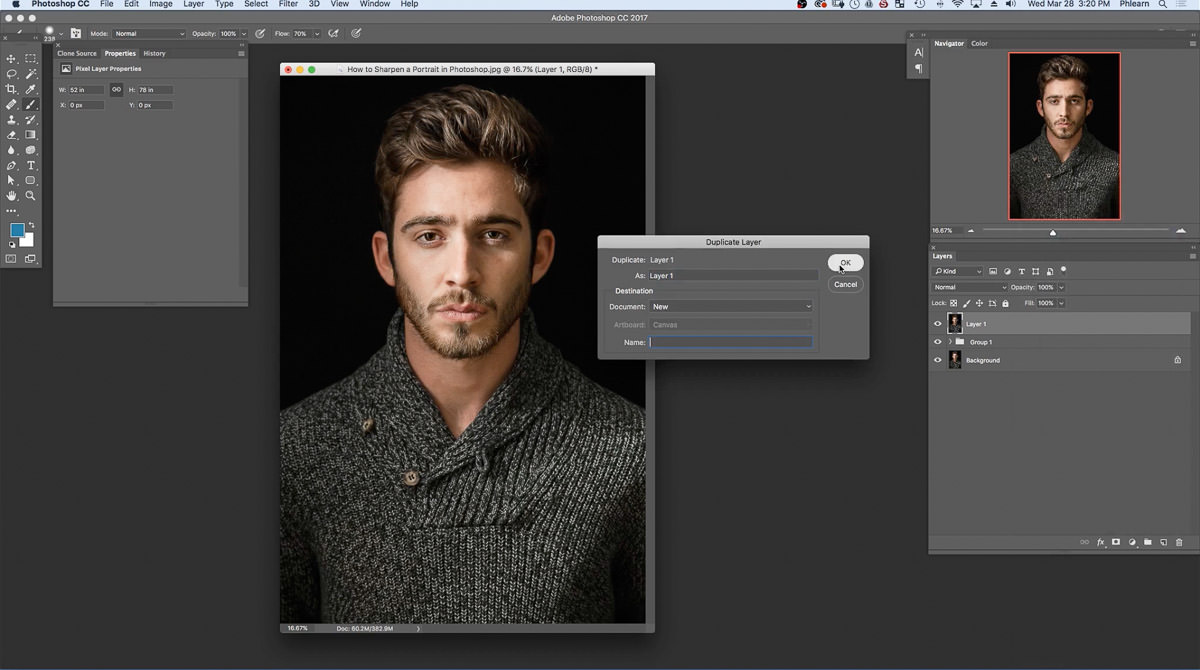
Now a duplicate of the layer will appear.
While working with the duplicated file, locate the top of the workspace and select Image and then Image Size….
The Image Size window will appear.
Notice how the dimensions of the image are large.
Change the Width to 800 Pixels and hit OK.
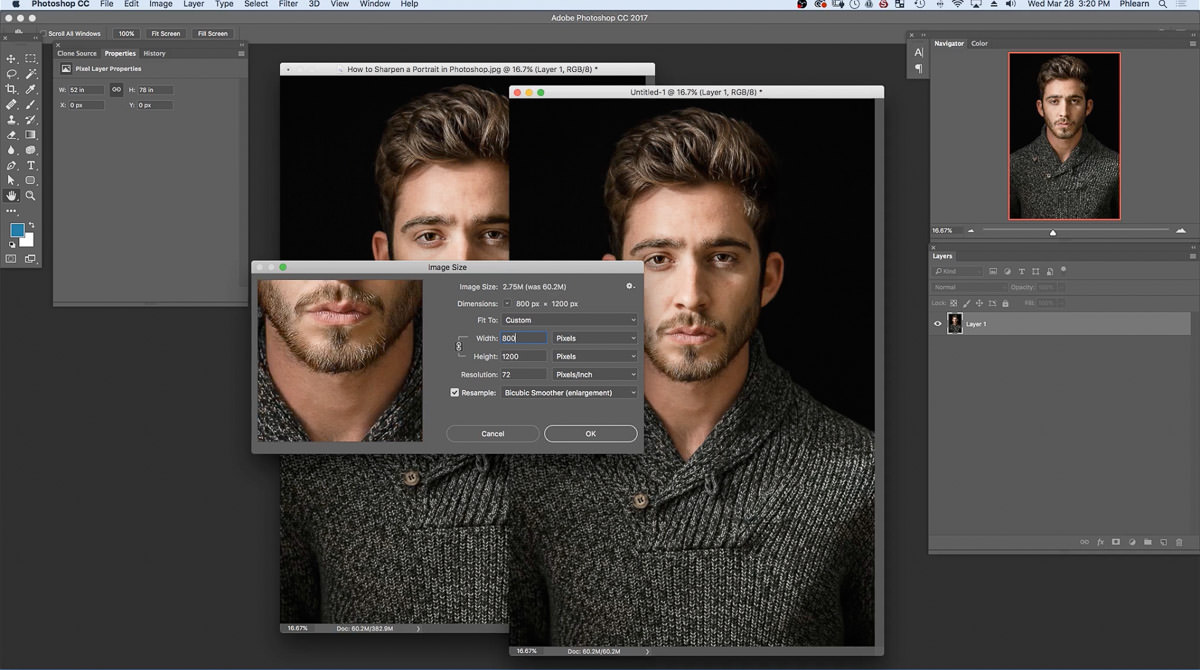
Now notice how the image is a lot smaller version compared to the original.
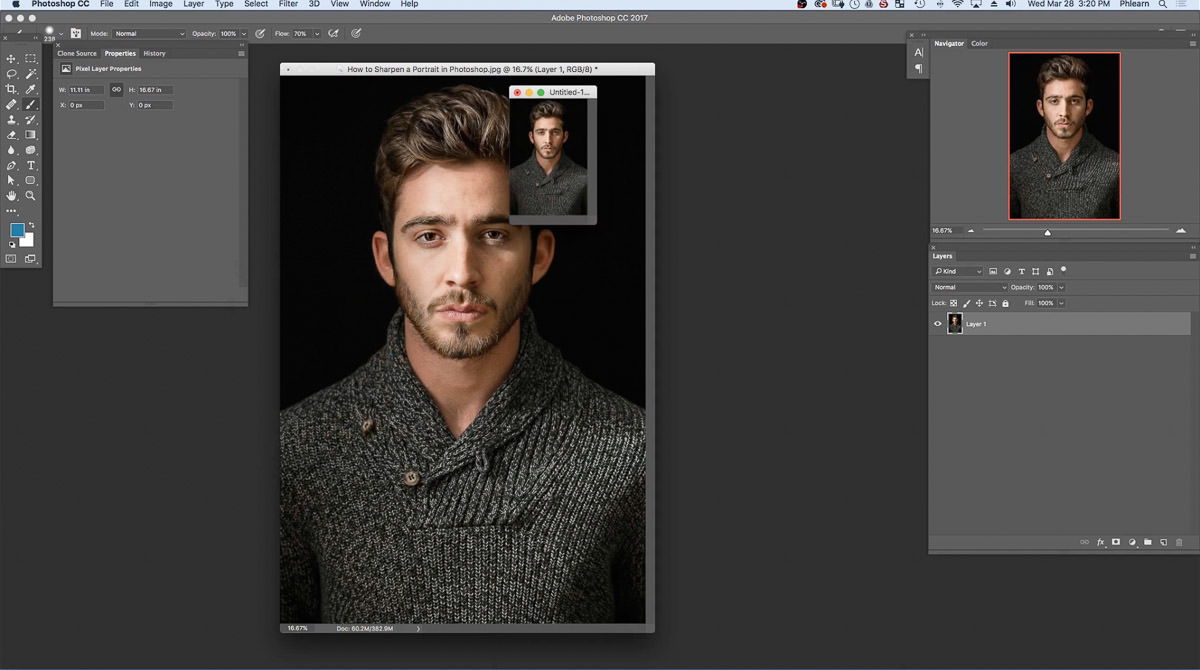
Rescale the window by clicking and dragging the corners and hit Z to Zoom in closer to the image.
While viewing the resized image, notice how the sharpening has lost the applied effect.
Zoom in closer to the image by hitting Z on the keyboard until at 100% zoom.
While the resized image is selected, hit F on the keyboard for Full screen.
Notice how the sharpening has lost a lot of sharpening.
Apply More Sharpening To The Resized Image
Now, since the image was downscaled, more sharpening can be added to the image.
Duplicate the Layer 1 layer by clicking and dragging the layer to the New Layer symbol at the bottom of the Layers Panel.
A new layer called Layer 1 copy will appear in the Layers Panel.
Locate the top of the workspace and click on Image and go down to Apply Image….
Once selected, Apply Image window will appear.
The Layer should be set to Merged, Channel to RGB, Blending Mode to Normal, and Opacity to 100%.
Once these options are selected, hit OK.
Locate the top of the workspace and click on Image, go down to Adjustments and then select Desaturation or hit Shift + CMD + U or Shift + CTRL + U on the keyboard.
Make Sharpen Layer A Smart Object
Next, make the layer a Smart Object so the Smart Filters can be edited at any time.
To do this, select and right click on the Sharpen Layer in the Layers Panel.
When right clicking, a side tab will appear and select Convert to Smart Object.
The Sharpen layer is now a Smart Object, which is identified by the small paper logo in the Blur layer thumbnail.
At the top of the workspace, select Filter, go down to Other, and select High Pass….
The High Pass window will appear.
Set the Radius 4.1 px.
Once selected, hit OK.
Change Blending Mode To Overlay
Now, locate the Layers Panel on the right side of the workspace.
In the Layers Panel, the Blending Mode for the Sharpen layer is currently set to Normal.
Change the Blending Mode from Normal to Overlay.
At the top of the workspace, select Filter, go down to Other, and select High Pass….
The High Pass window will appear.
Set the Radius 0.4 px.
Once selected, hit OK.
Sharpen The Face
While the Layer 1 layer mask is selected, hit Shift + Delete or Shift + Backspace on the keyboard to view the Fill Color window.
The Fill Color window will appear.
Within the window, change the Content to Black, Blending Mode to Normal, and Opacity to 100%.
Once the options are selected, hit OK.
Hit B on the keyboard to select the Brush Tool.
While the Layer 1 copy is selected, paint the hair and clothing white.
Hit CMD or CTRL + J shortcut on the keyboard, to duplicate the Layer 1 copy.
Now a duplicate of the layer will appear as Layer 1 copy 2.
While the Layer 1 copy 2 layer mask is selected, hit Shift + Delete or Shift + Backspace on the keyboard to view the Fill Color window.
The Fill Color window will appear.
Within the window, change the Content to Black, Blending Mode to Normal, and Opacity to 100%.
Once the options are selected, hit OK.
While the Layer 1 copy 2 layer mask is selected, paint the eyes, eyebrows, lips, and facial hair white.
Adjust Radius
Double click on the High Pass Filter for Layer 1 copy 2.
The High Pass window will appear.
Set the Radius 0.9 px.
Once selected, hit OK.
Deselect and select both Layer 1 copy2 and Layer 1 copy to notice the added sharpening.
Double click on the High Pass Filter for Layer 1 copy 2.
The High Pass window will appear.
Set the Radius 0.9 px.
Once selected, hit OK.
Now, compare the original sized image and the web ready image and notice the different level of sharpening for the set resolution.

When the image resolution changes the sharpening resolution has to change as well. If the image were resized with the general sharpening, the image would appear as if Layer 1 copy 2 and Layer 1 copy were not visible but sharpening after the image has been resized, there is a more visible sharpening of detail. Also, if the image will be exported as a smaller size, first export the smaller size then sharpen the image.
Always remember to do any kind of sharpen for the last step.