How to Breathe New Life into Old Images with Photo Colorization
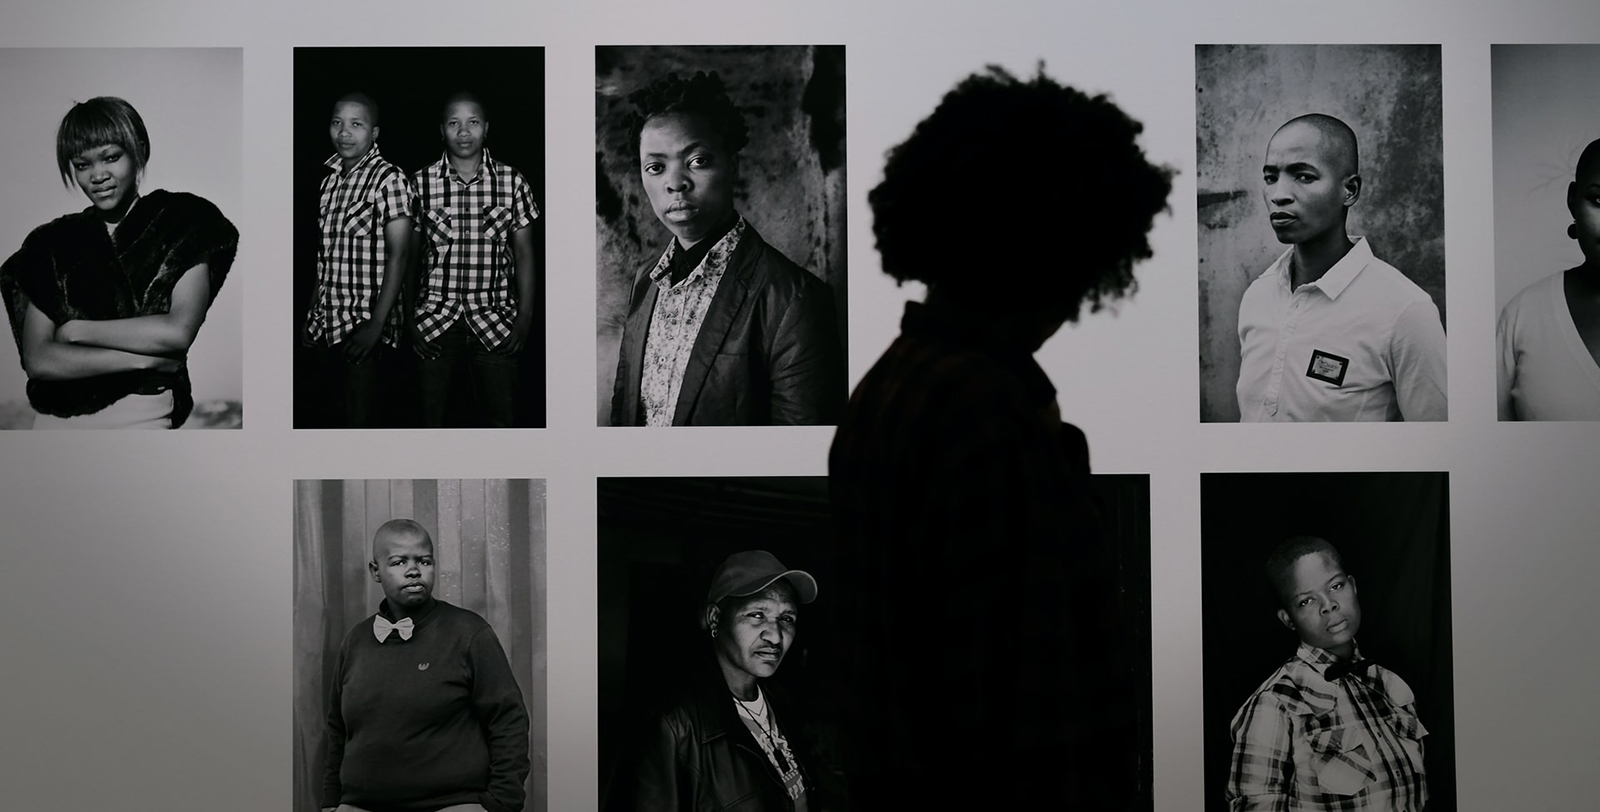
“They lived their experiences in color,” Peter Jackson says in an interview extra from his They Shall Not Grow Old documentary. It sounds pretty obvious, but when we look at the people in old, black and white historical photographs, they seem oddly removed from reality. They don’t feel “real” the way that you or I feel “real.”
Colorizing images that were taken hundreds of years ago allows us to see distant history in a new light, which is naturally as divisive as it is intriguing. Though some point out that viewing history through the lens of relatability could be doing it a disservice, there’s no denying that it adds a completely different layer of perspective.
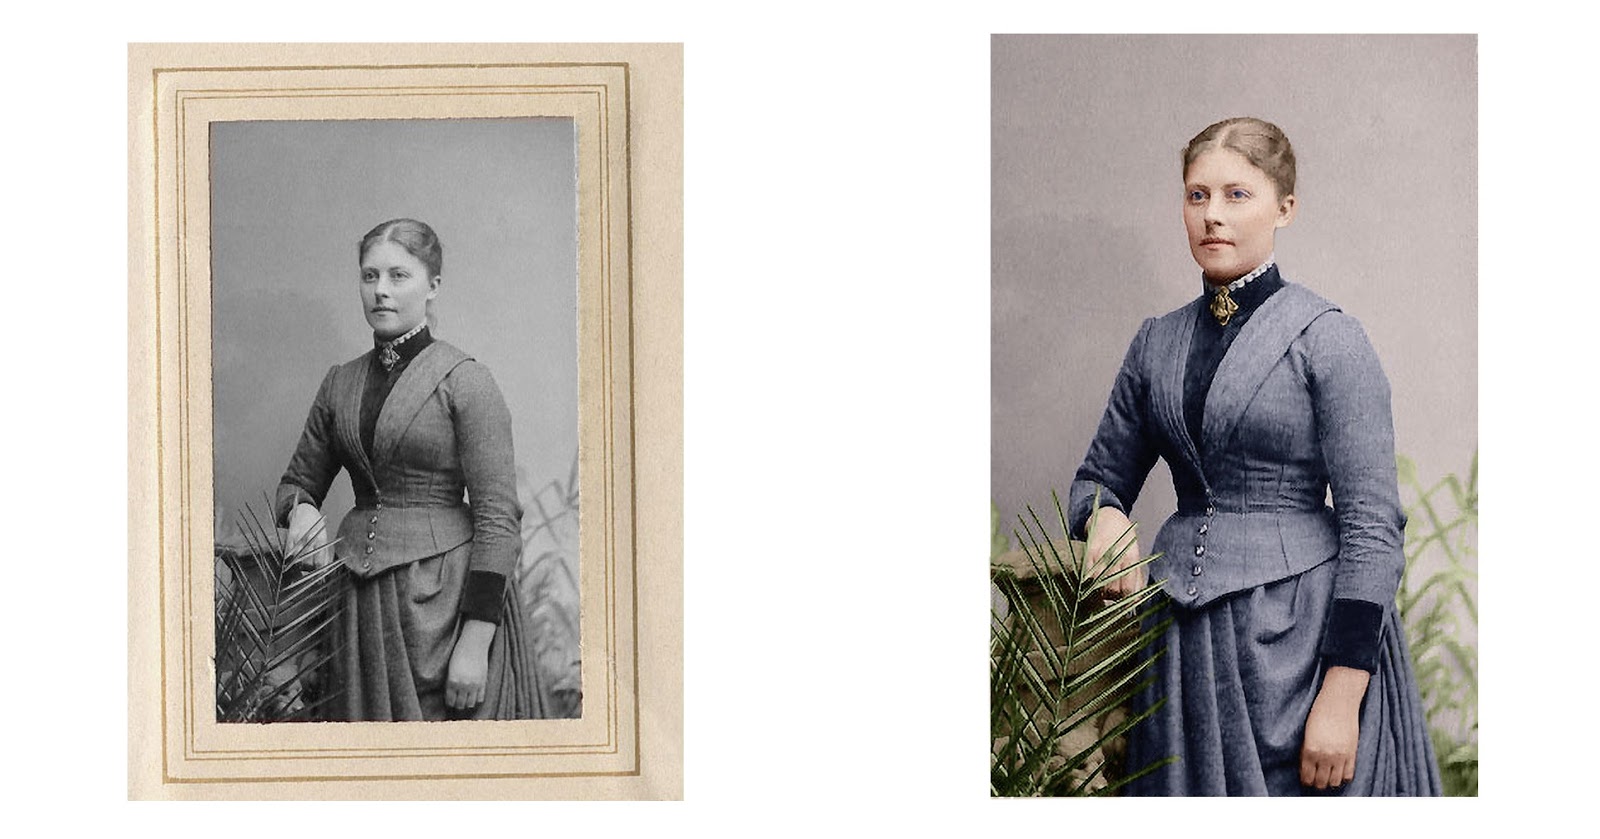
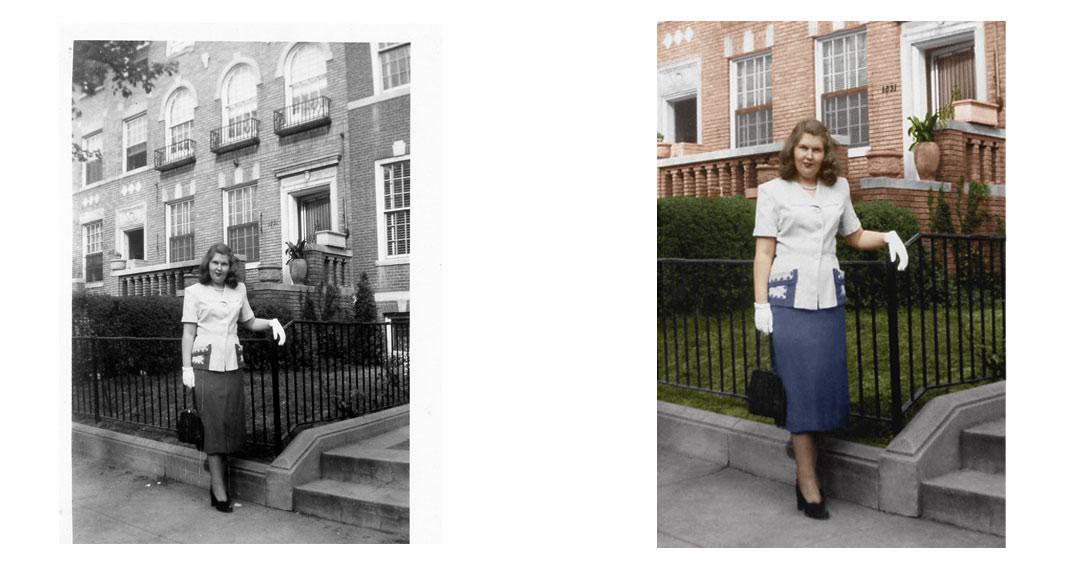
I’ve had people tell me they never considered having an old black and white image colorized, but when they see it done, they’re amazed at how different it looks. Photo colorization isn’t intended to replace the original black and white photo, but to complement it. Placing the original side-by-side with the colorized version is especially effective at inspiring a “wow” moment.
Finding Good Information
The first step for accuracy in colorizing an image is to do historical research. If you’re colorizing a landmark, it will be more recognizable if the colors are accurate, and it’s especially important to do your due diligence to military uniforms and equipment.
Of course, it’s helpful if the photo is dated, but often that’s not the case. I find that Google is terrific for this as you can start with a pretty generic search and refine it until you find what you’re looking for. It can take a while to find a specific uniform color of the day, what style bow ties men wore during certain time periods, and so forth, but it’s worth the time spent in the end when you have a product that does justice to its historical roots.
There are two books containing photos and descriptions of clothing worn during certain time periods that I recommend. The first is More Dating Old Photographs 1840–1929 by Halvor Moorshead, which discusses men’s and women’s clothing and hairstyles of the time. The second is 20th Century Photographs KwikGuide by Gary W. Clark. It discusses changes to photographs at the turn of the century, men’s and women’s hairstyles, introduction of color film and slides (Kodacolor), and 20th century cars, among other things.
Another option is speaking to family, veterans, or anyone else who can tell you what something was at the time. Always try to fact check secondhand information. it’s a great starting point, but memories are colored by more than… well, color. Emotions and events that hold significance for your source may impact their recollection of certain elements.
Calibrating Monitors
Another step I strongly recommend before colorizing an image is to calibrate your computer monitor (also recommended for modern images). It’s important to calibrate monitors regularly – typically every 2-4 weeks – for accurate colors. If you have an i1Profiler calibrator, you can download the free app ColorTRUE, which also supports iPad Pro.
Getting Started
Adobe Photoshop is an invaluable tool for photo colorization. It allows us to reproduce images much more accurately, and allows for the subtleties and variation we would find in today’s color photography.
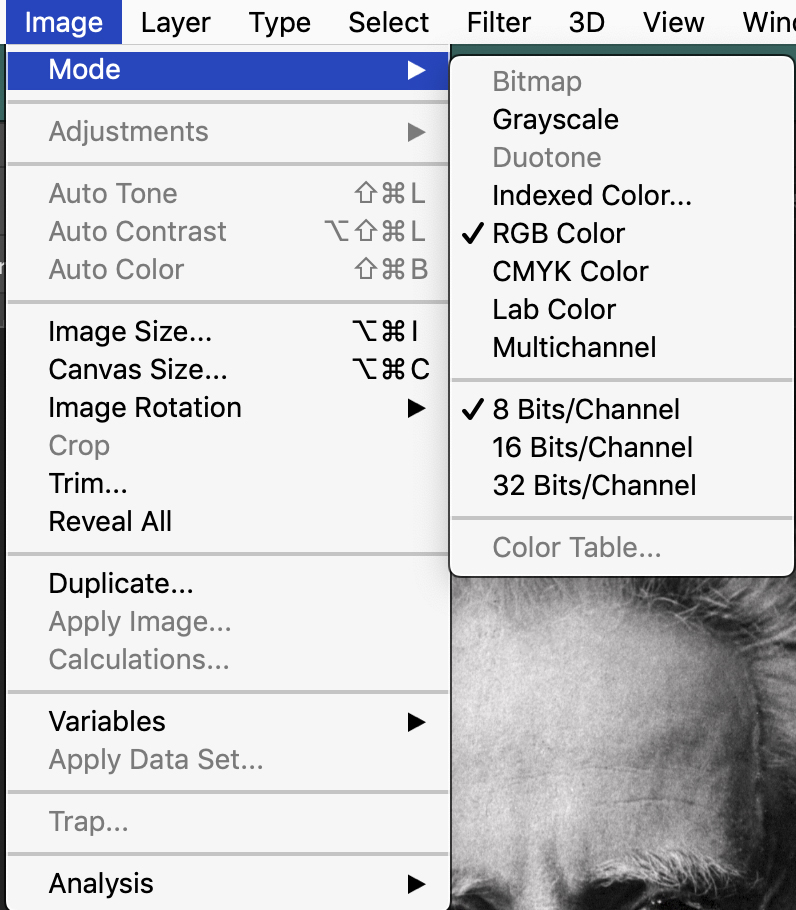
Retouching/restoring the photo before you begin colorizing is important, so that any dust or scratches you choose to remove will not impact the final appearance. Use good judgement here, since some imperfections may be characteristic of the era. It’s up to you to decide whether these things belong in the colorized version of a historical photo. Once retouching/restoration has been completed, go to Image – Mode in Photoshop and ensure the color mode is set to RGB Color. If it’s set to Grayscale mode, you won’t be able to colorize it.
Make sure to work non-destructively here, on multiple layers. For example, create a new, blank layer for each color you work with. This way, if one color isn’t looking right, you can delete only that color range or adjust it independently of the other colors by clipping an adjustment layer to only that color.
Take snapshots in the History tab as you go. You may find that an earlier version of your edit was closer, and who needs the hassle of starting from scratch when you can recall that version of your edit with the single click of a button? Don’t be alarmed if you find yourself with hundreds of layers for more detailed images. Try grouping layers to keep things organized.
Photo colorization can take days or weeks depending on the complexity of the image. For example, portraits typically don’t take as long to colorize as an image of an event, location, or group of people. Having patience is also important because many images require a great deal of tedious work.
Colorizing Skin
Creating authentic-looking skin tones is imperative in colorizing images. I suggest using this chart for different skin colors. Skin tones aren’t just one color, but can be made of several different hues.
In Photoshop, it’s important to adjust the opacity for skin, clothing, etc., rather than leaving them set to 100 percent. Full opacity may create an unrealistic look in the image. You can also play around with different blend modes that allow your color to interact with the values in your photo.
If you’re colorizing an image where colors are unknown, such as clothing colors in a portrait, do a little research into the textiles that were available at the time. You wouldn’t expect to see vibrant colored clothing in a photo from the 1800s, for example.
Colorizing Facial Hair
If a teenage or adult male is in a photo, adding stubble is important for realism. In colorizing gray or white hair, bluish tones should be included for realism. Address the beard area from ear to ear and just below the Adam’s apple on the neck. I generally color the entire face, then paint away from the facial hair areas by using a layer mask.
With modern images, we tend to remove bloodshot veins in sclera (whites of eyes) and whiten teeth, but during the 1800s/early 1900s, eye drops and teeth whitening products weren’t available. In that case, your colorization will be more believable if you don’t make those characteristics too pristine.
Colorizing Eyes
When you’re colorizing eyes, sharpen them before you begin color work. Choose a dominant color (e.g. blue, brown, etc.) as the base color. Fill the entire eye and change your blend mode from Normal to Color, then create a mask and invert it so that the entire mask is black.
Paint away the black on that layer mask by using a white brush, only over the colorful part of the eye. All eyes, regardless of color, have a small thin black line between the color part and sclera. Leave that and the pupil black when you are painting away from your layer mask.
Another technique I apply to both old and modern photos is adding a blank layer above the colorized layers for each color, adding two or three small dots (depending on size of photo/eye). Using a very small brush, change Adjustment Layer to Color and reduce opacity to the point the color still lightly shows. Place two dots on the opposite side of the catch light (bright light) in the pupil. If no catch light is present, place the two dots at the bottom of the pupil. This is a technique Aaron demonstrates in this video. (In the screenshot, I accentuated the dots to show the process better.)
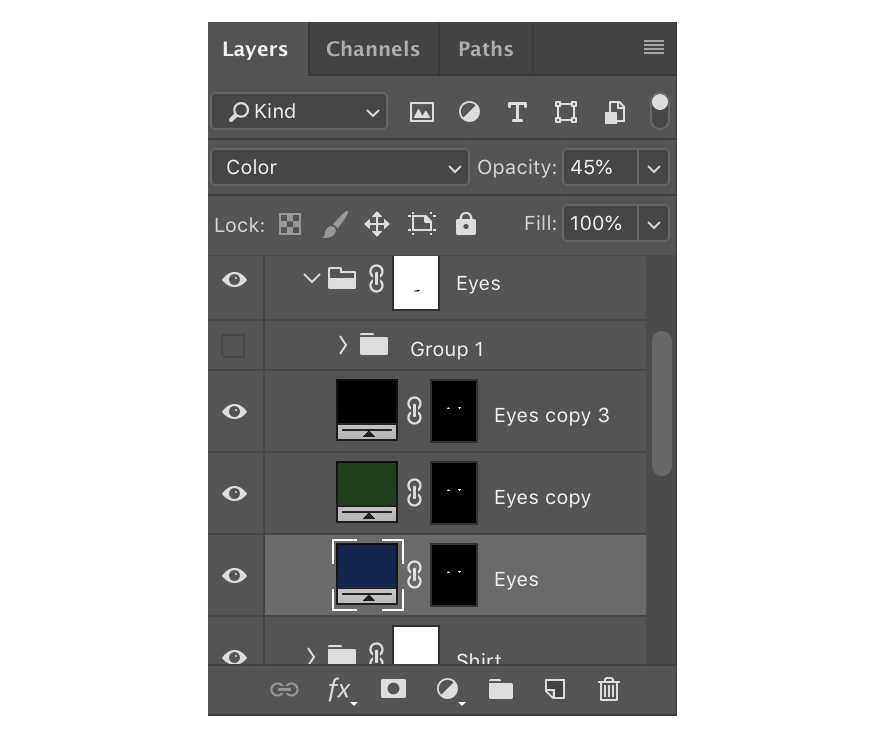
Photo Colorization Tools
Pantone Colors and the Adobe Color Wheel are two great resources that can be found in Photoshop. With the latter, you can select Analogous, Monochromatic, Triad, Complementary, Compound, Shades, or Custom. Leaving the Color Mode set to RGB, it provides the HEX for whichever you’ve selected, such as Complementary or Compound.
You can also Google the relevant color shades. One site I often reference for shades of clothing (not including uniforms) is Vintage Dancer. This includes types of clothing and fabrics by era and is a good place to begin when you’re creating complementary colors for fabric or clothing. Another option for locating colors is to look on eBay. People often sell old uniforms, tins, or magazines that you can use as reference material for authentic colorization.
Lighting and Shadows
Reflective lighting and shadows are important to bear in mind when colorizing images as well. When colorizing shadows on clothing for instance, it’s good practice to pick up the hues surrounding the immediate area of clothing. Shadows are fairly easy to determine by noticing the source of light, such as the outdoor sun or indoor fluorescent lights.
Sunlight may be streaming through a window, therefore subtle orange or yellowish hues can be added to whatever the sunlight may be hitting (carpet, table, etc.). If the photo was taken on an overcast day, the sky will appear dull and washed out. This holds true for the entire photo.

Finishing Up
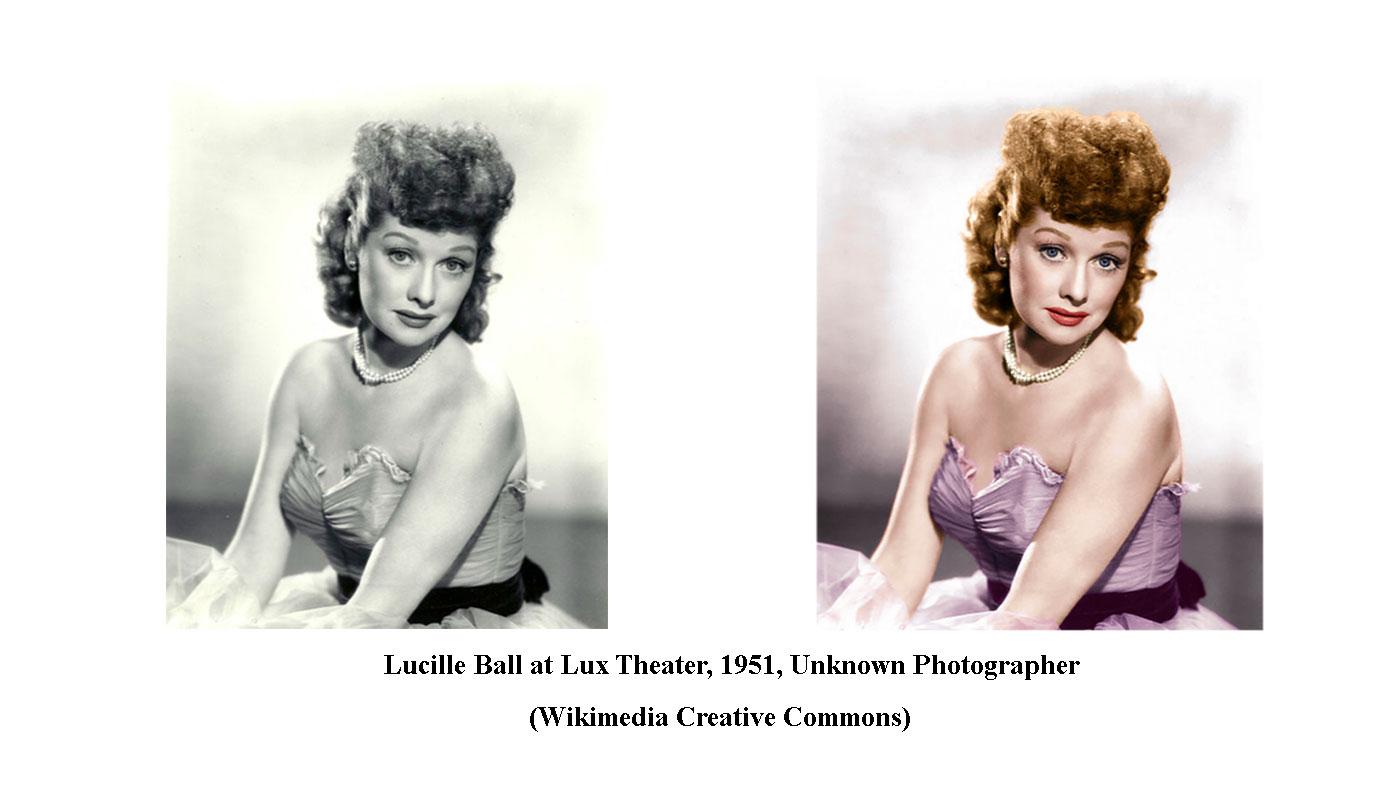
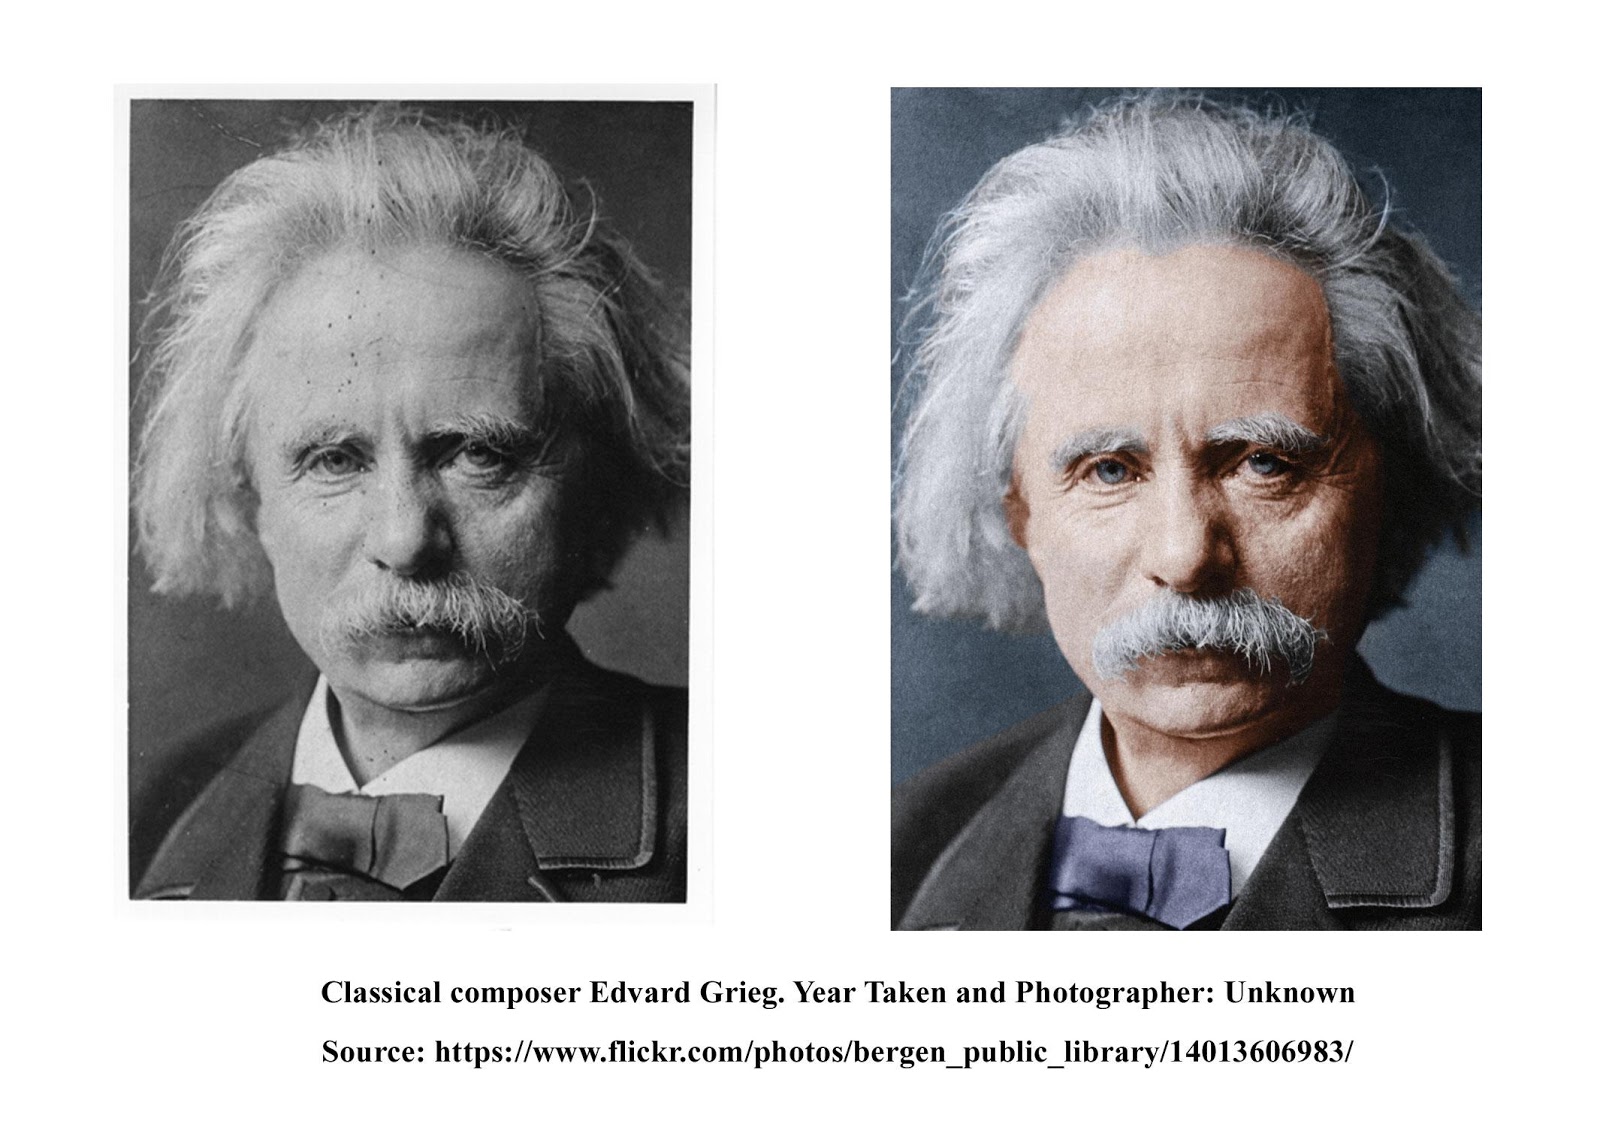
If you’re colorizing an image you don’t own for practice, always look for images on a Creative Commons site such as Wikimedia Commons, Flickr Commons, or Creative Commons. If you’re posting a Creative Commons image online, it’s also important to give attribution with a URL link to the image, including photographer and year if possible.
On Flickr, there are several photos notated with different symbols (if you’re not looking in the specific Flickr Commons). If you’re in doubt about the Copyright legalities of colorizing an image, check Commons: Flickr files. This lists a breakdown from copyright, attribution, public domain, to no known copyright restrictions.
Photo colorization can be very rewarding, especially when comparing the original and final versions side-by-side. Best of all, it’s fun! Although some of the detail work may seem tedious while it’s in-progress, good work is always its own reward. Never take shortcuts in a colorization! Go get started with some practice and before you know it, you may be getting paid to breathe new life into old images.