The Beginner’s Guide to Time-Lapse Photography
Looking for a way to practice your photography skills anywhere, anytime? Time-lapse photography is a technique you can work on just about anywhere your camera is. You don’t have to go out into the desert and camp out overnight to capture the Milky Way in motion and shooting stars. You can capture interesting cloud patterns from your bedroom window as they move across the sky or document yourself assembling a LEGO masterpiece.
This technique is a way to create videos that visually demonstrate the passage of time, in a digestible time frame. For example, watching a flower grow would require a commitment of hours, if not days, at its natural pace. If you speed it up, not only are you able to enjoy the entire process from beginning to end, you’re also able to study it in a different way.
This guide will explain time-lapse photography on a basic level to help you get started. We’ll cover what time-lapse is (and what it isn’t) and move on to some important equipment and methods that will help you get quality results.
Some Time-Lapse Facts You May Not Know
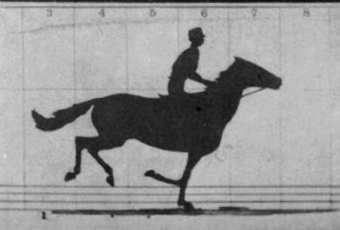
This technique has been around longer than most people realize, and it’s closely tied to the early days of video creation. Ever seen that famous sequence of a horse running? That’s compliments of Eadweard Muybridge, who did extensive photography studies of horses trotting to determine whether, at any point, all four of a horse’s hooves were off the ground. (They were, by the way. See frames two and three.)
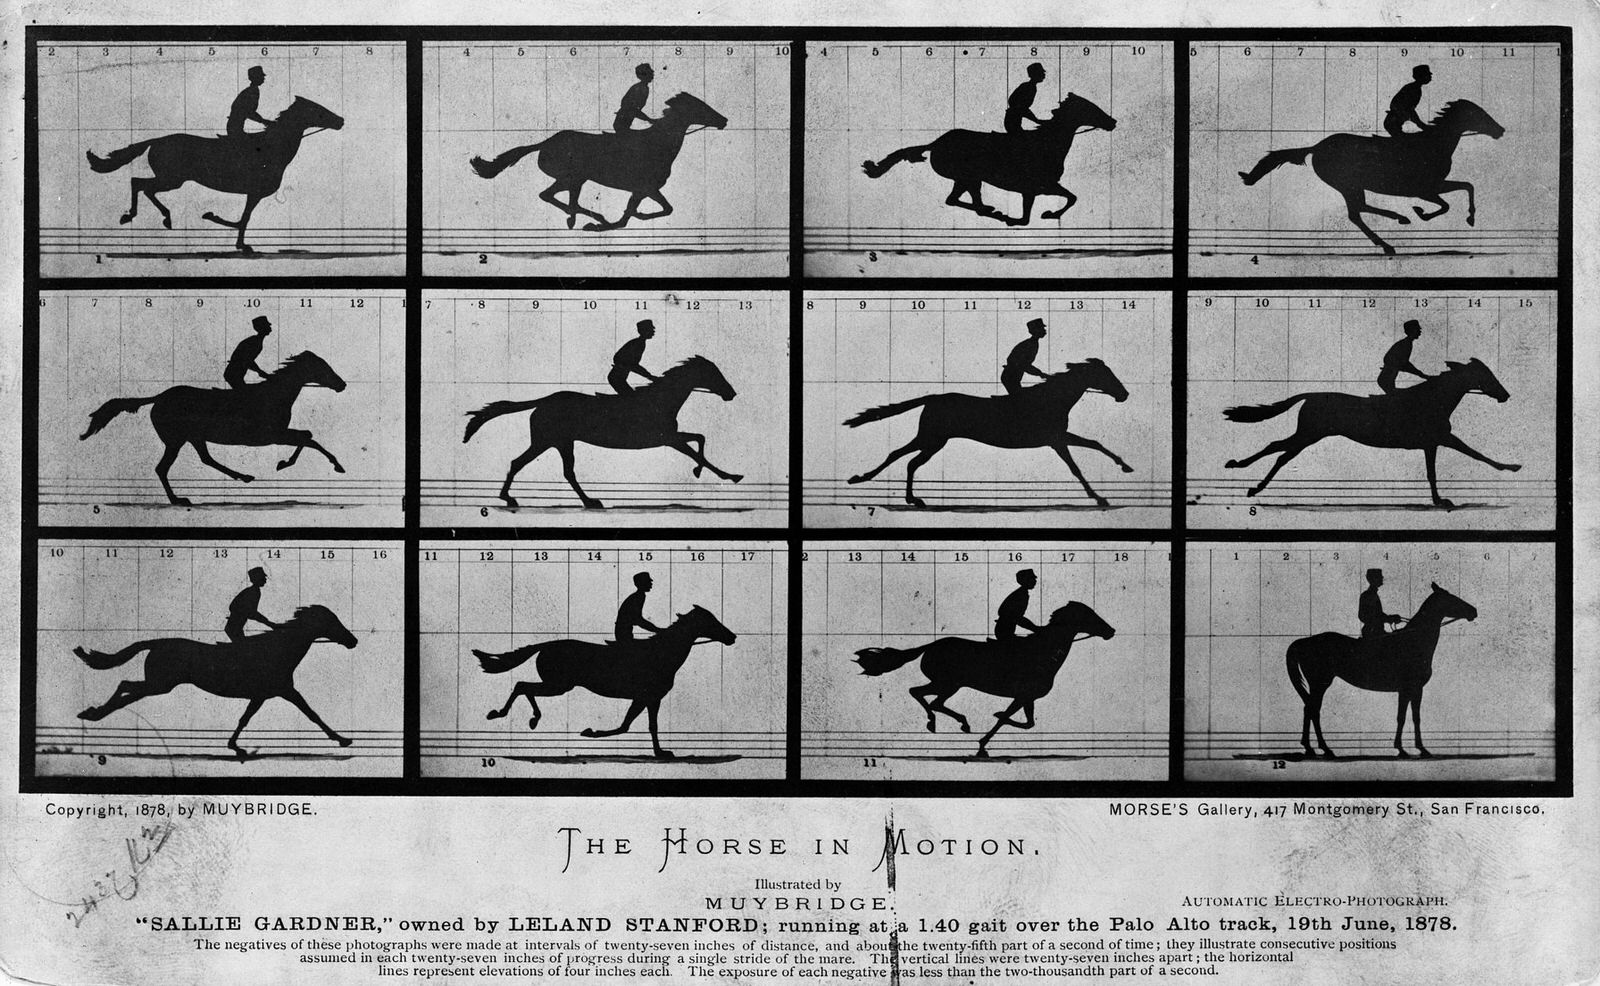
By taking photos at regular intervals during the horse’s gait, Muybridge was able to record a sequence of motion. When those images are played in order, you can recreate that motion.
This is video creation at its most basic level, but it’s also early time-lapse photography. (During its own time, it was known as chronophotography.) The same effect can be found in flip books or even in the semi-pornographic peep shows that originated in mutoscopes. For obvious reasons, we won’t include a visual aid of that.
Today, time-lapse is widely used and more accessible than ever, thanks to digital advances. Go rewatch the House of Cards intro. Whatever your feelings about the show itself, the opening sequence is a stunning modern-day example of time-lapse photography, and it demonstrates a lot of things we’ll discuss going forward.

House of Cards Intro
Time-Lapse vs. Stop Motion
Hopefully you have a decent understanding at this point of what time-lapse photography is, but do you know what it isn’t?
Time-lapse is often confused with stop motion, and for good reason. They’re very similar. Both involve taking multiple still images to record motion. The difference is, stop motion is used to create that motion, while time-lapse photography is used to recreate it. Take this incredible short film by Guillaume Blanchet:
A Girl Named Elastika
Note the difference between this film and the House of Cards intro. Rather than taking a series of images to capture motion that was already in front of him, in A Girl Named Elastika, Blanchet actively created motion by changing the scene between frames to form a story.
For this reason, stop motion is not as dependent on regular intervals as time-lapse is. Stop motion also tends to be more narrative in nature (although there are exceptions to every rule), and time-lapse is more likely to use the same viewpoint or a similar one throughout the capture.
What Should I Use Time-Lapse For?
Anything that moves or changes!
Time-lapse is a versatile technique that’s perfect for experimentation. The first thing to decide is whether you’ll be photographing a long-term time-lapse or a short-term one. Since you’re just getting started, a short-term project is a good starting point. Here are some tried-and-true ideas:
- Astrophotography – Think star tracking, eclipses, and shooting stars.
- Plant life – Look for flowers that open and close daily.
- Small-scale project progress – Document your drawings, paintings, and crafts
- People – People are great test subjects for a time-lapse. Photograph them walking, running, doing household chores, any task or activity, really.
Are you planning to document an event that takes several weeks or even seasons? Try one of these subjects:
- More plant life – Think a little bigger than flowers. Look for crops or forestry that you can shoot consistently over the course of weeks or months.
- Large-scale project progress – If you can find construction or exterior renovations in progress, they’re great for getting the before/after “wow factor”.
- City life – A time-lapse of transit always makes for a very interesting video, as you can see times of congestion fading into smooth-flowing commutes or vice versa, and how highways and roads look and function over the course of hours or days.
NASA’s Mars 2020 Rover in Test Chamber
The Mechanics of It
As we mentioned before, time-lapse photography is a half-still, half-video process. After all, video is just a massive collection of still images played in quick succession. To create a time-lapse you are becoming the middle man, in a sense, by jumping into the “capture” part of the process that a video camera would normally do for you. To do that, you need to understand a few things:
Frames
The images that you play to create a video effect are called frames. The speed at which you play these frames is called the frame rate, which is usually represented by “frames per second”, or “fps”, after the appropriate number. The traditional standard for cinema is 24 frames per second. Although that standard has been bucked by films like The Hobbit series, let’s stick with 24 for the sake of simplicity. That means, for one second of video, you need 24 different images. So, for those of us who don’t do mental math at the speed of light:
There are 60 seconds in a minute, and you want five minutes of video.
60 x 5 = 300 seconds
You need to fill 300 seconds, and you want 24 frames in each of those seconds.
300 x 24 = 7,200 frames
If you want a five-minute time-lapse video at 24fps, you’re looking at a whopping 7,200 frames. That’s where an intervalometer is going to really rescue your shutter finger, but we’ll get into that in a bit.
Intervals During Shooting
As you’re considering frames per second, you’ll need to take into account how long to go between shots. Factor in your camera’s buffering between images and your shutter speed. The more consistent the intervals are, the more realistic the final effect will be.
Although perfectly-spaced time-lapses have that perfectionist appeal, you can still create interesting time-lapse videos without a completely consistent angle or interval. There are many different subjects you can document without exact precision to get an interesting effect.
- Take a photo of your face every day – You’re not likely to get the exact same angle or shoot at the same time of day for each photo, but you’ll capture changes in your hairstyle, expression, and fashion sense that are interesting nonetheless.
- Got a bruise under your thumbnail? – All right, it doesn’t have to be your thumbnail, but you can document the progression of an injury you’ve had. Check out this bruise time-lapse GIF. Even though there are slight differences from image to image, you get a clear effect of the bruise moving up, up, and away.
- Self-improvement – Losing weight? Beefing up? Learning a new skill you’ll need to repeat over and over? Documenting the changes in your body or the improvement in your technique will bring that much more satisfaction to the end result.
Why Can’t I Just Speed Up a Normal Video?
Actually, you can. The results would even be very similar, if not almost identical, but here’s one reason time-lapse is worth a look over that route:
When you’re speeding up a long video, you’re essentially removing frames from that video. That means, unless you’re going to use the regular-speed version for something different, you’ve used up a lot of space for nothing. The stills from a long time-lapse likely won’t require nearly as much memory. If you’re usually a stills person and not a video person, you may not have the right amount of storage for hours of high-quality video.
Capturing Motion
There are several choices you’ll make during shooting that affect the appearance of your time-lapse. The way motion behaves in a time-lapse is an important indicator of quality, so spend some time considering that as you plan.
Getting Smoother Motion
You already know that shutter speed affects the appearance of motion in your photography. Longer shutter speeds result in blurred motion while shorter shutter speeds freeze it. In a time-lapse, longer shutter speeds serve three purposes:
- To create smooth, cinematic blurs rather than choppy, disjointed movements
- To minimize unnecessary movement that distracts from your main subject
- To allow more light in for astrophotography and other low-light situations
Keeping It Interesting
Although time-lapse videos are inherently interesting (you’re watching hours of progress happen in a matter of minutes!), you may still have to use a few videography tricks to keep your viewer’s attention. Try panning, zooming, or cutting between other time-lapses to keep things moving. You can do this during a shoot with some of the equipment we’re about to cover, or you can work it into your post-processing. Shooting in RAW will allow you a lot more flexibility if you want to zoom in without sacrificing image quality.
If you’re feeling confident, try attempting a hyperlapse by moving your camera long distances as you shoot. You can do this in an actual vehicle or just move ahead one foot length at a time. Without a slider or motorized tripod head, you’ll be introducing a lot of bumpiness into your video, so you may need a stabilizing feature like the Warp Stabilizer in Premiere Pro to regain some smoothness.
Equipment
The list of required equipment for time-lapse photography is pretty limited, which makes it an easy technique to jump into. However, if you want professional-looking results, there are several recommended bits of gear that will make your life a lot easier.
Photo by Frank Zhang on Unsplash
A Camera (Required), Preferably Digital
Because you are working with so many images at once, it’s both more sustainable and more realistic to limit this process to digital photography. That’s not to say you “can’t” do it with film, that is how this whole thing started after all, but it’s going to be a longer, more complex process that goes through a lot more resources.
For high-quality results, use your DSLR or mirrorless. If you’re just playing around with the technique, you can make do with something more accessible, even…
Your… Smartphone?
Yep, you can actually create basic time-lapse photography with the phone in your pocket. Both iPhone and Android have native time-lapse capabilities. There are also a handful of apps you could go with, like Framelapse or PicPac Stop Motion & TimeLapse for Android and Timelapse Pro or Hyperlapse from Instagram for iPhone.
Stabilizing Equipment
The more consistent your positioning, the smoother your time-lapse will appear. To stabilize your camera, include a tripod, motorized head, slider, or gimble in your gear list.
Intervalometers
If you’re only going to invest in one bit of recommended equipment for time-lapse, let it be this one. An intervalometer is a remote control device that syncs with your camera to trigger the shutter at regular intervals. That means you aren’t in charge of pressing the shutter button exactly right 7,200 times in a row, as we discussed earlier. It gives you a big leg up over burst mode, since you can set the intervals to accomodate for buffering between shots.
Your DSLR or mirrorless may have an intervalometer included, so check your camera manual before you go shopping for one.
ND Filter
An ND filter allows you to shoot longer shutter speeds without introducing too much light into your image and potentially blowing out your highlights. Since smoother motion translates to a more professional-looking time-lapse and longer shutter speeds translate to smoother motion, this is pretty important for shooting on sunny days!
Editing Software (Required)
Once you have your images, you still need a way to turn them into a video. This can be done with Adobe Creative Cloud products or with something as simple as iMovie (though you’ll have to do a lot of it manually that way). There are also several basic video editors with dedicated time-lapse features you can choose from, like Wondershare Filmora9.
Photo by Avel Chuklanov on Unsplash
Post-Processing
Speaking of editing, here’s a quick rundown of how you can create a time-lapse video with Adobe Creative Cloud:
First, in Lightroom:
- Make your batch edits
- Export your images as a sequence, making sure all images have the same number of digits and no numbers are skipped (Do this in File Renaming in the Export menu)
Then, in Photoshop:
- Go to File > Open, then select your first image
- Click Option > Select Image Sequence
- Switch your workspace to Motion (there’s an icon for this at the top right of your screen)
- You can now view the video and make adjustments to the frame rate, resolution, and so on
- Go to File > Export > Render
Finally, in Premiere Pro:
- Import the rendered video from Photoshop
- Now you can change the scale and positioning, use the Warp Stabilizer if needed, and make other stylistic edits before your final save
Ready to give time-lapse photography a try? This process quickly becomes addictive once you master the basics. To practice, start with your native smartphone app, a tripod, and some clouds. Then you can move up to your DSLR and an intervalometer. The sky’s the limit from there!